
Blueberry Kush 02, Growers Choice Seeds


Soil
Custom

Indoor
Room Type
LST
weeks 5-6
38 l
Pot Size
Start at Harvest
1
Week 1. Vegetation7y ago


6.35 cm
Height
18 hrs
Light Schedule
22 °C
Day Air Temp
6.3
pH
71 %
Air Humidity
18 °C
Night Air Temp
3.79 l
Pot Size
500 PPM
CO₂ Level
MovingOn ALL ORGANIC!
This time I chose to do “Blueberry Kush” from Growers Choice Seeds again because my first plant of this strain was honestly the best weed I have ever had. Awesome smell, and the high is calm and relaxing. The aroma was a perfect mix of both the Blueberry and OG Kush parents without one of the flavors suppressing the other. The high doesn’t cause too much couch lock or anxiety - even while still getting you very stoned. Let’s see how well and similar this next phenotype will do.
Unfortunately, this strain isn’t listed on this site as an official strain yet, so I have to say “Custom Breeder & Strain”. When I did this strain the first time, the site’s user interface was different and I was able to input the correct breeder.
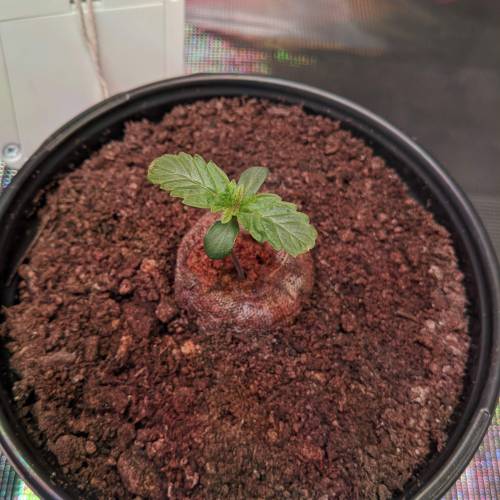
I put two seeds in peat pods in a seed dome. They popped one day apart (3 & 4 day germination periods). Then I quickly transplanted them to 1gal pots to prevent the tap roots from getting too exposed. These small pots will be the demos for me to select the better of the two sprouts to keep for my journal. The first seedling is in the square pot, and the second is in the round one.
I am going to be trying the KIS Organics Water Only Soil with Biochar again. On the last grow, with the “Holy Grail Kush” and “The Church”, I made the mistake of amending this soil with perlite. After it was too late, I learned from the producer that you don’t need to add drainage to this soil, and that a full cycle plant should have a minimum of about 7gal to make it through flower. So when I added perlite, it basically put the volume of my 5gal pots around 2.5gal of soil - a stupid mistake. My plants ran out of nutes in flower, and my yield was hurt substantially. This time there should be more than enough volume. I’m hoping to not have to use any nutes or amendments/supplements at all, besides a small dose of KIS Organics Nutrient Pack, and a tiny dose of CAMG+ calmag every watering.
I will be trying a SCROG setup on this grow. I haven’t done this yet, and I am trying to figure out a good training technique that I can do without having to top the plant. This SCROG will be done with the tucking method. In fact, tucking is how you do a true SCROG; otherwise, you are just trellising (SCROG’ing is a specific form of trellising). Unfortunately, there are a lot of people that call their grow a SCROG when it really isn’t.
I will also be thinking of changing my CO2 generation from fungus bags to something else. I just don’t get enough CO2 out of them to make much of a difference.
Average light wattage first half of week 1: 142W
Average light wattage second half of week 1: 238W
Target VPD for the seedling cycle is 0.7kPa.
Target VPD for the veg cycle will be 1.0kPa.
Target VPD for the flower cycle will be 1.35kPa.
VPD = Vapor Pressure Deficit, the temperature to relative humidity equation that affects plants’ water intake and respiration rates.
GROW SETUP:
GROWING MEDIUM:
- KIS Organics: Water Only Soil with Biochar, the bottom half will be amended with a dash of KIS Organics: Nutrient Pack
CONTAINER:
- Vivosun Premium Fabric Pot 10gal (might not fill all the way)
TENT:
- Gorilla Grow Tent: Lite Line, 4’x4’ (actually only using 2'x4' space, because I'm sharing the tent with @Mothra)
LIGHTING:
- Kind LED: K5 XL1000
Every light cycle stage will be programmed with a sunrise and sunset mode where the light intensity starts low and increases, peaks, and then gradually dims before shut off. I use lower intensity programs for seedlings, and gradually increase the intensities through veg. I use a Kill-a-Watt monitor to measure the actual wattage draw, and will post the wattages of each cycle on this page.
HUMIDIFIER (the tent usually runs dry):
- Elechomes: UC5501 Ultrasonic Humidifier (has an automatic humidistat control)
CO2:
- 2x Exhale: The XL
VENTILATION:
- AC Infinity: Cloudline T6 (has an automatic sensor control I use to decrease temp and RH)
MONITORING:
- Pulse One Temp, RH, and VPD monitor with WiFi (I really like this. It really helps me to keep everything dialed in at all times. The graphing feature is a really great addition)
- Hydrofarm: CO2 Monitor
Also in the tent is @Mothra’s Doctor Seedsman CBD plant. Check out her journal:
https://growdiaries.com/diaries/47143-seedsman-doctor-seedsman-cbd-grow-journal-by-mothra
If you’d like to give this strain a try, you can find it here (I highly recommend it):
https://www.growerschoiceseeds.com/shop/cannabis-seeds/feminized/blueberry-kush-feminized-cannabis-seeds/
14 likes
6 comments
Share
2
Week 2. Vegetation7y ago


7.62 cm
Height
18 hrs
Light Schedule
22 °C
Day Air Temp
6.3
pH
71 %
Air Humidity
18 °C
Night Air Temp
3.79 l
Pot Size
500 PPM
CO₂ Level
MovingOn ALL ORGANIC!
WEEK 2 RECAP (TL;DR journal comments):
The roots are establishing themselves, and the leaves are multiplying. The first set of serrated leaves got wrinkly and wavy. I think this was caused by a combination of initial overwatering (to awaken the living soil), and being immediately transplanted into the living soil. Living soil is somewhat “hot” with nutrients, so it can be a shock at first. All is well now though, except the wrinkles on those two leaves are permanent (no big deal). The plants have readjusted.
I am only going to be keeping one of these starts for my journal, and I think we already know which one will be the keeper.
The Kind LED XL1000’s light schedule program was adjusted halfway through the week and the temps have gone up, but that isn’t a bad thing because the VPD is right on target. First half of the week was 238W, and the second half of the week is 451W. The “Grow Conditions” of the week (from above) reflect the first half of the week’s values.
Target VPD halfway through the week changed from the seedling value of 0.7kPa to the veg value of 1.0kPa. VPD = Vapor Pressure Deficit, the temperature to relative humidity equation that affects plants’ water intake and respiration rates.
~=~=~=~=~=~=~=~=~=~=~=~
FULL GROW RECAP (the long boring journal comments, unless you’re a nerd like me):
~=~=~=~=~=~=~=~=~=~=~=~
TIMELINE:
Pre-Week 1:
1. I put two seeds in peat pods in a seed dome.
2. Light set at low intensities, 142W.
Week 1:
3. Seedling “A” popped after 3 days, and “B” popped after 4.
4. Transplanted to 1gal pots to prevent the tap roots from getting too exposed.
5. Target VPD for the seedling cycle was 0.7kPa.
6. Second half of the week light intensity was increased to an average of 238W.
Week 2:
7: See weekly recap at the top.
~=~=~=~=~=~=~=~=~=~=~=~
FUTURE PLANS:
A new CO2 setup is on the way. My fungus bags can hardly ever get the tent over 550ppm, especially when the exhaust fan is on. Stay tuned until next week for the details on that.
Next week these will be transplanted into their final containers - 10gal fabric pots.
I will be trying a SCROG setup on this grow. I haven’t done this technique yet, and I’m trying to figure out a good training technique that I can do without having to top the plant. This SCROG will be done with the tucking method. In fact, tucking is how you do a true SCROG; otherwise, you are just trellising (SCROG’ing is a specific form of trellising).
I will not be defoliating either, unless dead leaves need to be removed. Contrary to popular belief, living leaves should not be removed at all. Leaves are both solar panels and batteries for plants, and you actually slow down the plant a tiny bit for each leaf plucked due to shock. If need be, I will only tuck large leaves to expose other areas that need more light.
The reason why a plant seems to “boom” after defoliation is just because the plant is trying to quickly regain the leaf power that it just lost. Even the growth of mass in flowers will slow when the plant is trying to expand existing leaves or regrow new ones. Some people deny this, but they should do a side by side clone comparison to prove that defoliation actually increases the yield of a plant.
That being said, there are some reasons to defoliate: keeping the bottom leaves from touching the ground, helping air circulation down low, and removing dead leaves.
~=~=~=~=~=~=~=~=~=~=~=~
GROW SETUP:
GROWING MEDIUM:
- KIS Organics: Water Only Soil with Biochar (living soil), the bottom half will be amended with a dash of KIS Organics: Nutrient Pack. I miscalculated some factors on my last grow, and my flower phase suffered because of it. This time I have properly readjusted. I’m hoping to not have to use any nutes or amendments/supplements at all, besides a small dose of the nutrient pack mixed in at the bottom of the pot, and a tiny dose of CAMG+ calmag every watering.
CONTAINER:
- Vivosun Premium Fabric Pot 10gal (might not fill it all the way)
TENT:
- Gorilla Grow Tent: Lite Line, 4’x4’ (actually only using 2'x4' space, because I'm sharing the tent with @Mothra)
LIGHTING:
- Kind LED: K5 XL1000. Every light cycle stage is programmed with a sunrise and sunset mode where the light intensity starts low, increases, peaks, and then gradually dims before shut off. I use lower intensity programs for seedlings, and gradually increase the intensities through veg. I use a Kill-a-Watt meter to measure the actual wattage draw, and will post the wattages of each cycle on this page.
HUMIDIFIER (the tent usually runs dry):
- Elechomes: UC5501 Ultrasonic Humidifier (has an automatic humidistat control)
CO2:
- 2x Exhale: The XL
VENTILATION:
- AC Infinity: Cloudline T6 (has an automatic sensor control I use to decrease temp and RH)
MONITORING:
- Pulse One Temp, RH, and VPD monitor with WiFi (I really like this. It really helps me to keep everything dialed in at all times. The graphing feature is a really great addition. VPD (Vapor Pressure Deficit) is the way of the future.
- Hydrofarm: CO2 Monitor
~=~=~=~=~=~=~=~=~=~=~=~
STRAIN DECISION:
This time I chose to do “Blueberry Kush” from Growers Choice Seeds again because my first plant of this strain was honestly the best weed I have ever had. Blueberry Kush is a Blueberry x OG Kush cross. It had an awesome smell, and the high was calm and relaxing. The aroma was a perfect mix of both the Blueberry and OG Kush parents without one of the flavors suppressing the other. The high doesn’t cause too much couch lock or anxiety - even while still getting you very stoned. Let’s see how well and similar this next phenotype will do.
Unfortunately, this strain isn’t listed on this site as an official strain yet, so I have to say “Custom Breeder & Strain”. When I did this strain the first time, the site’s user interface was different and I was able to input the correct breeder.
If you’d like to give this Blueberry Kush strain from Growers Choice Seeds a try, you can find it here (I highly recommend it):
https://www.growerschoiceseeds.com/shop/cannabis-seeds/feminized/blueberry-kush-feminized-cannabis-seeds/
~=~=~=~=~=~=~=~=~=~=~=~
Also in the tent is @Mothra’s Doctor Seedsman CBD plant. Check out her first journal and first grow:
https://growdiaries.com/diaries/47143-seedsman-doctor-seedsman-cbd-grow-journal-by-mothra
~=~=~=~=~=~=~=~=~=~=~=~
THANKS FOR READING!
22 likes
comments
Share
3
Week 3. Vegetation7y ago


12.7 cm
Height
18 hrs
Light Schedule
27 °C
Day Air Temp
6.4
pH
Weak
Smell
71 %
Air Humidity
18 °C
Night Air Temp
3.79 l
Pot Size
0.08 l
Watering Volume
1150 PPM
CO₂ Level
Nutrients 1

Calcium Magnesium Supplement
0.528 mll
MovingOn ALL ORGANIC!
WEEK 3 RECAP (TL;DR journal comments):
Since I am only keeping one of the starts for this journal, I have selected the “A” seedling from the previous weeks.
The good news: my new CO2 setup is now in action. I can be more confident with the higher temperatures now.
The bad news: due to heavy snows on trees outside causing them to bend and/or break onto local power lines, our power went out! Since there is no generator, we had to quickly find as many LED lights as possible to put in the tent. So unfortunately, we had to give the plants 2 hours of shitty light. Then after the power was back on it went off again while I was asleep, so I couldn’t supplement with the crappy LED lighting again, and the tent was in pure darkness for about 15 minutes. The plants in the tent were NOT HAPPY about these power outages at all…
More bad news: getting rootbound is slowing it a bit. I forgot to get an extra bag of soil, because my original plan was to only do one plant in the tent, but when I planned with @Mothra to do a side by side grow, I forgot to get a new extra bag of soil and there wasn't enough to do the transplant into the final pot. Unfortunately it was too late on a Friday when that happened, and I had to wait until Monday for the farm where I get it to open.
And then…. because of the snow, the farm where I get my soil from was closed on Monday and Tuesday. 6 days later than planned is when I finally was able to get more soil (even until the first day of the next week). I had originally planned to do the final pot transplant at the beginning of this week, but forgetfulness and mother nature shows no mercy.
Also to note, my CO2 addition was also delayed due to the snow.
So all in all, because of these SNAFUs, my veg is delayed for a week.
Target VPD 1.0kPa. VPD = Vapor Pressure Deficit, the temperature to relative humidity equation that affects plants’ water intake and respiration rates.
~=~=~=~=~=~=~=~=~=~=~=~
FULL GROW RECAP (the long boring journal comments, unless you’re a nerd like me):
~=~=~=~=~=~=~=~=~=~=~=~
TIMELINE:
Pre-Week 1:
1. I put two seeds in peat pods in a seed dome.
2. Light set at low intensities, 142W.
Week 1:
3. Seedling “A” popped after 3 days, and “B” popped after 4.
4. Transplanted to 1gal pots to prevent the tap roots from getting too exposed.
5. Target VPD for the seedling cycle was 0.7kPa.
6. Second half of the week light intensity was increased to an average of 238W.
Week 2:
7. Halfway through the week changed the Kind LED XL1000 to Automatic Mode. Temps are up. The average daily wattage is now 451W
8. Halfway through the week adjusted the target VPD to 1.0kPa.
Week 3:
9: See weekly recap at the top.
~=~=~=~=~=~=~=~=~=~=~=~
FUTURE PLANS:
Next week (for real this time) these will be transplanted into their final containers - 10gal fabric pots. Then I will give it a week recovery time to recover from transplant shock. After a week, then I will start LST to get it ready for a SCROG.
I will be trying a SCROG setup on this grow because I haven’t done this technique yet. I’m trying to figure out a good training technique that I can do without having to top the plant. This SCROG will be done with the tucking method. In fact, tucking is how you do a true SCROG; otherwise, you are just trellising (SCROG’ing is a specific form of trellising).
I will not be defoliating either, unless dead leaves need to be removed. Contrary to popular belief, living leaves should not be removed at all. Leaves are both solar panels and batteries for plants, and you actually slow down the plant a tiny bit for each leaf plucked due to shock. If need be, I will only tuck large leaves to expose other areas that need more light.
The reason why a plant seems to “boom” after defoliation is just because the plant is trying to quickly regain the leaf power that it just lost. Even the growth of mass in flowers will slow when the plant is trying to expand existing leaves or regrow new ones. Some people deny this, but they should do a side by side clone comparison to prove that defoliation actually increases the yield of a plant.
That being said, there are some reasons to defoliate: keeping the bottom leaves from touching the ground, helping air circulation down low, and removing dead leaves.
~=~=~=~=~=~=~=~=~=~=~=~
GROW SETUP:
GROWING MEDIUM:
- KIS Organics: Water Only Soil with Biochar (living soil), the bottom half will be amended with a dash of KIS Organics: Nutrient Pack. I miscalculated some factors on my last grow, and my flower phase suffered because of it. This time I have properly readjusted. I’m hoping to not have to use any nutes or amendments/supplements at all, besides a small dose of the nutrient pack mixed in at the bottom of the pot, and a tiny dose of CAMG+ calmag every watering.
CONTAINER:
- Vivosun Premium Fabric Pot 10gal (might not fill it all the way)
TENT:
- Gorilla Grow Tent: Lite Line, 4’x4’ (actually only using 2'x4' space, because I'm sharing the tent with @Mothra)
LIGHTING:
- Kind LED: K5 XL1000. Every light cycle stage is programmed with a sunrise and sunset mode where the light intensity starts low, increases, peaks, and then gradually dims before shut off. I use lower intensity programs for seedlings, and gradually increase the intensities through veg. I use a Kill-a-Watt meter to measure the actual wattage draw, and will post the wattages of each cycle on this page.
HUMIDIFIER (the tent usually runs dry):
- Elechomes: UC5501 Ultrasonic Humidifier (has an automatic humidistat control)
CO2:
- 2x Exhale: The XL
VENTILATION:
- AC Infinity: Cloudline T6 (has an automatic sensor control I use to decrease temp and RH)
MONITORING:
- Pulse One Temp, RH, and VPD monitor with WiFi (I really like this. It really helps me to keep everything dialed in at all times. The graphing feature is a really great addition. VPD (Vapor Pressure Deficit) is the way of the future.
- Hydrofarm: CO2 Monitor
~=~=~=~=~=~=~=~=~=~=~=~
STRAIN DECISION:
This time I chose to do “Blueberry Kush” from Growers Choice Seeds again because my first plant of this strain was honestly the best weed I have ever had. Blueberry Kush is a Blueberry x OG Kush cross. It had an awesome smell, and the high was calm and relaxing. The aroma was a perfect mix of both the Blueberry and OG Kush parents without one of the flavors suppressing the other. The high doesn’t cause too much couch lock or anxiety - even while still getting you very stoned. Let’s see how well and similar this next phenotype will do.
Unfortunately, this strain isn’t listed on this site as an official strain yet, so I have to say “Custom Breeder & Strain”. When I did this strain the first time, the site’s user interface was different and I was able to input the correct breeder.
If you’d like to give this Blueberry Kush strain from Growers Choice Seeds a try, you can find it here (I highly recommend it):
https://www.growerschoiceseeds.com/shop/cannabis-seeds/feminized/blueberry-kush-feminized-cannabis-seeds/
~=~=~=~=~=~=~=~=~=~=~=~
Also in the tent is @Mothra’s Doctor Seedsman CBD plant. Check out her first journal and first grow:
https://growdiaries.com/diaries/47143-seedsman-doctor-seedsman-cbd-grow-journal-by-mothra
~=~=~=~=~=~=~=~=~=~=~=~
THANKS FOR READING!
13 likes
comments
Share
4
Week 4. Vegetation7y ago


17.78 cm
Height
18 hrs
Light Schedule
27 °C
Day Air Temp
6.3
pH
Normal
Smell
70 %
Air Humidity
19 °C
Night Air Temp
37.85 l
Pot Size
0.49 l
Watering Volume
1170 PPM
CO₂ Level
Nutrients 1
Calcium Magnesium Supplement
0.528 mll
MovingOn ALL ORGANIC!
WEEK 4 RECAP (TL;DR journal comments):
Was finally able to get the BK transplanted this week. This will be the final pot. I will give it a week to recover from transplant shock before giving it some LST to prepare for the SCROG.
I then put the pot on a BBQ grill on top of 2”x4”s to keep the pot off of the ground.
The only negative this week is I’m starting to see a bit of nitrogen toxicity via the dark green color and curly leaf tips (the LED lighting makes it hard to see the darkness of the green in the pictures). This is living soil though, and I’m not using fertilizers, so I’m just going to have to ride it out. It will be okay.
As you can see, I’m running at higher temperatures. This is okay because since I am supplementing a high amount of CO2 and keeping the VPD in check, the plant will do just fine under these temps and LED lighting.
Target VPD 1.0kPa. VPD = Vapor Pressure Deficit, the temperature to relative humidity equation that affects plants’ water intake and respiration rates. Average light wattage for the week is 451W.
~=~=~=~=~=~=~=~=~=~=~=~
FULL GROW RECAP (the long boring journal comments, unless you’re a nerd like me):
~=~=~=~=~=~=~=~=~=~=~=~
TIMELINE:
Pre-Week 1:
1. I put two seeds in peat pods in a seed dome.
2. Light set at low intensities, 142W.
Week 1:
3. Seedling “A” popped after 3 days, and “B” popped after 4.
4. Transplanted to 1gal pots to prevent the tap roots from getting too exposed.
5. Target VPD for the seedling cycle was 0.7kPa.
6. Second half of the week light intensity was increased to an average of 238W.
Week 2:
7. Halfway through the week changed the Kind LED XL1000 to Automatic Mode. Temps are up. The average daily wattage is now 451W
8. Halfway through the week adjusted the target VPD to 1.0kPa.
Week 3:
9. Removed the “B” seedling from the grow. Now only a one-plant diary.
10. Forgot to get enough soil.
11. Got my new CO2 setup going, but late because of snow.
12. Power outages due to heavy snow outside.
13. Soil farm closed due to heavy snow.
14. Plant is rootbound and will go one week longer for veg planning.
Week 4:
15. See weekly recap at the top.
~=~=~=~=~=~=~=~=~=~=~=~
FUTURE PLANS:
Next week (for real this time) these will be transplanted into their final containers - 10gal fabric pots. Then I will give it a week recovery time to recover from transplant shock. After a week, then I will start LST to get it ready for a SCROG.
I will be trying a SCROG setup on this grow because I haven’t done this technique yet. I’m trying to figure out a good training technique that I can do without having to top the plant. This SCROG will be done with the tucking method. In fact, tucking is how you do a true SCROG; otherwise, you are just trellising (SCROG’ing is a specific form of trellising).
I will not be defoliating either, unless dead leaves need to be removed. Contrary to popular belief, living leaves should not be removed at all. Leaves are both solar panels and batteries for plants, and you actually slow down the plant a tiny bit for each leaf plucked due to shock. If need be, I will only tuck large leaves to expose other areas that need more light.
The reason why a plant seems to “boom” after defoliation is just because the plant is trying to quickly regain the leaf power that it just lost. Even the growth of mass in flowers will slow when the plant is trying to expand existing leaves or regrow new ones. Some people deny this, but they should do a side by side clone comparison to prove that defoliation actually increases the yield of a plant.
That being said, there are some reasons to defoliate: keeping the bottom leaves from touching the ground, helping air circulation down low, and removing dead leaves.
~=~=~=~=~=~=~=~=~=~=~=~
GROW SETUP:
GROWING MEDIUM:
- KIS Organics: Water Only Soil with Biochar (living soil), the bottom half will be amended with a dash of KIS Organics: Nutrient Pack. I miscalculated some factors on my last grow, and my flower phase suffered because of it. This time I have properly readjusted. I’m hoping to not have to use any nutes or amendments/supplements at all, besides a small dose of the nutrient pack mixed in at the bottom of the pot, and a tiny dose of CAMG+ calmag every watering.
CONTAINER:
- Vivosun Premium Fabric Pot 10gal (might not fill it all the way)
TENT:
- Gorilla Grow Tent: Lite Line, 4’x4’ (actually only using 2'x4' space, because I'm sharing the tent with @Mothra)
LIGHTING:
- Kind LED: K5 XL1000. Every light cycle stage is programmed with a sunrise and sunset mode where the light intensity starts low, increases, peaks, and then gradually dims before shut off. I use lower intensity programs for seedlings, and gradually increase the intensities through veg. I use a Kill-a-Watt meter to measure the actual wattage draw, and will post the wattages of each cycle on this page.
HUMIDIFIER (the tent usually runs dry):
- Elechomes: UC5501 Ultrasonic Humidifier (has an automatic humidistat control)
CO2:
- Autopilot APC8200 CO2 Monitor & Controller (has an automatic sensor to regulate CO2 levels, and has a photoeye sensor to keep the CO2 from turning on at night)
- DoubeSun Aquarium CO2 Regulator with Solenoid
- Two 20lb CO2 tanks (brands always change due to periodic exchanges), one connected at a time so that I can exchange the other at my leisure when it runs out.
VENTILATION:
- AC Infinity: Cloudline T6 (has an automatic sensor control I use to decrease temp and RH)
MONITORING:
- Pulse One Temp, RH, and VPD monitor with WiFi (I really like this. It really helps me to keep everything dialed in at all times. The graphing feature is a really great addition. VPD (Vapor Pressure Deficit) is the way of the future.
- Hydrofarm: CO2 Monitor
~=~=~=~=~=~=~=~=~=~=~=~
STRAIN DECISION:
This time I chose to do “Blueberry Kush” from Growers Choice Seeds again because my first plant of this strain was honestly the best weed I have ever had. Blueberry Kush is a Blueberry x OG Kush cross. It had an awesome smell, and the high was calm and relaxing. The aroma was a perfect mix of both the Blueberry and OG Kush parents without one of the flavors suppressing the other. The high doesn’t cause too much couch lock or anxiety - even while still getting you very stoned. Let’s see how well and similar this next phenotype will do.
Unfortunately, this strain isn’t listed on this site as an official strain yet, so I have to say “Custom Breeder & Strain”. When I did this strain the first time, the site’s user interface was different and I was able to input the correct breeder.
If you’d like to give this Blueberry Kush strain from Growers Choice Seeds a try, you can find it here (I highly recommend it):
https://www.growerschoiceseeds.com/shop/cannabis-seeds/feminized/blueberry-kush-feminized-cannabis-seeds/
~=~=~=~=~=~=~=~=~=~=~=~
Also in the tent is @Mothra’s Doctor Seedsman CBD plant. Check out her first journal and first grow:
https://growdiaries.com/diaries/47143-seedsman-doctor-seedsman-cbd-grow-journal-by-mothra
~=~=~=~=~=~=~=~=~=~=~=~
THANKS FOR READING!
15 likes
2 comments
Share
5
Week 5. Vegetation6y ago


25.4 cm
Height
18 hrs
Light Schedule
27 °C
Day Air Temp
6.3
pH
Normal
Smell
70 %
Air Humidity
19 °C
Night Air Temp
37.85 l
Pot Size
0.49 l
Watering Volume
1170 PPM
CO₂ Level
Nutrients 1
Calcium Magnesium Supplement
0.264 mll
MovingOn ALL ORGANIC!
WEEK 5 RECAP (TL;DR journal comments):
Started LST to get ready for SCROGging, but when I pulled the Gorilla Grow Tent Screen out of its package, I realized it was a piece of crap. Bad material, badly tied knots, random hooks in odd locations, and the gaps were big enough to put my head through with little effort. It wasn’t really what I was looking for. After harvest, I will probably weave some string through it to make the gaps smaller in case I want to try it again in the future.
It might actually be a good thing though. Because I talked to the producer of the living soil, and they said that they don’t recommend doing a long veg time, and they were worried that I would have to use some finishing fertilizer in flower. So we’ll just keep it at some LST and a tomato ring. I am hoping that using a 10gal pot will still be enough living soil to last though. We shall see - this will be my test run to see how long it can actually go before having to add nutes. I’ll probably flip to flower at week 7.
Anyways, she is recovering from the LST and responding well. The only minor issue besides the screen failure is there is some tacoing, which is probably a magnesium deficiency. The next gallon of water will have 4ml of CaMg+ instead of 1ml next week.
Target VPD 1.0kPa. VPD = Vapor Pressure Deficit, the temperature to relative humidity equation that affects plants’ water intake and respiration rates. Average light wattage for the week is 451W.
~=~=~=~=~=~=~=~=~=~=~=~
FULL GROW RECAP (the long boring journal comments, unless you’re a nerd like me):
~=~=~=~=~=~=~=~=~=~=~=~
TIMELINE:
Pre-Week 1:
1. I put two seeds in peat pods in a seed dome.
2. Light set at low intensities, 142W.
Week 1:
3. Seedling “A” popped after 3 days, and “B” popped after 4.
4. Transplanted to 1gal pots to prevent the tap roots from getting too exposed.
5. Target VPD for the seedling cycle was 0.7kPa.
6. Second half of the week light intensity was increased to an average of 238W.
Week 2:
7. Halfway through the week changed the Kind LED XL1000 to Automatic Mode. Temps are up. The average daily wattage is now 451W
8. Halfway through the week adjusted the target VPD to 1.0kPa.
Week 3:
9. Removed the “B” seedling from the grow. Now only a one-plant diary.
10. Forgot to get enough soil.
11. Got my new CO2 setup going, but late because of snow.
12. Power outages due to heavy snow outside.
13. Soil farm closed due to heavy snow.
14. Plant is rootbound and will go one week longer for veg planning.
Week 4:
15. Transplanted from a 1gal to a 10gal pot.
16. Put the pot up on a BBQ grill and 2x4s to keep the bottom off the floor.
Week 5:
17. See weekly recap at the top.
~=~=~=~=~=~=~=~=~=~=~=~
FUTURE PLANS:
I will not be defoliating, unless dead or ground dragger leaves need to be removed. Leaves are both solar panels and batteries for plants, and you actually slow down the plant a tiny bit for each leaf plucked due to shock. If need be, for light or air circulation, I will tuck large leaves.
The reason why a plant seems to “boom” after defoliation is just because the plant is trying to quickly regain the leaf power that it just lost. Even the growth of mass in flowers will slow when the plant is trying to expand existing leaves or regrow new ones. Some people deny this, but they should do a side by side clone comparison to prove that defoliation actually increases the yield of a plant.
~=~=~=~=~=~=~=~=~=~=~=~
GROW SETUP:
GROWING MEDIUM:
- KIS Organics: Water Only Soil with Biochar (living soil), the bottom half will be amended with a dash of KIS Organics: Nutrient Pack. I miscalculated some factors on my last grow, and my flower phase suffered because of it. This time I have properly readjusted. I’m hoping to not have to use any nutes or amendments/supplements at all, besides a small dose of the nutrient pack mixed in at the bottom of the pot, and a tiny dose of CAMG+ calmag every watering.
CONTAINER:
- Vivosun Premium Fabric Pot 10gal (might not fill it all the way)
TENT:
- Gorilla Grow Tent: Lite Line, 4’x4’ (actually only using 2'x4' space, because I'm sharing the tent with @Mothra)
LIGHTING:
- Kind LED: K5 XL1000. Every light cycle stage is programmed with a sunrise and sunset mode where the light intensity starts low, increases, peaks, and then gradually dims before shut off. I use lower intensity programs for seedlings, and gradually increase the intensities through veg. I use a Kill-a-Watt meter to measure the actual wattage draw, and will post the wattages of each cycle on this page.
HUMIDIFIER (the tent usually runs dry):
- Elechomes: UC5501 Ultrasonic Humidifier (has an automatic humidistat control)
CO2:
- Autopilot APC8200 CO2 Monitor & Controller (has an automatic sensor to regulate CO2 levels, and has a photoeye sensor to keep the CO2 from turning on at night)
- DoubleSun Aquarium CO2 Regulator with Solenoid
- Two 20lb CO2 tanks (brands always change due to periodic exchanges), only one connected at a time, so that I can exchange the other at my leisure when one runs out.
VENTILATION:
- AC Infinity: Cloudline T6 (has an automatic sensor control I use to decrease temp and RH)
MONITORING:
- Pulse One Temp, RH, and VPD monitor with WiFi (I really like this. It really helps me to keep everything dialed in at all times. The graphing feature is a really great addition. VPD (Vapor Pressure Deficit) is the way of the future.
- Hydrofarm: CO2 Monitor
~=~=~=~=~=~=~=~=~=~=~=~
STRAIN DECISION:
This time I chose to do “Blueberry Kush” from Growers Choice Seeds again because my first plant of this strain was honestly the best weed I have ever had. Blueberry Kush is a Blueberry x OG Kush cross. It had an awesome smell, and the high was calm and relaxing. The aroma was a perfect mix of both the Blueberry and OG Kush parents without one of the flavors suppressing the other. The high doesn’t cause too much couch lock or anxiety - even while still getting you very stoned. Let’s see how well and similar this next phenotype will do.
Unfortunately, this strain isn’t listed on this site as an official strain yet, so I have to say “Custom Breeder & Strain”. When I did this strain the first time, the site’s user interface was different and I was able to input the correct breeder.
If you’d like to give this Blueberry Kush strain from Growers Choice Seeds a try, you can find it here (I highly recommend it):
https://www.growerschoiceseeds.com/shop/cannabis-seeds/feminized/blueberry-kush-feminized-cannabis-seeds/
~=~=~=~=~=~=~=~=~=~=~=~
THANKS FOR READING!
13 likes
comments
Share
Used techniques
LST
Technique
6
Week 6. Vegetation6y ago


29.21 cm
Height
18 hrs
Light Schedule
28 °C
Day Air Temp
6.4
pH
Normal
Smell
70 %
Air Humidity
19 °C
Night Air Temp
37.85 l
Pot Size
0.49 l
Watering Volume
1170 PPM
CO₂ Level
Nutrients 1
Calcium Magnesium Supplement
1.057 mll
MovingOn ALL ORGANIC!
WEEK 6 RECAP (TL;DR journal comments):
Now that I have abandoned the crappy Gorilla Grow Tent screen and gone with the tomato ring (see last week’s comments and picture), I have fully embraced it. I am a busy person, so it is nice to not have to dedicate all the extra time to a SCROG right now anyway. This week has just been all about using minor LST to keep the colas at a relatively even height.
I raised the magnesium supplementation to help with tacoing. Like I said before, the organic CaMg+ is the only thing I hope to have to add as far as nutrients go, but we’ll see. This is a test run for this soil to see how long it lasts. I will add organic nutes if I see too many deficiencies early on during flower.
The heat is a little high though. Sometimes it hovers around 84-85degF, so next week I will lift the light up a bit. It looks bad in the picture with the leaves getting curly, but since there is a full supply of CO2, the plant is doing better than it looks. If there is enough CO2 in the air, the plant can still process its nutrients in high heat and intense light.
This is also the last week of veg.
Target VPD 1.0kPa. VPD = Vapor Pressure Deficit, the temperature to relative humidity equation that affects plants’ water intake and respiration rates. Average light wattage for the week is 451W.
~=~=~=~=~=~=~=~=~=~=~=~
FULL GROW RECAP (the long boring journal comments, unless you’re a nerd like me):
~=~=~=~=~=~=~=~=~=~=~=~
TIMELINE:
Pre-Week 1:
1. I put two seeds in peat pods in a seed dome.
2. Light set at low intensities, 142W.
Week 1:
3. Seedling “A” popped after 3 days, and “B” popped after 4.
4. Transplanted to 1gal pots to prevent the tap roots from getting too exposed.
5. Target VPD for the seedling cycle was 0.7kPa.
6. Second half of the week light intensity was increased to an average of 238W.
Week 2:
7. Halfway through the week changed the Kind LED XL1000 to Automatic Mode. Temps are up. The average daily wattage is now 451W
8. Halfway through the week adjusted the target VPD to 1.0kPa.
Week 3:
9. Removed the “B” seedling from the grow. Now only a one-plant diary.
10. Forgot to get enough soil.
11. Got my new CO2 setup going, but late because of snow.
12. Power outages due to heavy snow outside.
13. Soil farm was closed due to heavy snow.
14. Plant is rootbound and will go one week longer for veg planning.
Week 4:
15. Transplanted from a 1gal to a 10gal pot.
16. Put the pot up on a BBQ grill and 2x4s to keep the bottom off the floor.
Week 5:
17. Started LST.
18. Changed my mind about doing a SCROG because the Gorilla Grow Tent screen is a piece of crap, and I put in the bottom part of a tomato ring instead.
Week 6:
19. See weekly recap at the top.
~=~=~=~=~=~=~=~=~=~=~=~
FUTURE PLANS:
I will not be defoliating, unless dead or ground dragger leaves need to be removed. Leaves are both solar panels and batteries for plants, and you actually slow down the plant a tiny bit for each leaf plucked due to shock. If need be, for light or air circulation, I will tuck large leaves.
The reason why a plant seems to “boom” after defoliation is just because the plant is trying to quickly regain the leaf power that it just lost. Even the growth of mass in flowers will slow when the plant is trying to expand existing leaves or regrow new ones. Some people deny this, but they should do a side by side clone comparison to prove that defoliation actually increases the yield of a plant.
~=~=~=~=~=~=~=~=~=~=~=~
GROW SETUP:
GROWING MEDIUM:
- KIS Organics: Water Only Soil with Biochar (living soil), the bottom half will be amended with a dash of KIS Organics: Nutrient Pack. I miscalculated some factors on my last grow, and my flower phase suffered because of it. This time I have properly readjusted. I’m hoping to not have to use any nutes or amendments/supplements at all, besides a small dose of the nutrient pack mixed in at the bottom of the pot, and a tiny dose of organic calmag (CaMg+) every watering.
CONTAINER:
- Vivosun Premium Fabric Pot 10gal (might not fill it all the way)
TENT:
- Gorilla Grow Tent: Lite Line, 4’x4’ (actually only using 2'x4' space, because I'm sharing the tent with @Mothra)
LIGHTING:
- Kind LED: K5 XL1000. Every light cycle stage is programmed with a sunrise and sunset mode where the light intensity starts low, increases, peaks, and then gradually dims before shut off. I use lower intensity programs for seedlings, and gradually increase the intensities through veg. I use a Kill-a-Watt meter to measure the actual wattage draw, and will post the wattages of each cycle on this page.
HUMIDIFIER (the tent usually runs dry):
- Elechomes: UC5501 Ultrasonic Humidifier (has an automatic humidistat control)
CO2:
- Autopilot APC8200 CO2 Monitor & Controller (has an automatic sensor to regulate CO2 levels, and has a photoeye sensor to keep the CO2 from turning on at night)
- DoubleSun Aquarium CO2 Regulator with Solenoid
- Two 20lb CO2 tanks (brands always change due to periodic exchanges), only one connected at a time, so that I can exchange the other at my leisure when one runs out.
VENTILATION:
- AC Infinity: Cloudline T6 (has an automatic sensor control I use to decrease temp and RH)
MONITORING:
- Pulse One Temp, RH, and VPD monitor with WiFi (I really like this. It really helps me to keep everything dialed in at all times. The graphing feature is a really great addition. VPD (Vapor Pressure Deficit) is the way of the future.
- Hydrofarm: CO2 Monitor
~=~=~=~=~=~=~=~=~=~=~=~
STRAIN DECISION:
This time I chose to do “Blueberry Kush” from Growers Choice Seeds again because my first plant of this strain was honestly the best weed I have ever had. Blueberry Kush is a Blueberry x OG Kush cross. It had an awesome smell, and the high was calm and relaxing. The aroma was a perfect mix of both the Blueberry and OG Kush parents without one of the flavors suppressing the other. The high doesn’t cause too much couch lock or anxiety - even while still getting you very stoned. Let’s see how well and similar this next phenotype will do.
Unfortunately, this strain isn’t listed on this site as an official strain yet, so I have to say “Custom Breeder & Strain”. When I did this strain the first time, the site’s user interface was different and I was able to input the correct breeder.
If you’d like to give this Blueberry Kush strain from Growers Choice Seeds a try, you can find it here (I highly recommend it):
https://www.growerschoiceseeds.com/shop/cannabis-seeds/feminized/blueberry-kush-feminized-cannabis-seeds/
~=~=~=~=~=~=~=~=~=~=~=~
THANKS FOR READING!
14 likes
2 comments
Share
Used techniques
LST
Technique
7
Week 7. Flowering6y ago


36.83 cm
Height
13 hrs
Light Schedule
28 °C
Day Air Temp
6.4
pH
Normal
Smell
62 %
Air Humidity
19 °C
Night Air Temp
37.85 l
Pot Size
0.95 l
Watering Volume
91.44 cm
Lamp Distance
1170 PPM
CO₂ Level
Nutrients 1
Calcium Magnesium Supplement
0.793 mll
MovingOn ALL ORGANIC LIVING SOIL!
(KIS Organics Water Only Soil with Biochar; so far only slight KIS Nutrient Pack amendment mixed into the bottom layer of soil, and CaMg+ each watering)
WEEK 7 RECAP (short journal comments):
Flipped to a 13/11 light schedule. The sunset program on the light is just red, which encourages the plant to still go into flower even with a 13hr daylight schedule. (Kind LED K5 XL1000 has an intensity program that can have sunrise and sunset simulations).
I turned the heat down and raised the light a little bit and continued the CaMg+ for magnesium to decrease the floppy leaf curls, and it is starting to work. The heat still looks high, but I’m running with a full supplementation of CO2, which lets the plant still process nutrients at high temps and light intensities.
I removed some of the leaves that were touching the soil, but I’m not going to mark this down as defoliation because I am not defoliating the rest of the plant like most growers do. Don’t know how that will turn out, but the last side by side comparison of clones I saw that were 3 defo vs. 3 non-defo, the non-defo plants had a higher yield (I shared the link below). I don’t know… we’ll see….
Target VPD 1.4kPa. VPD = Vapor Pressure Deficit, the temperature to relative humidity equation that affects plants’ water intake and respiration rates. Average light wattage for the week is 572W.
~=~=~=~=~=~=~=~=~=~=~=~
FULL GROW RECAP (the long boring journal comments, unless you’re a nerd like me):
~=~=~=~=~=~=~=~=~=~=~=~
TIMELINE:
Pre-Week 1:
1. I put two seeds in peat pods in a seed dome.
2. Light set at low intensities, 142W.
Week 1:
3. Seedling “A” popped after 3 days, and “B” popped after 4.
4. Transplanted to 1gal pots to prevent the tap roots from getting too exposed.
5. Target VPD for the seedling cycle was 0.7kPa.
6. Second half of the week light intensity was increased to an average of 238W.
Week 2:
7. Halfway through the week changed the Kind LED XL1000 to Automatic Mode. Temps are up. The average daily wattage is now 451W.
8. Halfway through the week adjusted the target VPD to 1.0kPa.
Week 3:
9. Removed the “B” seedling from the grow. Now only a one-plant diary.
10. Forgot to get enough soil.
11. Got my new CO2 setup going, but late because of snow.
12. Power outages due to heavy snow outside.
13. Soil farm was closed due to heavy snow.
14. Plant is rootbound and will go one week longer for veg planning.
Week 4:
15. Transplanted from a 1gal to a 10gal pot.
16. Put the pot up on a BBQ grill and 2x4s to keep the bottom off the floor.
Week 5:
17. Started LST.
18. Changed my mind about doing a SCROG because the Gorilla Grow Tent screen is a piece of crap, and I put in the bottom part of a tomato ring instead.
Week 6:
19. Raised CaMg+ amendment to account for magnesium deficiencies shown by leaf tacoing.
Week 7:
20. See weekly recap at the top.
~=~=~=~=~=~=~=~=~=~=~=~
FUTURE PLANS:
I will not be defoliating, unless dead or ground dragger leaves need to be removed. Leaves are both solar panels and batteries for plants, and you actually slow down the plant a tiny bit for each leaf plucked due to shock. If need be, for light or air circulation, I will tuck large leaves.
The reason why a plant seems to “boom” after defoliation is just because the plant is trying to quickly regain the leaf power that it just lost. Even the growth of mass in flowers will slow when the plant is trying to expand existing leaves or regrow new ones. Some people deny this, but they should do a side by side clone comparison to prove that defoliation actually increases the yield of a plant.
Here are some references so you know I’m not just being random:
https://www.cocoforcannabis.com/community/photons_corner/to-defoliate-or-not-to-defoliate/
https://www.mmjdaily.com/article/9181646/does-defoliation-really-improve-a-cannabis-crop/
https://www.icmag.com/ic/showthread.php?t=285930&page=15
The bottom layer of the KIS Organics Water Only Soil with Biochar will be amended with a dash of KIS Organics: Nutrient Pack. I miscalculated some factors on my last grow, and my flower phase suffered because of it. This time I have properly readjusted. I’m hoping to not have to use any nutes or amendments/supplements at all, besides a small dose of the nutrient pack mixed in at the bottom of the pot, and a tiny dose of organic calmag (CaMg+) every watering. If I see any deficiencies in the flowering phase, I will add some organic nutes to finish it out.
~=~=~=~=~=~=~=~=~=~=~=~
GROW SETUP:
GROWING MEDIUM:
- KIS Organics: Water Only Soil with Biochar (living soil)
CONTAINER:
- Vivosun Premium Fabric Pot 10gal (might not fill it all the way)
TENT:
- Gorilla Grow Tent: Lite Line, 4’x4’ (actually only using 2'x4' space, because I'm sharing the tent with @Mothra)
LIGHTING:
- Kind LED: K5 XL1000. Every light cycle stage is programmed with a sunrise and sunset mode where the light intensity starts low, increases, peaks, and then gradually dims before shut off. I use lower intensity programs for seedlings, and gradually increase the intensities through veg. I use a Kill-a-Watt meter to measure the actual wattage draw, and will post the wattages of each cycle on this page.
HUMIDIFIER (the tent usually runs dry):
- Elechomes: UC5501 Ultrasonic Humidifier (has an automatic humidistat control)
CO2:
- Autopilot APC8200 CO2 Monitor & Controller (has an automatic sensor to regulate CO2 levels, and has a photoeye sensor to keep the CO2 from turning on at night)
- DoubleSun Aquarium CO2 Regulator with Solenoid
- Two 20lb CO2 tanks (brands always change due to periodic exchanges), only one connected at a time, so that I can exchange the other at my leisure when one runs out.
VENTILATION:
- AC Infinity: Cloudline T6 (has an automatic sensor control I use to decrease temp and RH)
MONITORING:
- Pulse One Temp, RH, and VPD monitor with WiFi (I really like this. It really helps me to keep everything dialed in at all times. The graphing feature is a really great addition. VPD (Vapor Pressure Deficit) is the way of the future.
- Hydrofarm: CO2 Monitor
~=~=~=~=~=~=~=~=~=~=~=~
STRAIN DECISION:
This time I chose to do “Blueberry Kush” from Growers Choice Seeds again because my first plant of this strain was honestly the best weed I have ever had. Blueberry Kush is a Blueberry x OG Kush cross. It had an awesome smell, and the high was calm and relaxing. The aroma was a perfect mix of both the Blueberry and OG Kush parents without one of the flavors suppressing the other. The high doesn’t cause too much couch lock or anxiety - even while still getting you very stoned. Let’s see how well and similar this next phenotype will do.
Unfortunately, this strain isn’t listed on this site as an official strain yet, so I have to say “Custom Breeder & Strain”. When I did this strain the first time, the site’s user interface was different and I was able to input the correct breeder.
If you’d like to give this Blueberry Kush strain from Growers Choice Seeds a try, you can find it here (I highly recommend it):
https://www.growerschoiceseeds.com/shop/cannabis-seeds/feminized/blueberry-kush-feminized-cannabis-seeds/
~=~=~=~=~=~=~=~=~=~=~=~
THANKS FOR READING!
14 likes
comments
Share
8
Week 8. Flowering6y ago


52.07 cm
Height
13 hrs
Light Schedule
28 °C
Day Air Temp
6.3
pH
Normal
Smell
63 %
Air Humidity
19 °C
Night Air Temp
37.85 l
Pot Size
0.76 l
Watering Volume
91.44 cm
Lamp Distance
1170 PPM
CO₂ Level
Nutrients 1
Calcium Magnesium Supplement
2.642 mll
MovingOn ALL ORGANIC LIVING SOIL!
(KIS Organics Water Only Soil with Biochar; so far only slight KIS Nutrient Pack amendment mixed into the bottom layer of soil, and CaMg+ each watering)
WEEK 8 RECAP (short journal comments):
Flowers are popping up all over. It smells like the aroma will be as good as the last Blueberry Kush I grew. This week was the biggest stretch week with about 6” (15.2cm) of growth on the main cola, and around the same for the smaller branch colas (some more, some less).
I noticed a faint yellow inter-ribbing on the leaves, and I started reading up more on deficiencies. On my last two plants, the Holy Grail Kush and The Church journals, I had yellow inter-ribbing on the leaves from what I thought was a nitrogen deficiency. But after doing more reading now, I am starting to think it was both an N *and* a magnesium deficiency, even more so with the magnesium though. I also came to this conclusion because of how red/purple some of my stems get. Plants need magnesium to produce chlorophyll. So I drastically increased my CaMg+ amendments even more this week. It seems to be helping.
Target VPD 1.4kPa. VPD = Vapor Pressure Deficit, the temperature to relative humidity equation that affects plants’ water intake and respiration rates. Average light wattage for the week is 572W.
~=~=~=~=~=~=~=~=~=~=~=~
FULL GROW RECAP (the long boring journal comments, unless you’re a nerd like me):
~=~=~=~=~=~=~=~=~=~=~=~
TIMELINE:
Pre-Week 1:
1. I put two seeds in peat pods in a seed dome.
2. Light set at low intensities, 142W.
Week 1:
3. Seedling “A” popped after 3 days, and “B” popped after 4.
4. Transplanted to 1gal pots to prevent the tap roots from getting too exposed.
5. Target VPD for the seedling cycle was 0.7kPa.
6. Second half of the week light intensity was increased to an average of 238W.
Week 2:
7. Halfway through the week changed the Kind LED XL1000 to Automatic Mode. Temps are up. The average daily wattage is now 451W.
8. Halfway through the week adjusted the target VPD to 1.0kPa.
Week 3:
9. Removed the “B” seedling from the grow. Now only a one-plant diary.
10. Forgot to get enough soil.
11. Got my new CO2 setup going, but late because of snow.
12. Power outages due to heavy snow outside.
13. Soil farm was closed due to heavy snow.
14. Plant is rootbound and will go one week longer for veg planning.
Week 4:
15. Transplanted from a 1gal to a 10gal pot.
16. Put the pot up on a BBQ grill and 2x4s to keep the bottom off the floor.
Week 5:
17. Started LST.
18. Changed my mind about doing a SCROG because the Gorilla Grow Tent screen is a piece of crap, and I put in the bottom ring of a tomato cage instead.
Week 6:
19. Raised CaMg+ amendment to account for magnesium deficiencies shown by leaf tacoing.
Week 7:
20. Flipped to a 13/11 light schedule with a red-only-sunset program to encourage flowering. The average daily wattage is now 572W.
21. Turned heat down to 82degF and increased calmag to reduce leaf curling (high heat is okay with a full amount of CO2. It was even spiking at 84 before this).
22. Target VPD is now 1.4kPa.
Week 8:
23. See weekly recap at the top.
~=~=~=~=~=~=~=~=~=~=~=~
FUTURE PLANS:
I will not be defoliating, unless dead or ground dragger leaves need to be removed. Leaves are both solar panels and batteries for plants, and you actually slow down the plant a tiny bit for each leaf plucked due to shock. If need be, for light or air circulation, I will tuck large leaves.
The reason why a plant seems to “boom” after defoliation is just because the plant is trying to quickly regain the leaf power that it just lost. Even the growth of mass in flowers will slow when the plant is trying to expand existing leaves or regrow new ones. Some people deny this, but they should do a side by side clone comparison to prove that defoliation actually increases the yield of a plant.
Here are some references so you know I’m not just being random:
https://www.cocoforcannabis.com/community/photons_corner/to-defoliate-or-not-to-defoliate/
https://www.mmjdaily.com/article/9181646/does-defoliation-really-improve-a-cannabis-crop/
https://www.icmag.com/ic/showthread.php?t=285930&page=15
The bottom layer of the KIS Organics Water Only Soil with Biochar is amended with a dash of KIS Organics: Nutrient Pack. I miscalculated some factors on my last grow, and my flower phase suffered because of it. This time I have properly readjusted. I’m hoping to not have to use any nutes or amendments/supplements at all, besides a small dose of the nutrient pack mixed in at the bottom of the pot, and a tiny dose of organic calmag (CaMg+) every watering. If I see any deficiencies in the flowering phase, I will add some organic nutes to finish it out.
~=~=~=~=~=~=~=~=~=~=~=~
GROW SETUP:
GROWING MEDIUM:
- KIS Organics: Water Only Soil with Biochar (living soil)
CONTAINER:
- Vivosun Premium Fabric Pot 10gal (might not fill it all the way)
TENT:
- Gorilla Grow Tent: Lite Line, 4’x4’ (actually only using 2'x4' space, because I'm sharing the tent with @Mothra)
LIGHTING:
- Kind LED: K5 XL1000. Every light cycle stage is programmed with a sunrise and sunset mode where the light intensity starts low, increases, peaks, and then gradually dims before shut off. I use lower intensity programs for seedlings, and gradually increase the intensities through veg. I use a Kill-a-Watt meter to measure the actual wattage draw, and will post the wattages of each cycle on this page.
HUMIDIFIER (the tent usually runs dry):
- Elechomes: UC5501 Ultrasonic Humidifier (has an automatic humidistat control)
CO2:
- Autopilot APC8200 CO2 Monitor & Controller (has an automatic sensor to regulate CO2 levels, and has a photoeye sensor to keep the CO2 from turning on at night)
- DoubleSun Aquarium CO2 Regulator with Solenoid
- Two 20lb CO2 tanks (brands always change due to periodic exchanges), only one connected at a time, so that I can exchange the other at my leisure when one runs out.
VENTILATION:
- AC Infinity: Cloudline T6 (has an automatic sensor control I use to decrease temp and RH)
MONITORING:
- Pulse One Temp, RH, and VPD monitor with WiFi (I really like this. It really helps me to keep everything dialed in at all times. The graphing feature is a really great addition. VPD (Vapor Pressure Deficit) is the way of the future.
- Hydrofarm: CO2 Monitor
~=~=~=~=~=~=~=~=~=~=~=~
STRAIN DECISION:
This time I chose to do “Blueberry Kush” from Growers Choice Seeds again because my first plant of this strain was honestly the best weed I have ever had. Blueberry Kush is a Blueberry x OG Kush cross. It had an awesome smell, and the high was calm and relaxing. The aroma was a perfect mix of both the Blueberry and OG Kush parents without one of the flavors suppressing the other. The high doesn’t cause too much couch lock or anxiety - even while still getting you very stoned. Let’s see how well and similar this next phenotype will do.
Unfortunately, this strain isn’t listed on this site as an official strain yet, so I have to say “Custom Breeder & Strain”. When I did this strain the first time, the site’s user interface was different and I was able to input the correct breeder.
If you’d like to give this Blueberry Kush strain from Growers Choice Seeds a try, you can find it here (I highly recommend it):
https://www.growerschoiceseeds.com/shop/cannabis-seeds/feminized/blueberry-kush-feminized-cannabis-seeds/
~=~=~=~=~=~=~=~=~=~=~=~
THANKS FOR READING!
13 likes
16 comments
Share
9
Week 9. Flowering6y ago


60.96 cm
Height
13 hrs
Light Schedule
28 °C
Day Air Temp
6.3
pH
Normal
Smell
59 %
Air Humidity
19 °C
Night Air Temp
37.85 l
Pot Size
0.76 l
Watering Volume
81.28 cm
Lamp Distance
1170 PPM
CO₂ Level
Nutrients 1
Calcium Magnesium Supplement
2.642 mll
MovingOn ALL ORGANIC LIVING SOIL!
(KIS Organics Water Only Soil with Biochar; so far only slight KIS Nutrient Pack amendment mixed into the bottom layer of soil, and CaMg+ each watering)
WEEK 9 RECAP (short journal comments):
The stretch has slowed down, and now we’re in the boring part of the grow, waiting for flowers to mature. Considering adding some nutes to be safe, but torn, because I really do want to see how I can maximize the plant through living soil. I like the challenge. Eventually I might start using teas and special nutes formulated for living soils in future grows, but I am enjoying fine tuning my environmental controls first.
The internodal stretching got larger on this phenotype than it did on my last one of this strain, so the buds won’t be as pretty, but oh well - I don’t grow for bag appeal, I grow for terps. Speaking of terps, I have a cannabinoid and terp tester that I will use to see what my percentages are at the end of the grow.
I changed out my 20lb (9kg) CO2 tank. That means I got about 6 weeks out of the tank even with it turning on frequently and keeping a high ppm. That should only cost around $15 every 6 weeks.
Target VPD 1.4kPa. VPD = Vapor Pressure Deficit, the temperature to relative humidity equation that affects plants’ water intake and respiration rates (it had been toeing 1.5 a bit this week because I’m trying not to be humid enough for mold or mildew). Average light wattage for the week is 572W.
~=~=~=~=~=~=~=~=~=~=~=~
FULL GROW RECAP (the long boring journal comments, unless you’re a nerd like me):
~=~=~=~=~=~=~=~=~=~=~=~
TIMELINE:
Pre-Week 1:
1. I put two seeds in peat pods in a seed dome.
2. Light set at low intensities, 142W.
Week 1:
3. Seedling “A” popped after 3 days, and “B” popped after 4.
4. Transplanted to 1gal pots to prevent the tap roots from getting too exposed.
5. Target VPD for the seedling cycle was 0.7kPa.
6. Second half of the week light intensity was increased to an average of 238W.
Week 2:
7. Halfway through the week changed the Kind LED XL1000 to Automatic Mode. Temps are up. The average daily wattage is now 451W.
8. Halfway through the week adjusted the target VPD to 1.0kPa.
Week 3:
9. Removed the “B” seedling from the grow. Now only a one-plant diary.
10. Forgot to get enough soil.
11. Got my new CO2 setup going, but late because of snow.
12. Power outages due to heavy snow outside.
13. Soil farm was closed due to heavy snow.
14. Plant is rootbound and will go one week longer for veg planning.
Week 4:
15. Transplanted from a 1gal to a 10gal pot.
16. Put the pot up on a BBQ grill and 2x4s to keep the bottom off the floor.
Week 5:
17. Started LST.
18. Changed my mind about doing a SCROG because the Gorilla Grow Tent screen is a piece of crap, and I put in the bottom ring of a tomato cage instead.
Week 6:
19. Raised CaMg+ amendment to account for magnesium deficiencies shown by leaf tacoing.
Week 7:
20. Flipped to a 13/11 light schedule with a red-only-sunset program to encourage flowering. The average daily wattage is now 572W.
21. Turned heat down to 82degF and increased calmag to reduce leaf curling (high heat is okay with a full amount of CO2. It was even spiking at 84 before this).
22. Target VPD is now 1.4kPa.
Week 8:
23. Increased calmag again
Week 9:
24: See weekly recap at the top.
~=~=~=~=~=~=~=~=~=~=~=~
FUTURE PLANS:
I will not be defoliating, unless dead or ground dragger leaves need to be removed. Leaves are both solar panels and batteries for plants, and you actually slow down the plant a tiny bit for each leaf plucked due to shock. If need be, for light or air circulation, I will tuck large leaves.
The reason why a plant seems to “boom” after defoliation is just because the plant is trying to quickly regain the leaf power that it just lost. Even the growth of mass in flowers will slow when the plant is trying to expand existing leaves or regrow new ones. Some people deny this, but they should do a side by side clone comparison to prove that defoliation actually increases the yield of a plant.
Here are some references so you know I’m not just being random:
https://www.cocoforcannabis.com/community/photons_corner/to-defoliate-or-not-to-defoliate/
https://www.mmjdaily.com/article/9181646/does-defoliation-really-improve-a-cannabis-crop/
https://www.icmag.com/ic/showthread.php?t=285930&page=15
The bottom layer of the KIS Organics Water Only Soil with Biochar is amended with a dash of KIS Organics: Nutrient Pack. I miscalculated some factors on my last grow, and my flower phase suffered because of it. This time I have properly readjusted. I’m hoping to not have to use any nutes or amendments/supplements at all, besides a small dose of the nutrient pack mixed in at the bottom of the pot, and a tiny dose of organic calmag (CaMg+) every watering. If I see any deficiencies in the flowering phase, I will add some organic nutes to finish it out.
~=~=~=~=~=~=~=~=~=~=~=~
GROW SETUP:
GROWING MEDIUM:
- KIS Organics: Water Only Soil with Biochar (living soil)
CONTAINER:
- Vivosun Premium Fabric Pot 10gal (might not fill it all the way)
TENT:
- Gorilla Grow Tent: Lite Line, 4’x4’ (actually only using 2'x4' space, because I'm sharing the tent with @Mothra)
LIGHTING:
- Kind LED: K5 XL1000. Every light cycle stage is programmed with a sunrise and sunset mode where the light intensity starts low, increases, peaks, and then gradually dims before shut off. I use lower intensity programs for seedlings, and gradually increase the intensities through veg. I use a Kill-a-Watt meter to measure the actual wattage draw, and will post the wattages of each cycle on this page.
HUMIDIFIER (the tent usually runs dry):
- Elechomes: UC5501 Ultrasonic Humidifier (has an automatic humidistat control)
CO2:
- Autopilot APC8200 CO2 Monitor & Controller (has an automatic sensor to regulate CO2 levels, and has a photoeye sensor to keep the CO2 from turning on at night)
- DoubleSun Aquarium CO2 Regulator with Solenoid
- Two 20lb CO2 tanks (brands always change due to periodic exchanges), only one connected at a time, so that I can exchange the other at my leisure when one runs out.
VENTILATION:
- AC Infinity: Cloudline T6 (has an automatic sensor control I use to decrease temp and RH)
MONITORING:
- Pulse One Temp, RH, and VPD monitor with WiFi (I really like this. It really helps me to keep everything dialed in at all times. The graphing feature is a really great addition. VPD (Vapor Pressure Deficit) is the way of the future.
- Hydrofarm: CO2 Monitor
~=~=~=~=~=~=~=~=~=~=~=~
STRAIN DECISION:
This time I chose to do “Blueberry Kush” from Growers Choice Seeds again because my first plant of this strain was honestly the best weed I have ever had. Blueberry Kush is a Blueberry x OG Kush cross. It had an awesome smell, and the high was calm and relaxing. The aroma was a perfect mix of both the Blueberry and OG Kush parents without one of the flavors suppressing the other. The high doesn’t cause too much couch lock or anxiety - even while still getting you very stoned. Let’s see how well and similar this next phenotype will do.
Unfortunately, this strain isn’t listed on this site as an official strain yet, so I have to say “Custom Breeder & Strain”. When I did this strain the first time, the site’s user interface was different and I was able to input the correct breeder.
If you’d like to give this Blueberry Kush strain from Growers Choice Seeds a try, you can find it here (I highly recommend it):
https://www.growerschoiceseeds.com/shop/cannabis-seeds/feminized/blueberry-kush-feminized-cannabis-seeds/
~=~=~=~=~=~=~=~=~=~=~=~
THANKS FOR READING!
14 likes
6 comments
Share
10
Week 10. Flowering6y ago


67.31 cm
Height
13 hrs
Light Schedule
28 °C
Day Air Temp
6.3
pH
Normal
Smell
60 %
Air Humidity
18 °C
Night Air Temp
37.85 l
Pot Size
0.76 l
Watering Volume
74.93 cm
Lamp Distance
1170 PPM
CO₂ Level
Nutrients 4

Mammoth P
0.264 mll

Recharge
0.651 mll

Organical Magic
1.981 mll
MovingOn ALL ORGANIC!
(KIS Organics Water Only Soil with Biochar; started supplementing with Espoma Tomato! And changed calmag from CaMg+ to Organical Magic)
WEEK 10 RECAP (short journal comments):
The leaves quickly started yellowing this week, so I got worried and started supplementing my watering with Espoma Tomato! Nutes. I know you might think I’m crazy for not using cannabis nutes, but it has everything I need in it, and I think it will work just the same. I also need to use it up before it gets old. The nutes are in the low percentages, and it has lots of beneficial microbes. I also started the use of Recharge and Mammoth P.
I’m hoping the yellowing is more due to senescence instead of chlorosis, but I just don’t think KIS Organics Water Only Soil with Biochar can last for a full moderate grow (the owner told me that it is formulated more for 2-3 week veg times, but I would prefer a 6 week veg time so that I can do some LST before flower).
I changed my calmag supplement from General Hydroponics CaMg+ to Future Harvest Organical Magic. Since I keep seeing signs of nitrogen toxicity, I wanted to switch to a non-nitrogen based calmag that is still safe for beneficial microbes.
I will not be doing a harvest flush. More on this below in my section called “Future Plans”.
I think this phenotype is more of an equatorial pheno (commonly known as “sativa”) than my last Blueberry Kush. It is still stretching 4 weeks into flower, and the internodal spacing is larger.
Target VPD 1.4kPa. VPD = Vapor Pressure Deficit, the temperature to relative humidity equation that affects plants’ water intake and respiration rates (it had been toeing 1.5 the last two weeks because I’m trying not to get humid enough to introduce mold or mildew). Average light wattage for the week is 572W.
~=~=~=~=~=~=~=~=~=~=~=~
FULL GROW RECAP (the long boring journal comments, unless you’re a nerd like me):
~=~=~=~=~=~=~=~=~=~=~=~
TIMELINE:
Pre-Week 1:
1. I put two seeds in peat pods in a seed dome.
2. Light set at low intensities, 142W.
Week 1:
3. Seedling “A” popped after 3 days, and “B” popped after 4.
4. Transplanted to 1gal pots to prevent the tap roots from getting too exposed.
5. Target VPD for the seedling cycle was 0.7kPa.
6. Second half of the week light intensity was increased to an average of 238W.
Week 2:
7. Halfway through the week changed the Kind LED XL1000 to Automatic Mode. Temps are up. The average daily wattage is now 451W.
8. Halfway through the week adjusted the target VPD to 1.0kPa.
Week 3:
9. Removed the “B” seedling from the grow. Now only a one-plant diary.
10. Forgot to get enough soil.
11. Got my new CO2 setup going, but late because of snow.
12. Power outages due to heavy snow outside.
13. Soil farm was closed due to heavy snow.
14. Plant is rootbound and will go one week longer for veg planning.
Week 4:
15. Transplanted from a 1gal to a 10gal pot.
16. Put the pot up on a BBQ grill and 2x4s to keep the bottom off the floor.
Week 5:
17. Started LST.
18. Changed my mind about doing a SCROG because the Gorilla Grow Tent screen is a piece of crap, and I put in the bottom ring of a tomato cage instead.
Week 6:
19. Raised CaMg+ amendment to account for magnesium deficiencies shown by leaf tacoing.
Week 7:
20. Flipped to a 13/11 light schedule with a red-only-sunset program to encourage flowering. The average daily wattage is now 572W.
21. Turned heat down to 82degF and increased calmag to reduce leaf curling (high heat is okay with a full amount of CO2. It was even spiking at 84 before this).
22. Target VPD is now 1.4kPa.
Week 8:
23. Increased calmag again
Week 9:
24: Changed out 20lb (9kg) CO2 tank. Looks like with good usage I will get about 6 weeks per tank. Which means the cost is about $15/6 weeks (not counting setup cost). On the next grow I will probably turn down the output since it doesn’t need to be as high as it is. So I will probably get even more than 6 weeks then.
Week 10:
25: See weekly recap at the top.
~=~=~=~=~=~=~=~=~=~=~=~
FUTURE PLANS:
I will not be defoliating, unless dead or ground dragger leaves need to be removed. Leaves are both solar panels and batteries for plants, and you actually slow down the plant a tiny bit for each leaf plucked due to shock. If need be, for light or air circulation, I will tuck large leaves.
The reason why a plant seems to “boom” after defoliation is just because the plant is trying to quickly regain the leaf power that it just lost. Even the growth of mass in flowers will slow when the plant is trying to expand existing leaves or regrow new ones. Some people deny this, but they should do a side by side clone comparison to prove that defoliation actually increases the yield of a plant.
Here are some references so you know I’m not just being random:
https://www.cocoforcannabis.com/community/photons_corner/to-defoliate-or-not-to-defoliate/
https://www.mmjdaily.com/article/9181646/does-defoliation-really-improve-a-cannabis-crop/
https://www.icmag.com/ic/showthread.php?t=285930&page=15
I will not be doing a harvest flush. There is no scientific evidence that I can find that says the quality of your bud is hurt by using nutes until finish. There is no other agriculture that uses this practice (vegetables, fruits, etc.), and besides, the plant only takes up what it needs from the roots, so you really aren’t flushing out anything out of the plant. Here is a good read on it:
https://support.ilovegrowingmarijuana.com/t/to-flush-or-not-to-flush/6432
~=~=~=~=~=~=~=~=~=~=~=~
GROW SETUP:
GROWING MEDIUM:
- KIS Organics: Water Only Soil with Biochar (living soil)
CONTAINER:
- Vivosun Premium Fabric Pot 10gal (might not fill it all the way)
TENT:
- Gorilla Grow Tent: Lite Line, 4’x4’ (actually only using 2'x4' space, because I'm sharing the tent with @Mothra)
LIGHTING:
- Kind LED: K5 XL1000. Every light cycle stage is programmed with a sunrise and sunset mode where the light intensity starts low, increases, peaks, and then gradually dims before shut off. I use lower intensity programs for seedlings, and gradually increase the intensities through veg. I use a Kill-a-Watt meter to measure the actual wattage draw, and will post the wattages of each cycle on this page.
HUMIDIFIER (the tent usually runs dry):
- Elechomes: UC5501 Ultrasonic Humidifier (has an automatic humidistat control)
CO2:
- Autopilot APC8200 CO2 Monitor & Controller (has an automatic sensor to regulate CO2 levels, and has a photoeye sensor to keep the CO2 from turning on at night)
- DoubleSun Aquarium CO2 Regulator with Solenoid
- Two 20lb CO2 tanks (brands always change due to periodic exchanges), only one connected at a time, so that I can exchange the other at my leisure when one runs out.
VENTILATION:
- AC Infinity: Cloudline T6 (has an automatic sensor control I use to decrease temp and RH)
MONITORING:
- Pulse One Temp, RH, and VPD monitor with WiFi (I really like this. It really helps me to keep everything dialed in at all times. The graphing feature is a really great addition. VPD (Vapor Pressure Deficit) is the way of the future.
- Hydrofarm: CO2 Monitor
~=~=~=~=~=~=~=~=~=~=~=~
STRAIN DECISION:
This time I chose to do “Blueberry Kush” from Growers Choice Seeds again because my first plant of this strain was honestly the best weed I have ever had. Blueberry Kush is a Blueberry x OG Kush cross. It had an awesome smell, and the high was calm and relaxing. The aroma was a perfect mix of both the Blueberry and OG Kush parents without one of the flavors suppressing the other. The high doesn’t cause too much couch lock or anxiety - even while still getting you very stoned. Let’s see how well and similar this next phenotype will do.
Unfortunately, this strain isn’t listed on this site as an official strain yet, so I have to say “Custom Breeder & Strain”. When I did this strain the first time, the site’s user interface was different and I was able to input the correct breeder.
If you’d like to give this Blueberry Kush strain from Growers Choice Seeds a try, you can find it here (I highly recommend it):
https://www.growerschoiceseeds.com/shop/cannabis-seeds/feminized/blueberry-kush-feminized-cannabis-seeds/
~=~=~=~=~=~=~=~=~=~=~=~
THANKS FOR READING!!! I realize having this long of a "Week Comment" is boring, 😴, and deters people from "liking" my journal, but oh well, I'm here to share information, not win likes. 😉 You are awesome if you made it this far down!!! 👍
17 likes
12 comments
Share
Grow Questions

MovingOnstarted grow question 6y ago
I found out my double bud/wide stem mutation is called "fasciation". It can be caused by many factors. I've not found scientific evidence on whether this is bad to keep or not. Does anyone have scientific proof on whether this is safe to leave on? No opinions, just facts please.

Solved
Buds. Other
2 likes

Wicked_Stixanswered grow question 6y ago
The only negative to it is the bud is more work trimming. Nothing about it is going to harm you or the plant.
11
Week 11. Flowering6y ago


67.31 cm
Height
13 hrs
Light Schedule
28 °C
Day Air Temp
6.3
pH
Normal
Smell
60 %
Air Humidity
18 °C
Night Air Temp
37.85 l
Pot Size
0.76 l
Watering Volume
74.93 cm
Lamp Distance
1170 PPM
CO₂ Level
Nutrients 4
Mammoth P
0.264 mll
Recharge
0.66 mll
Organical Magic
1.981 mll
MovingOn ALL ORGANIC!
(KIS Organics Water Only Soil with Biochar; started adding with Espoma Tomato!, Recharge, and Mammoth P. Also using Future Harvest Organical Magic calmag.)
WEEK 11 RECAP (short journal comments):
Not much to do this week. Just keeping an eye on things and considering decreasing my humidity next week.
Sorry for the crappy color on a couple of the pics - that’s the disadvantage of trying to take pictures under purple LED lighting. You never know how it is going to turn out.
The smell is definitely musky. Less crisp of an aroma while flowering than the previous pheno I did of this strain.
Target VPD 1.4kPa. VPD = Vapor Pressure Deficit, the temperature to relative humidity equation that affects plants’ water intake and respiration rates (I’m at 1.5kPa because I’m trying not to get humid enough to introduce mold or mildew). Average light wattage for the week is 572W.
~=~=~=~=~=~=~=~=~=~=~=~
FULL GROW RECAP (the long boring journal comments, unless you’re a nerd like me):
~=~=~=~=~=~=~=~=~=~=~=~
TIMELINE:
Pre-Week 1:
1. I put two seeds in peat pods in a seed dome.
2. Light set at low intensities, 142W.
Week 1:
3. Seedling “A” popped after 3 days, and “B” popped after 4.
4. Transplanted to 1gal pots to prevent the tap roots from getting too exposed.
5. Target VPD for the seedling cycle was 0.7kPa.
6. Second half of the week light intensity was increased to an average of 238W.
Week 2:
7. Halfway through the week changed the Kind LED XL1000 to Automatic Mode. Temps are up. The average daily wattage is now 451W.
8. Halfway through the week adjusted the target VPD to 1.0kPa.
Week 3:
9. Removed the “B” seedling from the grow. Now only a one-plant diary.
10. Forgot to get enough soil.
11. Got my new CO2 setup going, but late because of snow.
12. Power outages due to heavy snow outside.
13. Soil farm was closed due to heavy snow.
14. Plant is rootbound and will go one week longer for veg planning.
Week 4:
15. Transplanted from a 1gal to a 10gal pot.
16. Put the pot up on a BBQ grill and 2x4s to keep the bottom off the floor.
Week 5:
17. Started LST.
18. Changed my mind about doing a SCROG because the Gorilla Grow Tent screen is a piece of crap, and I put in the bottom ring of a tomato cage instead.
Week 6:
19. Raised CaMg+ amendment to account for magnesium deficiencies shown by leaf tacoing.
Week 7:
20. Flipped to a 13/11 light schedule with a red-only-sunset program to encourage flowering. The average daily wattage is now 572W.
21. Turned heat down to 82degF and increased calmag to reduce leaf curling (high heat is okay with a full amount of CO2. It was even spiking at 84 before this).
22. Target VPD is now 1.4kPa.
Week 8:
23. Increased calmag again
Week 9:
24: Changed out 20lb (9kg) CO2 tank. Looks like with good usage I will get about 6 weeks per tank. Which means the cost is about $15/6 weeks (not counting setup cost). On the next grow I will probably turn down the output since it doesn’t need to be as high as it is. So I will probably get even more than 6 weeks then.
Week 10:
25: Because of too much chlorosis, I started the use of Espoma Tomato!. It’s mostly microbes, but has a very small percentage of NPK at 1:3:1. Also started using Recharge and Mammoth P. Changed my calmag from General Hydroponics CaMg+ to Future Harvest Organical Magic to avoid overdosing nitrogen.
Week 11:
26: See weekly recap at the top.
~=~=~=~=~=~=~=~=~=~=~=~
FUTURE PLANS:
I will not be defoliating, unless dead or ground dragger leaves need to be removed. Leaves are both solar panels and batteries for plants, and you actually slow down the plant a tiny bit for each leaf plucked due to shock. If need be, for light or air circulation, I will tuck large leaves.
The reason why a plant seems to “boom” after defoliation is just because the plant is trying to quickly regain the leaf power that it just lost. Even the growth of mass in flowers will slow when the plant is trying to expand existing leaves or regrow new ones. Some people deny this, but they should do a side by side clone comparison to prove that defoliation actually increases the yield of a plant.
Here are some references so you know I’m not just being random:
https://www.cocoforcannabis.com/community/photons_corner/to-defoliate-or-not-to-defoliate/
https://www.mmjdaily.com/article/9181646/does-defoliation-really-improve-a-cannabis-crop/
https://www.icmag.com/ic/showthread.php?t=285930&page=15
I will not be doing a harvest flush. There is no scientific evidence that I can find that says the quality of your bud is hurt by using nutes until finish. There is no other agriculture that uses this practice (vegetables, fruits, etc.), and besides, the plant only takes up what it needs from the roots, so you really aren’t flushing out anything out of the plant. Here is a good read on it:
https://support.ilovegrowingmarijuana.com/t/to-flush-or-not-to-flush/6432
~=~=~=~=~=~=~=~=~=~=~=~
GROW SETUP:
GROWING MEDIUM:
- KIS Organics: Water Only Soil with Biochar (living soil)
CONTAINER:
- Vivosun Premium Fabric Pot 10gal (might not fill it all the way)
TENT:
- Gorilla Grow Tent: Lite Line, 4’x4’ (actually only using 2'x4' space, because I'm sharing the tent with @Mothra)
LIGHTING:
- Kind LED: K5 XL1000. Every light cycle stage is programmed with a sunrise and sunset mode where the light intensity starts low, increases, peaks, and then gradually dims before shut off. I use lower intensity programs for seedlings, and gradually increase the intensities through veg. I use a Kill-a-Watt meter to measure the actual wattage draw, and will post the wattages of each cycle on this page.
HUMIDIFIER (the tent usually runs dry):
- Elechomes: UC5501 Ultrasonic Humidifier (has an automatic humidistat control)
CO2:
- Autopilot APC8200 CO2 Monitor & Controller (has an automatic sensor to regulate CO2 levels, and has a photoeye sensor to keep the CO2 from turning on at night)
- DoubleSun Aquarium CO2 Regulator with Solenoid
- Two 20lb CO2 tanks (brands always change due to periodic exchanges), only one connected at a time, so that I can exchange the other at my leisure when one runs out.
VENTILATION:
- AC Infinity: Cloudline T6 (has an automatic sensor control I use to decrease temp and RH)
MONITORING:
- Pulse One Temp, RH, and VPD monitor with WiFi (I really like this. It really helps me to keep everything dialed in at all times. The graphing feature is a really great addition. VPD (Vapor Pressure Deficit) is the way of the future.
- Hydrofarm: CO2 Monitor
~=~=~=~=~=~=~=~=~=~=~=~
STRAIN DECISION:
This time I chose to do “Blueberry Kush” from Growers Choice Seeds again because my first plant of this strain was honestly the best weed I have ever had. Blueberry Kush is a Blueberry x OG Kush cross. It had an awesome smell, and the high was calm and relaxing. The aroma was a perfect mix of both the Blueberry and OG Kush parents without one of the flavors suppressing the other. The high doesn’t cause too much couch lock or anxiety - even while still getting you very stoned. Let’s see how well and similar this next phenotype will do.
Unfortunately, this strain isn’t listed on this site as an official strain yet, so I have to say “Custom Breeder & Strain”. When I did this strain the first time, the site’s user interface was different and I was able to input the correct breeder.
If you’d like to give this Blueberry Kush strain from Growers Choice Seeds a try, you can find it here:
https://www.growerschoiceseeds.com/shop/cannabis-seeds/feminized/blueberry-kush-feminized-cannabis-seeds/
~=~=~=~=~=~=~=~=~=~=~=~
THANKS FOR READING!!!
16 likes
10 comments
Share
12
Week 12. Flowering6y ago


67.31 cm
Height
13 hrs
Light Schedule
28 °C
Day Air Temp
6.3
pH
Strong
Smell
53 %
Air Humidity
18 °C
Night Air Temp
37.85 l
Pot Size
0.57 l
Watering Volume
74.93 cm
Lamp Distance
1170 PPM
CO₂ Level
Nutrients 4
Mammoth P
0.264 mll
Recharge
0.33 mll
Organical Magic
7.5 mll
MovingOn ALL ORGANIC!
(KIS Organics Water Only Soil with Biochar; started adding Espoma Tomato!, Recharge, and Mammoth P. Also using Future Harvest Organical Magic calmag.)
WEEK 12 RECAP (short journal comments):
Had to be out of the house for a couple days, so it went two days without watering, but it did well. While deprived of water, it pulled stored nutrients from the petiole (fan) leaves. Leaves are energy stores, so I don’t purposefully defoliate. The plant wants this stored energy. The buds grew substantially afterwards. I will just let it defoliate itself. Of course I will remove dead leaves or any that could potentially become gross, but letting the plant mostly do its own thing has been a positive experience so far.
The energy displacement has brought out some pretty “fall colors” this week. The tent is getting even more musky. Also, the trichomes are already mostly milky. The majority of pistils are white still, but I think next week could potentially be the last week. If not, it won’t go much longer past that. I will share some microscope shots of trichomes next week.
I haven’t had to water it as much now either.
Average VPD 1.8kPa. VPD = Vapor Pressure Deficit, the temperature to relative humidity equation that affects plants’ water intake and respiration rates (higher VPD now because I’m trying not to get humid enough to introduce mold or mildew). Average light wattage for the week is 572W.
~=~=~=~=~=~=~=~=~=~=~=~
FULL GROW RECAP (the long boring journal comments, unless you’re a nerd like me):
~=~=~=~=~=~=~=~=~=~=~=~
TIMELINE:
Pre-Week 1:
1. I put two seeds in peat pods in a seed dome.
2. Light set at low intensities, 142W.
Week 1:
3. Seedling “A” popped after 3 days, and “B” popped after 4.
4. Transplanted to 1gal pots to prevent the tap roots from getting too exposed.
5. Target VPD for the seedling cycle was 0.7kPa.
6. Second half of the week light intensity was increased to an average of 238W.
Week 2:
7. Halfway through the week changed the Kind LED XL1000 to Automatic Mode. Temps are up. The average daily wattage is now 451W.
8. Halfway through the week adjusted the target VPD to 1.0kPa.
Week 3:
9. Removed the “B” seedling from the grow. Now only a one-plant diary.
10. Forgot to get enough soil.
11. Got my new CO2 setup going, but late because of snow.
12. Power outages due to heavy snow outside.
13. Soil farm was closed due to heavy snow.
14. Plant is rootbound and will go one week longer for veg planning.
Week 4:
15. Transplanted from a 1gal to a 10gal pot.
16. Put the pot up on a BBQ grill and 2x4s to keep the bottom off the floor.
Week 5:
17. Started LST.
18. Changed my mind about doing a SCROG because the Gorilla Grow Tent screen is a piece of crap, and I put in the bottom ring of a tomato cage instead.
Week 6:
19. Raised CaMg+ amendment to account for magnesium deficiencies shown by leaf tacoing.
Week 7:
20. Flipped to a 13/11 light schedule with a red-only-sunset program to encourage flowering. The average daily wattage is now 572W.
21. Turned heat down to 82degF and increased calmag to reduce leaf curling (high heat is okay with a full amount of CO2. It was even spiking at 84 before this).
22. Target VPD is now 1.4kPa.
Week 8:
23. Increased calmag again
Week 9:
24: Changed out 20lb (9kg) CO2 tank. Looks like with good usage I will get about 6 weeks per tank. Which means the cost is about $15/6 weeks (not counting setup cost). On the next grow I will probably turn down the output since it doesn’t need to be as high as it is. So I will probably get even more than 6 weeks then.
Week 10:
25: Because of too much chlorosis, I started the use of Espoma Tomato!. It’s mostly microbes, but has a very small percentage of NPK at 1:3:1. Also started using Recharge and Mammoth P. Changed my calmag from General Hydroponics CaMg+ to Future Harvest Organical Magic to avoid overdosing nitrogen.
Week 11:
26: Maintaining, watching, and waiting.
Week 12:
27: See weekly recap at the top.
~=~=~=~=~=~=~=~=~=~=~=~
FUTURE PLANS:
I will not be defoliating, unless dead or ground dragger leaves need to be removed. Leaves are both solar panels and batteries for plants, and you actually slow down the plant a tiny bit for each leaf plucked due to shock. If need be, for light or air circulation, I will tuck large leaves.
The reason why a plant seems to “boom” after defoliation is just because the plant is trying to quickly regain the leaf power that it just lost. Even the growth of mass in flowers will slow when the plant is trying to expand existing leaves or regrow new ones. Some people deny this, but they should do a side by side clone comparison to prove that defoliation actually increases the yield of a plant.
Here are some references so you know I’m not just being random:
https://www.cocoforcannabis.com/community/photons_corner/to-defoliate-or-not-to-defoliate/
https://www.mmjdaily.com/article/9181646/does-defoliation-really-improve-a-cannabis-crop/
https://www.icmag.com/ic/showthread.php?t=285930&page=15
I will not be doing a harvest flush. There is no scientific evidence that I can find that says the quality of your bud is hurt by using nutes until finish. There is no other agriculture that uses this practice (vegetables, fruits, etc.), and besides, the plant only takes up what it needs from the roots, so you really aren’t flushing out anything out of the plant. Here is a good read on it:
https://support.ilovegrowingmarijuana.com/t/to-flush-or-not-to-flush/6432
~=~=~=~=~=~=~=~=~=~=~=~
GROW SETUP:
GROWING MEDIUM:
- KIS Organics: Water Only Soil with Biochar (living soil)
CONTAINER:
- Vivosun Premium Fabric Pot 10gal (might not fill it all the way)
TENT:
- Gorilla Grow Tent: Lite Line, 4’x4’ (actually only using 2'x4' space, because I'm sharing the tent with @Mothra)
LIGHTING:
- Kind LED: K5 XL1000. Every light cycle stage is programmed with a sunrise and sunset mode where the light intensity starts low, increases, peaks, and then gradually dims before shut off. I use lower intensity programs for seedlings, and gradually increase the intensities through veg. I use a Kill-a-Watt meter to measure the actual wattage draw, and will post the wattages of each cycle on this page.
HUMIDIFIER (the tent usually runs dry):
- Elechomes: UC5501 Ultrasonic Humidifier (has an automatic humidistat control)
CO2:
- Autopilot APC8200 CO2 Monitor & Controller (has an automatic sensor to regulate CO2 levels, and has a photoeye sensor to keep the CO2 from turning on at night)
- DoubleSun Aquarium CO2 Regulator with Solenoid
- Two 20lb CO2 tanks (brands always change due to periodic exchanges), only one connected at a time, so that I can exchange the other at my leisure when one runs out.
VENTILATION:
- AC Infinity: Cloudline T6 (has an automatic sensor control I use to decrease temp and RH)
MONITORING:
- Pulse One Temp, RH, and VPD monitor with WiFi (I really like this. It really helps me to keep everything dialed in at all times. The graphing feature is a really great addition. VPD (Vapor Pressure Deficit) is the way of the future.
- Hydrofarm: CO2 Monitor
~=~=~=~=~=~=~=~=~=~=~=~
STRAIN DECISION:
This time I chose to do “Blueberry Kush” from Growers Choice Seeds again because my first plant of this strain was honestly the best weed I have ever had. Blueberry Kush is a Blueberry x OG Kush cross. It had an awesome smell, and the high was calm and relaxing. The aroma was a perfect mix of both the Blueberry and OG Kush parents without one of the flavors suppressing the other. The high doesn’t cause too much couch lock or anxiety - even while still getting you very stoned. Let’s see how well and similar this next phenotype will do.
Unfortunately, this strain isn’t listed on this site as an official strain yet, so I have to say “Custom Breeder & Strain”. When I did this strain the first time, the site’s user interface was different and I was able to input the correct breeder.
If you’d like to give this Blueberry Kush strain from Growers Choice Seeds a try, you can find it here:
https://www.growerschoiceseeds.com/shop/cannabis-seeds/feminized/blueberry-kush-feminized-cannabis-seeds/
~=~=~=~=~=~=~=~=~=~=~=~
THANKS FOR READING!!!
14 likes
2 comments
Share
13
Week 13. Flowering6y ago


67.31 cm
Height
13 hrs
Light Schedule
29 °C
Day Air Temp
6.3
pH
Strong
Smell
52 %
Air Humidity
18 °C
Night Air Temp
37.85 l
Pot Size
0.49 l
Watering Volume
74.93 cm
Lamp Distance
1170 PPM
CO₂ Level
Nutrients 4
Mammoth P
0.264 mll
Recharge
0.33 mll
Organical Magic
1.849 mll
MovingOn ALL ORGANIC!
(KIS Organics Water Only Soil with Biochar; started adding Espoma Tomato!, Recharge, and Mammoth P. Also using Future Harvest Organical Magic calmag.)
WEEK 13, FLOWER WEEK 7, RECAP (short journal comments):
Seeing these fall colors in spring time has been a pleasure, and also something to spark joy while in quarantine. The aroma is piney like a winter solstice tree. The leaves are still naturally defoliating themselves - it is interesting to see how the plant removes its own leaves similar to a grower who unnaturally defoliates.
It’s weird how the lighting and coloring looks different from different angles through the protective glasses’ lens. Side angles look washed out, whereas downward angles look saturated. When I do my harvest pictures, it will be nice to be able to take more consistent pictures outside of the grow tent.
Early in the week I was surprised to see the trichomes mostly milky with how many white pistils there are still. I am guessing next week will be the last flower week though (even though I said that last week, haha). If I disappear without an update for a while, it’ll be because I’m curing the harvest, and hopefully not because of covid-19. Stay safe and smart out there everybody!
Average VPD 1.8kPa. VPD = Vapor Pressure Deficit, the temperature to relative humidity equation that affects plants’ water intake and respiration rates (higher VPD now because I’m trying not to get humid enough to introduce mold or mildew). Average light wattage for the week is 572W.
~=~=~=~=~=~=~=~=~=~=~=~
FULL GROW RECAP (the long boring journal comments, unless you’re a nerd like me):
~=~=~=~=~=~=~=~=~=~=~=~
TIMELINE:
Pre-Week 1:
1. I put two seeds in peat pods in a seed dome.
2. Light set at low intensities, 142W.
Week 1:
3. Seedling “A” popped after 3 days, and “B” popped after 4.
4. Transplanted to 1gal pots to prevent the tap roots from getting too exposed.
5. Target VPD for the seedling cycle was 0.7kPa.
6. Second half of the week light intensity was increased to an average of 238W.
Week 2:
7. Halfway through the week changed the Kind LED XL1000 to Automatic Mode. Temps are up. The average daily wattage is now 451W.
8. Halfway through the week adjusted the target VPD to 1.0kPa.
Week 3:
9. Removed the “B” seedling from the grow. Now only a one-plant diary.
10. Forgot to get enough soil.
11. Got my new CO2 setup going, but late because of snow.
12. Power outages due to heavy snow outside.
13. Soil farm was closed due to heavy snow.
14. Plant is rootbound and will go one week longer for veg planning.
Week 4:
15. Transplanted from a 1gal to a 10gal pot.
16. Put the pot up on a BBQ grill and 2x4s to keep the bottom off the floor.
Week 5:
17. Started LST.
18. Changed my mind about doing a SCROG because the Gorilla Grow Tent screen is a piece of crap, and I put in the bottom ring of a tomato cage instead.
Week 6:
19. Raised CaMg+ amendment to account for magnesium deficiencies shown by leaf tacoing.
Week 7:
20. Flipped to a 13/11 light schedule with a red-only-sunset program to encourage flowering. The average daily wattage is now 572W.
21. Turned heat down to 82degF and increased calmag to reduce leaf curling (high heat is okay with a full amount of CO2. It was even spiking at 84 before this).
22. Target VPD is now 1.4kPa.
Week 8:
23. Increased calmag again
Week 9:
24: Changed out 20lb (9kg) CO2 tank. Looks like with good usage I will get about 6 weeks per tank. Which means the cost is about $15/6 weeks (not counting setup cost). On the next grow I will probably turn down the output since it doesn’t need to be as high as it is. So I will probably get even more than 6 weeks then.
Week 10:
25: Because of too much chlorosis, I started the use of Espoma Tomato!. It’s mostly microbes, but has a very small percentage of NPK at 1:3:1. Also started using Recharge and Mammoth P. Changed my calmag from General Hydroponics CaMg+ to Future Harvest Organical Magic to avoid overdosing nitrogen.
Week 11:
26: Maintaining, watching, and waiting.
Week 12:
27: “Fall colors” have started showing in the leaves.
Week 13:
28: See weekly recap at the top.
~=~=~=~=~=~=~=~=~=~=~=~
FUTURE PLANS:
I will not be defoliating, unless dead or ground dragger leaves need to be removed. Leaves are both solar panels and batteries for plants, and you actually slow down the plant a tiny bit for each leaf plucked due to shock. If need be, for light or air circulation, I will tuck large leaves.
The reason why a plant seems to “boom” after defoliation is just because the plant is trying to quickly regain the leaf power that it just lost. Even the growth of mass in flowers will slow when the plant is trying to expand existing leaves or regrow new ones. Some people deny this, but they should do a side by side clone comparison to prove that defoliation actually increases the yield of a plant.
Here are some references so you know I’m not just being random:
https://www.cocoforcannabis.com/community/photons_corner/to-defoliate-or-not-to-defoliate/
https://www.mmjdaily.com/article/9181646/does-defoliation-really-improve-a-cannabis-crop/
https://www.icmag.com/ic/showthread.php?t=285930&page=15
I will not be doing a harvest flush. There is no scientific evidence that I can find that says the quality of your bud is hurt by using nutes until finish. There is no other agriculture that uses this practice (vegetables, fruits, etc.), and besides, the plant only takes up what it needs from the roots, so you really aren’t flushing out anything out of the plant. Here is a good read on it:
https://support.ilovegrowingmarijuana.com/t/to-flush-or-not-to-flush/6432
~=~=~=~=~=~=~=~=~=~=~=~
GROW SETUP:
GROWING MEDIUM:
- KIS Organics: Water Only Soil with Biochar (living soil)
CONTAINER:
- Vivosun Premium Fabric Pot 10gal (might not fill it all the way)
TENT:
- Gorilla Grow Tent: Lite Line, 4’x4’ (actually only using 2'x4' space, because I'm sharing the tent with @Mothra)
LIGHTING:
- Kind LED: K5 XL1000. Every light cycle stage is programmed with a sunrise and sunset mode where the light intensity starts low, increases, peaks, and then gradually dims before shut off. I use lower intensity programs for seedlings, and gradually increase the intensities through veg. I use a Kill-a-Watt meter to measure the actual wattage draw, and will post the wattages of each cycle on this page.
HUMIDIFIER (the tent usually runs dry):
- Elechomes: UC5501 Ultrasonic Humidifier (has an automatic humidistat control)
CO2:
- Autopilot APC8200 CO2 Monitor & Controller (has an automatic sensor to regulate CO2 levels, and has a photoeye sensor to keep the CO2 from turning on at night)
- DoubleSun Aquarium CO2 Regulator with Solenoid
- Two 20lb CO2 tanks (brands always change due to periodic exchanges), only one connected at a time, so that I can exchange the other at my leisure when one runs out.
VENTILATION:
- AC Infinity: Cloudline T6 (has an automatic sensor control I use to decrease temp and RH)
MONITORING:
- Pulse One Temp, RH, and VPD monitor with WiFi (I really like this. It really helps me to keep everything dialed in at all times. The graphing feature is a really great addition. VPD (Vapor Pressure Deficit) is the way of the future.
- Hydrofarm: CO2 Monitor
~=~=~=~=~=~=~=~=~=~=~=~
STRAIN DECISION:
This time I chose to do “Blueberry Kush” from Growers Choice Seeds again because my first plant of this strain was honestly the best weed I have ever had. Blueberry Kush is a Blueberry x OG Kush cross. It had an awesome smell, and the high was calm and relaxing. The aroma was a perfect mix of both the Blueberry and OG Kush parents without one of the flavors suppressing the other. The high doesn’t cause too much couch lock or anxiety - even while still getting you very stoned. Let’s see how well and similar this next phenotype will do.
Unfortunately, this strain isn’t listed on this site as an official strain yet, so I have to say “Custom Breeder & Strain”. When I did this strain the first time, the site’s user interface was different and I was able to input the correct breeder.
If you’d like to give this Blueberry Kush strain from Growers Choice Seeds a try, you can find it here:
https://www.growerschoiceseeds.com/shop/cannabis-seeds/feminized/blueberry-kush-feminized-cannabis-seeds/
~=~=~=~=~=~=~=~=~=~=~=~
THANKS FOR READING!!! And be safe and smart out there with all of this pandemic madness!!! Wash your hands!
17 likes
10 comments
Share
14
Week 14. Flowering6y ago


67.31 cm
Height
13 hrs
Light Schedule
29 °C
Day Air Temp
6.3
pH
Strong
Smell
52 %
Air Humidity
18 °C
Night Air Temp
37.85 l
Pot Size
0.38 l
Watering Volume
74.93 cm
Lamp Distance
1170 PPM
CO₂ Level
Nutrients 4
Mammoth P
0.264 mll
Recharge
0.33 mll
Organical Magic
1.849 mll
MovingOn ALL ORGANIC!
(KIS Organics Water Only Soil with Biochar; started adding Espoma Tomato!, Recharge, and Mammoth P. Also using Future Harvest Organical Magic calmag.)
WEEK 14, FLOWER WEEK 8, RECAP (short journal comments):
Wondering when the trichomes are going to get ripe. Oh well, I’m not in a hurry right now.
I didn’t post some of the pictures I took because they were a little dark - part of my light board in the Kind fixture went out. Looks like just under 1/8th of it. Luckily it has a 3 year warranty, and I’ll send it in after the grow is finished. Still is lame though, I’d like the full light power to finish out the grow. So I compensated with some pictures under a flash, I hope you like them still.
@Mothra’s Doctor Seedsman has been harvested now too. So now the Blueberry Kush is all by itself.
Average VPD 1.8kPa. VPD = Vapor Pressure Deficit, the temperature to relative humidity equation that affects plants’ water intake and respiration rates (higher VPD now because I’m trying not to get humid enough to introduce mold or mildew). Average light wattage for the week is 572W.
~=~=~=~=~=~=~=~=~=~=~=~
FULL GROW RECAP (the long boring journal comments, unless you’re a nerd like me):
~=~=~=~=~=~=~=~=~=~=~=~
TIMELINE:
Pre-Week 1:
1. I put two seeds in peat pods in a seed dome.
2. Light set at low intensities, 142W.
Week 1:
3. Seedling “A” popped after 3 days, and “B” popped after 4.
4. Transplanted to 1gal pots to prevent the tap roots from getting too exposed.
5. Target VPD for the seedling cycle was 0.7kPa.
6. Second half of the week light intensity was increased to an average of 238W.
Week 2:
7. Halfway through the week changed the Kind LED XL1000 to Automatic Mode. Temps are up. The average daily wattage is now 451W.
8. Halfway through the week adjusted the target VPD to 1.0kPa.
Week 3:
9. Removed the “B” seedling from the grow. Now only a one-plant diary.
10. Forgot to get enough soil.
11. Got my new CO2 setup going, but late because of snow.
12. Power outages due to heavy snow outside.
13. Soil farm was closed due to heavy snow.
14. Plant is rootbound and will go one week longer for veg planning.
Week 4:
15. Transplanted from a 1gal to a 10gal pot.
16. Put the pot up on a BBQ grill and 2x4s to keep the bottom off the floor.
Week 5:
17. Started LST.
18. Changed my mind about doing a SCROG because the Gorilla Grow Tent screen is a piece of crap, and I put in the bottom ring of a tomato cage instead.
Week 6:
19. Raised CaMg+ amendment to account for magnesium deficiencies shown by leaf tacoing.
Week 7:
20. Flipped to a 13/11 light schedule with a red-only-sunset program to encourage flowering. The average daily wattage is now 572W.
21. Turned heat down to 82degF and increased calmag to reduce leaf curling (high heat is okay with a full amount of CO2. It was even spiking at 84 before this).
22. Target VPD is now 1.4kPa.
Week 8:
23. Increased calmag again
Week 9:
24: Changed out 20lb (9kg) CO2 tank. Looks like with good usage I will get about 6 weeks per tank. Which means the cost is about $15/6 weeks (not counting setup cost). On the next grow I will probably turn down the output since it doesn’t need to be as high as it is. So I will probably get even more than 6 weeks then.
Week 10:
25: Because of too much chlorosis, I started the use of Espoma Tomato!. It’s mostly microbes, but has a very small percentage of NPK at 1:3:1. Also started using Recharge and Mammoth P. Changed my calmag from General Hydroponics CaMg+ to Future Harvest Organical Magic to avoid overdosing nitrogen.
Week 11:
26: Maintaining, watching, and waiting.
Week 12:
27: “Fall colors” have started showing in the leaves.
Week 13:
28: Still ripening.
Week 14:
29: See weekly recap at the top.
~=~=~=~=~=~=~=~=~=~=~=~
FUTURE PLANS:
I will not be defoliating, unless dead or ground dragger leaves need to be removed. Leaves are both solar panels and batteries for plants, and you actually slow down the plant a tiny bit for each leaf plucked due to shock. If need be, for light or air circulation, I will tuck large leaves.
The reason why a plant seems to “boom” after defoliation is just because the plant is trying to quickly regain the leaf power that it just lost. Even the growth of mass in flowers will slow when the plant is trying to expand existing leaves or regrow new ones. Some people deny this, but they should do a side by side clone comparison to prove that defoliation actually increases the yield of a plant.
Here are some references so you know I’m not just being random:
https://www.cocoforcannabis.com/community/photons_corner/to-defoliate-or-not-to-defoliate/
https://www.mmjdaily.com/article/9181646/does-defoliation-really-improve-a-cannabis-crop/
https://www.icmag.com/ic/showthread.php?t=285930&page=15
I will not be doing a harvest flush. There is no scientific evidence that I can find that says the quality of your bud is hurt by using nutes until finish. There is no other agriculture that uses this practice (vegetables, fruits, etc.), and besides, the plant only takes up what it needs from the roots, so you really aren’t flushing out anything out of the plant. Here is a good read on it:
https://support.ilovegrowingmarijuana.com/t/to-flush-or-not-to-flush/6432
~=~=~=~=~=~=~=~=~=~=~=~
GROW SETUP:
GROWING MEDIUM:
- KIS Organics: Water Only Soil with Biochar (living soil)
CONTAINER:
- Vivosun Premium Fabric Pot 10gal (might not fill it all the way)
TENT:
- Gorilla Grow Tent: Lite Line, 4’x4’ (actually only using 2'x4' space, because I'm sharing the tent with @Mothra)
LIGHTING:
- Kind LED: K5 XL1000. Every light cycle stage is programmed with a sunrise and sunset mode where the light intensity starts low, increases, peaks, and then gradually dims before shut off. I use lower intensity programs for seedlings, and gradually increase the intensities through veg. I use a Kill-a-Watt meter to measure the actual wattage draw, and will post the wattages of each cycle on this page.
HUMIDIFIER (the tent usually runs dry):
- Elechomes: UC5501 Ultrasonic Humidifier (has an automatic humidistat control)
CO2:
- Autopilot APC8200 CO2 Monitor & Controller (has an automatic sensor to regulate CO2 levels, and has a photoeye sensor to keep the CO2 from turning on at night)
- DoubleSun Aquarium CO2 Regulator with Solenoid
- Two 20lb CO2 tanks (brands always change due to periodic exchanges), only one connected at a time, so that I can exchange the other at my leisure when one runs out.
VENTILATION:
- AC Infinity: Cloudline T6 (has an automatic sensor control I use to decrease temp and RH)
MONITORING:
- Pulse One Temp, RH, and VPD monitor with WiFi (I really like this. It really helps me to keep everything dialed in at all times. The graphing feature is a really great addition. VPD (Vapor Pressure Deficit) is the way of the future.
- Hydrofarm: CO2 Monitor
~=~=~=~=~=~=~=~=~=~=~=~
STRAIN DECISION:
This time I chose to do “Blueberry Kush” from Growers Choice Seeds again because my first plant of this strain was honestly the best weed I have ever had. Blueberry Kush is a Blueberry x OG Kush cross. It had an awesome smell, and the high was calm and relaxing. The aroma was a perfect mix of both the Blueberry and OG Kush parents without one of the flavors suppressing the other. The high doesn’t cause too much couch lock or anxiety - even while still getting you very stoned. Let’s see how well and similar this next phenotype will do.
Unfortunately, this strain isn’t listed on this site as an official strain yet, so I have to say “Custom Breeder & Strain”. When I did this strain the first time, the site’s user interface was different and I was able to input the correct breeder.
If you’d like to give this Blueberry Kush strain from Growers Choice Seeds a try, you can find it here:
https://www.growerschoiceseeds.com/shop/cannabis-seeds/feminized/blueberry-kush-feminized-cannabis-seeds/
~=~=~=~=~=~=~=~=~=~=~=~
THANKS FOR READING!!! And be safe and smart out there with all of this pandemic madness!!! Wash your hands!
16 likes
4 comments
Share
15
Week 15. Flowering6y ago


67.31 cm
Height
13 hrs
Light Schedule
29 °C
Day Air Temp
6.3
pH
Strong
Smell
52 %
Air Humidity
18 °C
Night Air Temp
37.85 l
Pot Size
0.38 l
Watering Volume
74.93 cm
Lamp Distance
1170 PPM
CO₂ Level
Nutrients 4
Mammoth P
0.264 mll
Recharge
0.33 mll
Organical Magic
1.849 mll
MovingOn I’m starting this week off a little different. The world is in the grips of a deadly pandemic, so I just want to say that I hope you all are staying safe and healthy. I live near Seattle, Washington, US, and I have friends now who are sick. On top of that, I know others around the US who are sick too. San Francisco, Boston, New York City, Raleigh, and it just seems like we find out more and more people each week.
A lot of stuff has been going on at home and with work too. I’ve had to juggle so much right now, that it has been hard to keep up with this grow and this journal. So don’t let my faux-organization fool you, it’s been a struggle, and I’m sure many of you are struggling now too.
Thankfully, the ones I know who are already sick, are on the road to recovery, but so many people now that I don’t know are not so lucky, and we all have to wonder if we are the next who gets sick. I will tell you, the people I know who did go through it, have some pretty bad stories about it, this does not sound fun at all. In fact, quite the opposite and terrifying.
Some of the people I know that are sick, and other people’s friends and families that I don’t know, are being refused testing. Basically they are just told to stay home and ride it out unless they get much worse. Some people are dying in their homes, because they can’t go to the hospital. Hospitals are refusing people unless they call first. The United States is not as great of a place as many people around the world are told. It is all starting to fall apart here, and our government is hardly doing anything compared to other developed governments.
For those of you who are reading this that are sick, or who have friends and family that are sick, I wish the best for you all, and I hope we all come through this together and make the world a better place. <3
Ok, now back to our regularly scheduled programming…..
ALL ORGANIC!
(KIS Organics Water Only Soil with Biochar; started adding Espoma Tomato!, Recharge, and Mammoth P. Also using Future Harvest Organical Magic calmag.)
WEEK 15, FLOWER WEEK 9, RECAP (short journal comments):
This was basically just a watch and wait week. I am still watering and feeding, because I don’t believe in the pre-harvest flush. More on that below in my “grow plans”. Also, this is officially the last week. I will update the harvest node once I get my dry weights, so if you don’t see an update for a while, that is why. Don’t worry, I will be back (unless I get sick too! haha). :)
Sorry for the inconsistent coloring. Since some of my LED diodes quit working, the pics are really dependent on the angle I take the shots from, and the vibrant coloring that really showed in week 13 has been dying off anyway.
Average VPD 2.3kPa. VPD = Vapor Pressure Deficit, the temperature to relative humidity equation that affects plants’ water intake and respiration rates (higher VPD now because I’m trying not to get humid enough to introduce mold or mildew). Average light wattage for the week is 572W.
~=~=~=~=~=~=~=~=~=~=~=~
FULL GROW RECAP (the long boring journal comments, unless you’re a nerd like me):
~=~=~=~=~=~=~=~=~=~=~=~
TIMELINE:
Pre-Week 1:
1. I put two seeds in peat pods in a seed dome.
2. Light set at low intensities, 142W.
Week 1:
3. Seedling “A” popped after 3 days, and “B” popped after 4.
4. Transplanted to 1gal pots to prevent the tap roots from getting too exposed.
5. Target VPD for the seedling cycle was 0.7kPa.
6. Second half of the week light intensity was increased to an average of 238W.
Week 2:
7. Halfway through the week changed the Kind LED XL1000 to Automatic Mode. Temps are up. The average daily wattage is now 451W.
8. Halfway through the week adjusted the target VPD to 1.0kPa.
Week 3:
9. Removed the “B” seedling from the grow. Now only a one-plant diary.
10. Forgot to get enough soil.
11. Got my new CO2 setup going, but late because of snow.
12. Power outages due to heavy snow outside.
13. Soil farm was closed due to heavy snow.
14. Plant is rootbound and will go one week longer for veg planning.
Week 4:
15. Transplanted from a 1gal to a 10gal pot.
16. Put the pot up on a BBQ grill and 2x4s to keep the bottom off the floor.
Week 5:
17. Started LST.
18. Changed my mind about doing a SCROG because the Gorilla Grow Tent screen is a piece of crap, and I put in the bottom ring of a tomato cage instead.
Week 6:
19. Raised CaMg+ amendment to account for magnesium deficiencies shown by leaf tacoing.
Week 7:
20. Flipped to a 13/11 light schedule with a red-only-sunset program to encourage flowering. The average daily wattage is now 572W.
21. Turned heat down to 82degF and increased calmag to reduce leaf curling (high heat is okay with a full amount of CO2. It was even spiking at 84 before this).
22. Target VPD is now 1.4kPa.
Week 8:
23. Increased calmag again
Week 9:
24: Changed out 20lb (9kg) CO2 tank. Looks like with good usage I will get about 6 weeks per tank. Which means the cost is about $15/6 weeks (not counting setup cost). On the next grow I will probably turn down the output since it doesn’t need to be as high as it is. So I will probably get even more than 6 weeks then.
Week 10:
25: Because of too much chlorosis, I started the use of Espoma Tomato!. It’s mostly microbes, but has a very small percentage of NPK at 1:3:1. Also started using Recharge and Mammoth P. Changed my calmag from General Hydroponics CaMg+ to Future Harvest Organical Magic to avoid overdosing nitrogen.
Week 11:
26: Maintaining, watching, and waiting.
Week 12:
27: “Fall colors” have started showing in the leaves.
Week 13:
28: Still ripening.
Week 14:
29: Some of the diodes in my light stopped working.
30: @Mothra ’s Doctor Seedsman was harvested, and now the Blueberry Kush is alone in the tent.
Week 15:
31: See weekly recap at the top.
~=~=~=~=~=~=~=~=~=~=~=~
GROW PLANS:
I will not be defoliating, unless dead or ground dragger leaves need to be removed. Leaves are both solar panels and batteries for plants, and you actually slow down the plant a tiny bit for each leaf plucked due to shock. If need be, for light or air circulation, I will tuck large leaves.
The reason why a plant seems to “boom” after defoliation is just because the plant is trying to quickly regain the leaf power that it just lost. Even the growth of mass in flowers will slow when the plant is trying to expand existing leaves or regrow new ones. Some people deny this, but they should do a side by side clone comparison to prove that defoliation actually increases the yield of a plant.
Here are some references so you know I’m not just being random:
https://www.cocoforcannabis.com/community/photons_corner/to-defoliate-or-not-to-defoliate/
https://www.mmjdaily.com/article/9181646/does-defoliation-really-improve-a-cannabis-crop/
https://www.icmag.com/ic/showthread.php?t=285930&page=15
I will not be doing a harvest flush. There is no scientific evidence that I can find that says the quality of your bud is hurt by using nutes until finish. There is no other agriculture that uses this practice (vegetables, fruits, etc.), and besides, the plant only takes up what it needs from the roots, so you really aren’t flushing out anything out of the plant. Here is a good read on it:
https://support.ilovegrowingmarijuana.com/t/to-flush-or-not-to-flush/6432
~=~=~=~=~=~=~=~=~=~=~=~
GROW SETUP:
GROWING MEDIUM:
- KIS Organics: Water Only Soil with Biochar (living soil)
CONTAINER:
- Vivosun Premium Fabric Pot 10gal (might not fill it all the way)
TENT:
- Gorilla Grow Tent: Lite Line, 4’x4’ (actually only using 2'x4' space, because I'm sharing the tent with @Mothra)
LIGHTING:
- Kind LED: K5 XL1000. Every light cycle stage is programmed with a sunrise and sunset mode where the light intensity starts low, increases, peaks, and then gradually dims before shut off. I use lower intensity programs for seedlings, and gradually increase the intensities through veg. I use a Kill-a-Watt meter to measure the actual wattage draw, and will post the wattages of each cycle on this page.
HUMIDIFIER (the tent usually runs dry):
- Elechomes: UC5501 Ultrasonic Humidifier (has an automatic humidistat control)
CO2:
- Autopilot APC8200 CO2 Monitor & Controller (has an automatic sensor to regulate CO2 levels, and has a photoeye sensor to keep the CO2 from turning on at night)
- DoubleSun Aquarium CO2 Regulator with Solenoid
- Two 20lb CO2 tanks (brands always change due to periodic exchanges), only one connected at a time, so that I can exchange the other at my leisure when one runs out.
VENTILATION:
- AC Infinity: Cloudline T6 (has an automatic sensor control I use to decrease temp and RH)
MONITORING:
- Pulse One Temp, RH, and VPD monitor with WiFi (I really like this. It really helps me to keep everything dialed in at all times. The graphing feature is a really great addition. VPD (Vapor Pressure Deficit) is the way of the future.
- Hydrofarm: CO2 Monitor
~=~=~=~=~=~=~=~=~=~=~=~
STRAIN DECISION:
This time I chose to do “Blueberry Kush” from Growers Choice Seeds again because my first plant of this strain was honestly the best weed I have ever had. Blueberry Kush is a Blueberry x OG Kush cross. It had an awesome smell, and the high was calm and relaxing. The aroma was a perfect mix of both the Blueberry and OG Kush parents without one of the flavors suppressing the other. The high doesn’t cause too much couch lock or anxiety - even while still getting you very stoned. Let’s see how well and similar this next phenotype will do.
Unfortunately, this strain isn’t listed on this site as an official strain yet, so I have to say “Custom Breeder & Strain”. When I did this strain the first time, the site’s user interface was different and I was able to input the correct breeder.
If you’d like to give this Blueberry Kush strain from Growers Choice Seeds a try, you can find it here:
https://www.growerschoiceseeds.com/shop/cannabis-seeds/feminized/blueberry-kush-feminized-cannabis-seeds/
~=~=~=~=~=~=~=~=~=~=~=~
THANKS FOR READING!!! And be safe and smart out there with all of this pandemic madness!!! Wash your hands!
27 likes
22 comments
Share
16
Week 16. Harvest6y ago
Happy Harvest Day!


9/10
Rated
This is my second time doing this strain, because of how awesome the first pheno’s flavor was. This time around though it turned out more kushy than fruity. It is still pretty good though. This was a very robust plant, and I’m glad I don’t defoliate, because it would have been a nightmare to keep up with.
Even though the flavor wasn’t as good as the first time, the high of this plant is still a perfectly calm, relaxing, and happy experience. I would still recommend it, but next time I think I am going to try another breeder’s version of this strain to just see how different it is coming from other hands.
I was reading some of the Contest and GD Instagram comments, and it seems like people think there is a problem with these buds being "airy". Supposedly this has a negative effect on the smoking experience or something. I have been in the cannabis culture for 25 years now, I can assure you that the shape of these buds didn't have any negative consequences on how the buds burned or not. In fact, I have had more difficulty trying to smoke bud that is a hard nugget than cannabis looking like this. When you pick up one of these nugs, and drop it on the table, it makes a thump sound and bounces, an actual airy bud doesn't do that. It goes to show you how many people care about bag appeal more than the actual content of the weed itself. If you are familiar with different types of cannabis (equatorial, highland, etc.), then you know that some strains and phenotypes just naturally grow like this - some of the best buds out there look like a drunken hobo. Oh well, their loss...
I ran my MyDx Analyzer cannabinoid and terp tester on some buds to see what my values are. It isn’t a perfect system, and wouldn’t be used for professional farms, but it still gives you a ballpark figure for your levels. I have tested this on other plants, and it seems reliable, because I have even tested it on three samples from the same bud before, and got the same exact results for every value. So the consistency gives me confidence. Anyways, I tested a larf, popcorn, and cola bud. It seems like saving your larf is actually worth it. The difference in values are virtually the same as the cola buds, and it looks like the popcorn might actually be the strongest buds of the plant (I have had similar results with other plants, but this time it gives me a chance to prove it). Content Name, then first value is Larf, second is Popcorn, third is Cola, and fourth is Average:
Total THC %
19.25
21.50
20.01
20.25
Total CBD %
0.04
0.05
0.04
0.04
Total CBN %
0.08
0.08
0.06
0.07
beta-Caryophyllene mg/g
0.44
0.38
0.40
0.41
alpha-Pinene mg/g
0.11
0.12
0.15
0.13
beta-Pinene mg/g
0.27
0.32
0.30
0.30
Myrcene mg/g
0.06
0.05
0.08
0.06
Limonene mg/g
0
0.04
0.02
0.02
Geraniol mg/g
2.30
1.87
1.47
1.88
cis-Ocimene mg/g
0.03
0.03
0.06
0.04
Terpinene mg/g
0.49
0.29
0.49
0.42
Terpinolene mg/g
0.13
0.13
0.08
0.11
p-Cymene mg/g
0.08
0.06
0.06
0.07
Eucalyptol mg/g
0.05
0.03
0.04
0.04
Humulene mg/g
1.2
0.94
0.93
1.02
Nerolidol-1 mg/g
0.59
0.61
0.38
0.53
Carene mg/g
0.03
0.02
0.02
0.02
Show more
Translate
Spent 106 days
Ger Veg Flo Har
583.38 g
Bud wet weight per plant
91.42 g
Bud dry weight per plant
1
Plants
2.44 m²
Grow Room size
Easy
Difficulty

Euphoric, Happy, Relaxed
Positive effects

Dry mouth
Negative effects

Berries, Flowery, Pungent
Taste
Height
Day air temperature
Air humidity
PH
CO2
Light schedule
Night air temperature
Pot size
Lamp distance


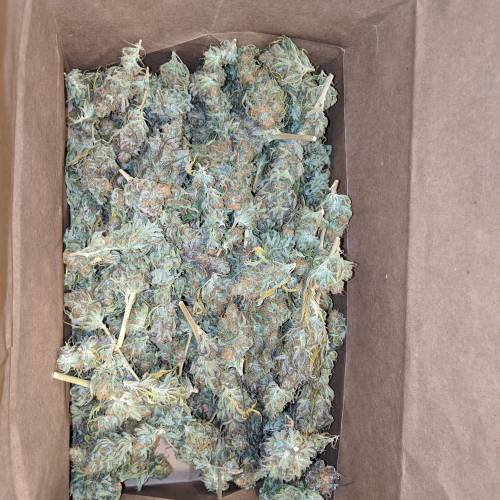


MovingOn ALL ORGANIC!
(KIS Organics Water Only Soil with Biochar; started adding Espoma Tomato!, Recharge, and Mammoth P. Also using Future Harvest Organical Magic calmag.)
WEEK 16 (and beyond) HARVEST RECAP (short journal comments):
Cut ‘er down and hung dry for 2 weeks in darkness at 60% RH and 60degF (16degC). Cut buds off of stalks and paper bag cured in the same conditions for 23 days. I could have even gone longer - it is crazy how well the paper bag just lets it all even out with the same dryness and texture. Dry trimmed and tested. See the test results above in the strain review. I’m still a noob, and this was my largest yield so far. I’m pretty happy with it being an all organic soil grow.
As mentioned above, this pheno turned out a little different than the previous pheno I did of this strain, and I think I will try a different breeder the next time I get around to doing Blueberry Kush again.
Some things I learned:
1. No defoliation turned out just fine. I cannot conclude that this is better or worse for the yield or not, unless I do a side by side grow to prove it, but this is my largest yield so far. So it shows potential for further testing.
2. No flush turned out fine. I cannot conclude that this is better or worse for the yield or not, unless I do a side by side grow to prove it, but this is my largest yield so far. So it shows potential for further testing. I cannot conclude that this is better or worse for the flavor, but it is still very fragrant and tasty.
3. Growing under LED lighting requires more magnesium than normal.
4. “KIS Organics Water Only Soil with Biochar” is not as good as “Kind Soil” as a water only soil. It is still a good soil though.
5. Keeping my Vapor Pressure Deficit (VPD) in check has done more for my plants’ health than any other method I have tried so far. If I were a synthetic nutrient, or hydro or coco grower, my plant would have been more plant than I really care to handle right now with my busy schedule. Get Pulse One monitor if you can: https://pulsegrow.com/
~=~=~=~=~=~=~=~=~=~=~=~
FULL GROW RECAP (the long boring journal comments, unless you’re a nerd like me):
~=~=~=~=~=~=~=~=~=~=~=~
TIMELINE:
Pre-Week 1:
1. I put two seeds in peat pods in a seed dome.
2. Light set at low intensities, 142W.
Week 1:
3. Seedling “A” popped after 3 days, and “B” popped after 4.
4. Transplanted to 1gal pots to prevent the tap roots from getting too exposed.
5. Target VPD for the seedling cycle was 0.7kPa.
6. Second half of the week light intensity was increased to an average of 238W.
Week 2:
7. Halfway through the week changed the Kind LED XL1000 to Automatic Mode. Temps are up. The average daily wattage is now 451W.
8. Halfway through the week adjusted the target VPD to 1.0kPa.
Week 3:
9. Removed the “B” seedling from the grow. Now only a one-plant diary.
10. Forgot to get enough soil.
11. Got my new CO2 setup going, but late because of snow.
12. Power outages due to heavy snow outside.
13. Soil farm was closed due to heavy snow.
14. Plant is rootbound and will go one week longer for veg planning.
Week 4:
15. Transplanted from a 1gal to a 10gal pot.
16. Put the pot up on a BBQ grill and 2x4s to keep the bottom off the floor.
Week 5:
17. Started LST.
18. Changed my mind about doing a SCROG because the Gorilla Grow Tent screen is a piece of crap, and I put in the bottom ring of a tomato cage instead.
Week 6:
19. Raised CaMg amendment to account for magnesium deficiencies shown by leaf tacoing.
Week 7:
20. Flipped to a 13/11 light schedule with a red-only-sunset program to encourage flowering. The average daily wattage is now 572W.
21. Turned heat down to 82degF and increased calmag to reduce leaf curling (high heat is okay with a full amount of CO2. It was even spiking at 84 before this).
22. Target VPD is now 1.4kPa.
Week 8:
23. Increased calmag again
Week 9:
24: Changed out 20lb (9kg) CO2 tank. Looks like with good usage I will get about 6 weeks per tank. Which means the cost is about $15/6 weeks (not counting setup cost). On the next grow I will probably turn down the output since it doesn’t need to be as high as it is. So I will probably get even more than 6 weeks then.
Week 10:
25: Because of too much chlorosis, I started the use of Espoma Tomato!. It’s mostly microbes, but has a very small percentage of NPK at 1:3:1. Also started using Recharge and Mammoth P. Changed my calmag from General Hydroponics CaMg to Future Harvest Organical Magic to avoid overdosing nitrogen.
Week 11:
26: Maintaining, watching, and waiting.
Week 12:
27: “Fall colors” have started showing in the leaves.
Week 13:
28: Still ripening.
Week 14:
29: Some of the diodes in my light stopped working.
30: @Mothra ’s Doctor Seedsman was harvested, and now the Blueberry Kush is alone in the tent.
Week 15:
31: Just watching and waiting. No flush.
Week 16: See weekly recap at the top.
~=~=~=~=~=~=~=~=~=~=~=~
GROW STRAGETIES:
I did not defoliate, except for ground dragger leaves and dead leaves. Leaves are both solar panels and batteries for plants, and you actually slow down the plant a tiny bit for each leaf plucked due to shock. For light or air circulation, I tucked large leaves.
The reason why a plant seems to “boom” after defoliation is just because the plant is trying to quickly regain the leaf power that it just lost. Even the growth of mass in flowers will slow when the plant is trying to expand existing leaves or regrow new ones. Some people deny this, but they should do a side by side clone comparison to prove that defoliation actually increases the yield of a plant.
Here are some references so you know I’m not just being random:
https://www.cocoforcannabis.com/community/photons_corner/to-defoliate-or-not-to-defoliate/
https://www.mmjdaily.com/article/9181646/does-defoliation-really-improve-a-cannabis-crop/
https://www.icmag.com/ic/showthread.php?t=285930&page=15
I did not do a harvest flush. There is no scientific evidence that I can find that says the quality of your bud is hurt by using nutes until finish. There is no other agriculture that uses this practice (vegetables, fruits, etc.), and besides, the plant only takes up what it needs from the roots, so you really aren’t flushing out anything out of the plant. Here is a good read on it:
https://support.ilovegrowingmarijuana.com/t/to-flush-or-not-to-flush/6432
~=~=~=~=~=~=~=~=~=~=~=~
GROW SETUP:
GROWING MEDIUM:
- KIS Organics: Water Only Soil with Biochar (living soil)
CONTAINER:
- Vivosun Premium Fabric Pot 10gal (might not fill it all the way)
TENT:
- Gorilla Grow Tent: Lite Line, 4’x4’ (actually only using 2'x4' space, because I'm sharing the tent with @Mothra)
LIGHTING:
- Kind LED: K5 XL1000. Every light cycle stage is programmed with a sunrise and sunset mode where the light intensity starts low, increases, peaks, and then gradually dims before shut off. I use lower intensity programs for seedlings, and gradually increase the intensities through veg. I use a Kill-a-Watt meter to measure the actual wattage draw, and will post the wattages of each cycle on this page.
HUMIDIFIER (the tent usually runs dry):
- Elechomes: UC5501 Ultrasonic Humidifier (has an automatic humidistat control)
CO2:
- Autopilot APC8200 CO2 Monitor & Controller (has an automatic sensor to regulate CO2 levels, and has a photoeye sensor to keep the CO2 from turning on at night)
- DoubleSun Aquarium CO2 Regulator with Solenoid
- Two 20lb CO2 tanks (brands always change due to periodic exchanges), only one connected at a time, so that I can exchange the other at my leisure when one runs out.
VENTILATION:
- AC Infinity: Cloudline T6 (has an automatic sensor control I use to decrease temp and RH)
MONITORING:
- Pulse One Temp, RH, and VPD monitor with WiFi (I really like this. It really helps me to keep everything dialed in at all times. The graphing feature is a really great addition. VPD (Vapor Pressure Deficit) is the way of the future.
- Hydrofarm: CO2 Monitor
~=~=~=~=~=~=~=~=~=~=~=~
STRAIN DECISION:
This time I chose to do “Blueberry Kush” from Growers Choice Seeds again because my first plant of this strain was honestly the best weed I have ever had. Blueberry Kush is a Blueberry x OG Kush cross. It had an awesome smell, and the high was calm and relaxing. The aroma was a perfect mix of both the Blueberry and OG Kush parents without one of the flavors suppressing the other. The high doesn’t cause too much couch lock or anxiety - even while still getting you very stoned. Let’s see how well and similar this next phenotype will do. This time around it was more kushy than fruity, but is still pretty good.
Unfortunately, this strain isn’t listed on this site as an official strain yet, so I have to say “Custom Breeder & Strain”. When I did this strain the first time, the site’s user interface was different and I was able to input the correct breeder.
If you’d like to give this Blueberry Kush strain from Growers Choice Seeds a try, you can find it here:
https://www.growerschoiceseeds.com/shop/cannabis-seeds/feminized/blueberry-kush-feminized-cannabis-seeds/
~=~=~=~=~=~=~=~=~=~=~=~
THANKS FOR READING!!!
91 likes
60 comments
Share
Equipment Reviews


152 comments
Sort by
popularity
popularity
newest
oldest
MovingOn commentedweek 106y ago
@Grey_Wolf and HighRoller909, this is actually not polyploidism. If you only have individual stalks that have this, it is called fasciation, and it is much more common than polyploidism. Poly affects the whole plant, not just individual branches. I'd post some articles on this, except I'm using my phone at the moment, and don't really want to copy/paste right now.
My main concern is the trichome count and if it can affect or infect other parts of the plant or other plants entirely. It seems many professional growers prefer to remove fasciated branches or whole plants because sometimes fasciation is caused by bacterial, viral, or fungal infections. I'm just not sure how often this is the case though, because the main causes are genetics or hormonal imbalances caused by chemicals (such as fem or insecticide chemicals). Unfortunately, this seems to be a controversial subject with the professional growing community split on if this is okay to leave or not.
Sorry, I would have clarified this in the grow question, but they limit the amount of characters you can put in the question. So I had to leave out the info about fasciation.
likes 5

TastyBudzz commented6y ago
@MovingOn, I remember reading about polyploid cell division. I think it's possible to happen naturally. Cells splitting more than twice increases size. So I like triploid even if it's different from polyploid. Cell mutation is how new shapes and flavours are discovered. Imagine stabilizing polyploid or triploid behavior. Many have.
likes
MovingOn commented6y ago
@TastyBudzz, Yes, I am aware of polyploidism and triploidism. In this thread I posted some articles on polyploidism, fasciation is unrelated. Fasciation is actually when the stem goes hollow. Also, poly and triploid plants are affected through the whole plant, not just one or two stems. These are the poly articles I shared before:
https://www.frontiersin.org/articles/10.3389/fpls.2019.00476/full
https://en.wikipedia.org/wiki/Polyploidy
https://www.ncbi.nlm.nih.gov/pmc/articles/PMC6503105/
like 1
TastyBudzz commented6y ago
@MovingOn,thanks for links . Will check it out now.
like 1
Show More (10)

JP148 commentedweek 166y ago
1st place win. Congrats beautiful plant and incredibly detailed diary. Well Done🌱🍒👏👏👏
likes 5
MovingOn commented6y ago
@@JP148, I really appreciate it. You've got some beauts of your own too.
likes 3

Highlaing commentedweek 166y ago
Hermoso doc!
Muy buen trabajo y saludos desde Chile
likes 4
MovingOn commented6y ago
@Highlaing, hola y gracias! I hope you are staying safe down there.
likes 2

Weird_Jimmy commentedweek 166y ago
Excellent plant and diary! Nice work!
likes 4
MovingOn commented6y ago
@Weird_Jimmy, thanks, Good Bud!
likes 3

Denzul commentedweek 126y ago
Beautiful lady. Buds coming along nicely. Lovely canopy. Fantastic work my friend. Keep it up and may the ganja garden gods bless you along the way with this grow and all future endeavors as well
likes 4
MovingOn commented6y ago
@Denzul, thank you very much! And may the GGGs bless you too!
likes 4

Darkwarsongs commentedweek 86y ago
Dude I love your presentation.. I also love your train of thought, research and learn. This idea of mutilating and abusing plants is much too rampant in the community and it never really sat well with me. Yes your plants look bushy but they also look super healthy. Growers are people and they fall victim to the psychology behind "what I did must have made a difference" at least in my opinion. Very excited to see what's to come and I'm sure your one proud dad :). Gonna keep following along.
likes 3

NuggetPawn commented6y ago
@@Darkwarsongs, agree with both of you 100%... if people make changes to get better results they’re gonna see what they want to see... that’s why this diary keeping is so important, 4 months between cycles is a long time to remember small details 😊
likes 2
MovingOn commented6y ago
@@Darkwarsongs, it is a mess of notes right now, and I am also combining it with my personal growing guidelines. It isn't anything too special or large. I mainly want to share some rules I have set for myself and my thinking behind them. If I find the time, I will even try to post them in this journal once I get organized, but that is definitely not a guarantee, haha. 😅
likes 2
MovingOn commented6y ago
..... I also hope to see @GrowDiaries someday possibly make a "bio" description that we can fill out on our profiles to tell the community more about ourselves, daily lives, histories, and our methods and guidelines. It would be a great addition in our profiles for such a social community that likes to share ideas.
likes 3
Show More (2)

TheBudWhisperer commentedweek 106y ago
Full disclosure, I still run a flush with my plants but like you said - there is little in the way of science based evidence to support the necessity. You can’t force feed a plant so the roots are only going to take in what they need. Through my own reading I’ve only discerned one half decent reason for it and that’s to advance the fade and minimize the amount of chlorophyll in the leaves. You might get a smoother smoke by doing so but again - questionable.
Enjoyed the read bud and she’s look’n fantastic👍
likes 3
MovingOn commented6y ago
@TheBudWhisperer, so far for me, the organic route has led to little to no chlorophyll left in the leaves at harvest anyway. Which I suppose is a double edged sword in itself. Although, would we rather have leaves with chlorophyll, or leaves that are rotting with possible diseases or unwanted mold/mildew/fungi? I'm not an expert though, so there's that, haha. 😁 Us closet growers can be quite the philosophers about our methods, can't we?
Thanks for the compliments! 👍
likes 3
TheBudWhisperer commented6y ago
@MovingOn, indeed! And with enough time, those points of view can and do change here and there. However there are certain topics (like those that are science based) which will remain constant... and fuck - I’m philosopherizing again... 😂😂😂
likes 4
Darkwarsongs commentedweek 96y ago
The "boring" part of flower is my favorite part.. I love seeing colors change and Aromas come through. And the plant's get soo pretty :)
likes 3
MovingOn commented6y ago
@@Darkwarsongs, ha, yes. Your opinion is probably the opinion of most people's, but I always enjoy the veg part because growth is visually faster and I enjoy the training. To me, waiting for the flowers to get bigger is like watching paint dry. 😴😀
likes 2
Darkwarsongs commented6y ago
@MovingOn, lol your totally right. The small and subtle changes from day to day are not nearly as exciting. I think in general the whole process is rewarding. When your in veg and they're growing strong you can see that potential. And then in the flower when all your hard work starts to pay off. The flower can also be the most nerve wrecking, quite a few more factors that come into play in making a nice end product.
like 1
NuggetPawn commentedweek 166y ago
Great work and liking the certificate of analysis 😉😊
likes 3
MovingOn commented6y ago
@NuggetPawn, thanks! 😁
likes 2

oulkboss88 commentedweek 156y ago
hi there i have double bud and triple bud like yours in my diary blueberry-skunk1..if you check you will find it in midle flower stage..nice job
likes 3
MovingOn commented6y ago
@oulkboss88, cool, I'll check it out. This one is a cross between Blueberry and OG Kush.
likes 3

Canadian commentedweek 156y ago
Congratulation you have a very nice lady
likes 3
MovingOn commented6y ago
@Canadian, thank you!
likes 2
TheBudWhisperer commentedweek 136y ago
Those fan leave colours are awesome dude. Those are some pretty plants indeed. Gonna be a little sad at chop me thinks👍
likes 3
MovingOn commented6y ago
@TheBudWhisperer, true! Even as they get old and fall off, I get a little bummed.
likes 3
NuggetPawn commentedweek 96y ago
That 3rd photo is trippy... Especially with bong in hand...
Photo perfect plants 👍😎
likes 3

Master_weeda commentedweek 86y ago
The thousandth likes is for me 👍 I have the immense honor of making you a master 🙏
May the force be with you💪
likes 2
MovingOn commented6y ago
@Master_weeda, no problem! I like it when people make it interesting. I think once I get more streamlined, like you, I would like to do things with my journals to make them more interesting as well. I should do more videos, and I wanted to do a time lapse on this one too, but the life timing didn't work out to start a new project like that.
I also wanted to take my plant out to take pictures in the room light instead of under the tent light, but this living soil is so heavy that it has been kind of a pain to lift, even before watering. It's not that I can't lift it though, it is just very awkward to get in and out of the tent, and the plant got so bushy that I am afraid of dropping it or breaking off branches or something. Luckily, I can put green sunglasses in front of my camera, and it makes the picture look more natural - instead of purple or red. On my next week I am going to show some pictures with the differences of the light and the lenses.
likes 2
Master_weeda commented6y ago
@MovingOn,je serais là pour voir cela 👍
likes 2
MovingOn commented6y ago
@Master_weeda, l'avenir a des possibilités infinies, et je vous y verrai!
likes 2
Show More (2)

y0shimitsu commentedweek 156y ago
Hi and congratulation for your growth. Great results, you inspired me on growing a blueberry next.
I have one question: what's under the pot? I'm curious...
likes 2
MovingOn commented6y ago
@y0shimitsu, thanks! It is a BBQ grill on a couple pieces of wood. In the past the bottom of my pots would be kind of soggy and gross, but doing this helps to keep the bottom dry.
likes 2
y0shimitsu commented6y ago
@MovingOn, great idea. 😊✌️
likes 2

Belverde commentedweek 166y ago
Congratulation Dr P , great pheno 😉👌🔥
If I can ask you, is the one in the picture the cannabinoid tester etc? Does it also detect terpenes?
likes 2
MovingOn commented6y ago
@Belverde, thanks! Yes, that black thing is the tester. You can see some of the terps it tests for in the readout above, and in the graph in one of the pictures.
likes 3
Belverde commented6y ago
@MovingOn,
HI mate
Thanks for the answer👍
you're right I could have seen them alone, I was probably too out of tune 😅
It is a great object I also saw one that shows urban oar in his videos, xo 'is bigger Thanks again for show it 😎
Good cultivation🌱
likes 2

WeedTheNorth commentedweek 166y ago
Let me be the first to congratulate you on a fantastic diary!! All the best 🇨🇦🌱🔥👏🙏
likes 2
MovingOn commented6y ago
Thank you, @WeedTheNorth! It's funny because I saw it on Instagram first, and was like, "whoa, this picture looks familiar..."
likes 3
WeedTheNorth commented6y ago
@MovingOn,me too well deserved brudda!!
likes 2
Master_weeda commentedweek 16y ago
May the force be with you 💪
likes 2
MovingOn commented6y ago
@Master_weeda, and to you as well!
likes 2
Master_weeda commented6y ago
@MovingOn,thx buddy 🙏
likes 2
Master_weeda commentedweek 16y ago
Good luck for your grow bro 🤞🌱very nice work 👌
likes 2
MovingOn commented6y ago
@Master_weeda, thanks, buddy!!
likes 2
Master_weeda commented6y ago
@MovingOn,with pleasure,👍
likes 2

Mrs_Larimar commentedweek 166y ago
A very Impressive and wonderful Plant. I really liked to read your Diary ( or parts of it^^)
crossing Fingers.....
Keep on Growing, stay safe and healthy
likes 2
MovingOn commented6y ago
@Mrs_Larimar, thanks Mrs! I hope you stay safe and healthy too
like 1

the end.
Enjoying this diary? Follow for more updates!


Prefer the old Diary view?
Go back to the old Diary view