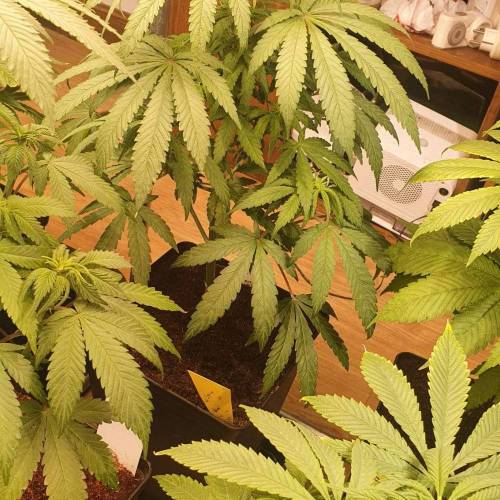
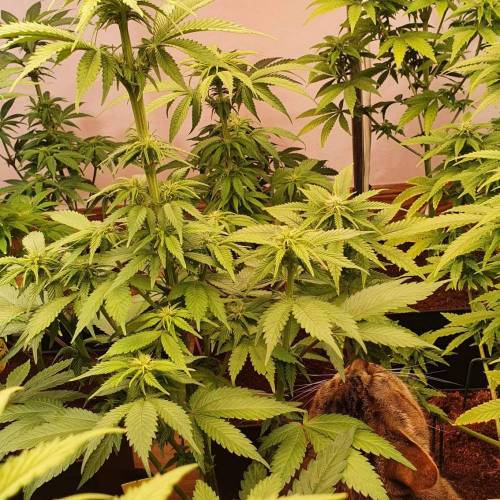
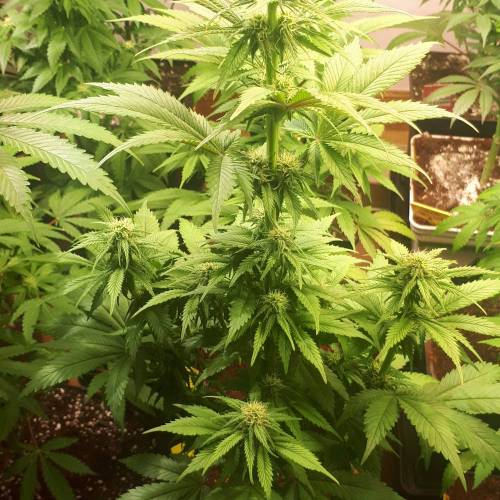
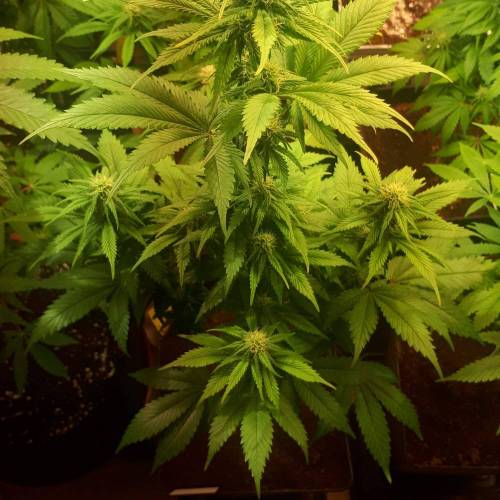
MELs_Garden Welcome to M.E.L.s "Runtz" from Zamnesia seeds.
First of all, I want to thank Crazy Roots for the support and help, and also GrowDiaries and Zamnesia for giving me the chance to try this strain.
RUNTZ (ZAMNESIA SEEDS) FEMINIZED - TECHNICAL SHEET
Brand: Zamnesia Seeds
Genetics: 50% Indica / 50% Sativa
Parents: Gelato x Zkittlez
Flowering Period: 8-9 weeks
THC: 27%
CBD: <1%
Indoor Yield: 450-500 gr/m²
Outdoor Yield: 400-450 gr/plant
Indoor Height: 130cm
Outdoor Height: 180cm
Type of Flowering: Photoperiod
Sex: Feminized
October 25, 23:35
First, we take the seeds out of the fridge and put them in a dish with a bit of water to hydrate.
October 27
We transfer the already hydrated seeds to the plug-in pro, previously sprayed with ryzofuel, and place them in the electric greenhouse.
October 29
All of them are turning up, 100% effectiveness. As soon as we see the root starting to peek out from the bottom of the plug, we transplant them to 0.25l pots with Canna coco substrate. We do a watering with 1ml of ryzofuel and move them to another greenhouse.
Every day, we occasionally do foliar feeding with ryzofuel.
November 1
We move to the growth cabinet with 3 LED strips from Grow the Jungle that will be running for 18 hours, and we continue with foliar feeding using ryzofuel. Temperatures will be around 22/24°C when ON and 20°C when OFF, with humidity around 60/65%.
3 likes
comments
Share
Used method
Glass Of Water
Germination Method
1
Week 1. Vegetation
6y ago
1/5
5 cm
Height
18 hrs
Light Schedule
23 °C
Day Air Temp
6.0
pH
100 PPM
TDS
65 %
Air Humidity
23 °C
Solution Temp
20 °C
Night Air Temp
0.25 liters
Pot Size
0.1 liters
Watering Volume
5 cm
Lamp Distance
Nutrients 1
Ryzofuel
1 mll
MELs_Garden Week 1
From November 2 to 8
Once in the grow cabinet with the LEDs about 15/20cm away and 18h ON, we continue the usual process, occasionally spraying water with rooting solution, and if we see that the substrate dries out a bit, we water with the same water from the sprayer.
Water + 1 ryzofuel
pH 6.0
EC: 0 2ms
We keep the same routine all week, foliar feeding every day, and if any pot dries out, we just water normally.
We have ordered the substrate and pots, so around Tuesday or so we will do the transplanting.
Other than that, nothing to comment on since there’s nothing special to say, everything is working well.
3 likes
comments
Share
2
Week 2. Vegetation
6y ago
1/5
8 cm
Height
18 hrs
Light Schedule
23 °C
Day Air Temp
6.0
pH
500 PPM
TDS
65 %
Air Humidity
23 °C
Solution Temp
20 °C
Night Air Temp
1.65 liters
Pot Size
0.3 liters
Watering Volume
40 cm
Lamp Distance
Nutrients 8
Ryzofuel
1 mll
B1 Boost
1 mll
Grow A
0.6 mll
MELs_Garden Week 2
From November 9 to 15
The plants are quite clear starting to yellow a bit, so we started with the nutrients.
November 10
We watered with the Cyco nutrients specified above.
November 11
We transplanted to 1.65l pots with Progen coconut substrate. Since we watered with nutrients yesterday, this time we only lightly added Ryzofuel just to help them settle a bit, but we watered very lightly on top.
We'll wait for them to get through the transplant stress.
November 13
After our little ones recovered from the transplant, we gave them a nutrient watering with the conditions specified above.
November 14
We changed the lighting in the vegetative cabinet.
Before, we had 3 LED strips of 25w from Grow the Jungle (75w total), which are good for the early stages of growth, and now we placed a Jackson 150w from the same brand to ensure that all the plants get plenty of light and don’t stretch or grow crooked.
Other than that, everything is going smoothly.
2 likes
comments
Share
3
Week 3. Vegetation
6y ago
1/15
12 cm
Height
18 hrs
Light Schedule
23 °C
Day Air Temp
5.8
pH
550 PPM
TDS
66 %
Air Humidity
22 °C
Solution Temp
18 °C
Night Air Temp
1.65 liters
Pot Size
0.3 liters
Watering Volume
35 cm
Lamp Distance
Nutrients 11
Calcium
0.8 mll
Magnesium
0.2 mll
Mammoth P
0.16 mll
MELs_Garden Week 3
From November 16 to 22
We continue doing foliar sprays with ryzofuel, and when it's time to water, we use the mix with everything detailed above.
It's progressing very well.
November 20
It seems like they have settled in and are starting to grow with a lot of strength. This looks good.
November 22
We continue with the waterings (specified above) but we added 0.16ml/l of Mammoth P to give our substrate a little boost 😉
We finish this week 3 with very good feelings. It's too early to say for sure, but based on how it's developing so far, we are facing our best grow yet; let's hope everything continues like this.
3 likes
2 comments
Share
4
Week 4. Vegetation
6y ago
1/9
24 cm
Height
18 hrs
Light Schedule
21 °C
Day Air Temp
5.8
pH
550 PPM
TDS
66 %
Air Humidity
22 °C
Solution Temp
18 °C
Night Air Temp
1.65 liters
Pot Size
0.3 liters
Watering Volume
35 cm
Lamp Distance
Nutrients 11
Calcium
0.8 mll
Magnesium
0.2 mll
Mammoth P
0.16 mll
MELs_Garden Week 4
From November 23 to 29
This just keeps getting better. The internodal distance is minimal and they are becoming very sturdy. They look great, and at the rate they're going, it won't be long until the transplant to the final pot.
We continue to do foliar sprays with ryzofuel practically 1 or 2 times a day.
The waterings are individual and with the conditions specified above.
We've alternated some nutrient waterings with others of water + calmag. We don't want the coco to be too loaded for the upcoming transplant.
We pruned some lower nodes and took the opportunity to remove a few leaves from the bottom.
We continue doing foliar sprays with ryzofuel from time to time.
3 likes
comments
Share
5
Week 5. Vegetation
6y ago
1/8
28 cm
Height
16 hrs
Light Schedule
21 °C
Day Air Temp
5.8
pH
550 PPM
TDS
66 %
Air Humidity
22 °C
Solution Temp
18 °C
Night Air Temp
7 liters
Pot Size
0.3 liters
Watering Volume
50 cm
Lamp Distance
Nutrients 12
Calcium
0.8 mll
Magnesium
0.2 mll
Mammoth P
0.16 mll
MELs_Garden Week 5
From November 30 to December 6
We're continuing with the same system we've been using so far.
December 3
We transplanted to 7L pots.
We'll be using cocogen from the Progen brand (which is what we've used throughout the grow so far) for the final pot transplant, 100% coco, previously moistened with water + ryzofuel.
We took the opportunity to remove some leaves from the bottom and eliminate a node.
December 5
We changed the light cycle to 15 hours and 30 minutes to start sexing.
We did some watering, this time we added water + 1g•10L of vegetative growth from Grotek because I really like how it works, it gives the plant a lot of strength for flowering. We watered with 0.5L per plant
pH: 6.2
EC: 0.4ms
This will be the last watering before switching to flowering on December 7.
3 likes
comments
Share
6
Week 6. Vegetation
6y ago
1/3
28 cm
Height
16 hrs
Light Schedule
21 °C
Day Air Temp
5.8
pH
550 PPM
TDS
66 %
Air Humidity
22 °C
Solution Temp
18 °C
Night Air Temp
7 liters
Pot Size
0.8 liters
Watering Volume
50 cm
Lamp Distance
Nutrients 12
Calcium
0.8 mll
Magnesium
0.2 mll
Mammoth P
0.16 mll
MELs_Garden Week 6
From November 7 to 13
First of all, I'm sorry for the lack of photos... there's a reason for everything...
Well, let's explain the week...
When everything was looking good and it seemed like we were going to have a massive harvest, we messed it up pretty badly...
The idea was to switch them to flowering on November 7, but since we still had a few plants left to transplant and were waiting for the substrate we ordered, we had to wait.
After finishing the transplants, we fired up the sulfur burner to eliminate any spores or bugs...
We always do this in the dark and without extraction, and we turn on the extractor 1 hour before the lights come on, but this time we forgot to turn off the burner and it kept running with the lights on. About 2 hours later, we turned it off...
But to make matters worse, since we saw that the leaves were drying out a bit, we gave them a foliar spray thinking there was Ryzofuel in the water (it doesn't have a magnifying effect), but it turned out to be a mix of water with fertilizers, and between that and the sulfur smoke... water + sulfur = acid.
In summary, they all got burned... overnight, the necrosis on the leaves was insane...
Throughout the week, we did foliar sprays with Vitality Plus, Calmag + Dr. Repair... and we're removing the most affected leaves...
The waterings are being done with the mix mentioned above.
The plants are recovering and still growing, so as soon as we see them bounce back a bit, we'll switch to 12 hours.
3 likes
1 comment
Share
Used techniques
Defoliation
Technique
7
Week 7. Flowering
6y ago
1/13
40 cm
Height
12 hrs
Light Schedule
21 °C
Day Air Temp
6.2
pH
Weak
Smell
600 PPM
TDS
60 %
Air Humidity
22 °C
Solution Temp
19 °C
Night Air Temp
7 liters
Pot Size
0.8 liters
Watering Volume
50 cm
Lamp Distance
Nutrients 12
Calcium
1 mll
Magnesium
0.4 mll
Mammoth P
0.16 mll
MELs_Garden Flowering 1
From December 17 to 23
Hey, we're back at it.
The grow was on the verge of being aborted, but the truth is that the plants have responded really well and have recovered perfectly.
We were applying plant vitality via foliar until a few days after switching to 12 hours.
The grow room has undergone several modifications (one of the reasons I haven't been able to update the diary as much as I'd like... excuses 😂😂) that have given a boost to the entire grow:
- We changed the extractor entry by placing a T and branching into 2 Canlite carbon filters.
- We added 1 Jackson plate of 150w from Grow the Jungle. As a result, we had to change the distribution of the lights to achieve a uniform light pattern throughout the grow space.
- As a final result, we have 2 LEC lamps of 315w + 2 LED plates from Grow the Jungle for a space of 1.2x2.4 (meters) where we have the plants.
- We changed the distribution of fans.
- We added a temperature and humidity controller.
- We incorporated yellow traps.
- We moved the plants according to size and space to achieve the most uniform grow possible.
Throughout the week, we have been watering in the usual manner, individually for each plant according to its needs. Since we've started flowering, we made a change in fertilizers; using the Cyco range, the bottles are practically the same, the only thing that changes is that some bottles are replaced by others, which is noted above.
Throughout the week, we have been removing all the marked leaves and eliminated several lower nodes (we took the opportunity to take backups).
The week has gone well; from now on, updates will be every 2 days.
2 likes
comments
Share
Used techniques
Defoliation
Technique
8
Week 8. Flowering
6y ago
1/17
40 cm
Height
12 hrs
Light Schedule
20 °C
Day Air Temp
6.2
pH
Weak
Smell
700 PPM
TDS
60 %
Air Humidity
22 °C
Solution Temp
16 °C
Night Air Temp
7 liters
Pot Size
0.8 liters
Watering Volume
50 cm
Lamp Distance
Nutrients 11
Calcium
0.5 mll
Magnesium
0.5 mll
B1 Boost
1 mll
MELs_Garden Week 2
From December 24 to 30
This is starting to take shape.
We're sticking with the same watering system.
The plants are stretching (not too much, to be honest) and making room for future flowers.
It's been really cold these days. With the light ON, we're around 20/21°C and with it OFF, between 16/18°C, and we have the climate controller set up, but there's not much we can do. To prevent the temperature from dropping too much at night, we've disconnected the fans.
Humidity is spot on, hovering around 58/60%.
Other than that, everything is going well.
December 29
After the watering, they woke up splendid today.
Since it's cold, we’re adding insulation in the part closest to the outside.
2 likes
2 comments
Share
9
Week 9. Flowering
6y ago
1/23
45 cm
Height
12 hrs
Light Schedule
18 °C
Day Air Temp
6.2
pH
Weak
Smell
750 PPM
TDS
60 %
Air Humidity
22 °C
Solution Temp
14 °C
Night Air Temp
7 liters
Pot Size
0.8 liters
Watering Volume
50 cm
Lamp Distance
Nutrients 10
Calcium
0.5 mll
Magnesium
0.5 mll
B1 Boost
1 mll
MELs_Garden Week 3
From December 31 to January 6
We enter week 3 since the cycle change.
We did a pretty severe defoliation, it will be the last one at the beginning.
We continue with the usual watering routine.
It's still very cold, and the temperatures are quite low. Minimums of 13°C and in the ON we will be around 18/19°C.
For week 3, I see that everything is going a bit slow, but well, we'll see how it progresses.
January 5
The cold doesn't let up, and they're feeling it quite a bit. I think they're not developing at 100% or maybe they're just lagging behind, and the harvest date will be later than expected.
With these strains, I think I made a mistake by changing them so quickly, or rather, I should have let them grow bigger because after switching to 12 hours, they have stayed a bit short for my taste. They will be around 48/56 cm for now, but the three are very balanced among themselves. Just because they aren't big doesn't mean they're not doing well.
The satellite branches look very strong, and it seems that most of the parthenocarpic fruits will be on the central bud.
We'll keep you updated on how things progress.
3 likes
2 comments
Share
Used techniques
Defoliation
Technique
10
Week 10. Flowering
6y ago
1/29
50 cm
Height
12 hrs
Light Schedule
18 °C
Day Air Temp
6.2
pH
Weak
Smell
750 PPM
TDS
60 %
Air Humidity
22 °C
Solution Temp
14 °C
Night Air Temp
7 liters
Pot Size
0.8 liters
Watering Volume
50 cm
Lamp Distance
Nutrients 12
Calcium
0.8 mll
Magnesium
0.8 mll
B1 Boost
1 mll
MELs_Garden Week 4
From January 7 to 13
First of all, the phone with the camera we used to take the photos has broken down, and indefinitely we will be taking photos with mine; the quality is quite inferior, but it is what it is.
The cold doesn't let up, and the temperatures remain at 18°C ON/12°C OFF; the plants are feeling it. Due to the cold, they don't drink as much, and it's harder for them. The watering in 7L pots that we would normally do every 3/4 days is now almost every 5/6, but that's what we have to deal with.
Humidity is set at 60% with a +/- of 2%.
This week I wanted to give them a watering with water + kleanse + dr repair because I have had bad experiences with over-fertilization, and I prefer to give them a break.
We continue to water the plants individually according to their needs, and you can see it when one is on fire and the other is asking for water.
I don't know if it's the cold, genetics, or light stress, but the leaves are taking on purple tones, and some terpenes have also come out purple.
Other than that, nothing to comment on; it's progressing adequately.
January 12
We lifted all the pots trying to keep all the tips at the same level.
Some roots are showing at the top of the substrate, so we added a bit of light mix from Biobizz to keep them from being exposed. We also took the opportunity to add a bit of diatomaceous earth to prevent and also to make it a bit harder for the fungus gnat.