
Likes
Comments
Share


@Drgreenthumb627
Follow
great tent, sturdy and durable. opened and closed it about 500 times during this grow haha Edit: 3 ounce harvest

Likes
28
Share


@Jef79
Follow
SUMO SEEDS
SUMO'S OG KUSH
Mys.OG Kush x Cali.Kush
85% Indica
15% Sativa
49-56 days in flowering
THC: High
CBD: Low
Great kushy strain for beginners to advanced growers.. Sure she wud b a beast in hydroponics systems or larger pots.. No problems with her growing and sge finished with a nice light purple on her top sugar leaves.. Will update on smoke report (taste & effects) in few days as i want to let her cure up a bit b4 i try her.. Big thanks to you all.. Stay safe and best wishes..


Likes
27
Share


@RDWCGrowing
Follow
1/20/2023- So much to do pre grow and over the next 16 days, absolute first order of business is that I have to take down my current Grow---TIMBER-- Then I have a list of things I have to get done in order to be ready to start this grow 1 Feb.
With that said
T - 2 days until start 48 hour Flush
T - 2 days until Start 48 hours of Light
T - 4 days until TIMBER!!!
Items that need to be done before 1 Feb 2023
1. I need to clean the tent out
2. I need to clean the equipment- Proper Sanitization between grows in Hydro is a must!!!
3. I need to get the hole in the ceiling above my tent repaired- For my last grow I had a deep sink installed in my grow room, to make Hydroponics a little bit easier and have a water source in the same room. The seals on the pipes they were installing broke and leaked through the ceiling causing some damage all the way across my grow room, I was already weeks into my grow and couldn't risk them working above my tent and it would have been very awkward positon for them to be working in as well, so have to get this done quickly between chop and germination.
4. I have to install my new light- I was using a Vivosun 4000 and for this grow I am switching up to a Spider-farmer SF 7000.
1/20/23- For this upcoming grow I am working with M/F photo seeds so I ordered 4 Sex determination kits. I recieved my my 4 Sex determination testing kits from Rimrock Analytics today. I will be using these to test my plants at week 2 of Veg so that when/if I take clones I know I am taking them off females. As well as I don't want to accidently pollinate my tent during this grow I am looking for big beautiful buds not seeded buds. :-)
1/24/2023- Harvest of current grow- Started at 2:00pm and finshed wet trim and firt batch into the freeze dryer.
1/25/2023- Next batch into the freeze dryer and cleaning all my equipment for this Grow.
T-1 Day until the workers are supposed to be here to fix the hole in the Grow Room.
T-3 days until I instll my new Gorilla Grow Tent and my New Light Spider Farmer SE-7000 for this grow.
T-7 Days until Start of Germination
1/26/2023- Harvest is done ran through the Freeze dryer and dry tim completed.
1/27/2023- Grow Room repairs completed. Hole is gone Letting the paint dry before I install the new tent.
T-2 days until Install the New Gorilla Grow tent and the new Light
T-3 days until I put the hydro equipment in the new tent
T-5 days until Germination
1/29/2023- Day 0- Final Pre Germination activities
Germination Start T-3 days
The paint on the ceiling was dry and it was time to finish prepping for Germination. I got the following items knocked off my list.
New 4X4 Gorilla Grow Tent is up and ready
New Spider Farmer SE-7000 Light is installed- Thanks Moony Grows for the suggestion and for the Code that got me some money off and free shipping (Moonygrows)!! I turned the lights all the way up to max and set the timer to 18/6 0600-0000. I will keep an eye on the temperature and humidity without my plants and see how hot it gets with the new light.
I put my Hydro system back together and put in 40 gallons of water into it, time to monitor for leaks the next few days.
I Setup my cloning machine for Germination Days 3-11
1/30/2023
let me break down the situation, ROOM in the TENT.. Enough said.. No really I tried putting my exhaust system up in the new tent with my new light, The light is so big corner to corner that it really didn't give me enough room for the lights be be raised, with the exahust hanging the buckets my plants are Starting in are 2 and 1/2 feet off the ground, great for plenty of room for roots but not so great for upwards space for the plant to grow. In a 6' 11 tent with the exauhst in side and hanging that only gave me a little over 4 feet of grow room to play with. My last grow if you saw my diary, anyone could tell I was struggling to keep the buds off the lights. No good, Since space was such an issue I was running my carbon filter inside on the ground but It really needed to be up sucking the heat out not shooting the cool out. With that setup I was sucking air through the filter and pushing it out the tent at a bottom exhaust hole cold out. Wasn't doing me any good for my heat. I was hitting temps of up to 85 degrees. I bought a portable AC unit and have been running it in the grow room to try and keep temps below 85 and I have had to lower the power on my lights during grow also not ideal.. With that said a friend of mine MoonyGrows (Check out his diary) took the time to look at my issue send me a picture of my grow tent setup with detailed instructions on how to suck the air out from the top but putting my filter and fan on top of my tent so no room issue and I am sucking the air out from the top where the heat is instead of pushing the air out from the bottom where the cool is... THANK YOU MoonyGrows For taking the time to help me get this straightened out.. Now I have room and I have the exhausts working right and now my temps with everything at 100% are topping out at 80 this dropped the temp by 5 + degrees at 100% max.
T-2 days until Start of Germination
Prepped my seed tray with humidity dome
Prepped my Rapid Rooter plugs. I Used RO water, and I added a few drops of Hydrogen peroxide to Oxygenate the water. I then PH balanced between 5.7-6.0 the same that they will be getting in the Cloning Machine and when they get to thier final grow pod. I perfere the 5.8x range and I hit 5.84 for these rapid rooters. If you want to see a complete video on the process HowWeedGrow has an amzing video that shows step by step how to do it and explains it better than I ever could including how to plant the seeds. Which I will cover when I get to that step on Wed. https://www.howweedgrow.com/how-germinate-weed-seeds-cannabis-rapid-rooters/
1/31/2023
T-1 day until Germination Start
All set and ready have my Rapid Rooter plugs ready to go have my seeds out.. Have my seed tray warming up tonight. Tomorrow morning right into the Rapid Rooter then strait into the tray. I will spray the dome to start the humidity in there.
2/1/2023
Germination Day!!
Let the games begin!
0600am Put the seeds into the Root Riots. And then put the seeded Root Riots into their first home the Seed tray. I have them under the light 24/7. Sprayed the dome
7:30pm Sprayed the Dome to keep humidity going on the dome.
2/2/2023
Day 1 of Germination
Sprayed the Dome in the morning
Sprayed the Dome in the evening
2/3/2023
Day 2 of Germination
Roots are starting to come out the bottom of the root riot plugs and the heads are slowly popping out of Number 4 just below the surface.
Afternoon- Number 4 has popped up
Evening- Number 3 has popped up as well. Happy Dance!!
2/4/2023
Day 3 - Germination
Surprise Surprise Surprise- all 4 have now poked their heads up.. Happy day!! 100% Germination succeeded.
Now major milestone to track is how many are female and how many are male.
I will take look at the roots this afternoon/evening and see if they have enough root to go into the cloning machine for the next 7 days before they go into their Hydro Pods.
Day 3 - Germination - Evening..
Roots looked good and they were tall enough to make it into the cloning machine.
Now that they are all in the cloning machine I have switched the lighting to veg state 18 on 6 off.
2/5/2023
Day 4 - Germination - Morning
All the Ladies (fingers crossed) looking great stretching nicely and look nice and green, Photo synthesis underway....
UPDATE!! After a very interesting POD cast on FSTS by Dr. Bruce Bugsbee from Utah University, I have shifted my lighting to 24 hours on through seedling and then I am going to shift to 20 hours on the rest of Veg.
2/6/2023
Day 5 - Germination
While Checking on my conditions inside the new tent last night, I found that the Humidity was down to 39 Percent. I added an AquaOasis Cool Mist Humidifier, the reason I selected this humidifier is that I needed one that could be turned on and off utilizing my Inkbird Humidity Controller IHC200 that I have my Pro Breeze Dehumidifier currently running with.
Root structures are starting to get there about 1/4 of an inch.
2/7/2023
Day 6 - Germination
Everything seems on track more roots poking out of each today. They are each getting a little taller as well.
Checked in the evening and number 3 was drooping the Root riot plug on the bottome was dry and the roots were not in the water yet. I raised the water just enough that the longest root that was sticking out is now hitting the water.
2/8/2023
Day 7 - Germination
Everything looked good while checking in on them this morning number 3 is now full up and no droop again.
2/9/2023
Day 8 - Germination
T-2 days until Plant into Forever Pods and we start week 1 of Veg .. :-)
Surprising thing to me is that number 1 and 2 were later in popping then 3 and 4 but the roots are growing longer in 1 and 2.
2/10/2023
Day 9 - Germination
Number 1 and Number 2 are definitely ready for transplant today.. Based on how they were yesterday and where they are today I am hoping by tomorrow 3 and 4 are ready. Today they look to me where 1 and 2 did yesterday.. I really hope 3 and 4 catch up by tomorrow since..
T-1 day until transplant to new/ final home for grow.
Need the roots long enough to have some clay down in the basket to keep the root riot out of the water and only roots in the water..
2/11/2023
Day 10 - Germination
Today they got placed in thier forever Home, 7 days from Sprout and 7 days until Week 1 Start.
PPM- 180 this is water out of the Tap
Temp Water: 70.7
Temp Tent: 77
Humidity: 40% I have a humidifier going 24/7 to try and bring this up.. I also have Humidity Domes on each plant.
2/12/2023
Day 11 - Germination
Sprayed the domes, all are looking good.. Nothing much to do at this phase but Keep monitoring the PH level in the system and making sure they have a comfortable home.
T-6 days until Week 1 start
2/13/2023
Day 12 - Germination
Sprayed the domes, They were looking a little yellow today so I moved the light down to assist. Nothing much to do at this phase but Keep monitoring the PH level in the system and making sure they have a comfortable home.
T-5 days until Week 1 start
2/14/2023
Day 13 - Germination
Sprayed the domes, They were looking a little Florissant yellow today, with what looks like slight burn on the tips, I talked with a fellow grower and we agreed that It was probably that I was drowning them, Yes you can drown you plants even in Hydro, but only early on.. :-) It usually happens with the water being too high, which soaks not only the roots but the medium (root Riot plug in this case). I lowered the water from touching the bottom of the pot to about 1" away. This will probably take 3-4 days to resolve. I will continue my daily monitoring.
T-4 days until Week 1 start
2/15/2023
Day 14 - Germination
Sprayed the domes, continue my daily monitoring they look a little darker green instead of lime green now that I lowered the water levels in the system, so I think that I might have resolved the issue but it will take a few days for recovery to happen.
T-3 days until Week 1 start
2/16/2023
Day 15 - Germination
I looked in on them this morning, 3 and 4 look like they are doing well and recovering nicely. Number 1 not so much it has brown spots on the leaves, this very well can still be a side effect of the overwatering but I decide to go ahead and add Nutes earlier than I was planning just incase. I was going to wait until Saturday but I think intervention is necessary now especially after drowning them early on.
I added 1/2 what I am planning on adding for week 1 start. I also think I am going to adjust my chart to add 1/2 2 days after plant from now on. I don't think it would hurt it to have some Nutes to pull from.
.25ml/Gal Calmag = 12.5ml
1ml/gal GH FloraMicro= 50ml
1ml/gal GH FloraGro = 50ml
1ml/gal GH FloraBloom = 50ml
T-2 days until Week 1 start = I will drain the system and start it over on Saturday with Week 1 Nutes.
2/17/2023
Day 16- Germination
I didn't even want to post today after looking in on them this morning, 3 of the 4 are now showing signs of dronwing.. Brown spots on the leaves, the water levels were still too high.. I drained about another inch out of the tanks.. Will see how quick they recover.. I start week 1 tomorrow and will have to ensure my water levels are at least 1" away from the basket on this round.

Likes
14
Share


@DogDoctorOfficial
Follow
# GMO Cookies Served with Extra Curiosity 🙂 — Week 13 | 12/12 From Seed
Week 13 from seed.
Or, if you prefer to count it like we do around here, around week 8 flower on this 12/12 from seed experiment.
And honestly?
This is one of those weeks where the room starts speaking for itself.
Before anything else, a quick recap for everyone just joining the journey:
This entire run was done under a 12/12 light cycle directly from seed. No traditional vegetative stage, no long recovery periods, no massive training sessions trying to force the plants into shape. Just letting the plant express itself naturally under flowering light conditions from the beginning, while guiding rather than controlling the process.
The idea was never maximum yield at all costs.
The idea was curiosity.
Curiosity about morphology.
Curiosity about structure.
Curiosity about behavior.
Curiosity about what happens when we step back a little and simply observe.
And now, at week 13, the room is changing fast.
The funny thing is that if we looked only at the environmental numbers, some people would probably panic immediately. Conditions are not exactly “by the book.” But the plants clearly did not read the same books, because they are reacting beautifully. That’s another reminder that context matters more than perfection, and observation matters more than blindly chasing charts.
At this stage, we are basically doing almost nothing besides enzymes and patience.
No feedings anymore.
Just Pure Zym.
Letting the plant finish the story herself.
And you can see it everywhere now.
The hairs are changing color.
The trichome heads are maturing.
The leaves are fading into yellows and lighter greens.
The buds are swelling, getting heavier, denser, louder.
This is no longer the “building” phase.
This is the “finishing” phase.
And honestly, it’s beautiful to watch.
This week was also special because we took her into the studio for a proper photo session. We slowed down, shared some medicine, observed the details, looked at the flowers under different lights, different angles, different moods. Some plants stop feeling like “projects” near the end and start feeling more like personalities, and this GMO definitely has that energy.
Not harvested yet though.
Close. Very close.
But not yet.
This is one of those important weeks where observation matters more than action. There’s a temptation near the finish line to interfere too much, but right now the plant is telling us clearly to simply watch, smell, learn, and wait a little longer.
The fade happening across the room feels completely aligned with the moment:
- minimal feeding,
- end-of-life expression,
- natural senescence,
- energy redistribution,
- and final ripening.
Nothing feels forced.
Nothing feels rushed.
And that’s probably the best part of this entire run.
Now the big question becomes:
Will the next report be the harvest report?
Honestly… maybe. 😄
We are extremely close now, but we still want to let the plant tell us when she’s truly ready instead of harvesting according to impatience or calendar numbers alone. The next few days will be mostly observation:
- trichome development,
- flower density,
- aroma evolution,
- overall plant posture,
- and that final “feeling” growers know when a plant is almost done speaking.
As always, huge love to everyone following this strange and beautiful little experiment.
To Zamnesia for the genetics.
To Plagron for the support.
To GrowDiaries for giving growers a place to document these journeys.
To the community.
To the curious ones.
To the skeptical ones.
To the longtime followers and OGs.
To the people discovering the diary today.
To the silent viewers.
To the supporters.
To the critics.
To everyone.
Seriously — thank you.
At the end of the day, this was never just about growing flowers.
It was about sharing the process, the observations, the mistakes, the experiments, the learning, the calm moments, and the curiosity behind all of it.
Wishing everyone healthy plants, peaceful minds, good harvests, and a little extra curiosity on their own journeys too. 🌱
📡 DELETED @ 1K Please stay tuned.we never quit https://www.youtube.com/@TheDogDoctorOfficial NEW 🙏 Thank you for your patience and continued support.
FOR DISCOUNT CODES AND MORE JUST FOLLOW THE LINK https://website.beacons.ai/dogdoctorofficial
📲 Don’t forget to Subscribe and follow me on Instagram and YouTube @DogDoctorOfficial for exclusive content, real-time updates, and behind-the-scenes magic. We’ve got so much more coming, including transplanting and all the amazing techniques that go along with it. You won’t want to miss it.
GrowDiaries Journal: https://growdiaries.com/grower/dogdoctorofficial
Instagram: https://www.instagram.com/dogdoctorofficial/
YouTube: https://www.youtube.com/@dogdoctorofficial Deleted by Youtube - https://www.youtube.com/@TheDogDoctorOfficial NEW
Vimeo : https://vimeo.com/dogdoctorofficial Under construction stay tuned ⸻
Explore the Gear that Powers My Grow
If you’re curious about the tech I’m using, check out these links:
🔆 Lighting & Environmental Control
• Future of Grow — Advanced LED lighting technology
https://www.futureofgrow.com/
DISCOUNT CODE: DOG20
• Lumiflora — Under-canopy LED lighting
https://lumiflorade.com/
• TrollMaster — Environmental controllers and automation gear (past collaboration)
⸻
Genetics
• Zamnesia Seeds — Genetics used in this project
https://www.zamnesia.com/
⸻
🌱 Soil, Substrates, Boosters & Root Support
• Plagron — Substrates, bio mixes, and supportive products
https://plagron.com/en/
⸻
🎒 Storage, Curing & Preservation
• Grove Bags — Curing and storage solutions
https://grovebags.com/
⸻
📸 Photography Equipment & Tools
(Not sponsors, but part of my creative toolkit)
• Sony A6700
• Sony full-frame macro lens + few more
• Stacking photography workflow - learning
• iPhone (for behind-the-scenes shots)
We’ve got much more coming as we move through the grow cycles. Trust me, you won’t want to miss the next steps, let’s push the boundaries of indoor horticulture together!
As always, this is shared for educational purposes, aiming to spread understanding and appreciation for this plant. Let’s celebrate it responsibly and continue to learn and grow together.
With true love comes happiness. Always believe in yourself, and always do things expecting nothing and with an open heart. Be a giver, and the universe will give back in ways you could never imagine.
💚 Growers love to all 💚
📸 P.S. – The Eye Behind the Lens
All photos in this diary (for now — except for the ones showing the camera, which I took with an iPhone) are taken with a Sony A6700 paired with a Sony full-frame macro lens and a few more.
Photography is part of the story — it’s how we share the fine textures, the glow, and the quiet details that words can’t always capture.
I’ve also started experimenting with photo stacking — a technique where multiple images, each taken at a slightly different focus point, are layered together to create one perfectly sharp image from front to back.
It’s not digital enhancement or AI; it’s pure photography — a way to reveal the plant’s beauty in microscopic depth, from trichome to petal.
You’ll even see a few shots of "ghost me" capturing the shots — camera, lens, setup — because every grow deserves not just to be cultivated, but documented like art.
FOR DISCOUNT CODES AND MORE JUST FOLLOW THE LINK https://website.beacons.ai/dogdoctorofficial
NEW DISCORD - Official Server Invite Link : https://discord.gg/ksjAkA5T74

Processing
Likes
7
Share


@DigitalJockeyKing
Follow
got bitten by a spider and realized i was always wondering what my spiritual animal was, and realized it was spiders after that awakening of asking mother natures help me and spiders made a blood pack and since then nature has been helping me out by protecting my plants, from thieves and bad rotten people. and nature gave me spiders to protect my children. one of my spiders thats protecting the rooibaard is called GREGGK.
Likes
39
Share


@Esoteric_growing
Follow
First day in the Wilma system and placed them under the net. Just installed the Mars FC4800 and the light is eye burning bright.

Likes
6
Share


@GuyPablo
Follow
Got some leaf taco ing, and a two of the plants have developed some yellow leaves, burnt tips, I don't think it's nute burn as amount of nutes watering every 2 to 3 days is very low, I thought possibly potassium deficiency, increased fish mix slightly, the yellowing is not effecting the top leaves only so I didn't think light burn, I've moved the light up a few inches to be on safe side and turned power down from 70 percent to 60 percent, using photone app to measure DLI/par intensity and reading about 700 so possibly too high. Gonna flush the two plants worse effected, PH testing RO filtered water to 6.5, also added a bit of cal mag, hopefully following the flush, should sort itself. Any advice greatly appreciated fellow growmies :)


Likes
17
Share


@HighZenBerg
Follow
Welcome back !
A lot of new branches developed and the tent gets fuller every day. The first flowers also developed, so I decided to start using Bio-Bloom and Top Max.
So far the plant did not stretch much, it’s more a horizontal bush. But I will wait, how she developed in her first weeks of flowering stage.
Keep in touch !
Cheers,
HighZenBerg

Likes
1
Share

@psychonaut420
Follow
Stretching like crazy and enjoying the followed foxfarm nutrient sched
Likes
4
Share


@Stick
Follow
OK guys I'm back after being away for 2 weeks. I've proceeded to a final transplantation into a 9L AirPot container, right before I left for vacations. I also added a canopy-ring in order to open up the plant and start some LST without adjusting strings everyday. A friend was in charge of the grow room while I was away, and she did a pretty good job. The GBK is healthy, with a vigorous growth, she has 8 main summits and the lower parts were pruned. She will remain under vegetative stage for 1~2 weeks before flipping into 12/12 light schedule. I can't wait to see her full of buds! Thanks for stopping by 👊

Likes
229
Share


@Crashoverite
Follow
Week 9
Hi everyone 😁
I am very pleased how girls are developing in recent days. Aroma is very fruity and a bit gasy. Sort of riped mango / pineapple. They are so frosty alraady and buds are developing very well. Was little bit worried that last week defoliation may stunt girls too much but really this strain showing no signs of any stress. The way things are looking these girls may be ready for harvest in about 2 weeks😁
Will keep updating progress of this week every couple days.
Have a great week everyone 🍀✌️
18/09 Day 57
Started watering with approx. of 2.5 ltr of solution until runoff per pot and this should last for 2 days. Girls like this magic mixture very much 😁
21/09 Day 60
Cant belive it's only 2 months since planting seeds. Everything is going well. Thankfully no issues at all.
Slow develop girl "Nuna" it's way behind the other 2 girls soon to be ladies "Luna" and "Sweet Mary Jane". but I'm glad that I have kept her as her flowers are small but frosty and she will be perfect for some cannabutter or bubble hash. Other 2 girls as all see they are absolutely gorgeous. Buds are gaining weight and that frost OMG love it. Will get some close up pics of trichomes over the weekend.
23/09 Day 62
Still lots of white pistils and currently trichomes level at 2-5% amber and rest are clear and milky. My personal preference for harvest 60-80% amber so will keep feeding with nutrients for few more days and will keep monitoring trichomes before switching to only water.
24/09 Day 63
End of week 9
Not much work this week. All been going great. Buds are now very sticky and they are smelling very fruity sort of lemony, zesty, apples and mangos.
Thank you all for all the support, comments and likes. It's some great community here.
Stay tuned for more updates in coming week.
Peace and love ✌️💚

Likes
15
Share


@SamDo
Follow
Hello,,, fin semaine 6, semaine de 2 floraison. Le plantes se portent super bien malgré le manque de place,, le stretch est vraiment impressionnant, plus de 20cm en 1 semaine!
Aujourd’hui j’ai fait une défoliation pour enlever les parties les plus basses qui n’arrivent pas à accéder correctement à la lumière, et j’ai aussi retiré toutes les petites pousses sur les parties basses qui prennent de l’énergie pour rien, pour vraiment essayer de laisser que les fleures exposées à la lumière afin qu’elles puissent bénéficier de toutes l’énergie de la plante et aussi pour limiter le stress sur la plante.
Les premières fleures commencent a apparaître tranquillement. J’ai augmenter doucement les nutriments. Pour le moment tous semble aller se dérouler normalement. Encore 5 semaines avant la date prévu.
Voilà pour cette semaine.
Happy grow... 😎


Likes
176
Share


@DevilsBud
Follow
Week 2 Veg phase
Day 8 Veg phase
This morning the leaves where twisting not sure in the beginning what was happening. pH is 6.5 my humidity in the tent in around 63 to 69 % . And i have the marshydro 1000 on 70% . At distance off 40cm from the plants . I will wait and see.
Day 9 Veg phase
Have bin letting the soil dry up . And today start giving them 2ml per liter In a 5 liter sprayerbottle and added the following nutrients
4Liter Filtered water with pH of 6.5
8ml of the nutrients below :
Advanced Nutrients pH Perfect Bloom
Advanced Nutrients pH Perfect grow
Advanced Nutrients pH Perfect micro
Advanced Nutrients B-52
Advanced Nutrients Voodoo Juice
Advanced Nutrients Rhino Skin
Day 10 Veg phase
Everything looking good besides the waving leaves . 3 part of leaves are slowly coming out 👍. Giving them around 0.3 L per plant per 24 hours
Day 11 Veg Phase
They are growing very nicely in good tempo . Going to be Adding some Biobizz calmag 1ML per 1Liter in the mix today
Day 12 Veg Phase
Everything going good nothing to tell
😎😎
Day 13 Veg Phase
The New leaves are coming out nicely
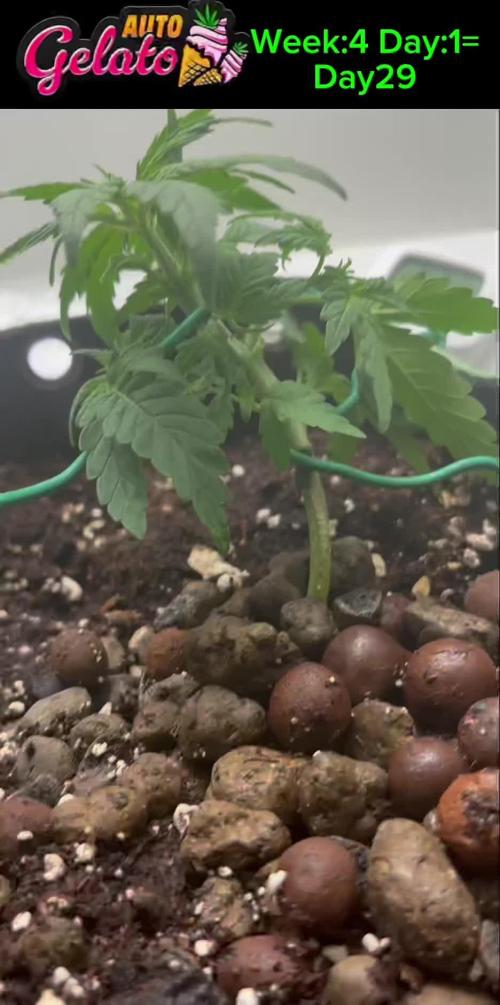
Day 14 Veg Phase
It was a perfect week for the 2 Cookies Gelato on to week 3 of Veg 👌👌
Likes
8
Share
@DogDoctorOfficial
Follow
Week 7 Flower – Roller Coaster Haze (Zamnesia Seeds)
The Final Push Begins
Here we are, Week 7 of flower, and the Roller Coaster Haze girls are standing tall, magnificent, and absolutely covered in white hairs and swelling calyxes. These monster plants have truly lived up to their name, a wild ride from germination until now, and this week marks an important turning point in their journey.
This week they received their last feed with nutrients, watered at pH 6.0 and EC 1.42. From here on out, it’s pure water only. The soil still carries enough reserves to sustain them as they finish ripening, and I want them to cleanly express their genetics all the way to harvest.
⸻
Environment Control – Heat vs Balance
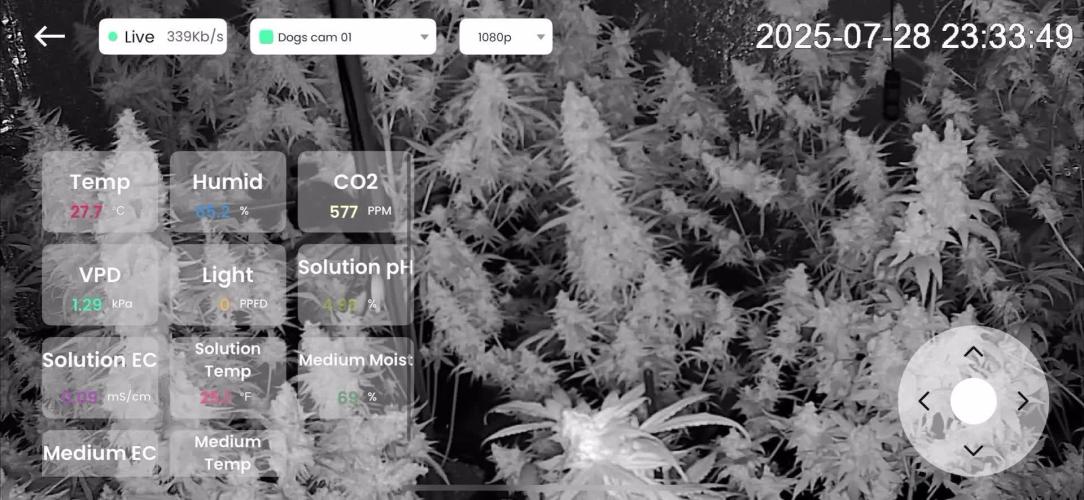
Outside, the temperatures are brutal — reaching 45°C (113°F) — but thanks to the combined ecosystem of TrolMaster and Spider Farmer controllers, the room remains stable:
• Room Temp: ~28–29°C
• Humidity: ~65%
• VPD: ~1.3–1.4
Even under pressure, the system holds strong, giving the plants exactly what they need to thrive in these final weeks.
⸻
Lighting Adjustments – Simulating the End of the Season
Light is one of the most powerful tools we have, and this week we began shifting the spectrum to signal “end of season” to the plants:
• Whites & Blues: slowly being reduced
• Reds: increased to 100%
• Far-Red & Deep Red: 100%
• UV: 100%
This spectrum mix encourages ripening, resin stacking, and terpene expression while mimicking the natural transition of sunlight as summer ends. The plants respond by pushing their energy into the flowers rather than continuing vegetative growth.
⸻
Plant Development – Giants in Full Force
The girls are absolutely towering now, monster plants with stacked colas and pistils shooting out everywhere. Their root systems are so strong that some roots at the soil surface are even thicker than the stalks themselves.
By the end of this week, Pheno #3 was harvested, though I will dive into the full harvest details later. Pheno #2 remains in full bloom, swelling, and shining bright.
⸻
What to Expect vs What Not to Expect
Expect:
• Continued swelling of buds and trichome development
• Pistils slowly beginning to darken and curl in
• Leaves showing natural fading as stored nutrients are consumed
• Stronger aromas and denser resin production
Not to Expect:
• Any more vegetative growth or stretching
• Heavy feedings, the focus now is ripening, not building
⸻
Final Thoughts
This week feels like the beginning of the final push. With nutrients removed and the spectrum shifted, the Roller Coaster Haze is entering her true finishing phase. These plants have been a wild, beautiful ride, and it’s only a matter of time now before the final chapters are written.
As always, thank you all for following along, sharing your knowledge, and riding this wave with me. The support means everything, and I can’t wait to share the harvest details soon.
Let’s grow together,
– DD (DogDoctorOfficial)
📲 Don’t forget to Subscribe and follow me on Instagram and YouTube @DogDoctorOfficial for exclusive content, real-time updates, and behind-the-scenes magic. We’ve got so much more coming, including transplanting and all the amazing techniques that go along with it. You won’t want to miss it.
• GrowDiaries Journal: https://growdiaries.com/grower/dogdoctorofficial
• Instagram: https://www.instagram.com/dogdoctorofficial/
• YouTube: https://www.youtube.com/@dogdoctorofficial
⸻
Explore the Gear that Powers My Grow
If you’re curious about the tech I’m using, check out these links:
• Genetics, gear, nutrients, and more – Zamnesia: https://www.zamnesia.com/
• Environmental control & automation – TrolMaster: https://www.trolmaster.eu/
• Advanced LED lighting – Future of Grow: https://www.futureofgrow.com/
• Root and growth nutrition – Aptus Holland: https://aptus-holland.com/
• Nutrient systems & boosters – Plagron: https://plagron.com/en/
• Soil & substrate excellence – PRO-MIX BX: https://www.pthorticulture.com/en-us/products/pro-mix-bx-mycorrhizae
• Curing and storage – Grove Bags: https://grovebags.com/
⸻
We’ve got much more coming as we move through the grow cycles. Trust me, you won’t want to miss the next steps, let’s push the boundaries of indoor horticulture together!
As always, this is shared for educational purposes, aiming to spread understanding and appreciation for this plant. Let’s celebrate it responsibly and continue to learn and grow together.
With true love comes happiness. Always believe in yourself, and always do things expecting nothing and with an open heart. Be a giver, and the universe will give back in ways you could never imagine.
💚 Growers love to all
Likes
9
Share


@d0cterstrain
Follow
last week of veg. about to try weaving a scrog for the first time. lezgoo


Likes
5
Share


@Capzinator
Follow
I want to start LST on Day 23. I will just bend her down and tie the leaves to the side.
Every Strain is doing really good, im watering them all 3 days adding the nutritions above. But i also see some strains that didnt like the overwatering at the start. And i burned my strawberry gorilla a bit with waterdrops on the leaves. but she seems to be unimpressed by that. Today i also noticed a very little smell when i opened my tent. im curious which one is making this scent, it was really sweet.
i raised the light intensity from 70% to 85%, leavin the rest for bloom.
Day 24: i watered them yesterday with about half a litre of water. i included lacalva stress treatment before making the LST. i kind of feeling like im a bit too late, but we will see.
Day 26: we had a blackout, because a constructionworker hitted the main cable. 2,5 hours less light, im so glad that these are automatics!
Day 27: Damn guys, i think i did bad on this LST stuff. all of them are really bushy and very strong showing upward. in my first grow, i never had these issues. but all of the stems are so huge. they are close to be bigger than the final stem of my first grow. i think i need to defoliate them soon. i removed the wire and let them do what they want, until they get to know the net.