
Likes
Comments
Share


@GrownwithLED
Follow
After germinating the seeds are transplanted into small pots with soil (see tutorial in VIDEO above). The soil is prepared with water mixed with a little bit of BIO NOVA Roots (0,5 ml/l), which aids the development of the seedling. Transplanting is very easy now, because they have grown a STRAIGHT tap-root while hanging during the SERIOUS' WAY of germination. This straight root allows for easy potting of the seeds. Simply make a little hole in the center of the soil with your pinky finger and carefully place the germinated seed with the white root pointing DOWNWARDS into the hole. Best is to lay it onto one side-wall of the hole with the seed shell right at the surface. Then I push the other side inwards and enclose the whole root with soil. At the end only the top of the seed-shell peeks out of the soil. IT IS VERY IMPORTANT to plant the seeds NOT TO DEEP into the soil. The seedling only needs extra strength to work itself upwards thru the soil and you run the risk of the soil drying out and the seed dying off. When you PLANT THE SEED VERY SHALLOW into the soil (=with the top of the seed-shell still peeking out) your seedling can grow out right away and you have a small plant already 24 hours after putting the seed into the soil.
The small seedling sometimes still has the seed-shell on its 'head', it normally falls off by itself, but sometimes you have to carefully help and take it off with your finger nails. Be careful to NOT clip of the seedling accidentally when you do this!
The seed-shall has an inner lining, which feeds the small seedling when it germinates. This inner lining sometimes gets tangled around the stem of the small seedling after the shell has fallen off. This little skin MUST be taken off the stem right away! Once it dries up, it gets hard and can strangulate the seedling around the stem. In order to avoid this, the skin must be taken off as soon as possible! I show it in the pics above and also made a video about taking off the inner lining of the seed.


Likes
40
Share


@GYOweed
Follow
Seems like ss is bushiest top right shortest. Hindsight bottom right. GS Top left.
Update 3 days later hittem all with light mist of MLE.


Likes
Comments
Share


@Cygi86
Follow
We have Monday today and we starting week 4, girls are after trimming and low stress training… everything going well

Likes
26
Share


@sacredgeometry
Follow
Glad to see them start filling out. I started giving compost tea and molasses in between feeding and watering once a week. At this point I'm trying to slowly raise ppm without getting nute burn. They are barely putting put smell. I'm guessing the buds will be significantly bigger next weeks update.

Likes
5
Share


@Mr_nugs_lover_David
Follow
Beautiful autoflowering strain, she had developed a very fat single main cola, very sticky and heavy.


Likes
10
Share


@byte_me
Follow
Today marks a significant milestone in the journey of my cannabis plants as I have successfully set up the irrigation system. This new development will ensure an efficient and consistent supply of water for the plants, fostering a conducive environment for their growth. Up until now, I've been diligently top feeding the plants since their germination, laying a solid foundation for their root system. As a result, I anticipate that the plants will be well-equipped to adapt to this change and will continue to flourish.
The plants have been thriving spectacularly and have demonstrated a clear preference for being dispersed over a larger surface area. I attribute this positive response to the method of main lining, a technique that has proven to be one of the most straightforward and effective approaches I've tried. The anticipation of seeing the final canopy and colas is immense, and I am eager to see how this technique will enhance the overall yield of my cannabis plants.

Likes
6
Share

@Prof_Weed
Follow
Yess she is healthy, but i will kill her in 20 daze!!
Hope to get 8 g's harvest ..
Processing
Likes
3
Share


@Black_Magic
Follow
Hello dear growers
Sorry for late update got a lot to do last few months
Did switch them to 12/12 last week
They got already preflowers
Also did buy new bit bigger tent
Ladies looking not so happy due to wrong ph (was not in the city)
Hopefully will get them healthy next few days

Likes
30
Share


@cheetah844
Follow
She's growing nicely. She's staying indoors this summer. This is suppose to be a good medical strain for headaches/migraines, I'm hopeful for my migraines will diminish with this strain.

Likes
11
Share


@FrostbiteFlowers
Follow
Overall the plant yielded good dense nugs with strong smell, if your planning on running these seeds make sure you have a good germination rate so you can get at least 1 good pheno with good color on it. This strain was very resistant to deficiencies, large amount of root development and decent lateral growth. I will post nug shots after dry and trim

Likes
3
Share


@Mr_Freeze
Follow
(Back Left) Panama Red, (Back Right) Amnesia Lemon, (Front Left) Super Purple 2.0 Pheno #1, ( Front Right ) Super Purple 2.0 Pheno #2


Likes
7
Share


@logangrowgan2020
Follow
plant grew awesome seems healthy! environment settling in, watering settling in. performed some defoliation.
Likes
2
Share

@DaedalusGrow
Follow
Schon schön Gewachsen die kleine!
Habe heute das Topping gemacht, mal sehen wir sich alles entwickelt 🌱✌️Etwas Topping+Training.
Likes
119
Share


@Natrona
Follow
***DIVINE SEEDS *****
*****OPIUM*****
Sponsored grow
Week 4
Germination April 6.
Week 1 water only
Week 2 water only
Week 3 added recharge and* TPS1 increasing ppm to 570.
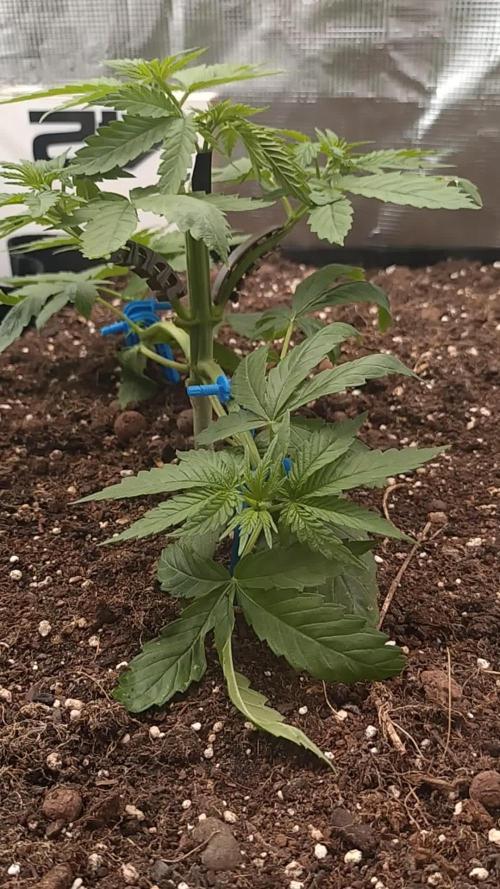
Week 4 added calmag, did LST and defoliation. Before & after pics. Increase ppm to 685
This week 4/28-5/4 consisted of plain ph 6.6-6.9 water with recharge, calmag and TPS1.
4/24 updated my ACInfinity app and started using the advanced programming settings for early vegetation. This is keeping humidity in 70% with temps in 80.
What I don't like is using advanced programming, the humidifier is at level6 . This spews moisture directly on my plants, into the drain tray and floor.
5/1 I did some LST and defoliation. Before and after pics above.
Until the plants are big enough to go outside, I will be using my AC Infinity tent and equipment. Once outside, I will be watering with well water and recharge and any additional fertilizers or amendments will be determined at that time.
Thank you @DivineSeeds
Thanks for the likes and comments, I appreciate all the plant love💚.
Have fun & love what you grow 💚
Sending love and light 💫
💫Natrona 💫
DIVINE SEEDS
***OPIUM***
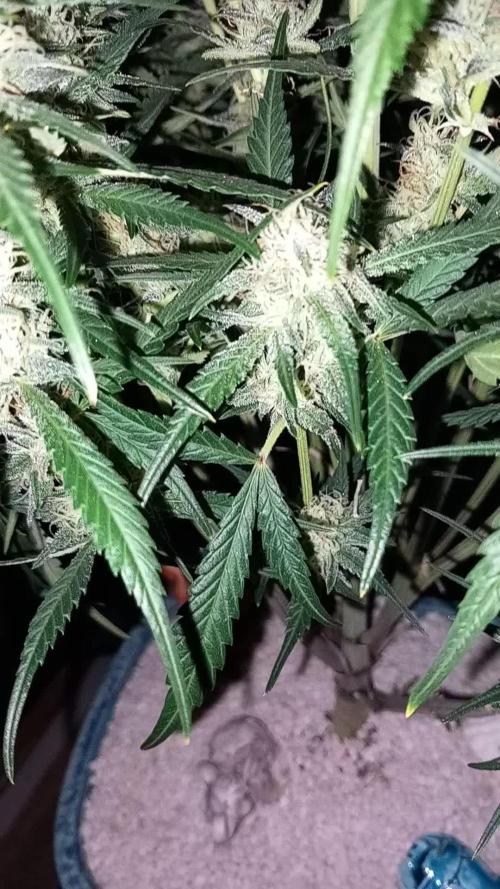
Harvest:1000 g/m2
Divine Seeds developed Opium as a new champion strain, unprecedently powerful and loaded with unbelievable quantities of resin. Certainly, no average genetic base could be behind such brilliant parameters! Several Afghani Indica landraces, recognized as most potent and resinous, were bred together with a mighty Brazilian Sativa which Opium inherits its bright berry taste from. Then a great deal of work followed aiming for the highest THC level and endurability as well as a branchy structure that would provide maximal yields. Now we can proudly title Opium the best Indica you could dream of growing!
Indoors these plants mostly stay mid-height (1.5 m), reaching up to 2.0 m out of doors. Depending on your height limitations, Opium flourishes universally in grow boxes, balconies, green houses and terraces. Due to its Afghani parentage, this strain can stand hot weather if provided enough water and some shadow. Responds well to any training techniques: ScroG and SoG, LST, topping and FIM, supercropping. The start of blooming is marked with a rush of growth, when plants stretch almost 1.4x. Expect heavy colas that often require additional supports. Whilst ripening, Opium gives off a pungent earthy stench with fruity and berry undertones, also a bit of pine. Ready for outdoor harvesting in October.
The stoning psychedelic impact of Opium is like being hypnotized (unless you’ve had too much, then it feels more like a blackout). Stone-lovers will appreciate every minute with Opium: its spicy taste immerses your mind into daydreaming, while the body rests flat. Recreation with this psychedelic Indica means silent tripping from one insight to another. Mighty enough to kill chronical pains, Opium is also medically efficient against insomnia, nausea, appetite disorders, muscle spasms, headaches, irritation, fatigue, panic attacks, epilepsy. Best consumed at night time, the effects keep going for up to 4 hours.
Equipment and nutrients
Pots: 5gallon Air pots
Soil Fox Farm Happy Frog Amended with worm castings, dolomite lime and mychorihiza Recharge
Seeds provided by Divine Seeds
Divine Seeds breeding company
The link to Opium Feminized Seeds
Opium - Divine Seeds breeding company
The link to Opium Auto Seeds
Auto Opium - Divine Seeds breeding company
=================================
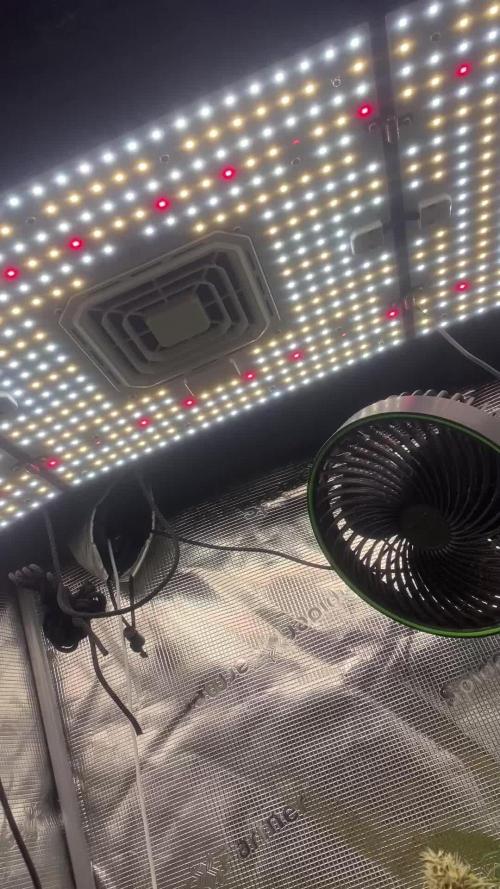
Equipment: AC Infinity
CLOUDLAB 844 – Advance Grow Tent 48”x48”x80”
CONTROLLER 69 PRO – Grow Tent Controller
CLOUDLINE LITE 6 - Inline Fan 6"
IONBOARD S44 – LED Grow Light Board 400W
CLOUDRAY S6 – Oscillating Circulation Clip Fan
Carbon Filter 6” 4

Likes
30
Share


@GanjaGecko
Follow
Das war die letzte Woche der GorillaAuto. An sich sehr vollgepackt mit Blüten. Leider etwas viele kleine Blätter die zwischen den Blüten gewachsen sind. Die musste man regelmäßig entfernen damit es nach Regentagen das Wasser besser wegtrocknet und man dem Schimmel etwas vorbeugt. Es waren echt viele von diesen kleinen Blättern...
Hier und da waren ein paar Stellen die vom Schimmel betroffen waren. Ich denke das lässt sich outdoor nicht komplett vermeiden. Besonders nicht bei dem verregneten Sommer den wir hier dieses Jahr haben.
Für die letzten Tage wurde die GorillaAuto an Regentagen reingeholt damit die buds nicht unnötig nass werden auf die letzten Tage und vielleichtnoch hier und da schimmel entsteht. Für die Zeit drinnen hat ein 5Watt Ventilator für Umluft gesorgt und eine 20W Anzuchtlampe die für etwas Tageslicht sorgt. Das Substrat wurde nur noch so minimal feucht gehalten das das Substrat nicht austrocknet.


Processing
Likes
4
Share


@ReelEyezEnt
Follow
Week 3 starting off strong No nuts just yet still letting the Nector of the gods and FF soil just be my main base for nuts. Also I add some cal mag and PH balance the water. I will probably start adding some noots toward the end of the week when I start seeing some more growth.
For right now I'm thinking I might let them veg for about 6 weeks depending on the growth in the upcoming two weeks.
Hope you all are having a safe and fund grown.
Make sure you hit the follow button

Likes
25
Share


@Jimmy89
Follow
All coming along nicely, still haven’t gotten around to defoliating.. must get some leaf off this week. Upped the nutrients. The buds are fattening up more and more each day which is nice to see! Smells really promising too. Photos taken day 40 of flower

Likes
93
Share


@Ferenc
Follow
Plants started growing very fast. 20 hours light a day and 140 ml water for 2 plants so 35 ml each plant. (70ml -35ml one plant- morning, and 70ml -35ml one plant evening). From Monday I will start giving 200ml water 100ml in the morning and then the rest in the evening. Ventilation almost 24 hours, They are getting bushy and the color looks healthy green. I am excited. Purple Punch ( the right one) does not have the smell but the Gelato Cookie D'ohpe started smelling from the 3rd week, it is not strong, it is smooth, enjoyable. I still use trigger spray but I stopped triggering directly on the plant to avoid any fungee or toxicity, I just keep the soil moist. I surrounded them with kitchen foil around the lamp to have a more effective light. It reflects the light and the light goes everywhere. This step has been done because I have only the 60w LED each plant so I try to provide the maximum strength this way, and by keeping close distance also. The lamp is not hot so it ain't gonna burn the plant I had checked it before. I just purchased today a 600w LED because these plants look so good so I wanna provide the best circumstances for them. 4th-week 4th day I a just waiting for my delivery my 600 W grow LED light will come. From today I started watering with 50ml each plant 2 times a day so all together 200ml a day. Plus I always use trigger spray for the soil to be kept wet. They are looking better and better. Nice color and bushy appearance. Wonderful. I realized some holes on the Gelato Cookie D'ohpe's leaf but there is no insect I was checking. I do not really know the reason for that. Tonight I will set up the new 600 W LED so I am changing the current 120W. Big Step forward! It is not that easy that I thought, the lamp is great but the temperature raised up a lot, so needed to buy a fan also and the humidity went down. It is not easy to find the proper solution to be acceptable, good temperature and humidity at the same time. So I decided to program a 6/2 schedule, so 6 hours light on and the fan always with 15 min more, and 2 hours off so I do provide 18 hours light and 6 hours darkness but it is divided. The plants can rest after every six hours and use the energy they received. Last day of the 4th week, LST has been done with the Gelato Cookie D'ohpe, both are growing rapidly, let's see what the 5th week brings! End of he week Gelato Cookie D'ohpe is 25cm, Purple Punch is 20cm😇
