


Likes
Comments
Share


@TiRobotProds
Follow
La Gorilla Haze Féminisée est une variété à dominance sativa. Ses plantes mères sont la Gorilla Glue, lauréate de la Cannabis Cup, et l'Amnesia. Les plantes produisent de gros rendements. La Gorila Haze peut être cultivée dans des climats continentaux chauds ou en intérieur. C'est une variété à faible odeur, avec un agréable parfum de citron. L'effet est intensément élévateur, énergique et psychédélique.
Genre
Féminisée
Gène
35% Indica / 65% Sativa
La génétique
Gorilla Glue x Amnesia
Récolte
450 - 500 g/m²
Floraison
65 - 80 jours
THC19%.
Début 12/12 le 15/11. Plante bien verte aucun problème en bonne santé.

Likes
27
Share


@adam_pawloski87
Follow
This week went really well ! Today we are at day 79 from seed an looking beautiful! One Forbiddin Runtz got chopped an hung to dry out an the rest are still flushing out through the rest of this week! Very nice looking fades coming along on the fan leafs from purple to green , so beautiful ! So happy with these genetics from @fastbuds_genetics! Super sticky an smell is so amazing, room full of purple punch’s an Forbiddin Runtz the smell you can’t beat, so many berries!!! Well stay tuned for next week! Cheers y’all

Likes
1
Share


Likes
7
Share


@Cogollo_eu
Follow
**Encontrarás la traducción a español al final de la descripción**
From/Desde: 19/04/19 || To/Hasta: 25/04/19
From day/Desde día: 57 || To day/Hasta día: 63
You can find the Gorillas Diary here (Texts are the same this week):
** Podéis encontrar el diario de las Gorilla aquí (Los textos son iguales esta semana):**
https://growdiaries.com/diaries/25675-makingmoney-with-gorilla-mm-vs-gorilla
-----IMAGES & VIDEOS-----
1 - Before defoliation
2 - Defoliation
3 - After defoliation
-----WEEK SUMMARY-----
(Following text was translated with tools and reviewed, sorry for mistakes, misspellings or nosense things)
As you can see I've done a defoliation this week. Yes, I have really gone over the top, I have removed many more leaves than I had, and the tails of the plants has not come to join at all due to the failed defoliation.
Being the first defoliation I do, I did not really know what I was doing and I went crazy. Now that it has been several weeks since I made this defoliation, I realize that I should not have removed the leaves from the nodes of the tails, because they have stopped growing and have not joined with their superior parts. Anyway, the plants are beautiful today and although they could be much better I feel very happy with them.
I know I've made 2 fatal mistakes in this grow
- The first has been the massive defoliation badly done, defoliation yes, but with head ... do not follow my example.
- The second failure that I see today, is that I did not leave enough growth time (18/6) after having made the last pruning and that has made the tails have been a length much less than what would have been desired, I think that 2 more weeks of growth would have been perfect.
-----WATERING CALENDAR-----
20/04/19 - 1,250 ml with Sensizym, Silica, Rhino Sk, Bud Ignitor, Big Bud, Bud Candy & Bud Factor-x @ PH6.4 & 1.2 E.C.
23/04/19 - 1,250 ml with All week nutrients - (Silica, Sensizym & Bud Ignitor) @ PH6.5 & 1.5 E.C.
*****ESPAÑOL*****
-----IMÁGENES Y VÍDEOS-----
1 - Antes de la defoliación
2 - Defoliación
3 - Después de la defoliación
-----SUMARIO SEMANAL-----
Como podéis ver esta semana he hecho una defoliación. Si, efectivamente me he pasado de listo, he quitado muchas más hojas de las que debía y las colas de las plantas no ha llegado a unirse del todo debido a la fallida defoliación.
Al ser la primera defoliación que realizo, no sabía muy bien que hacía y me lancé a lo loco. Ahora que han pasado varias semanas desde que realicé esta defoliación, me doy cuenta de que no debí de haber quitado las hojas de los nodos de las colas, pues estos han dejado de crecer y no se han unido con sus partes superioras. De todas maneras, las plantas están preciosas a día de hoy y aunque podrían estar mucho mejor me doy con un canto en los dientes.
Se que he cometido 2 errores gordos en este cultivo
- El primero ha sido la defoliación masiva mal realizada, defoliación si, pero con cabeza.... no sigáis mi ejemplo.
- El segundo fallo que yo veo a día de hoy, es que no dejé suficiente tiempo de crecimiento (18/6) después de haber realizado las últimas podas y eso ha hecho que las colas hayan quedado de una longitud muy inferior a la que hubiera deseado, creo que 2 semanas más de crecimiento hubiera sido perfecto.
-----CALENDARIO DE RIEGO-----
20/04/19 - 1.250 ml con Sensizym, Silica, Rhino Sk, Bud Ignitor, Big Bud, Bud Candy y Bud Factor-x @ PH6.4 & 1,2 E.C.
23/04/19 - 1.250 ml con todos los nutrientes semanales - (Silica, Sensizym y Bud Ignitor) @ PH6,5 & 1,5 E.C.

Likes
Comments
Share


@ScouseCityLX
Follow
Week 6 of flower and once again, some excellent bulking going on here, I was happy with it.


Likes
13
Share


@Rob96
Follow
Really thriving to be honest, really fattening up both along stems and in bulk, really impressed with this plant had it down for the weakest at very beginning but has proved to be a really good strong plant. Really looking forward to see this go into the last few week, hopefully gets some nice colours


Likes
55
Share


@Theia
Follow
All buds are cut and washed in a bath of lemon juice and baking soda/water. I have adopted this as a new standard for every harvest. We washed out quite a bit of dirt and shit. Lots of black floaties in the bath after and a few bugs we did not even realise were in there...
The buds were hung and left with a fan over them for an hour before being removed to my drying room. Sitting hanging in there at RH 65% and temp is 20c. Will bring Rh down to 55 in next few days.
I will update with a report once they have dried..
Thanks for all the help on this grow people who helped.. you know who you are..
Back in a wekk to 10 with a taste report..
Update.. buds dried after 6 days. Trimmed and jarred with a final dry weight of 112g once I took all branch off. Not tried her yet. I will give her a week at least in the hats before we try and will report back then.

Likes
6
Share


@GREENPHOENIX6262
Follow
*Week 8 (Week3 Flower) - 02/07 - Thus far no issues - Buds are becoming more and more dense - resin starting to set well also - running 12/12 until harvest *
Likes
11
Share


@Chubbs
Follow
420 Fastbuds
FBT2303 Week 6
This week has been exciting for sure. Both have definitely transitioned into flower now, showing flower sites everywhere. They both are growing very similar as far as height,look, and leaf structure goes.Had some calmag issues but I think we got that under control by upping the feeding to 1tsp per gal. Over all I'd say Happy Growing.
Likes
3
Share

@Aleks555
Follow
Hello friends! 🌱
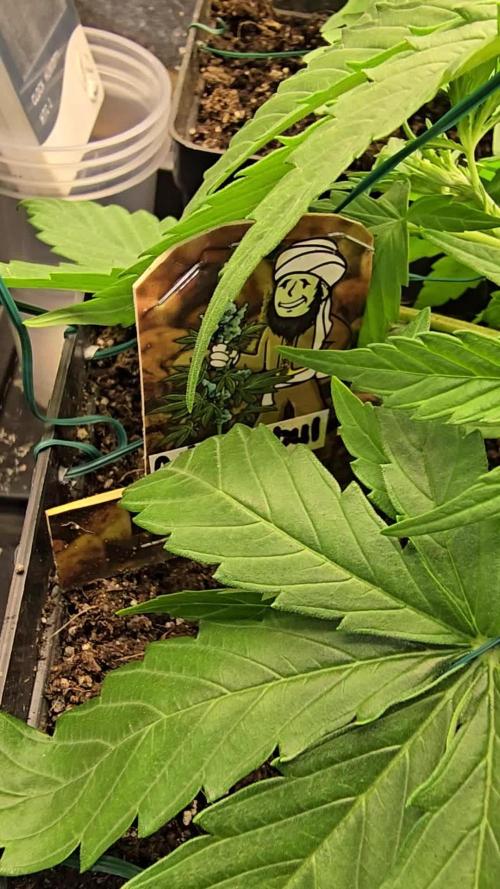
Day 23 — we continued training and tied down our beauty. She is now in a 5L pot and feeling great 👍
Over the past few days, our beauty Auto Kabul #1 has gained a lot of mass. We stretched her out again and gently bent the top to keep an even canopy and improve light distribution.
Temperature — Day: 24–28°C | Night: 20–23°C
Humidity — Day: 65–75% | Night: 65–90%
So far everything looks good — we continue to monitor her progress. More updates coming soon!
Likes
2
Share

@TiRobotProds
Follow
Le croisement s'annonce prométeuse nous entamons la 5eme semaine de floraison les plantes vont bien. SPD#1 odeurs sativa ⚡. SPD#2 odeurs hashich afghan terreux.
Likes
9
Share


@OS_Farmz
Follow
Everything goes good. Cutting big leaves. If someone of exeriensed growers knows how to make them feel even more better let me know plz;) Peace🤙🏻


Likes
141
Share


@bioaccessory
Follow
Приветствую, коллеги! 💚💛❤️
В этот раз я захотел вырастить сативадоминирующий сорт, Strawberry Cream от SumoSeeds как раз подходит:
"Прямо из района Эр-Риф Марокко, эксклюзивный гибрид Goji Haze с Strawberry Haze, знаменитой фруктовой сативой от Арьена из GHS. При курении этой красотки будет замечен приятный сладковатый аромат клубники." Звучит интригующе.😏
Теперь пару слов о проращивании: обычно после замачивания в стакане воды(RO water), я проращиваю семечки во влажных ватных дисках и зип-пакете(так мне легче контролировать нужную влажность). Но при этом способе нужно следить за корнем, есть риск вростания в ватный диск, что и случилось с одной из семечек. В этом случае извлекать семечку нужно предельно аккуратно(см. видео). Видимо в следующий раз я попробую менее рискованный способ проращивания. Ах да, перед стаканом с водой я слегка подпилил семечки по острой грани маникюрной пилочкой.
Итого:
23.01(вечер) поместил в стакан с водой
24.01(утро) поместил в диски
25.01(утро) появились корни
25.01(вечер) корни ≈1см. посадил в кокос
26.01(вечер) взошли
На всякий случай отметим, что чуть позже взошла растишка из правой(на фото) семечки, и она же была заметно крупнее.
Кокос(уже с перлитом, спасибо линейке Plagron) я зарядил слабеньким компотом(A+B-2, B52-1, CalMag - 0.5 pH5.9 ppm514), полетели!
Спасибо, что заглянули, и будьте здоровы! 🙏
Продолжение следует ...😶


Likes
11
Share


@CocoLogic
Follow
August 23th: (F6)
Fertigation once a day with same recipe (1150 EC 6.1 PH) watered until 10-20% run-off
August 24th: (F7)
Fertigation once a day with same recipe (1150 EC 6.1 PH) watered until 10-20% run-off
August 25th: (F8)
Fertigation once a day with same recipe (1150 EC 6.2 PH) watered until 10-20% run-off
August 26th: (F9)
Fertigation once a day with same recipe (1150 EC 6.2 PH) watered until 10-20% run-off
August 27th: (F10)
Fertigation once a day with same recipe (1150 EC 6.2 PH) watered until 10-20% run-off
August 28th: (F11)
Fertigation once a day with same recipe (1150 EC 6.2 PH) watered until 10-20% run-off
August 29th: (F12)
Fertigation once a day with same recipe (1150 EC 6.2 PH) watered until 10-20% run-off
Supercropped the 4 taller branches on the PE2 as a test and to get them at same level
Note: The Tut height is at the EXTREME limit had to remove the tray to gain 2 inch, will have to get the light at the roof of the tent and hope it will do it, first run of my life in 48 inch height space will learn from it for the next runs! :)


Likes
1
Share

@carlitoshaze44
Follow
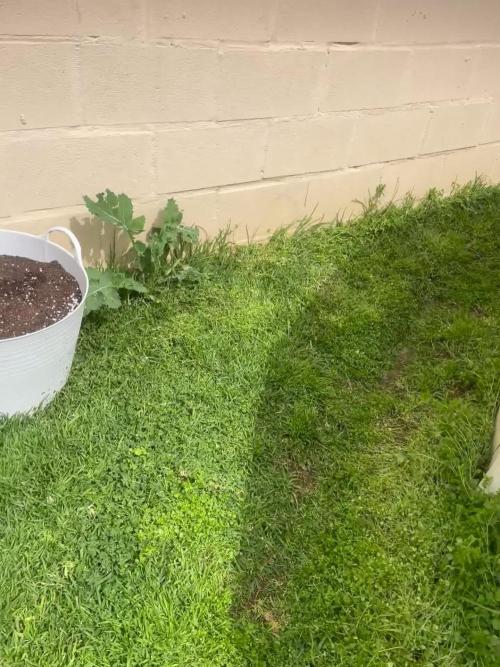
Seguimos otra semana más con las pequeñas ya se recuperaron de la araña roja ahora toca reponer energías y seguir creciendo!

Likes
46
Share


@LittleBigTrees
Follow
This is a must grow strain for anyone that likes a good balanced strong sativa , it grew well despite dripper and timer issues and had a really good medicinal side for crohns disease whilst leaving me energised and uplifted .
This plant continues to stretch right until harvest even with heavy defoliating it ended up 150cm tall. The smell is really strong and differs between pheno types.
One grew with almost no pistils/stigmas and was very frosty, this one could have continued Even after 9 weeks flowering .
Overall this has taken over as my favourite sativa ! I WILL grow this again for sure and would recommend it to anyone who likes sativa or citrus smelling/tasting flower 💚
NB: I didn't weigh the bud wet so ignore the guess in the grow report.


Likes
18
Share


@TheGreenLeopard
Follow
Part of an 8pot tent. Sweet seeds always has been a great experience from seed to smoke. All the senses get a good dance when growing with this bank. So can’t say any better - looking forward to building a nice sweet seed variety. These are waiting for a Harvest in coming weeks so we have them around the place being looked after by spider leg LED fir the early stages. On mobile so will add nutrients to the diary as we go. Can’t have anyone thinking I’m feeding seed full clip lol.