


Likes
10
Share


@CURATI_DA_SOLO
Follow
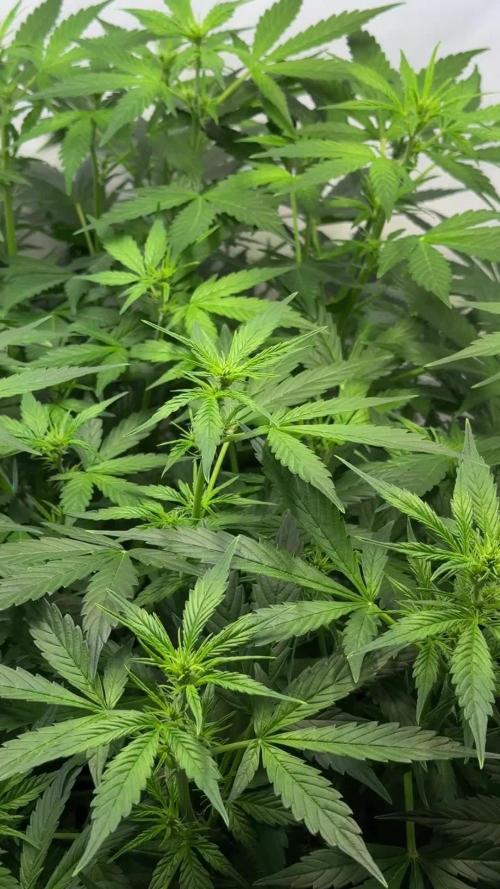
Allora.... Questa settimana ha ripreso veramente tanto! La settimana scorsa era rimasta un po' indietro rispetto le sue amiche (diverse genetiche) ma adesso ha veramente dato il suo scatto è ha rivelato che è all'altezza delle sue compagne di crescita! Anche lei sembra che si stia iniziando a riempire bene e ho deciso di togliere qualche internodo centrale per favorire l'areazione ed evitare eventuali sorprese di muffe più in là( anche se non ho mai avuto problemi meglio prevenire che curare)...non vedo l'ora che si inizi a gonfiare un po' perché sono molto curioso di questa genetica! Ha un 29% di THC quindi dovrebbe essere adatta a me .... speriamo bene e incrociamo le dita! Nel frattempo volevo ribadire la potenza di questi prodotti di Cannaboom! Sto usando tutta la linea full cream (con qualche aiuto della linea minerale tipo il loro CALMAG(SI) ) che oltre ad essere un semplice Cal Mag contiene anche silicio e ferro! Veramente adatto a le piante per fare assimilare meglio potassio e fosforo! Credetemi che con solo due applicazioni ho potuto vedere delle differenze esuberanti! Infatti speromtanto di continuare a usare i loro prodotti perché mi stanno veramente aiutando a spaccare questa growbox da 100x100! Quindi ancora grazie a CANNABOOM!
Un grande grazie speciale a tutto il team di anesia che mi ha fornito questa splendida nuovissima e potente genetica! Spero che piaccia come uscirà il diario! Ma alla fine ci saranno delle sorprese per tutti quindi rimanete sintonizzati! 💪🏼💪🏼💪🏼💪🏼
Seguitemi anche su Instagram sul mio profilo curati_da_solo🔥🔥🔥🔥

Likes
104
Share


@SmokingTiki
Follow
- The trichomes photos have been taken just before the harvest.
- Drying was made at 20°C and around 50% of humidity (4 days).
- Humidity in jar around 60% on the first day, temperature around 21°C.
Veg time : 58 days
Flowering time : 67 days
Total time from seed to harvest : 129 days
Height : 83cm
Pot size : 26l

Likes
7
Share

@sedygrows
Follow
Long time no see. Today i had to refill the system because my lady was very thirsty. She‘s looking beautiful. And for my first time dwc run im very proud so far. Have a nice day guys 😊🏻
Likes
17
Share


@GreenSkyz
Follow
Starting off week 9 and I'm impatient! This plant has been amazing since day 1. Came out super weird colored and finishing off with this beautiful purple! Will be growing this strain again for sure

Likes
154
Share


@CBD_Sweden
Follow
@FAST_BUDS,
Hi all the happy people here in GrowDiaries.
This is my second cultivation ever and it will be fun to try a bigger space than my closet grow.
First, I'm just going to say I'm done with the construction of my new growroom.
I put some pictures on the construction here in week one.
The room is 2.14 meters by 1.7 meters and has a ceiling height of 2 meters.
It provides a floor area of 3.6 square meters.
I use a 54 Watt Lightwawe T5 for germination and 2 Pcs 400 Watt HPS lamps.
I have a channel fan that replaces the room air about 40 times an hour to get a comfortable environment in the room, the air enters a fresh air intake from the outside.
The air is purified through a carbon filter to then leave the room to the rest of the basement.
Then I use that heat to heat the rest of the basement.
I will use 8 pcs 15 liter Autopots to grow with and a 100 liter water tank that supplies the pots of water and nutrition.
I will grow completely organically in soil and will watercure my buds to get the best possible medicine for me.
But there are no cultivation rooms to be displayed here, so I continue with what is most important.
Today I have put my seeds in my moisture dome and hope the seeds have germinated within a few days.
I am very excited to see how the new growroom will work and how this new secret CBD plant from @FAST_BUDS, will turn out.
..............................................................................................................................................................................................................................................................................................................................................
Update 2017-08-15. Both seeds have germinated and planted in small pots inside the humidity dome.
I'm so glad it worked so well and now it's just hoping they'll start growing and become 2 big healthy girls :)
...............................................................................................................................................................................................................................................................................................................................................
Update 2017-08-16. I have mixed my own soil today. Its 40% sieved peat harrow H2-H4 0-30 mm, 45% sieved peat harrow H4-H6 0-30 mm. 5% sand and 10% of compost soil. And i use 15% of perlite and mix it all together.
....................................................................................................................................................................................................................................................................................................................................................
2017-08-21 The 2 sisters are doing great, Nr2 is a bit after Nr1 . Some new pics.
............................................................................................................................................................................................................................................................................................................................................................................
2017-08-23. Transplanted from humidity dome and the small germinating pots to 15 liter autopots.
................................................................................................................................................................................................................................................................................................................................................................................
2017-08-27. The girls have settled in to there new home of the 15 liters autopot after a little transplant chock. Now the real week 1 starts for me and the girls. 4 new pics.
---------------------------------------------------------------------------------------------------------------------------------------------------------------------------------------------------------
2017-08-29. New movie of the girls. Its no water for 3 days now so the roots develop more and match the plant above the soil. The temp controlled fan is awesome, its easy to set what temp you like to have in the room. Right now its 28 celcius. And humidity is 56%.
--------------------------------------------------------------------------------------------------------------------------------------------------------------------------------------------------------------------------------------------------
2017-08-29.
Hello to you who read my diary, I just want to say that I am pleased that you have chosen to check in with me and in my diary.
I just want to say that I do this for myself and for a steady flow of my medicine.
Everything you read and see in my diary is 100% honest and I will never distort or beautify anything here.
I document my crops so that I can learn from my mistakes and also to look back at those different crops.
I try to update with pictures every day and with text if something special has happened in the garden.
This is my strainhunt for the best medicine and the beginning of my journey with cannabis and the cultivation of it.
-----------------------------------------------------------------------------------------------------------------------------------------------------------------------
2017-08-30. Cleaned the room this morning, just vacuuming and cleaning with chlorine solution. Im testing the fan to control temp and humidity, it works great.
Added some pics with measurements and a movie. Everything is looking great right now.
-----------------------------------------------------------------------------------------------------------------------------------------------------------------------------
2017-08-31. New video of the girls.
-------------------------------------------------------------------------------------------------------------------------------------------------------------------------------
2017-09-01. New pics and videos. Gave each of the girls with 2 ml Alg-A-Mic, 4ml Bio-Grow, 4ml Bio-Heaven and 10 ml Formulex mixed in 2 liters of water.
I hope they like it :)
-------------------------------------------------------------------------------------------------------------------------------------------------------------------------------------------------------------------------------------------
2017-09-02. New pics and the girls liked the water and nutrients yesterday.
-----------------------------------------------------------------------------------------
2017-09-03. Video of the girls this morning.
Kl 16.00. Did some defoliation on the girls. Videos added.
KL. 23.00. New video.
Likes
28
Share


@OrganicPower
Follow
Week 8 flower and the Sour Diesel is still fattening up and looks like about 2 weeks to go. Going to swell good I think. Lots of frost and getting thick. Turned the lights down now to 50% and they seem to be happy with that. Still just water through the drip and hand water once a week. Gnats suck and need to take care of them before next grow and do a better job moving forward. These TSW 2000’s from Mars Hydro are awesome and with two of them side by side are more than enough for this space. Blimburn Sour Diesel are turning out really good and smell like gas and are strong on the nose! Thanks for the view

Likes
5
Share


@BerlinBaal
Follow
October 10th she started her 9th week and got her last nutrition. i will harvest her next week or even this weekend.

Likes
5
Share


@GrowFunMD
Follow
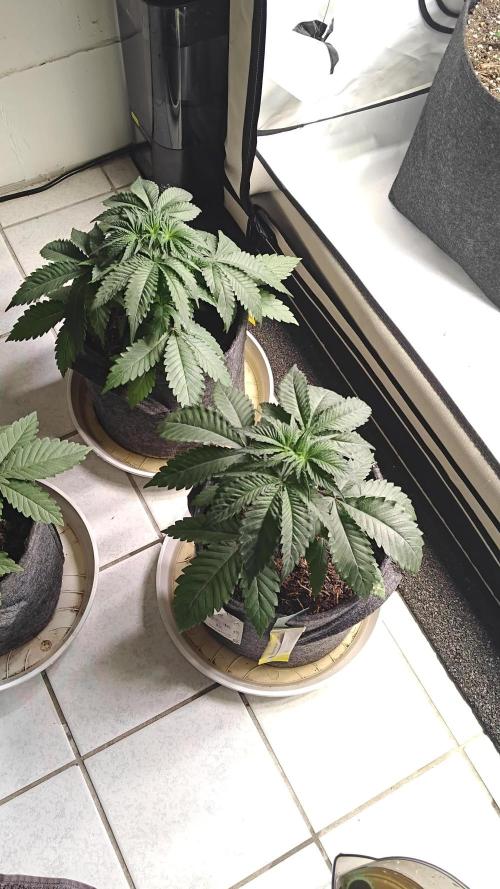
See comments in videos. I will say, I am loving my AutoPots. It has taken a huge burden off the growing process, not having to water everyday or every other day. So much, that I have purchased a 4 Pot XL system for my smaller tent. Grow easier, with #AutoPotUSA.

Likes
6
Share


@Susquihanna
Follow
Dosido is dancing her way to new heights. She is 14 inches which means she grew 6 inches this week. @RoyalQueenSeeds says, "In the garden, Do-Si-Dos Auto seeds grow into slightly taller plants of around 140cm"--which is 55 inches. Time will tell but we are well on our way to reaching new heights.
Miss Dosido is also dancing her way to a lot of undergrowth. Lots of growth is taking place.
Flowering time is said to be between 7-8 weeks. So we are right on target.
Because it has been so hot in this area, Miss Dosido is getting 1 gallon of nutrients per day. I have a pool umbrella up to protect her from the direct sunlight, but the heat is real here.
Dancing is described as good for the soul so dance on Miss Dodido!
Stay tuned for next week, and feel free to comment:)


Processing
Likes
29
Share


@Grey_Wolf
Follow
Ginger Nut Cookies & Aussie Music Videos
5 weeks of flowering completed
2nd April 2020
Hi Everyone , Welcome back to my diary
The plant I created is growing nicely
nothing much to report other than the smell has changed yet again...
Now it resembles yoghurt or slightly sour milk crossed with fruit.
Not an unpleasent smell by any means
just unusual. I'm not needing to feed
a lot as the soil seems to be providing most of her nutritional needs.
Now For the Aussie Music Videos
Because this plant is geeting closer and closer to harvest time I thought I had better start doing more than one video a
week lest I miss out on too many great videos I could add. So this week I have
picked three videos from three different
Artists all of which are very much loved here in australia.
First one is a Group called "Crowded House" with their hit song "Better be home soon" here is the link....
https://www.youtube.com/watch?v=AQOlwMKpmvQ
Second group is called the "Hoodoo Gurus" with "Like wow wipe out"
https://www.youtube.com/watch?v=vFnaNPGe4gQ
And the third for this week is a great
band actually from New Zealand but we claim them as our own "Mental as Anything" with "Live It Up"
https://www.youtube.com/watch?v=kK_eQImKnPA
As usual I have provided a short clip of each song as a preview in the above image and video section.
I hope you like this weeks update and please leave me a like if you did.
Please stay safe and well Everyone and
I will see you all back here next Week.
Likes
23
Share


@Firepharmer
Follow
She’s getting frosty and dank
👃🍪🍊🍓🍰🍌🍒🍇🍭👃
Day 29 almost half way , happy with all the phenos so far all frosty so many terps
.. started feed the canna nutrients plants canna pk1314 ..
2 flush’s Got the remo plants all most on the proper Ec again


Processing
Likes
38
Share


@growsmoke420
Follow
After Input from the Community I've Decided on NO Nutrients for a few Days to let Her Recover from Her Suspected Nitrogen Toxicity. If She Recovers like I Hope She'll get One more Feeding of Beastie Bloomz only before a Final Flush as I Suspect only a Few Weeks before She's ready to Harvest.
Likes
51
Share


@Corwinism
Follow
WEEK 12 - (05/16/2021 - 05/22/2021)
Week 4, Day 23 - FLOWER: 05/17/2021
Tap water: 238ppm, 8.8 pH, 71℉
+ FF Big Bloom: 60ml/6 gallons (¾ strength)
+ FF Grow Big: 15ml/6 gallons (¼ strength)
+ FF Tiger Bloom: 45ml/6 gallons (¾ strength)
+ Cal-Mag: 15ml/6 gallons (½ strength)
+ Fish Shit: 12ml/6 gallons
+ HydroGuard: 6ml/6 gallons
+ pH Down: 22ml
Mixture: 883ppm, 6.2 pH, 71℉
6 gallons = 1.5 gallons per 5 gallon pot
ppm/ppm = runoff/soil
JB#1 - 2990ppm/2107ppm, 6.2 pH
AP#1 - 1970ppm/1087ppm, 6.2 pH
AP#2 - 1550ppm/667ppm, 6.4 pH
GC#1 - 2400ppm/1517ppm, 6.2 pH
These ppm readings don’t seem accurate. They are all over the place, yet the pH was basically the same. I’m going to let these girls dry out for 5 days this time and try again on the readings.
--------------------------------------------------------------------------------------------------------------------------------------------
Week 4, Day 28 - FLOWER: 05/22/2021
Had a curve ball thrown at me today. I came into the grow room this morning around 9 a.m. and realized that my grow lights were still on, which set off an alarm in my head becauseI have my lights set to turn on at 5 p.m. and go off at 5 a.m. Though, I quickly found the cause of the lights not going off at their regular time. The switch on my timer had somehow flipped from "Timer On" to "Outlet On" at some point within the past day, without me realizing, so the lights remained on past their normal "bedtime". I can only conclude that the switch got bumped when unplugging a fan. This unfortunate incident caused the plants to get about an extra 4 hours of light than normal before I was able to shut them off.
I went with my instinct and decided to keep the lights off for a full 12 hours, rather than wake them up at their regular time. That means the lights didn’t come back on until 9pm, at which point I watered. Plants were all noticeably droopy with dry soil. They were definitely thirsty.
Tap water: 228ppm, 8.5 pH, 71℉
+ HydroGuard: 8ml/8 gallons
+ pH Down: 25ml
Mixture: 255ppm, 6.2 pH, 71℉
ppm/ppm = runoff/soil
JB#1 - 1190ppm/935ppm, 6.5 pH
AP#1 - 1180ppm/925ppm, 6.3 pH
AP#2 - 954ppm/699ppm, 6.8 pH
GC#1 - 1600ppm/1345ppm, 6.3 pH
This watering was SUCH A JOY. I got plenty of runoff! I was able to take readings that seemed to be much more accurate than the last few waterings. Maybe this is evidence that I should actually let my pots dry out a bit longer than I was previously.
--------------------------------------------------------------------------------------------------------------------------------------------
[SUMMARY]
Started the week off with a final defoliation to expose more bud sites.
Aside from the incident at the end of this week, all is well.
American Pie #1 seems to be catching up with her sisters.
THE END OF WEEK 4. That's crazy.
Another 4-6 weeks expected to go before the chop.
Thanks for stopping by and checking out the diary! And if you've read this far into the text, please let me know in the comments what your top favorite strains are, up to 3! I'm curious to know what strains are out there that maybe I haven't heard of or tried yet, and what others around the world are enjoying. 🙏
"Stay high
Go for what you know
Let it in your mental
And don't ever let it go"


Likes
Comments
Share

@GoodTimesOrganics
Follow
Allmählich entwickeln sich die Blütenstände aus und es ist schön zu erkennen, das die Interniodenabstände sich während des SCROG nicht groß weiter auseinander gestreckt haben.
Daraus vermute ich dass nun eine Dichte und Breite Budstruktur zum Vorschein kommen wird.
Jetzt geht es darum zu schauen wie sich daß Aroma und eben die Blütenbildung weiterentwickelt.
Heute befindet sich die Blue Cream Haze bei Blütetag 18.
Likes
2
Share


@jojopfoh
Follow
The stretch is finally over and now she is starting to stack. The bud formation is beautiful and there are so many bud sites. The colas are ging to be huge

Likes
27
Share


@adam_pawloski87
Follow
First off I just want to say for some reason it’s not letting me change the right temperatures on my diaries ! Each time when I put it in they stay at 50. My day air stays 75 degrees an , night degrees is 70 !
Today is day 58 for all these ladies! This week has been really great ! Girls really progressed a lot , especially for one the Forbiddin Runtz, looks like is gonna finish up in a week or 2 ! Other then that they are coming along well! Keep those eyes peeled for next week! Cheers😶🌫️💨💨💨💨
Processing
Likes
5
Share


@Mr_nugs_lover_David
Follow
She's looking very happy and healthy,let's see how this wonderful lady performs,looks like she's not gonna be very productive but always quality over quantity. Hope you guys enjoy.
This lady has started the 4 week since planted on August 26th but also it's the start of her 1st week of flower,let's get the job done! 🔝💎💚✌️

Likes
38
Share


@GanjaGecko
Follow
WEEK 7/4F // D43/22F - D49/28F
Dafür das Lady#2 mit der Blüte ein paar Tage hinterher ist, ist sie mittlerweile aber größer als Lady#1 und ist definitiv stabiler was die Seitentriebe angeht. Beide Ladys werden ordentlich voll sein. Jeweils die unteren vier Seitentriebe wurden mit Bindedraht an der Stange in der Mitte befestigt das die Triebe und dicker werdenden Buds bei starkem Wind etwas gestützt sind.
Gegossen wurde an Tag 43/22F, an Tag44/23F, an Tag45/24F, an Tag48/27F und an Tag49/28F.
An den Tagen gab es jeweils ca 1L-1.2L.
Die Töpfe werden vor dem gießen leicht angehoben um zu abzuschätzen wie viel jede Lady benötigt.
Temperatur
Tag: 22-28°C
Nacht: 13-19°
Höhe
#1 94cm
#2 106cm