The Grow Awards 2026 🏆 


Likes
Comments
Share


@DevilsBud
Follow
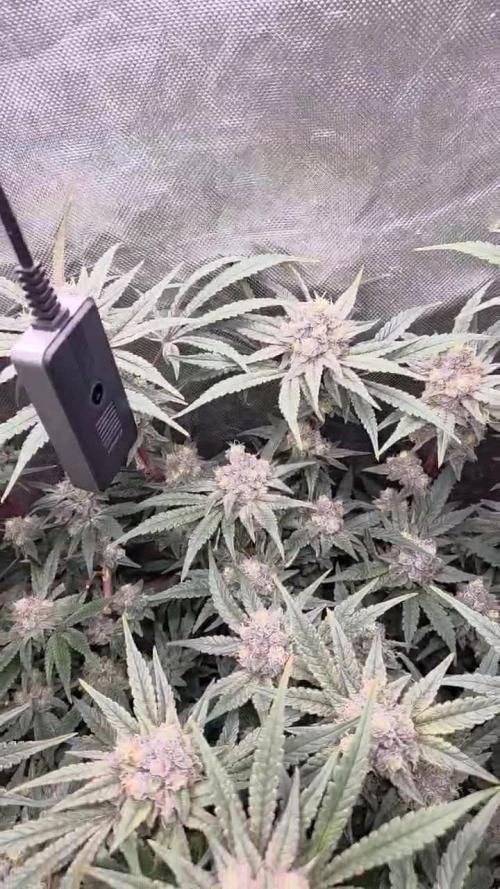
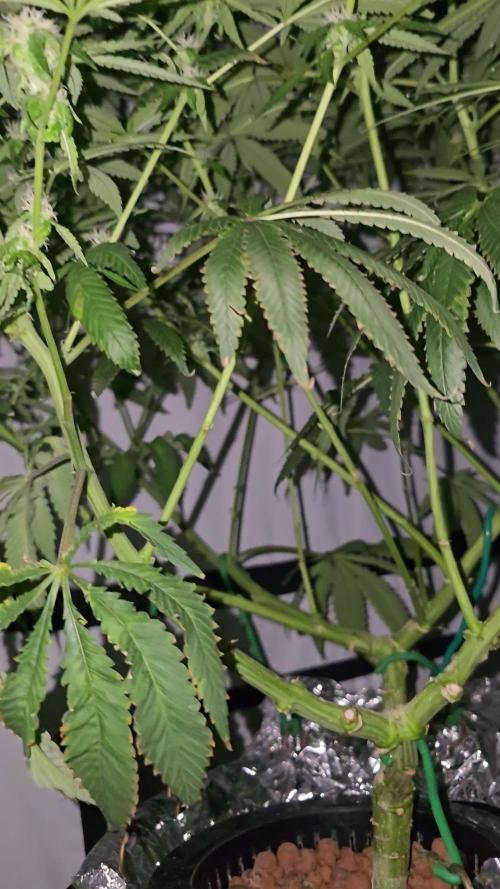
Day 56 of flowering of Afghani Gold From Spliff Seeds
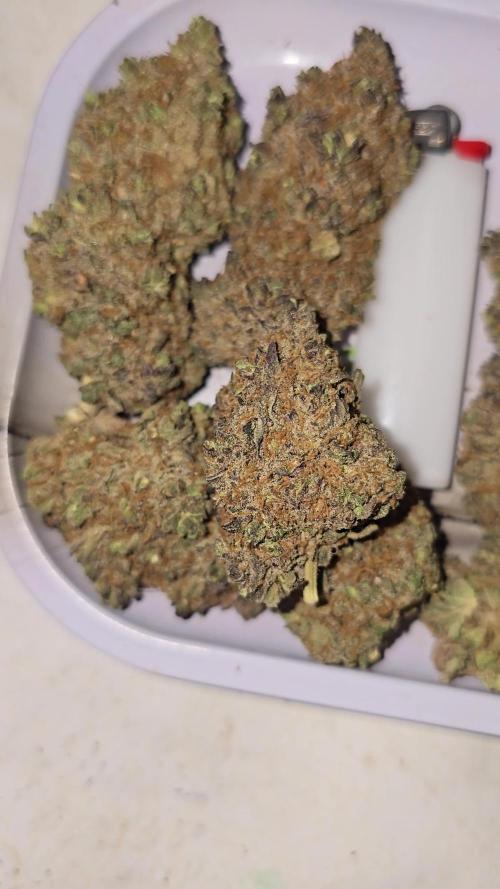
Getting to the end of the line of this beautiful 2 plants she frosty she smells and colors absolutely amazing and the only thing that is still going on is flushing.
These ones had more nutrients because they drink more Tru out the grow i had to think about that when say they drink a lot noted for next grow if there drinkers it's fine but give less nutrients 💪🏻 but and i hope i can cut here down Sunday will see i want the ppm to go lower for fine end result i am not going to cut corners on this grow it's looking and going to good for that
23/12/21
Runoff is around 1800 ppm
25/12/21
Runoff is around 900 ppm
I will be now drying the pots out and then it's chop time for these 2
26/12/21
Day 58 flowering runoff 590 ppm 🤘🏻
There looking frosty smell absolutely
🔥🔥🔥🔥
28/12/21
Chop chop 1 Afghani Gold
One left to chop good times
Happy holidays people hope you have some great days stay healthy take care of the one's around yeah and let next year be more weed and Less fucking corona so i can get my ass to Alberta Canada for month vacation to see if we could move there 🤘🏻🇨🇦🤘🏻
visit www.marshydro.eu
for your best gear and use the PROMO CODE: DEVILSBUD
Some info about the Marshydro FC-4800
Superb Quality LED Chips: The whole light is composed of 1206 pcs Samsung lm301b and Osram 660nm chips. More than two times as many LEDs are used to drive the grow lights at low currents and to avoid overdrive. Quality is guaranteed and efficiency is up to 2.8 μmol/j.
Even PAR Distribution and High PPFD Output: The multi-light bar design and the densely distributed light chips enable the LED grow lights to achieve the optimum PPFD required for plant growth over the entire effective coverage area.
Specifically Designed Spectrum: To ensure even plant growth, blue and red light are enhanced on the basis of a full spectrum combination. Not only does this accelerate plant growth, but it also improves the yield and quality of the plants at the same time.
Dimming Daisy Chain Function: The dimming function saves on electricity costs and enables brightness from 10% to 100% for the different stages of plant growth. A single master light can connect up to 30 lights in a daisy-chain system.
Business LED Grow Light: The light's wavy heat sink dissipates heat quickly and the IP65 waterproof allows the light to operate in humid conditions. 180° collapsible feature for easier installation. All these features provide favorable assistance for commercial cultivation.
And some tent info
●【Lock All Light Insid】MARS HYDRO Grow Tent Interior is made of diamond mylar. Non-toxic to the environment, no harm to plants. High-quality 1680D canvas being double stitched, (ALL OTHERS BRAND grow tent is 601D canvas) which is tear-proof for perfect light locking, No light leaks or rips at all.
●【Durability Grow Tent】Stable Metal corner adapters and poles are the trustful supporters of the tent. No rusting nor paint-falling. Quick easy tool-free installation. Carries strong heavy-duty SBS zippers, double layer lining to create a light-proof seal.
●【Easy Observation of your Plants】Special peeks window made by double layers of cloths. Observe the growing conditions of your plants without opening the tent and avoid disturbing plants. The peek window also serves to dissipate heat and ventilate air.
●【Removable Tray Keep Clean】The package includes a removable waterproof floor tray to hold soil and fallen leaves. The tray can be taken out easily to wash. Removable and water-proof makes cleaning easy.
●【Good Ventilation&Fast Assembly】 Circular double-sleeved vent holes with adjustable nylon strap for air circulation by exhaust fan, ducting, carbon filter, or reflector. Better allows proper light, heat, and airflow. Quick tool-free installation. Reinforced by a sturdy metal frame to ensure security and stability, supports up to 140lb. Perfectly safeguard your plants to thrive even in winter
Processing
Likes
97
Share


@DudeGrowsWeed
Follow
The 2 older BlackBerry's still look like they are struggling. They are growing, but I'm not seeing the branches starting to develop as I would expect by this point. The newer BlackBerry seedling looks fine. We'll see what happens over the next few weeks.
Likes
14
Share


@goeser
Follow
Cant wait to harvest them. Only water right now. Till the harvest. Dense headbud. Lets see what the results will be.
Likes
14
Share


@eldruida_lamota
Follow
Venga familia que ya viene la cosecha de estas Punch Pie de RoyalQueenSeeds , que ganas que tenia ya de darles machetazo.
No veas que pinta que tienen estas plantas.
Las flores aparte se ven bien resinosas.
a sido una genética con la que disfruté mucho cultivarla, es algo complicada cultivarla pero merece la pena si eres cultivador con experiencia no te será problema cosechar.
Agrobeta:
https://www.agrobeta.com/agrobetatiendaonline/36-abonos-canamo
Mars hydro:
Code discount: EL420
https://www.mars-hydro.com/
Hasta aquí es todo , espero que lo disfrutéis, buenos humos 💨💨.
Likes
16
Share


@Plantinator
Follow
I was expecting a slower plant, but the yellow pisils proving I was wrong. I added Canna Flush to the mix and from this point I will monitoring daily the trichomes.
Likes
8
Share


@Dameon0803
Follow
Another smooth week with the continued issues ive previously addressed. Trichomes are multiplying and buds have grown some. With the dehumidifier running pretty much constantly, it has bypassed my carbon filter. (I have my dehumidifier extract from outside the so I'm not adding additional, unwanted, heat.) Smell is very evident within the entire room. Final week of feeding and I have turned my reds down to 50%. Took trichome shots for fun around the front of the plant.
Likes
2
Share


@sunshinegroww
Follow
Super dense buds and smells super sweet
One more feed and onto the flush as its getting too hot and starts to foxtail a bit
Likes
45
Share


@Dingle
Follow
The trichomes towards the end of this week had started to go slightly cloudy so I decided not to feed and to start the flushing process instead.
I flushed the medium with a couple of litres of water per plant until I got a good amount of run off. I think I may have not back off the nuets enough on the few last feeds as the majority of the leafs on all 4 plants are still quiet dark green in colour with no yellowing.
I did a good amount of defoliation at the start of week to try and get as much light to the lower areas as possible. The buds are still developing ok I think they feel dense, they won’t be massive buds but I am hopeful for a decent yield overall.
The smell is strong but the carbon filter is working great.
Happy growing so far 🤞🏻
Likes
20
Share


@Mrs_Larimar
Follow
Today i cut down the males.
they have pollinted the whole area,
the rest of the is into the refrigerator
they had lots of pollenpowder
its just everywhere in the roo---
means i have to do a very good cleaning
Likes
13
Share


@Stork
Follow
Day 84 Mon
Add Water
PH 6.1- 6.0
EC 0.7 - 0.5
DLI 12h
PPFD
Water 18c
Day 85 Tue
PH 5.9
EC 0.5
DLI 12h
PPFD
Water 18c
Day 86 Thu
PH 6.0
EC 0.5
DLI 12h
PPFD
Water 22c
Day 87 Fri
PH 5.9
EC 0.5
DLI 12h
PPFD
Water 17
Day 88 Sat
PH 6.0
EC 0.5
DLI 12h
PPFD
Water 18c
Likes
18
Share


@Grower_Of_Persia
Follow
my dry and cure style is this:
4 days of hanging upside down to get water activity lower to around 0.6 in 50% humidity and 26 C temp (i know its a little high but we are in a hot summer right now and i cant get it lower even with air conditioner) and then after 4 days of drying i remove leaves and stalks, trim buds and move them to jar for the rest of their life :D . and in the first 4 days of curing i open the jar door and let hem get some fresh air in the jar for about 5 minutes and close the jar door again, after 4 days of curing like that buds are smokable but they will get better as they getting cured about 1 month.
buds are one of the hardest as fucking rocks type of buds! very dense , compact , sticky , smelly , amazing at every aspect
growing stage was 56 days and flowering stage was 75 days total (harvested tops at day 64th)
the total weight of dry buds was : (plant #1 & #3 top buds 56 G + lower buds 22 G ) 78 G + (plant #2 top buds 47 G + lower buds 18 G ) 55 G + (plant #4 top buds 120 G + lower buds 67 G ) 187 G = 367 G
Likes
74
Share


@Mr_Maes
Follow
This plant will be grown again for sure. From start to finish there wasn’t a single issue and she performed well under my Optic LED and LST. Can’t wait to grow this again.
Likes
12
Share


@BudXs
Follow
These SECRET genetics look fine. All sprouted, 100% germ, no issues. Got some stretch on one, but thats cool, i like a bit of stretch, will bury her a bit on transplant.
Dont trust the talking dog
Likes
20
Share


@eldruida_lamota
Follow
Venga familia que ya viene la cosecha de estas Apple Fritter de RoyalQueenSeeds, que ganas que tenia ya de darles machetazo.
No veas que pinta que tienen estas plantas.
Las flores aparte de prietas se ven bien resinosas.
a sido una genética con la que disfruté mucho cultivarla, es algo complicada cultivarla pero merece la pena si eres cultivador con experiencia no te será problema cosechar.
Agrobeta:
https://www.agrobeta.com/agrobetatiendaonline/36-abonos-canamo
Mars hydro:
Code discount: EL420
https://www.mars-hydro.com/
Hasta aquí es todo , espero que lo disfrutéis, buenos humos 💨💨.
Processing
Likes
3
Share


@Vayne
Follow
Have yellowing on tips of new growth. Also some discoloration on older leaves. Havent been able to narrow it down yet what it could be. Using ro water with calimagic ph'd to 6.0. And feeding 1 tbsp for a 5 gal bucket with organic blackstrap molasses once a week.
Likes
19
Share


@Comfrey
Follow
Tropicana had to go back indoor because the temperature outside is the opposite of tropical. I took off two leafs and gave her time to relax after.
Everything is fine and I can already smell something when I‘m near to her. 🤭☺️
Where is the sun? Preparing for sun storm!
Likes
44
Share


@BlackDragon22
Follow
Finalmente è percepibile l'esplosione della fioritura💣 forse un leggero blocco dovuto agli sbalzi di temperatura esterni di questi giorni che influivano nella mia grow room.. I terpeni sono di un'altro pianeta, comincia a ghiacciati come un iceberg 😂💚 speriamo che continui così e che l'imprevisto mi faccia arrivare comunque ad un buon raccolto
Likes
23
Share


@Fatnastyz
Follow
Week 2 flower
Day 1, Day 29 from seed.
Bent her head just a little and removed a few leaf blockers! She got a tent all by herself.
Smellin good now too, only one open stinking up the room! 🤤🤘
10-5
250ml
10-6
1/4 cup poo, 3 tbs buildaflower scoop of connect.
10-7
water, started a tea, 1/4 poo, kelp, yucca, cal/mag, recharge! Tried to keep it simple.
10-8
Day 34
Lovin her tea! Lst and defol, open her up a bit.
Slight defol and used some clips.
Fun with pictures! 😁🤘
10-9
Last day of the week! Her head and another branch took off enough for me to bend it!
Was worried wasn't going to be able to. But we got her! Helped a ton!.
After spacing her out, had to play musical tents!
Water after she sleeps today!
See ya next week! 🤘
Heads pulling up after sleepy time!


