


Likes
Comments
Share


@DevilsBud
Follow
Day 56 of flowering of the CBD spliff Berry From Spliff Seeds
Getting to the end of the line of this beautiful 2 plants she frosty she smells absolutely amazing and the only thing that is still going on is flushing and i hope i can cut here down Sunday will see i want the ppm to go lower for fine end result i am not going to cut corners on this grow it's looking and going to good for that
23/12/21
Run off was 1600 ppm so almost there
25/12/21
Runoff is around 700 ppm
I will be now drying the pots out and then it's chop time for these 2
26/12/21
Day 58 flowering runoff 550 ppm 🤘🏻
There looking frosty smell absolutely 🔥🔥🔥 thricome are where i want them and has a day to go to dry out the soil and then light's out for 24 hours it was a perfect grow From beginning to end CBD SPLIFF BERRY From @spliffseeds
28/12/21
Chop chop 1 CBD spliff berry
I have decided to do one wet trim and one dry trim so will be trimming first one tomorrow and goes into dry reck
One left to chop good times
Happy holidays people hope you have some great days stay healthy take care of the one's around yeah and let next year be more weed and Less fucking corona so i can get my ass to Alberta Canada for month vacation to see if we could move there 🤘🏻🇨🇦🤘🏻
visit www.marshydro.eu
for your best gear and use the PROMO CODE: DEVILSBUD
Some info about the Marshydro FC-4800
Superb Quality LED Chips: The whole light is composed of 1206 pcs Samsung lm301b and Osram 660nm chips. More than two times as many LEDs are used to drive the grow lights at low currents and to avoid overdrive. Quality is guaranteed and efficiency is up to 2.8 μmol/j.
Even PAR Distribution and High PPFD Output: The multi-light bar design and the densely distributed light chips enable the LED grow lights to achieve the optimum PPFD required for plant growth over the entire effective coverage area.
Specifically Designed Spectrum: To ensure even plant growth, blue and red light are enhanced on the basis of a full spectrum combination. Not only does this accelerate plant growth, but it also improves the yield and quality of the plants at the same time.
Dimming Daisy Chain Function: The dimming function saves on electricity costs and enables brightness from 10% to 100% for the different stages of plant growth. A single master light can connect up to 30 lights in a daisy-chain system.
Business LED Grow Light: The light's wavy heat sink dissipates heat quickly and the IP65 waterproof allows the light to operate in humid conditions. 180° collapsible feature for easier installation. All these features provide favorable assistance for commercial cultivation.
And some tent info
●【Lock All Light Insid】MARS HYDRO Grow Tent Interior is made of diamond mylar. Non-toxic to the environment, no harm to plants. High-quality 1680D canvas being double stitched, (ALL OTHERS BRAND grow tent is 601D canvas) which is tear-proof for perfect light locking, No light leaks or rips at all.
●【Durability Grow Tent】Stable Metal corner adapters and poles are the trustful supporters of the tent. No rusting nor paint-falling. Quick easy tool-free installation. Carries strong heavy-duty SBS zippers, double layer lining to create a light-proof seal.
●【Easy Observation of your Plants】Special peeks window made by double layers of cloths. Observe the growing conditions of your plants without opening the tent and avoid disturbing plants. The peek window also serves to dissipate heat and ventilate air.
●【Removable Tray Keep Clean】The package includes a removable waterproof floor tray to hold soil and fallen leaves. The tray can be taken out easily to wash. Removable and water-proof makes cleaning easy.
●【Good Ventilation&Fast Assembly】 Circular double-sleeved vent holes with adjustable nylon strap for air circulation by exhaust fan, ducting, carbon filter, or reflector. Better allows proper light, heat, and airflow. Quick tool-free installation. Reinforced by a sturdy metal frame to ensure security and stability, supports up to 140lb. Perfectly safeguard your plants to thrive even in winter

Processing
Likes
4
Share


@Drtomb
Follow
I'm about 13 days from the 60 day mark. I can't remember the actual finish on this plant, but I'll figure it out this time. Seed breeder suggests 60 days.


Likes
Comments
Share

@MisterGroot420
Follow
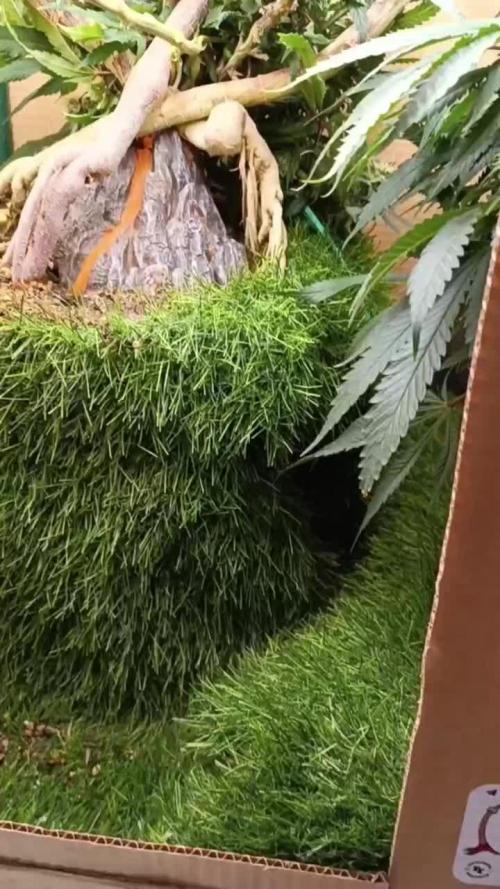
Приветствую товарищи,бонсай уже принял красивую форму,дальше делаю тренировку лст и переодичсеки делаю дефоляцию,сразу заметно,что растения голодают,чуть проморгал питание,не привычно кормить три растения одновременно в одном горшке,как говорится лучше не покормить,чем перекормить,была произведена очередная дефоляция


Likes
2
Share


@KeemBboomin
Follow
I gave them a feed about two weeks ago I think I’m going to give them one more feed next week and let them puff up. I water them about every 2-3 days except on of my bubble gum plants she drinks a little slower than the others but she’s still nice and healthy.
Tent #1 has 2 Bubblegum and a Amnesia Haze
Tent #2 has 1 GMO Cookies, 1 Peanut Butter Pie x Royal Kandy( I won this seed on 420 so?)
As well as a plant I got from a friend and brought back to life to see what she rewards me with
Likes
29
Share


@THCeitor
Follow
Ya estamos a medio camino del proceso, las plantas se ven sanas y con una leve ventaja de la Red Strawberry Banana #2, la cual muestra una floración mas adelantada que la #1 como muestran los videos. Se nota un tono purpura mas oscuro en la R.S.Banana #2 y un tono mas claro en la R.S.Banana #1, la cual muestra un tallo de gran proporción quizás por un leve exceso de Nitrógeno.


Likes
6
Share



Likes
3
Share


@SolitudeCorners
Follow
Have to cut them early cause they're too crowded with colas, and there are risks for mold. Whole plant weight average at 750g /only flower 400-450g
The total flower from 23 plants is 9.95kgs


Likes
12
Share

@MindFlowers68
Follow
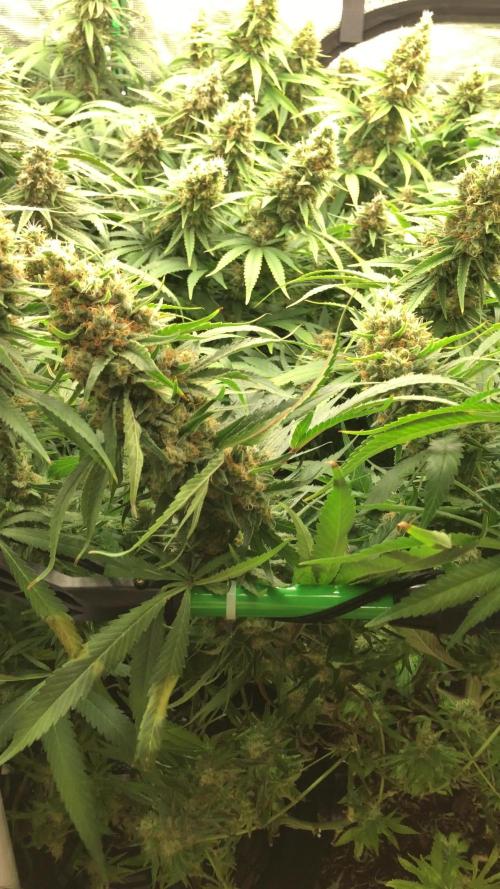
The white dominana was really stacking and not showing too much signs of wanting to slow down towards the end but this week I got her to frost up. A lot of the stigmas are now orange as well when I cut that main cola off to take pictures. My arm was starting to get sore from holding it straight out. There was a lot of big colas in there. She's got a nice funkiness to her, but nothing to exotic or pungent in your face. Not a Skunky sort of funk, but more of like a light BO funk. It's got a slight citrus, earthiness and fruity kind of watermelon and honestly it's very subtle though. Looks like the potency is there though.
Harvest went really well with the plants. It's always a little nerve-racking going in there wondering if you're gonna run into anything like budrot or pests you didn't see but this round, nothing to speak of. Which most rounds are but I've had a few issues with some bud rot in some big colas before. Everything looked really clean. No signs of bud rot, no pests in or our of the soil. No powdery mildew. The tent really wasn't even that dirty. I had to clean it after I recommended my 65 gallon pots for my next round and was shocked how clean I got it within a day of having those plants in there growing.
This week my main focus was trying to get the temps down a little bit and humidity is low as I could. At the beginning of the week I dropped the lights down a full hour, down to 10/14. Also, the last few days before harvest, my temps were getting above 83 towards the end of the night and cut them off even earlier, so there was a few days they got roughly 9 hours of light last few days. I watered twice this week but the last dry back before cutting them my soil moisture's got around 18%, so pretty dry. I would've like to keep them a little wetter but ambient humidity has been very high. The last few days I managed to get into the 78°F 55% humidity range which I was happy with.
Harvesting the four plants took from 8 PM to 4 AM after their night cycle by myself. Each plant taking an hour and a half With very tiny breaks in between. I was on the second plant taking a hanger out to my dry area and I hear a loud shuffle in my mind thought it was the cat at first and then I realized that was too big of a sound to be my cat. Then I thought I was getting robbed or something and then I looked up and it was like a three year old buck about 250 pounds big antlers! We both looked at each other and jump scared, and both took off in opposite directions. It was kind of hilarious, but I was a little spooked after that, so I kinda had to set up a light outside so I could see better and the first few trips after that, I may have grabbed a PVC pipe in my off hand like I was in the game Doom or something lol.
I wasn't able to fit all the pictures I took from harvesting. I'll have to add them to my next week after they're dry, of all the plants hanging. It seems like I've got my drying area carved out pretty good for the flowers space I have. Does suck having to move my drum set out for two weeks and freezing in my studio though but better than not having a decent drying space that's for sure I had my twine still up from during my auto flowers and utilized a few of those hanging from the ceiling to get a couple extra hangers in.


Likes
167
Share


@PapaNugs
Follow
Was another good week of growth. After getting transplanted, the girl got topped. She took a few days to fully recover. Whether that be from topping, transplanting or most likely both, we are on track again.
Dimmed to 40%
Here are the lights details:
Medic Grow Mini Sun-2 150W LED
Model: MN150-022
Spectrum mode: V1
Efficacy: 2.8 umol/J
Thanks for stopping by!
You can find the light on Grow Diaries:
https://growdiaries.com/grow-lights/medic-grow/mini-sun-2-150-watts
You can find the light on Medic Grow's website:
https://medicgrow.com/

Likes
4
Share


@DonEspas
Follow
L'ensemble se porte bien, seul un phénotype /4 paraît plus faible que les autres
Likes
16
Share


@Max1973
Follow
Day 52 - before pic/vid
pulled em both out scrubbed tanks..... moved em into a different tent, with a different light....
did up completely different solutions, and currently still building it all....
Day 53 - still buildin... vids of new home...
Nutrifield, Rock Nitro, 1200-1500 ppm and 6.5 PH.... see if we can give em a good boost....
left em in pure water before puttin em in new solution....
Day 57 - pics vid.... been adjusting ph... down to 5.8.... they are just growin along nicely in the new home...
got a fan for the tent... looks good tho... solution temp is abit high,
fan will fix that..... changed just the tanks to 5lt Cereal containers, they are alot taller, more room below the container... fits perfect....
Day 59 - pics vids, , 6.2ph, 1300ppm ... water temps been getting abit high, fans should arrive next week....
👍😎
120W Aluminum+PC Plug 2835SMD 7995-9594LM
1131Pcs Red+234Pcs Blue
* Blue(wavelength: 430nm, 554nm
* Red(wavelength: 630nm 660nm)


Likes
38
Share


@MrSpooky882
Follow
Die Woche ist ansich gut verlaufen, 2 Pflanzen haben irgendetwas aber ich weiß nicht woran es liegt.
Morgen/heute werden alle plants ausgedünnt, und ich werde die beiden Kastenventilatoren rechts und links an den Zelt Wänden gegen oszilierende monky Fans an den Mittel Stangen anbringen, ich spare Platz in der Mittel Reihe den ich brauche.
Ich bin sehr zufrieden bisher mal sehen ob ich raus finde was die 2 Pflanzen haben...ansonsten wünsche ich euch eine schöne woche und stay high 😬😁👌
Ach so an Dünge tagen gieße ich immer easy 2L pro Topf. Und dazu von Madame Grow alle 4 bis 7 Tage Flower Karma rauf sprühen das Zeug ist top!👌
The week itself went well, 2 plants have something but I don't know what the reason is.
Tomorrow all the plants will be thinned out, and I will put the two box fans on the right and left of the tent walls against oscillating monky fans on the middle poles, I save space in the middle row that I need.
I'm very satisfied so far, let's see if I can find out what the 2 plants have... otherwise I wish you a nice week and stay high 😬😁👌
Oh, on fertilizer days I always pour easy 2L per pot. And spray Madame Grow with Flower Karma every 4 to 7 days, the stuff is great!👌😬


Likes
10
Share


@Stacy_smokez
Follow
For my second girl, this was overall the pretty good grow. Can’t wait to start my third growth and see what I can do to make sure that how comes even better. overall, it was amazing grow and I can’t wait to use the same product in my next grow
