


Likes
Comments
Share


@Dezignertreez
Follow
I didn’t yield as much as I would like but I did get some quality flower 83 ofgrams worth between the three cardi b plants, and about 74 grams of 2 envy mintz plants I did have a lot of stress in the beginning which got corrected late and also I might have flipped too early , but all in all it’s some tasty beautiful flower definitely running again gonna do 1 plant this time so tune in for that journal
Likes
4
Share


@Ninjabuds
Follow
The rainbow melon is living up to fastbuds reputation in every way it’s growing fast great leaves great roots it smells like gas already it’s gonna be a powerhouse plant
This past week was smooth sailing and I topped all the plants

Likes
10
Share


@SgtDoofy
Follow
4/27
Fed half strength nutes with epsom salt and molasses to Amnesia. Trainwreck got plain PH'd water.

Likes
22
Share

@Trippie
Follow
First 45gr of tops are off. Keepin an eye on the rest. Ma lenz came in tha mail today, awesome!


Likes
14
Share


@BLAZED
Follow
Week 13 (24-4 to 30-4)
24-4
Temperature: 23.8 degrees (lights on) 18.9 degrees (lights off)
Humidity: 66% (highest) 53% (lowest)
No pictures.
Opened the reservoir for a couple of minutes.
25-4
Temperature: 24.7 degrees (lights on) 18.9 degrees (lights off)
Humidity: 66% (highest) 52% (lowest)
Increased the strength of the light from 60% to 65%.
26-4
Temperature: 25.2 degrees (lights on) 19.5 degrees (lights off)
Humidity: 66% (highest) 51% (lowest)
No pictures.
I emptied the reservoir, there was 2750ml left.
I made a 15L new feed and added it to the reservoir.
Opened the reservoir for a couple of minutes.
27-4
Temperature: 26 degrees (lights on) 19.9 degrees (lights off)
Humidity: 65% (highest) 47% (lowest)
28-4
Temperature: 26.4 degrees (lights on) 21.5 degrees (lights off)
Humidity: 64% (highest) 47% (lowest)
Opened the reservoir for a couple of minutes.
29-4
Temperature: 26.4 degrees (lights on) 20.6 degrees (lights off)
Humidity: 64% (highest) 39% (lowest)
Increased the strength of the light from 65% to 70%
Opened the reservoir for a couple of minutes.
30-4
Temperature: 27.4 degrees (lights on) 21.1 degrees (lights off)
Humidity: 62% (highest) 47% (lowest)


Likes
18
Share


@Staffedition
Follow
Привет друзья. Моей растихе сегодня 43 дня.
Начал применять LST технику на 19 дне и продалжаю применять её через день, а 18 августа добавил ДЕФОЛИЗАЦИЮ
С 20.08 ДЕФОЛИЗАЦИЮ делаю каждые 3,4 дня
С 20.08 LST технику делаю каждые 4.6 дней
На сегодняшний день влажность 70%
Чувствуется по листьям много влажности.
Буду что решать с этим вопросом, ведь впереди цветение.
Не смотря на высокую влажность растение растёт хорошо. генетика радует.
Всем мира и добра!
https://t.me/smail_seeds
#Smail_Seeds
Likes
38
Share


@Snakeking
Follow
Guys i swear it’s like my girls are awakened after a few changes and i love to share with who interested about it.
One of them is put something under your fabric pots in outdoor growing to keep your bottom of your pot a little bit wet and don’t worry about water sitting in there because there will be no water after just a few hours.
There are 2 other things and i will answer to who ask only! Believe me you want to know about this
Likes
175
Share


@love_2_grow
Follow
Day 1 Flower (Day 43)
Wooohoooo! First day of flower! I decided to flip both plants after all. The thing is that I will be fully vaccinated against Corona by mid-July, and when that is done, I'm off on vacation. After 1,5 years of this pandemic crap, I'm more than ready to travel again, to see the world, meet new people, and have new experiences.
So yeah, this strain is supposed to be a fast flowering strain (45 days!), so mid-July should do it.
I switched to the Flower Induction light recipe in my main tent, and I will let that recipe run for some days before I switch over to the regular Flower recipe. The tiny tent has nothing so fancy and was switched to a regular 12/12 schedule.
Speaking about lights. That cheap budget light that I bought for my veggies when I moved in my ViparSpectra light into the tiny tent broke down after only two days. So much for trying to save a bit by buying something cheap. I've already sent it back and won't get another light as I think the tomatoes and chilis are ready to move outside. I'll wait and buy this fall instead, but I won't go for the cheapest light I can find then. lol
I was foliar feeding the girls with filtered compost tea while they were still sleeping. I only spray when the lights are out to avoid any leaf burns.
A few hours later, after the girls woke up, I gave them each around 3 liters of unfiltered pH 6.2 compost tea. I FINALLY remembered to pH the compost tea. Woooooo!!!
That was all today.
Day 2 Flower (Day 44)
Today was a really busy day. I opened the tents, took pics, closed up the tents. Phew! Exhausting.
Day 3 Flower (Day 45)
Alright, today was a bit more work than yesterday but still fairly relaxed.
I watered the girls; the left one got 3 liters, and the right one got 4.5 liters of pH 6.0 water.
I noticed a bit of light bleaching on the girl in the small tent, so I turned down the light a bit and increased the distance to the canopy.
It is very tight in there, but that is expected with such a small tent.
I will need to raise the light more in the future, and I'll probably have to resort to a bit of MacGyver-ism to make it work but that's a problem for a later day.
The girl in the main tent has a bit of an uneven canopy where the left side is taller, so I raised the left light as the light level was around 1300 PPFD.
I also super-cropped half a dozen branches to slow them down and let the rest of the canopy catch up. It's probably the last training I do before the girls go into flower.
Finally, I did a bit of defoliating by removing a few leaves that weren't getting any light low down on the girls.
Day 4 Flower (Day 46)
Fuck. Disaster struck. I opened the main tent today and found that the CO2 bag had fallen down and broken one of the main branches. That one branch is responsible for about a quarter of the canopy, so losing it would suck.
I got busy right away taping the broken branch and used some old chili stalks to support the branch further. I also watered it with around 1.5 liters of pH 6.5 water hoping that it will be beneficial.
Now, all I can do is wait and hope for the best.
For those of you who have been following this diary, you already know that I dislike this CO2 bag because it smells like shit. Literally. Now though, I really hate this friggin shit bag and its weird hanging contraption that is as shitty as the smell from the bag.
Day 5 Flower (Day 47)
So far so good. Last night, I checked in on her a couple of hours after I taped the broken branch and the left side of the canopy was already back up with no drooping leaves or branches. YES! However, it was still nerve-wracking to open the tent today but she looked just fine. Fingers crossed that it holds.
Naturally, I don't want to disturb her much right now so all I did today was to water her and carefully LST a couple of branches that got messed up yesterday. I gave her 2 liters of pH 6-0 water and 1 liter of water to the girl in the small tent.
Speaking of the small tent. There's some light bleaching on the tips of the leaves closest to the light so I turned down the dimmer even further down to 40%. I need to try to raise the light but can only gain another 5-7 cm. The tent is soo tiny lol. Will be interesting to see if she will even fit in there after the stretch is done.
I also raised the lights in the main tent as the canopy was getting a bit close.
That was it for today.
Day 6 Flower (Day 48)
Chill day today. All I did today was to water the girls 3 liters each of pH 6.5 water.
Day 7 Flower (Day 49)
Today was the end of a rather tumultuous first week of flower. It looks like I got lucky, though, and that the branch on the right girl will survive. She is growing strong and loving life. I am hopeful.
She is a big girl and drinks a lot, so I'm watering her every day (around 10% of pot volume), and I gave her 3 liters of pH 6.4 water today. The left girl didn't need any, so I just measured both girls, snapped some pics and videos before zipping up both tents.
The left girl is 50 cm tall (12 cm increase in a week), and the right girl is 77 cm tall (31 cm increase in a week!)

Likes
7
Share


@MaxWax
Follow
The plants are all doing well, unfortunately they are developed differently, in the future I will make a report per plant


Likes
4
Share

@DogDoctorOfficial
Follow
LSD × Zamnesia — Week 6 From Seed
(Week 2 of Flower / Early Pre-Flower)
Quick recap for anyone just joining
We’re at Week 6 from seed, which we’re counting as Week 2 of flower. Plants were grown 12/12 from seed, with only leaf tucking and very light bending, no topping, no hard training, no defoliation so far. The goal with this run is maximum natural expression of the genetics, not shape enforcement.
This week marks the transition into pre-flower: stretch is active, structure is being decided, and the plants are still very much setting their architecture.
⸻
Room & Environmental Conditions (Stabilized This Week)
After some fluctuations earlier, conditions are now much more stable, and the plants are clearly responding well.
• Temperature: ~27.5 °C
• Humidity: ~65%
• CO₂: ~900 ppm
• PPFD: ~600–850
• Smaller plants: ~600–700
• Taller plants: up to ~800–850
• Plants are managing light by growing into the photons naturally
• Nutrients:
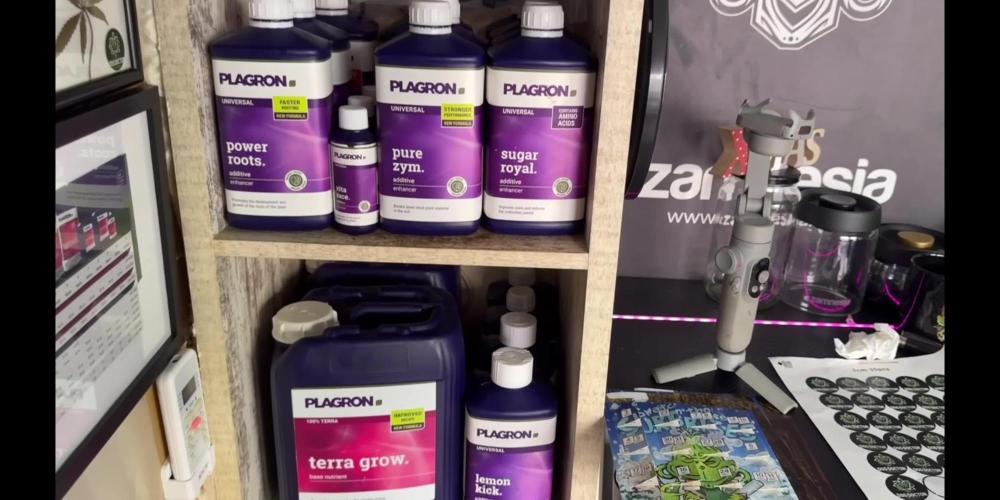
• Switched from Plagron Terra Grow → Terra Bloom
• Following the Plagron feeding schedule
• This was the only change made
• Watering:
• pH: 6.5
• EC: 2.4
• Root / Reservoir Temperature:
• ~17 °C (a bit on the cold side, acknowledged)
• Plants are adapting well and showing no negative response so far
⸻
Plant Observations — LSD × Zamnesia
Honestly… these girls look outstanding.
Even though LSD is often described as a more indica-leaning hybrid, these plants are expressing a strong sativa-style structure:
• Tall, upright growth
• Dominant central main stem
• Side branches present, but clearly secondary
• Very uniform behavior across all plants → strong genetic consistency
Each plant is showing roughly 12–14 nodes, with:
• Lower branches well developed
• Side branches about half the size of the main stem
• No signs that side branches want to overtake the main cola
This is important:
👉 this is not a training issue and not a phenotype split
All seeds are behaving the same way, which tells us this is genetic expression, not grower influence.
⸻
Training & Defoliation — Why We’re Doing Nothing
There has been:
• ❌ No topping
• ❌ No hard training
• ❌ No defoliation
Only:
• ✔️ Leaf tucking
• ✔️ Very light bending when needed
Why?
Because at this stage, we want to:
• Let the plants decide their final structure
• Observe whether this genetic wants:
• One dominant main cola
• With several secondary colas supported by under-canopy lighting
This run is about listening, not forcing.
And with under-canopy lights active, even those secondary branches are getting meaningful light, which should pay off later.
⸻
Where We Are Right Now
• Plants are still in pre-flower
• Stretch is ongoing
• Bud sites are forming, but structure is not finished
• Each plant is moving at its own rhythm, which is exactly what we want to see
This week is about stability, not intervention.
⸻
What to Expect Next Week (Week 3 Flower)
Here’s what’s likely coming:
• Stretch will continue, possibly peak
• Clearer confirmation of:
• Dominant main cola behavior
• Final spacing between nodes
• Pre-flowers will become more defined
• Still no rush to defoliate unless airflow becomes an issue
• Feeding stays consistent—no chasing, no stacking products
Next week is about watching, not reacting.
⸻
Final Thoughts
This marks a clean, confident Week 6 / Week 2 Flower checkpoint.
Environment is stable, nutrition is dialed, and the plants are clearly happy expressing themselves.
FOR DISCOUNT CODES AND MORE JUST FOLLOW THE LINK https://website.beacons.ai/dogdoctorofficial
📲 Don’t forget to Subscribe and follow me on Instagram and YouTube @DogDoctorOfficial for exclusive content, real-time updates, and behind-the-scenes magic. We’ve got so much more coming, including transplanting and all the amazing techniques that go along with it. You won’t want to miss it.GrowDiaries Journal: https://growdiaries.com/grower/dogdoctorofficial
Instagram: https://www.instagram.com/dogdoctorofficial/
YouTube: https://www.youtube.com/@dogdoctorofficial
⸻
Explore the Gear that Powers My Grow
If you’re curious about the tech I’m using, check out these links:
🔆 Lighting & Environmental Control
• Future of Grow — Advanced LED lighting technology
https://www.futureofgrow.com/
DISCOUNT CODE: DOG20
• Lumiflora — Under-canopy LED lighting
https://lumiflorade.com/
• TrollMaster — Environmental controllers and automation gear (past collaboration)
⸻
Genetics
• Zamnesia Seeds — Genetics used in this project
https://www.zamnesia.com/
⸻
🌱 Soil, Substrates, Boosters & Root Support
• Plagron — Substrates, bio mixes, and supportive products
https://plagron.com/en/
⸻
🎒 Storage, Curing & Preservation
• Grove Bags — Curing and storage solutions
https://grovebags.com/
⸻
📸 Photography Equipment & Tools
(Not sponsors, but part of my creative toolkit)
• Sony A6700
• Sony full-frame macro lens + few more
• Stacking photography workflow - learning
• iPhone (for behind-the-scenes shots)
We’ve got much more coming as we move through the grow cycles. Trust me, you won’t want to miss the next steps, let’s push the boundaries of indoor horticulture together!
As always, this is shared for educational purposes, aiming to spread understanding and appreciation for this plant. Let’s celebrate it responsibly and continue to learn and grow together.
With true love comes happiness. Always believe in yourself, and always do things expecting nothing and with an open heart. Be a giver, and the universe will give back in ways you could never imagine.
💚 Growers love to all 💚
📸 P.S. – The Eye Behind the Lens
All photos in this diary (for now — except for the ones showing the camera, which I took with an iPhone) are taken with a Sony A6700 paired with a Sony full-frame macro lens and a few more.
Photography is part of the story — it’s how we share the fine textures, the glow, and the quiet details that words can’t always capture.
I’ve also started experimenting with photo stacking — a technique where multiple images, each taken at a slightly different focus point, are layered together to create one perfectly sharp image from front to back.
It’s not digital enhancement or AI; it’s pure photography — a way to reveal the plant’s beauty in microscopic depth, from trichome to petal.
You’ll even see a few shots of "ghost me" capturing the shots — camera, lens, setup — because every grow deserves not just to be cultivated, but documented like art.
FOR DISCOUNT CODES AND MORE JUST FOLLOW THE LINK https://website.beacons.ai/dogdoctorofficial
NEW DISCORD - Official Server Invite Link : https://discord.gg/ksjAkA5T74

Likes
27
Share


@RDWCGrowing
Follow
1/20/2023- So much to do pre grow and over the next 16 days, absolute first order of business is that I have to take down my current Grow---TIMBER-- Then I have a list of things I have to get done in order to be ready to start this grow 1 Feb.
With that said
T - 2 days until start 48 hour Flush
T - 2 days until Start 48 hours of Light
T - 4 days until TIMBER!!!
Items that need to be done before 1 Feb 2023
1. I need to clean the tent out
2. I need to clean the equipment- Proper Sanitization between grows in Hydro is a must!!!
3. I need to get the hole in the ceiling above my tent repaired- For my last grow I had a deep sink installed in my grow room, to make Hydroponics a little bit easier and have a water source in the same room. The seals on the pipes they were installing broke and leaked through the ceiling causing some damage all the way across my grow room, I was already weeks into my grow and couldn't risk them working above my tent and it would have been very awkward positon for them to be working in as well, so have to get this done quickly between chop and germination.
4. I have to install my new light- I was using a Vivosun 4000 and for this grow I am switching up to a Spider-farmer SF 7000.
1/20/23- For this upcoming grow I am working with M/F photo seeds so I ordered 4 Sex determination kits. I recieved my my 4 Sex determination testing kits from Rimrock Analytics today. I will be using these to test my plants at week 2 of Veg so that when/if I take clones I know I am taking them off females. As well as I don't want to accidently pollinate my tent during this grow I am looking for big beautiful buds not seeded buds. :-)
1/24/2023- Harvest of current grow- Started at 2:00pm and finshed wet trim and firt batch into the freeze dryer.
1/25/2023- Next batch into the freeze dryer and cleaning all my equipment for this Grow.
T-1 Day until the workers are supposed to be here to fix the hole in the Grow Room.
T-3 days until I instll my new Gorilla Grow Tent and my New Light Spider Farmer SE-7000 for this grow.
T-7 Days until Start of Germination
1/26/2023- Harvest is done ran through the Freeze dryer and dry tim completed.
1/27/2023- Grow Room repairs completed. Hole is gone Letting the paint dry before I install the new tent.
T-2 days until Install the New Gorilla Grow tent and the new Light
T-3 days until I put the hydro equipment in the new tent
T-5 days until Germination
1/29/2023- Day 0- Final Pre Germination activities
Germination Start T-3 days
The paint on the ceiling was dry and it was time to finish prepping for Germination. I got the following items knocked off my list.
New 4X4 Gorilla Grow Tent is up and ready
New Spider Farmer SE-7000 Light is installed- Thanks Moony Grows for the suggestion and for the Code that got me some money off and free shipping (Moonygrows)!! I turned the lights all the way up to max and set the timer to 18/6 0600-0000. I will keep an eye on the temperature and humidity without my plants and see how hot it gets with the new light.
I put my Hydro system back together and put in 40 gallons of water into it, time to monitor for leaks the next few days.
I Setup my cloning machine for Germination Days 3-11
1/30/2023
let me break down the situation, ROOM in the TENT.. Enough said.. No really I tried putting my exhaust system up in the new tent with my new light, The light is so big corner to corner that it really didn't give me enough room for the lights be be raised, with the exahust hanging the buckets my plants are Starting in are 2 and 1/2 feet off the ground, great for plenty of room for roots but not so great for upwards space for the plant to grow. In a 6' 11 tent with the exauhst in side and hanging that only gave me a little over 4 feet of grow room to play with. My last grow if you saw my diary, anyone could tell I was struggling to keep the buds off the lights. No good, Since space was such an issue I was running my carbon filter inside on the ground but It really needed to be up sucking the heat out not shooting the cool out. With that setup I was sucking air through the filter and pushing it out the tent at a bottom exhaust hole cold out. Wasn't doing me any good for my heat. I was hitting temps of up to 85 degrees. I bought a portable AC unit and have been running it in the grow room to try and keep temps below 85 and I have had to lower the power on my lights during grow also not ideal.. With that said a friend of mine MoonyGrows (Check out his diary) took the time to look at my issue send me a picture of my grow tent setup with detailed instructions on how to suck the air out from the top but putting my filter and fan on top of my tent so no room issue and I am sucking the air out from the top where the heat is instead of pushing the air out from the bottom where the cool is... THANK YOU MoonyGrows For taking the time to help me get this straightened out.. Now I have room and I have the exhausts working right and now my temps with everything at 100% are topping out at 80 this dropped the temp by 5 + degrees at 100% max.
T-2 days until Start of Germination
Prepped my seed tray with humidity dome
Prepped my Rapid Rooter plugs. I Used RO water, and I added a few drops of Hydrogen peroxide to Oxygenate the water. I then PH balanced between 5.7-6.0 the same that they will be getting in the Cloning Machine and when they get to thier final grow pod. I perfere the 5.8x range and I hit 5.84 for these rapid rooters. If you want to see a complete video on the process HowWeedGrow has an amzing video that shows step by step how to do it and explains it better than I ever could including how to plant the seeds. Which I will cover when I get to that step on Wed. https://www.howweedgrow.com/how-germinate-weed-seeds-cannabis-rapid-rooters/
1/31/2023
T-1 day until Germination Start
All set and ready have my Rapid Rooter plugs ready to go have my seeds out.. Have my seed tray warming up tonight. Tomorrow morning right into the Rapid Rooter then strait into the tray. I will spray the dome to start the humidity in there.
2/1/2023
Germination Day!!
Let the games begin!
0600am Put the seeds into the Root Riots. And then put the seeded Root Riots into their first home the Seed tray. I have them under the light 24/7. Sprayed the dome
7:30pm Sprayed the Dome to keep humidity going on the dome.
2/2/2023
Day 1 of Germination
Sprayed the Dome in the morning
Sprayed the Dome in the evening
2/3/2023
Day 2 of Germination
Roots are starting to come out the bottom of the root riot plugs and the heads are slowly popping out of Number 4 just below the surface.
Afternoon- Number 4 has popped up
Evening- Number 3 has popped up as well. Happy Dance!!
2/4/2023
Day 3 - Germination
Surprise Surprise Surprise- all 4 have now poked their heads up.. Happy day!! 100% Germination succeeded.
Now major milestone to track is how many are female and how many are male.
I will take look at the roots this afternoon/evening and see if they have enough root to go into the cloning machine for the next 7 days before they go into their Hydro Pods.
Day 3 - Germination - Evening..
Roots looked good and they were tall enough to make it into the cloning machine.
Now that they are all in the cloning machine I have switched the lighting to veg state 18 on 6 off.
2/5/2023
Day 4 - Germination - Morning
All the Ladies (fingers crossed) looking great stretching nicely and look nice and green, Photo synthesis underway....
UPDATE!! After a very interesting POD cast on FSTS by Dr. Bruce Bugsbee from Utah University, I have shifted my lighting to 24 hours on through seedling and then I am going to shift to 20 hours on the rest of Veg.
2/6/2023
Day 5 - Germination
While Checking on my conditions inside the new tent last night, I found that the Humidity was down to 39 Percent. I added an AquaOasis Cool Mist Humidifier, the reason I selected this humidifier is that I needed one that could be turned on and off utilizing my Inkbird Humidity Controller IHC200 that I have my Pro Breeze Dehumidifier currently running with.
Root structures are starting to get there about 1/4 of an inch.
2/7/2023
Day 6 - Germination
Everything seems on track more roots poking out of each today. They are each getting a little taller as well.
Checked in the evening and number 3 was drooping the Root riot plug on the bottome was dry and the roots were not in the water yet. I raised the water just enough that the longest root that was sticking out is now hitting the water.
2/8/2023
Day 7 - Germination
Everything looked good while checking in on them this morning number 3 is now full up and no droop again.
2/9/2023
Day 8 - Germination
T-2 days until Plant into Forever Pods and we start week 1 of Veg .. :-)
Surprising thing to me is that number 1 and 2 were later in popping then 3 and 4 but the roots are growing longer in 1 and 2.
2/10/2023
Day 9 - Germination
Number 1 and Number 2 are definitely ready for transplant today.. Based on how they were yesterday and where they are today I am hoping by tomorrow 3 and 4 are ready. Today they look to me where 1 and 2 did yesterday.. I really hope 3 and 4 catch up by tomorrow since..
T-1 day until transplant to new/ final home for grow.
Need the roots long enough to have some clay down in the basket to keep the root riot out of the water and only roots in the water..
2/11/2023
Day 10 - Germination
Today they got placed in thier forever Home, 7 days from Sprout and 7 days until Week 1 Start.
PPM- 180 this is water out of the Tap
Temp Water: 70.7
Temp Tent: 77
Humidity: 40% I have a humidifier going 24/7 to try and bring this up.. I also have Humidity Domes on each plant.
2/12/2023
Day 11 - Germination
Sprayed the domes, all are looking good.. Nothing much to do at this phase but Keep monitoring the PH level in the system and making sure they have a comfortable home.
T-6 days until Week 1 start
2/13/2023
Day 12 - Germination
Sprayed the domes, They were looking a little yellow today so I moved the light down to assist. Nothing much to do at this phase but Keep monitoring the PH level in the system and making sure they have a comfortable home.
T-5 days until Week 1 start
2/14/2023
Day 13 - Germination
Sprayed the domes, They were looking a little Florissant yellow today, with what looks like slight burn on the tips, I talked with a fellow grower and we agreed that It was probably that I was drowning them, Yes you can drown you plants even in Hydro, but only early on.. :-) It usually happens with the water being too high, which soaks not only the roots but the medium (root Riot plug in this case). I lowered the water from touching the bottom of the pot to about 1" away. This will probably take 3-4 days to resolve. I will continue my daily monitoring.
T-4 days until Week 1 start
2/15/2023
Day 14 - Germination
Sprayed the domes, continue my daily monitoring they look a little darker green instead of lime green now that I lowered the water levels in the system, so I think that I might have resolved the issue but it will take a few days for recovery to happen.
T-3 days until Week 1 start
2/16/2023
Day 15 - Germination
I looked in on them this morning, 3 and 4 look like they are doing well and recovering nicely. Number 1 not so much it has brown spots on the leaves, this very well can still be a side effect of the overwatering but I decide to go ahead and add Nutes earlier than I was planning just incase. I was going to wait until Saturday but I think intervention is necessary now especially after drowning them early on.
I added 1/2 what I am planning on adding for week 1 start. I also think I am going to adjust my chart to add 1/2 2 days after plant from now on. I don't think it would hurt it to have some Nutes to pull from.
.25ml/Gal Calmag = 12.5ml
1ml/gal GH FloraMicro= 50ml
1ml/gal GH FloraGro = 50ml
1ml/gal GH FloraBloom = 50ml
T-2 days until Week 1 start = I will drain the system and start it over on Saturday with Week 1 Nutes.
2/17/2023
Day 16- Germination
I didn't even want to post today after looking in on them this morning, 3 of the 4 are now showing signs of dronwing.. Brown spots on the leaves, the water levels were still too high.. I drained about another inch out of the tanks.. Will see how quick they recover.. I start week 1 tomorrow and will have to ensure my water levels are at least 1" away from the basket on this round.

Likes
92
Share


@Roberts
Follow
Apple Fritter is looking pretty neat. Plus the mutation cola dead center is a new one for me. I am not sure what that is called. Still neat! She is in a New Level Hydro bucket, under a Spider Farmer SE5000 light. Thank you Spider Farmer, New Level Hydro, and Amsterdam Marijuana Seeds 💪❄️🌱
Thank you grow diaries community for the 👇likes👇, follows, comments, and subscriptions on my YouTube channel👇. ❄️🌱🍻 Happy Growing 🌱🌱🌱
https://youtube.com/channel/UCAhN7yRzWLpcaRHhMIQ7X4g
Www.amsterdammarijuanaseeds.com
SE5000
https://amzn.to/3qFpAML
Spider Farmer Official Website Links:
US&Worldwide: https://www.spider-farmer.com
UK: https://spiderfarmer.co.uk
CA: https://spiderfarmer.ca
EU: https://spiderfarmer.eu
AU: https://spiderfarmer.com.au
Coupon Code: saveurcash
Www.newlevelhydro.com
Www.hygrozyme.com

Likes
49
Share


@AsNoriu
Follow
Day 22. Girls loved LST and now its absolute single bush ;)))
Hope they will start stretching a bit otherwise i will have soccer ball size one nugs instead of plant ;)))
In plans new wave of heavy training on thursday and feed.
Ordered new fans, old ones tend to die in a year of heavy work, theirs speed reduces a lot ...
Morning / evening showers and thats all my attention...
Can't tuck leaves, can't spread them yet, but hopefully next week all pot space will be taken.
Kushes are behind, they will be fimed or toped.
My LST style allows new branches to stretch up a bit and on second day i release leaves from prison, despite being lifted from soil, they touch each other and sweat, that brings static moist - highway to mold problems. But on first LST training i touch, bend them a lot, target to free up and expose all branches to light, at this time main top usually lowest. Wash your hands and do it before watering .
If you need you can twist stem left or right, to find best position for easy tucking, if you can't - sometimes view leaves has to fall ...
Day 24. Heavy training straight before night, hope to make everything :
1. New floor fans
2. New air fans
3. Heavy wave of LST and pot management
4. Watering.
All done !
Had no time to make photos, but girls got tie supports around pots, loads of tucking, few soft wires and loads of showers, they will be fed tomorrow ..
Don't forget its day 20-22 from first sign of life, both main strains grow amazing and super compact.
Kushes a bit struggling, they didn't enjoy 6.0 watering and i think light and humidity is way of range for younger plants... plus sensitive to nutes ? But they fight and grow, will have to top them next week.
Day 25. I know sometimes it happens, but one of Cheeses was too fat and thick and snaped during night after heavy LST session. First time in my life, once i snaped myself, now pressure did the thing ...
Day 30. Work took me totally away from growing, have no time, just water them and spray twice a day. Tomorrow should be next LST training done. Will upload how they bushed out.
Happy growing !!!

Likes
14
Share


@BoboLacetti
Follow
After I repotted the plants, they grew really well and healthily for 12 days. Now they are showing iron deficiency again... I already had the problem before repotting. The pH value of the earth has fallen again to 4.8 to 5.7. This time I used biodegradable braids to germinate. I believe that this is the reason for the PH fluctuations in the soil. Every time I water I measure the PH and adjust it to 6 - 6.5. Nevertheless, the PH value drops back to 4 to 5. I'm trying to correct the problem.
I also work with neemoil because I can't get rid of the trips

Likes
4
Share


@Nina00
Follow
Die gelben Blattspitzen haben sich vom 12.10-18.10.24 sehr vermehrt. Betroffen sind nur die jungen Blätter, spitzen sind stark sichtbar gelb geworden. Ph-Wert beträgt aktuell 7.0.
Ich werde der Pflanze keinen Dünger mehr geben. Ph-Wert vom Wasser wird auf natürliche Weise gesenkt, um die Erde durchzuspülen.

Likes
8
Share


@RBG
Follow
28/10/25Grape doing well overall, absolutely loving how shoes keeping her shape but i do want to start trying to spread her out a bit more, I'm hoping for some lovely growth overnight so she can start being bent out so that middle is a little more spread out
Nutrients change today ( a day early ) because i didnt like how she smelt, so flushes, filled hit with 400ml sleeps then flushed, refilled and nutrients
Floramax veg 1
Floramax Rezin plus
Floramax flowering enhancer
Floramax Organabud
Green Planet vitathrive
Isn cal mag
Green planet massive bloom
Green planet bud booster ( 30ml scoops x 4 )
Cyco platinum series silica
Sleeps with the fishez ( HOCI )
Hit 4.8 e.c, changed 100L got 2.3-2.4e.c, 6.1ph. Used a lot but wanted to get rid of the Green planet line plus the ISN cal mag as im switching out to sensi cal mag
Week 3 here we go!
29/10/25
Light defoil and spread to get that light in, last week to do anything then let her just thrive and vibe


