




Likes
2
Share


@Bluemels
Follow
Tag 44: getoppt an 4 Zweigen.
Tag 47: Ich gebe Alg a mic zur Hitzestress Behandlung ins gießwasser, die Pflanze ist an machen Stellen schon recht hell geworden, aber draußen wird es auch bald Kühler.

Likes
32
Share


Likes
16
Share


@Rungood
Follow
Floraison +18 jours . Le stretch est plus important que sur le pied mère 😍 bizarre mais tant mieux 😍
Likes
13
Share


@Gi773s
Follow
Grow 003 West Coast OG & Girl Scout Cookies
Day 92 1,5L water
Day 96 1,5l water
15L Air pots, BioBizz light mix, extra perlite, Bio Nova Microlife, The ExHale Homegrown CO2 Bag

Likes
5
Share

@MrLahey
Follow
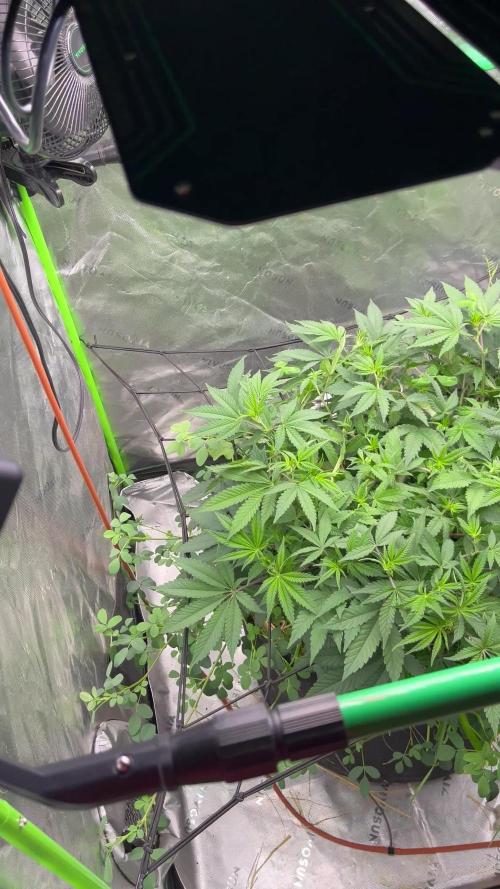
Day nine of flower and so far so good. I’m gonna let her go another 12 days or so before I do a deep defoliation and open up the canopy for better light penetration and clear out some of the lower branches and leaves. For now I’m just tucking fan leaves daily to expose bud sites to more light. Might give her a small amount of amendments next week to send her off to the finish line with.
So far she looks good to my novice eyes. My favorite part of the grow cycle is just around the corner!


Processing
Likes
20
Share


Likes
14
Share


@GodZilla_Owner
Follow
Week 4 Update – Progress and Adjustments 🌱
It’s been another eventful week in my grow tent! Here’s how things are shaping up:
GHF#2 Update:
I decided to let GHF#2 go and followed the community's advice to rename #3 to AN#3. I’ve been preparing my osmosis water with CalMag Xtra, bringing the EC to 0.35, and adding nutrients to reach a total EC of 1.2.
AN#3
This plant has been a challenge from the start, struggling with deformed cotyledons and unusual leaf patterns. However, there’s finally some good news! The roots are healthy and reaching the pot’s edges, and growth is picking up steadily. Adjusting the pH and nutrients seems to have helped a lot.
BioBizz#1
I’ve moved this one to the larger tent, and it’s been performing well despite a slightly yellowish tint. It’s now on its way to flowering (currently at BT2). Unfortunately, the usual CalMag deficiency has reappeared, even with 1.3ml/L CalMag and 0.05g/L Epsom salt in the feed.
AN#4
This plant is thriving with no visible deficiencies, drinking 1L per day. However, I noticed pre-flowering signs while still on an 18/4 light schedule. Has anyone else experienced this with photoperiod plants? Otherwise, everything looks great, and I’ve been feeding it at an EC of 1.5.
Container Size Feedback
I’ve realized that 9L pots are a bit too small for my setup. I’m watering 3L every two days now, and I believe 12-15L pots would be ideal for future grows.
Timelapse Recovery!
For AN#3, I identified a potential issue with the pH of the drain water—it was as low as 5.3 after its first feeding with Advanced Nutrients. Before that, it only received plain tap water. I’ve corrected this with pH-adjusted water (6.6) and nutrients at an EC of 0.9. You can see its steady recovery in the timelapse!
Overall, things are coming together, and I’m excited to see how the plants perform in the coming weeks. Thanks for following along!


Likes
20
Share


@apmcfly76
Follow
Surprised by the size and can’t wait for It wtf they growing big let’s go 💪
Likes
7
Share

@DeepRootsGrowTrees
Follow
GRANDPA ZOMBIE 🧟♂️ / IZI SEEDS
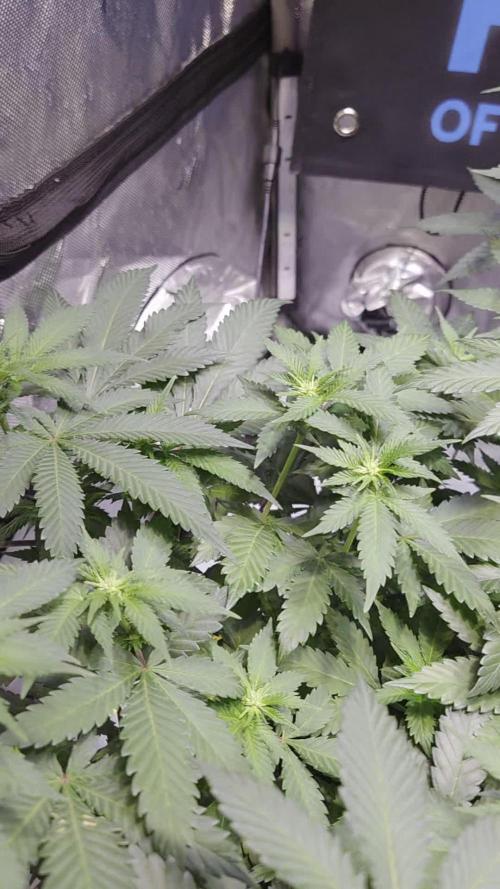
WEEK #8 OVERALL
WEEK #2 FLOWER
This week you can 👀 she's slowed 🐌 down the stretch and started focusing on flower she's still stretching but not at such a rapid rate. She's about as wide as she is tall and she's got multiple bud sites going on. She's looking healthy and vibrant green 💚!! STAY GROWING MY FRIENDS!!!
THANK YOU FOR STOPPING ✋️ BY AND TAKING A LOOK IT'S MUCH APPRECIATED!!
THANK YOU IZI SEEDS!!!
GRANDPA ZOMBIE 🧟♂️ / IZI SEEDS

Likes
13
Share


@Pierrougarou21
Follow
Salut les Growmies,
Quelle superbe aventure cette génétique de chez Exotic Seeds.
Cette Zkittalicious depuis le debut m'étonne , de part sa grande vitalité .Malgré l attaque du caht , elle a reprise le dessus , elle a réagi merveilleusement bien a l entrainement que je lui ai fait subir ,LST ,Topping.....
Et maintenant comme vous pouvez le voir elle développe de nombreux sites floraux et elle devient de jour en jour de plus en plus frosty.
Donc en gros vous pouvez vous tourner vers Exotic Seed les yeux fermés et je lui donne une note de 9/10 pour sa vigueur, beauté, odeur pour la production on verra plus tard. Mais au vue des resultats mors de la phase croissance et debut de flo . Je m attend a de tres bons resultats 👍👍👍👍👍🤜🤛Merci Exotic Seeds.

Likes
18
Share


@Pennuts
Follow
Harvest time has come. It was an excellent cycle without any problems, in fact the plants were doing great and produced some beautiful buds. Now I will dry for 2 weeks plus cure for 1 month.

Likes
40
Share


@nijuana
Follow
Let's harvest ! Let's dry 💚 this was a good week like usual , it was the flushing and final week

Likes
15
Share


@dank604
Follow
Flush started today. It is SO nice to see colas coming out from the side!! Just like some of the pics I've seen from other wonderful growers here! I plan on growing more in 3 gallon pots but tent-size is an issue for me but I'll figure it out :D
Likes
9
Share

@Naujas
Follow
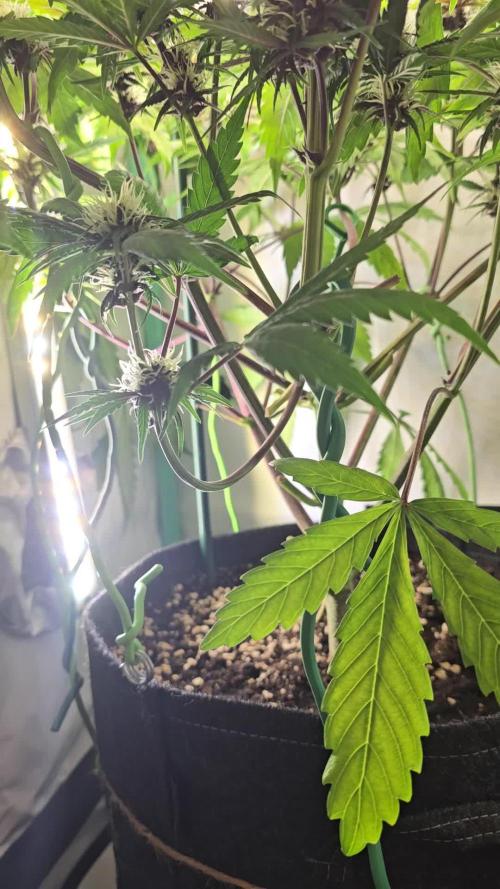
42 dienos!!! Mergaitė atgavo jėgas ir dabar deda pastangas krovindama gėles :) Mano palapinė per maža auginti dvi mergaites vienu metu, tad visada kyla problemų ;) bet manau, kad jos jau praeityje ir dabar viskas bus gerai :) Sėkmės visiems :).
Likes
27
Share

@DeepRootsGrowTrees
Follow
Week #16 Gelato-K By Kannabia
Week #5 Flower
She's about mid way through 🌼 covered in trichomes and you can smell her aroma it's strong 💪!! Great 👍 genetics at Kannabia Seeds!! Thank you for checking the diary much appreciated!!


Likes
6
Share


@Krautbauern
Follow
The chimera has grown extremely large. It has perfect internodal spacing so that the light can penetrate deep into the plant. Now the flowering starts, we increase the addition of Prosper the flowering fertiliser.