


Likes
12
Share


@GrowGuy97
Follow
Sorry for the lack of updating recently I have a new job & don’t have much time for anything but I just wanted to show how amazing these ladies are doing! Both Strains smell unbelievable & by far some of the frostiest plants I have grown, have taken to fox farm nutrients very & they have not really gave me any issues the entire grow! Will post some more updates around harvest time thanks for following friends!🙏🏼🙏🏼 Happy growing🌱🌱

Likes
21
Share


@PrairieFrostGrow
Follow
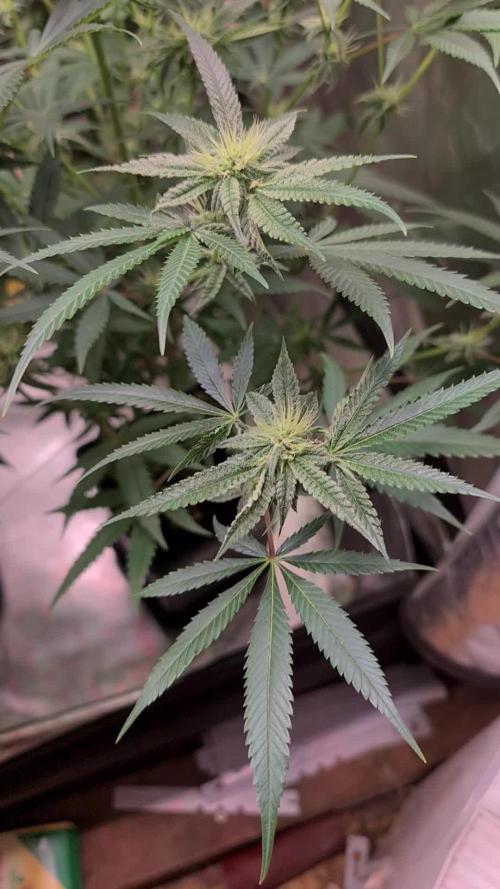
****** Week 8 Flower, November 7 to 13, 2020 ******
Hey Growmies......winding this run down........they are ripening this week and next.......this is the second week of flush.
Lights are down and temps are down to mimic fall.
Just lots of plain RO water this week......keep flushing out the media👍
One is growing spears......the other is growing bats😂👍
So much fox tailing that there will be a good mixture of trichomes at different stages of ripening.......should make for good smoke! Trichomes are continuing to come out more and bud swelling has continued,👍
That’s what I have for a quick update gang........as you can see they are by themselves in the tent now......these girls have more Sativa in them and taking a little longer to finish......better for me with trimming as well🤪😃🙏

Likes
40
Share


@BudXs
Follow
Nice growth after 4 days following a heavy defoliation. The Slurricane is overall smaller that the Bruce Banners they sit beside, but the nodal spacing is amazing and the branches all have ample access to the lights. The stems when crushed smell very heavily of lemon. This is a common trait with GreenMachine's grow of this strain, and he says his pheno like this turned out to be very fruity in flavor.
The 60 day countdown is on, this should be a frosty grow


Processing
Likes
8
Share


@Order_66
Follow
Hay good week the flowers have started to bulk up a bit .I've stopped the take root and started a low dose of explode . I've been taking a few more leaves an I've tied down a couple of branches to let the light get in . Lots of tricomes some frosty leaves and getting sticky and smelly .

Likes
201
Share


@JamMAKEcan
Follow
Very satisfying very
Sticky as heck. Smells already only few wk into flower.. She is going to be very strong.. Love it

Likes
14
Share


@Growbody
Follow
Herzlich Willkommen zu meinem Grow der Lemon Cherry Cookies Auto von FastBuds. Der Strain hat beim American Autoflower Cup in Los Angeles 2025 in der Kategorie Best Auto Hybrid den 2. Platz belegt. Wenn der Name hält was er verspricht, ist das genau das richtige für eine Naschkatze wie mich.
Für den Grow wird ein 20 Liter ROOTiES Stofftopf verwendet. Und die Bio Hanferde von Sonnenerde wird verwendet mit der Bio Faser zum Mulchen. Die Bio Hanferde habe ich noch mit Monster Bud Mix für Living Soil von BIONOVA und Zamnesia angereichert.
Tag 35: Die Lemon Cherry Cookies Auto von FastBuds geht in die Blüte. 1,5 Liter Brunnenwasser gegossen.
Tag 37: 1 Liter Brunnenwasser gegossen.
Tag 39: 1 Liter Brunnenwasser gegossen.
Tag 41: 1,5 Liter Brunnenwasser gaanz laangsam gegossen. Die Blüten wachsen unglaublich schnell.
Schön, dass du meinen Grow angesehen hast. Schau mal wieder rein. 🌱😎


Likes
1
Share

@Oims_Finest
Follow
Good day Mates.After bit starting problems, the two remaining plants catched up perfectly.
Buds started to grow really big'n'fat..
Strong Red fruit and spice on the Z-leaning pheno..👌
Likes
26
Share


@siL01337
Follow
What do you think about this road to candy kush express.... Let me know....

Likes
15
Share


@Wizzel420
Follow
Slight nute burn from last weeks feeding, you can just see yellowing on the tips, this week just fed water and molasses, 1 tbsp to 3ltrs, also gave a small water mid week, PH at 6.5. For the molasses the filtered water was coming out at a PH of 8, added the molasses which brought it down to 5.8. Plants looking and feeling healthy, I think most of the stretch is over and now she is concentrating on fattening up her buds, starting to frost...boom.
Continues to respond well to LST, have only had to give a slight defoliation so far.

Processing
Likes
3
Share


Likes
24
Share


@Captensmokey
Follow
We suffer from rain. But don't worry. They smell very much like weed. But blooms late. So she has to be strong. To be continued.

Likes
6
Share

@CalGonJim
Follow
2/2 12am Hotel is looking great, got a great feeling about this.
2/3 1:31M BILLY MAY'S VERSION OF STRANGERS IN THE NIGHT....THE GREATEST SONG FOR STONER EARS...SO MOVING.
2/3 12:01 PM I have all three of the trailer Park boys going in one tent. I cut Ricky down way way down and I’ll cut bubbles back a little bit. I want them all to flower at the same time and the Ricky plant has been growing since September so I can cut quite a bit off. She’ll be just fine. It’s kind of funny looking so they’re kind of trailer trash looking. It’s all perfect what I lack in ability. I’m making up for in showmanship so if I screw up, it’s on purpose. It’s part of the show you wouldn’t understand.🎥
2/6 12:22AM CBG'S ARE ALL FAILS...BAD SEEDS? NOT ONE TURNED OUT GOOD. SO CBG SEEDS ARE ALL GARBAGE AND IN THE FUCKING TRASH NOW.
AND I GOT LOTS OF DEVISTATING FINANCIAL NEWS SO I WILL BE SUICIDING OUT THIS MOTH SO FUCK YOU YOU THOSE WHO CAUSED THIS

Likes
14
Share


Likes
20
Share


@m0use
Follow
Not a bad week, nothing much happening, topped the plants and made some more dry PH down as I don't like using the liquid Phosphoric acid down as I don't use it fast enough and its going bad. Starting to discolor and tun yellow from clear. The acorbic acid is also ageing and going yellow, will need to replace it soon. ran the ph down mix through and sieve to grind it all down to around the same particle size for the chucks. Also added in a desiccate packet into the container to help with moisture issues.
Over all the plants are good. Some issues with the transplant but not going to react to it. just going to let it sort its self out. defiantly some N tox, seems to always happen with Gaia Green 4-4-4 the N content is just too available while the rest is slower release. Would like it if their N in the formula was a bit more slow release over all. most of it is fast. Some of them showing some other issues as well but just have to wait it out. they are also going back into veg from my mess up on the lights. Thought they where on 16/8 but was really 12/12 from a week or so ago. the CBG seeds from GTR are doing the best. handling the extra N with good strides and nice growth on them.
Topping plants was fine, took some pics of their tops. tried to get em all around the same height. looks good to me. Herbs doing well too. the basil is getting nice and deep rich green. can smell it heavy if the plant is brushed at all. Will need to keep pinching off their tops to make a tasty little plant. The catnip is going to explode in size I have a feeling. Its only one seed in that whole pot. Taste so good crushed into some cola. Nice minty flavor but not too offensive/sharp like other common mints such as pepermint or spearmint, its softer and almost creamy. highly recommend. fresh not dired.


Likes
1
Share

@Jungle_James_Grows
Follow
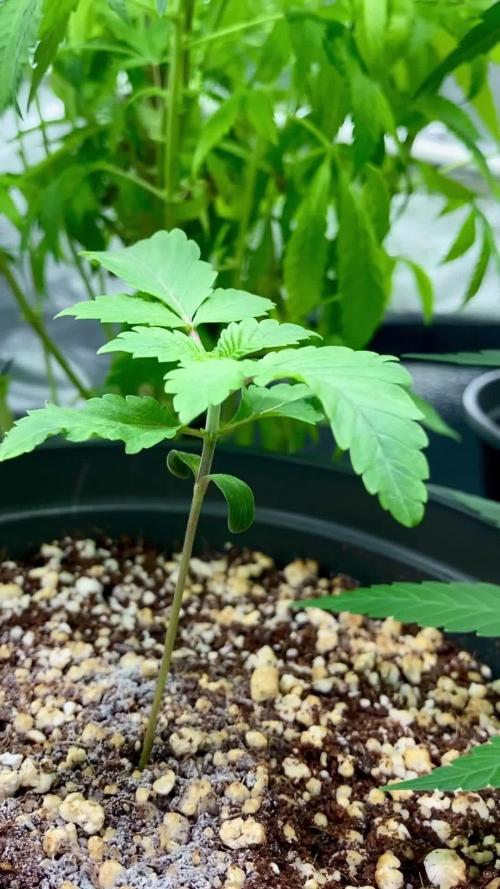
They're coming along nicely, but we have 2 runts that aren't doing much, might replace them with something else.
Quick video of how the girls are getting on.
Video 2 is 2 days later
Processing
Likes
10
Share


@LittleManGrow
Follow
Might have some hermies, I plucked anything that might have looked like a sack forming haven't seen anymore show up. One of the Skunk #1s is 35 inches the other hasn't done as well and is very stumpy. A. Lemon is a happy camper, 35 inches, but is the one showing hermie. Zkittlez is a good size. Got a new tent for Christmas 48x24x84 so I have sufficient height going forward.


Likes
37
Share


@LaGrassaFarm
Follow
Muy contento por haber podido cultivar esta genética que nace del cruce de una Matanuska Tundra X Critical Bilbo, este cruce ha sido creado por Fenorock.