


Likes
Comments
Share


@TheGreenLeopard
Follow
theyre looking PEV strong. happy out. size to pot is great. take nutrients well. like the structure for so early days. looking good. i live in fear of these autos leveling me up one day where they are too big. this gorw is all about pushing it for me in small space. take care every1. have a great week. enjoy the overall summary with a legend voice

Likes
Comments
Share


@Herbaristus
Follow
Infelizmente a dark lemonade não está se desenvolvendo. mesmo solo, mesma luz... mas ela não vai. Já a santasemente está uma gigante, pretendo colher com 16 semanas.

Likes
93
Share


@PEAKYPLANTERS
Follow
Wo wo wo....stop everyone, friends! Stop for a second and admire my central zkittez that seems to be turning into a Christmas tree 😋
Very satisfied with this flowering start
Many greetings and good harvests for all

Likes
8
Share


@Mo_Powers
Follow
the 7th week. i decided to do the first topping. she took it well. and the new branches are thriving. i have also started LST training. she has got used to the environment and is finally showing the power i expected from her. the first weeks were just too changeable and sometimes too cold.

Likes
14
Share


@SunshineBud
Follow
Was playing around with netting here, I never get the hang of it ;( Back on nutes this week, I really didn't do much measuring of the girls this week due to netting as well, but I did flip the lights on 1/12.

Likes
11
Share

@birdmountain
Follow
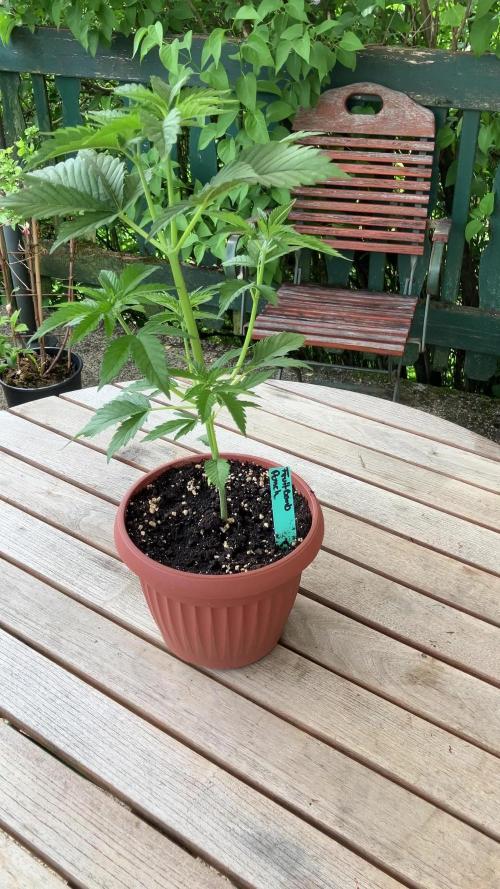
Sie entwickelt sich sehr gut. Vom Topping hat sie sich erholt und ist insgesamt kräftiger geworden. Kommende Woche nach den Eisheiligen wird sie noch einmal verpflanzt in ihren endgültigen Topf. Sie zeigt sehr breite, indicalastige Blätter, meist verändert sich das in der Blütezeit. Ansonsten ist sie gesund und zeigt keine Mangelerscheinungen, wird allerdings kommende Woche vor dem Umpflanzen mit einer Portiopn Vinasse und Seetang auf das Umpopfen vorbereitet werden.



Processing
Likes
17
Share


@JustKeepGrowing
Follow
I placed the 2 seeds in a damp paper towel and placed it into a closed Tupperware. The tupperware was placed in my stereo cabinet (warmest place I could find) and less than a day taps roots were showing. I then placed them in my humidity dome and within 18hrs I had roots sprouting thru the bottom of the sponge. This has been the best start I have yet to have. I also built a new RDWC system with waterfalls to veg and flower these two in. I have photos and video above on the new tent setup. I have it running with just regular tap water until the seedlings are ready to go in. I have also installed a 90gpd RO system (APEC brand) under my kitchen sink. The water comes out 5.8ph and 7ppm. I will be using this RO water thru the entire grow with some Cal-mag of course. The system holds about 25 gallons total of water. The main res is 17 gallons and the two buckets are 5 gallons. I will no longer be using air stones. I have a recirculating pump in the main res, waterfalls in the buckets and of course the main pump running the whole system. Should be plenty of air for the roots. I used 2 in return pipes in the hopes of avoiding roots clogging the pipes. I scrogged last time but I'm not sure I will be going that route. I might just top and train. I will be doing a major defoliation on one and just simple trimming on the other. I am trying to find out if the risks of stressing the plant are worth the returns. Well wish me luck....and away we go.
Equipment used on this grow:
VIVOSUN 48"x48"x80" Mylar Hydroponic Grow Tent
AC Infinity CLOUDLINE T6, Quiet 6" Inline Duct Fan
Grower's Choice Horticulture Lighting with Full Spectrum 315W Ceramic Metal Halide
Kingbrite diy 240W lm301h qb288 v3 led grow light
PHILIPS 901573 Master Color CDM Lamp 315 Watt Elite MW, 4200K (Blue)
PELONIS PFT30T2ABB-V Portable 3-Speed 12-Inch Oscillating Table Air Circulation Fan,
Bluelab Guardian Monitor for pH, Temperature, and Conductivity Measures
Power Strip Surge Protector, Anker 12 Outlets & 3 USB Ports
hygger 1060GPH Quiet Submersible and External 24V Water Pump, with Controller
Marineland Maxi-Jet 600
Midea SmartCool 8,000 BTU Wi-Fi Window Air Conditioner (will be running a 4 inch tube into tent from a/c)
All hardware and buckets were bought from Lowes.
1in & 3/4 in for supply lines
2 in for returns

Likes
22
Share


@Basementganja
Follow
I will be growing her again, as I feel like I let her down, by letting her PH drift so low..
Other than that, she grew beautifully, and fumes of potency as you gaze at her!
She yielded more than I expected! She's not that far below my previously lowest yielding plant! :)


Likes
16
Share

@Northern_Ent
Follow
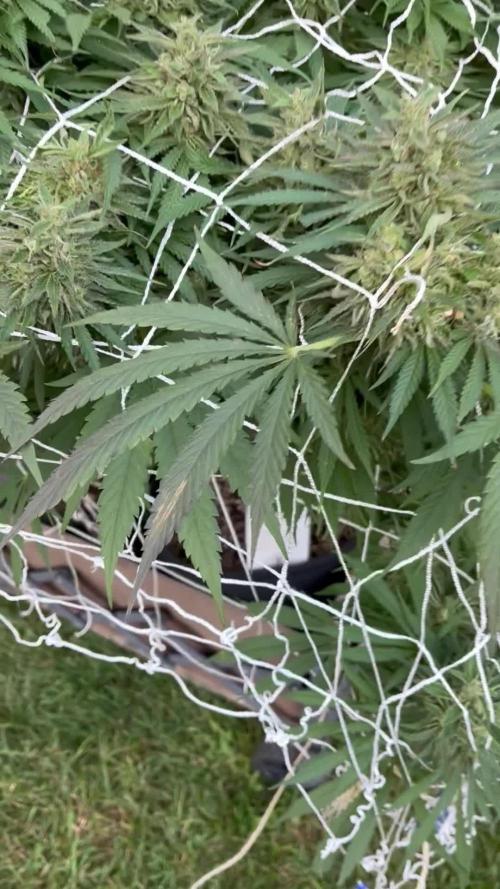
Sep 27: lower buds are maturing nicely withh no further signs of bud rot.
Sep 29: buds look great, and lots of them still ripening.
Oct 2: lower buds look good and there are still lots of them. Despite losing all 16 tops to bud rot from a single cool humid night, causing a loss of about 300 g dried bud equivalent, this plant will still yield hundreds of grams of high quality buds. Manifolding and scrog nets really pay off at this stage. Easy harvest of nice uniform buds should make all growers happy.
Likes
295
Share


@Polygus
Follow
Good day to all my friends and visitors here on GD.
Decided to finally finish this diary, I took my time with his one ;)
Now we cut the second POGP auto plant, the first cut you can find in week 17. The plant from week 17 weighted 660g. wet, this one finished at 1,85kg. wet.
The girls where autoflower but thanks to me starting this grow in cold day temps (14 degree Celsius) the started flower really late, maybe that's also the reason for all my problems with this strain during the grow?!
The two plants where different phenotypes, the smaller one (from Week 17)though small had nice hard flowers, the bigger one as the only plant from four I grew during the growop started foxtailing.
Both of them branched nicely the smell was quite strong and awoul xD like gasoline and something rotten, it smelled so bad i checked a couple times under microscope for any signs of mold in the flower and to my suprise I found nothing.
Thank God later during drying the smell would subdue to a more generic "hazediesel" smell
--------------------------------------------------------------------------------------------------
SE7000 done it's magic with this grow as with all my other grow ops.
For anyone who is interested in obtaining this efficient and affordable light fixture ($ to gram) here's the link:
https://spider-farmer.com/products/spider-farmer-upgraded-se7000-730w-commercial-led-grow-light/
A shout out to SSSC for the gift of genetics: supersativaseedclub.com/
Thank you all for your companionship on this voyage, I hope you enjoyed it at least as much as I did.
Also thank you for this awesome year together here.

Likes
81
Share


@UnorthadoxDude
Follow
Transplanted to 40l container on week 4 day 1. Container has approx 30l in it.
Also added a photo of the setup for size reference.
Let me explain my thinking behind the repotting strategy. Firstly I should say that I am quite an old school kind of grower, although I've never grown cannabis before I have grown hundreds of other plants. Due to my experience with other plants, I understand the value of well planned and executed transplants, they can have an absolutely transformative effect upon root systems when done properly, as far as I know it's the main reason why they are done at all. It is fair to say I have never grown any auto-flowering plant indoors before, and I have read all about how you should not transplant autos, and all the good reasons why not. Ultimately though, as I am not called UnorthadoxDude for nothing, I believe that I can make it work with an auto, and get the benefit of improved root growth pattern, without delaying or interrupting the growth. I want to have my cake and eat it, as it were.
So the strategy is to avoid transplant shock, which admittedly I have already failed in the first unplanned transplant, but in my hopeful naivety I still believe I can make the second one work! I'm using coco, and I have had the larger pot prepared and have been watering and feeding them as well as the plant. If I am careful not to disturb the plant at all, and move the entire contents of the pot gently into the larger pot (which is exactly the same medium in broadly the same state), then I may be able to avoid shocking the plant and just let it crack on. We will find out in a few days! If it stops growing or slows at all then I failed, otherwise it worked!
A note about my use of organic nutes with coco. I have read a lot about coco and nutes and microbes and PH and TDS and what have you, and I know that the overwhelming majority of people believe that you can't or at least shouldn't use organic nutes with coco. The thing is, I like organic gardening, I prefer to cultivate a beneficial microbiota and keep it healthy. I recycle, and reuse all my compost except where a plant is diseased and this has worked well for me for a long time. I've never grown with coco before though, I always used soil. I wanted to gain the benefits of coco (better drainage, more air to roots, lighter, less inviting to pests, etc) - but I wanted to use a method of nutrition that I was already familiar with. I think I've mentioned that I am not called UnorthadoxDude for nothing, so I am using BioBizz and coco. By adding bacterial, mycorrhizal, and trichoderma inoculants and having the unplanted coco in the tent being fed and watered I hope to have cultivated a nice microbiota which will feed my plant. That's the theory. However just in case, I have a trick up my sleeve.
Now, I do not know if you are aware of this, but there is a fiery debate raging on the internet about using BioBizz organic nutes with coco for cannabis. Some people try it, most people shout it down, and I have not found much in the way of solid evidence of it being a good idea. Except one! I found a commercial grower that has used biobizz nutes, and he said that as long as you are using "Acti-Vera" you can use anything from the BioBizz organic range. Apparently the enzymes in the mix break down nutes chemically in a similar way to what the theoretically missing microbes do.
So I have ordered a bottle of that, and if my microbial cultivation attempts don't work out, I at least know I have a fallback that should work.
Those are my thoughts on it, let's see how it pans out.
Oh I should also probably point out that I am growing some companion plants, specifically alfalfa (nitrogen fixing), basil (improved flavour), and German Chamomile (increased essential oil production).
Update week 4 day 2 dropped PH to 5.8 after advice from a grow question. Look! It's carried on growing... maybe there was no transplant shock?
Update week 4 day 3: Growth continues, interveinal chlorosis lessening. Plant is pushing out node five at the moment.
Update week 4 day 4: Growth continues, interveinal chlorosis further lessening. Apologies for the poor quality photos for the last few days, I was lazy and didn't want to move everything out to photograph. Today I have done that and the pic is better. I am declaring the second transplant a complete success. I do not believe that plant was in any way shocked.
Update week 4 say 5: I think I've finally managed to overwater. Going to skip watering today.
Update week 4 day 6: Photo taken just before lights on hence wilting. Growth continues to accelerate. I believe the alfalfa has been raising the PH so I've removed it. Today I will flush through with PH lowered water and then fertigate. The colour is still too pale but the growth and overall look and feel of the plant screams to me that it's happy and about to explode.
Day 27.5 flushed with 30l of PH lowered water then fertigated with 5l.
Day 28: Height 12cm Width: 28cm Nodes: 6
Weekly growth data:
From 5cm Height to 12cm +140%
From 12cm Width to 28cm +133%
From 4 primary nodes to 6 +50%
Summary: Wow, wow. Wow. What else can I say. What a crazy week, amazing and unexpected given the problems. I am really excited to see what happens over the next seven days!!
It looks like it has quite severe chlorosis, but otherwise seems robust and is seriously stretching. Almost unbelievable growth. Pre-flowers appeared a few days ago, so I guess this was the final week of veg. Let's see how the first week of flowering stretch goes!
Update 7/2/23: My instincts about this plant on week 4 day 6 were absolutely correct, she was happy and, she was about to explode. Since my early attempts at transplanting, I practiced multiple times with Citronella (a photoperiod plant) and then I did it again with an auto (Polly) - this one went flawlessly and further demonstrates that you can transplant an auto without shocking it. Time will tell, because I can compare Polly to both Misty and Nesia both of whom were sown directly in their final pots.


Likes
121
Share


@Tropicannibis_Todd
Follow
💩Holy Crap Growmies We Are Back💩
Code Name FBT2307
Well growmies we are at 42 days in and everything is going great 👌 except for the fact that I may have some issues with my medium 😅
👉 Started to do some light low stress training and its looking good👌💪
Lights being readjusted and chart updated .........👍rain water to be used entire growth👈
👉I used NutriNPK for nutrients for my grows and welcome anyone to give them a try .👈
👉 www.nutrinpk.com 👈
NutriNPK Cal MAG 14-0-14
NutriNPK Grow 28-14-14
NutriNPK Bloom 8-20-30
NutriNPK Bloom Booster 0-52-34
I GOT MULTIPLE DIARIES ON THE GO 😱 please check them out 😎
👉THANKS FOR TAKING THE TIME TO GO OVER MY DIARIES 👈
Likes
21
Share


@Fullmeltalchemist
Follow
6.13 F73 -
Started chopping and pre-washing late Thursday into the early Friday morning.
Three buckets - 1) 1/2c lemon juice, 1/2c Baking Soda 2) water 3) water - seems to have worked really well, buds are very clean and the the water definitely had a bunch of fiber and dust. They drip dried for an hour or so before being moved into the dry tent which has been between 60-70F and 50-60rh
Took down most of the ScrOG Passion Berry and Deadstar from drying and froze. Gonna wash some tonight to see if it pulls well.
The last five plants have been in dark since monday morning, so will cut, wash and hang tomorrow.
6.19 F80 -


Likes
8
Share


Likes
12
Share


@Studabaker
Follow
Growing great. Growth took off when I gave it recharge. Going to give it some mammoth p this week when it arrives 😎
