


Likes
Comments
Share


@steadfast_grower
Follow
#########################################
HARVEST (Day 110 / December 21)
#########################################
-----------------------------------------------------------
GROW SUMMARY
-----------------------------------------------------------
Grown in 4x4 tent - but I only used 2x4 because of heater and dehumidification but each plant averaged a 2x3 canopy. Each plant had a dedicated light, Sage 2 used the HLG 300 V2 Rspec and Sage 3 used the CMH 315. It's not an accurate comparison of lights because there was some overlap but I'm just utilizing my resources the best I can for this dedicated autoflower tent. The plants were grown in hydroponics using a custom two-site PA hydroponics clone RDWC system with Advanced Nutrients Sensi Coco line, Microbial Mass and Orca for beneficials.
All around a pretty easy grow and things went very well. Sage #3 had an issue just after stretch, and I think I burnt it a bit when the CMH was at 22". I also experimented with a single water change which was only performed when switching to bloom nutrients around week 7 and turned out surprisingly well - see the results below. It's always fun to see the two contrasting phenotypes side by side.
-----------------------------------------------------------
HARVEST
-----------------------------------------------------------
From day 106 to day 110, I just stopped feeding and let the ppms run down.
No dark period and no flush. On day 110 they were chopped. I probably could have let them go a bit longer, but my concerns were growing with Sage 3 and the sugar leaves being brittle and flacking off onto lower buds promoting bud rot. The smell of this flower on the plant was funk and was hard to control the funk... even with a carbon filter. Trichomes are slightly amber, mostly milky overall. I'm convinced hydroponics can add a couple of weeks of veg time to the run compared to coco/soil. Cutting the Scrog net was required.
-----------------------------------------------------------
DRYING
-----------------------------------------------------------
The plants were dried in a 3x3 tent, so I had to cut the plants in 1/4 sections to fit in the 3x3 drying tent for a slow dry. Branches were hung to dry on burlap twine in a tent in complete darkness, branches upside down. The temps were dialed in at 60F by pointing AC at the intake vent on side of the tent. Humidity was dialed in at 63%/60F for 24hr, 62%/60F for the next 48hr. Then 60%/60F for the third day and onward. Ambient RH in my house is 30% due to winter so I had to use two humidifiers and an Inkbird controller to add humidity to the room and block the humidity streams from hitting plants directly. AC Infinity T6/S6 exhaust and intake fans were on the setting of '2' during drying until day 8, then I could turn down to a setting of '1' once the plants were not transpiring excess moisture. I pulled the branches to trim as they were ready around starting around day 12.
-----------------------------------------------------------
TRIMMING
-----------------------------------------------------------
I trimmed each branch as it was ready but there were times when I pulled more than I could trim without being interrupted so a few branches did overdry on my trim table due to the low ambient RH due to winter. Very few fan leaves on branches, so most trim was all sugar leaves. I went tight with trim to ensure a better flower product and more supply for edible totaling in over 11 ounces of trim product.
-----------------------------------------------------------
CURING
-----------------------------------------------------------
Flower product was transferred to 1L mason jars averaging 35g of product per jar. I added a mini hygrometer to each jar and boveda/boost 8gr humidity pack. The RH averaged 62-64% when trimmed flowers went in jars.
I started by burping once a day for the first seven days, once every other day for the next seven days, rolling jars often. The burp was only for 3-5 second for air exchange. Because the flower product was already at almost 62% when packaged in jars, quite the contrast from drying in summer conditions, I only needed to burp once per day and mold really wasn't much of an issue due to low humidity in winter.
-----------------------------------------------------------
YIELD
-----------------------------------------------------------
* Weight calculated at 62% humidity after 10 day cure.
==============================
FLOWER PRODUCT
==============================
Sage 2: 301g (10.75oz)
Sage 3: 377g (13.46oz)
----------------------------------------
Total: 670g (23.93oz)
==============================
TRIM PRODUCT
==============================
Sage 2: 204g
Sage 3: 135g
----------------------------------------
Total: 327g (11.67oz)
**I went tight on the trim for better flower product and sufficient supply for edibles, and is calculated in overall yield.
** All major fan leaves, stems, and branches removed from trim product.
==============================
TOTAL OVERALL YIELD
==============================
Flower: 678g (24.21oz)
Trim: 327g (11.68oz)
----------------------------------------
Total: 1005g (35.89oz) (2.24lb)
==============================
SPACE YIELD
==============================
1005g / 12 sqft (3x4 canopy) = 83.75g per sqft
==============================
WATTAGE YIELD
==============================
615 Watts / 12 Square Foot (3x4 canopy) = 51.25 watts per sqft.
1005g / 615 watts = 1.63 grams per watt
-----------------------------------------------------------
PRODUCT TEST
-----------------------------------------------------------
On day 10 of cure, I tested the flower and passed some to a few friends for their input. Feedback was positive. One little bud was given to a friend and he reported it stunk his entire car.
Sticky, trichome-covered fire! Smoke is smooth, no cough. White ash. The 60/40 (sativa/indica) is a blend that is on point.
Sage Scout definitely is a heavy hitter; upwards of 3.5 hour noticeable head/body change with no couchlock at the end. In regards to flavor and smell, it's not fully there yet on only day 10 of cure. The flavors/scents are still muted but I expect the flavours to prevail after 6-8 weeks of curing. Very funky and strong smell that bursts past the mason jar lids. Piney sweet scent.
-----------------------------------------------------------
REGRETS
-----------------------------------------------------------
Honestly, I only have two regrets with this run.
1. More aggressive lolipopping! I just feel if I had lolipopped more, I would have had a denser product overall. The flower product is indeed dense, and all in all, I'm happy with the result, but it's I'm adding as a reminder for the next run. I need to be more selective.
2. I slacked on the training of Sage #2 due to the hard-to-reach factor which probably affected about additional 1-2 oz of yield.
-----------------------------------------------------------
NEXT RUN
-----------------------------------------------------------
1. I’m was very happy with Microbial Mass product in combination with Orca. Once again, I was overall happy with Advanced Coco blend for RWDC. I went with Coco product because Coco is similar to hydroponics, the AN Coco line just has added Calmag to it. I didn’t really see any issues with the AN Coco line and I like the autonomous factor of AN sensi products because my photoperiod tent takes some of my attention, so it is nice to have this autolower tent on auto-pilot for the majority of the grow.
2. When harvesting, I did find a few spots of concern in the root system, so I will definitely upgrade the pump from 250gph to a 400gph for better flow to combat that issue.
3. My experiment with a single water change when switching to bloom nutrients was a surprising result. Sage 2 (purple pheno) performed well with no deficiencies which I had trouble sorting out the deficiency on Sage 3. I continue to wonder if it was salt build-up, but it seemed to start shortly after the change to bloom nutrients so maybe it was a nitrogen/calmag issue. I may add an additional water change mid-flower (week 11) to the next run and see if it makes any difference is the same conditions happen.
4. I'll also like to move the two-site system to the front of the tent for better accessibility to train the plants.
5. I'm also looking at the floorplan of the tent and I think I can run a single system in parallel next to this two-site system and still have room for heater/dehumidifier and still keep accessibility for training.
-----------------------------------------------------------
FINAL THOUGHTS
-----------------------------------------------------------
Night Owl genetics has performed once again in my RDWC setup. I also feel a dedicated light for each plant really helped improve the yield. If I calculate a 2x3 space for each plant, with a total of 615 watts / 12 sq ft, running at 51.25 watts per square foot is the result. In regards to gram per watt, I've calculated the result is nearly 1.63 gram per watt when using 1005g / 615 watts. My goal was a pound per plant, I was happy to exceed that goal line with autoflowers with 2.24lb total yield.
-----------------------------------------------------------
THE END
-----------------------------------------------------------
Thanks for checking out my diary! I typically journal in my notebook but I put some time and effort into documenting my grows on this platform in hopes it will help a new or experienced grower with their DWC journey. Any questions or suggestions are welcomed.
Happy growing!

Likes
16
Share


@MountainFlowers
Follow
Final Report:
Grow:
The plants has grown very beautiful and healty without pests and diseases. They grown bushy and with medium height during all the life cycle.
I had try to use LST in third veg week but i did't made correctly and after that i dicided to return to grown normally without any particolar tecnique.
I used a littel more fertilizer then mine usual and that made the plants grown fast with only a littel bit of leaf margin burn which I solved by decreasing the quantity.
In the first two weeks of flowering stage the plants started grow not to very tall (except for one) and the number of the branches increase, in this phase i only defoliated when the fan leaves turn yellow in late stage.
During all flowering stage the flowers grown but they remained very soft, they turned dense and bigger in the last weeks and this time i waited until almost all of them were mature before harvest the plants(I waited a littel more respect OG Kush CBD).
I changed the taller plant from one grow room to another(in the sixth week) when she became too high and she couldn't stay more in the smaller grow box(nothing changed in the enviroment between the two boxes).
Equipment and grow box:
The enviorment of grow box has been optimized every stage with the right temperature, umidity and air flow.
Vegetative temp/umidity --> 23-29 °C/45-55%
Flowering temp/umidity --> 20-26 °C/40-50%
The air flow was created by two pc fans and one big fan.
Harvest:
This time the plants were full of dense buds but the lower branches had many fluffy flowers(i used them to make some hash) but the result not change too much .
The result of this grow is amezing compared to my old expiriences.
I harvested the flower and i made a fast curing process after i washed the crop and i let them to dry with a fan on it.
After five days a take the branches which were to dry and i did the final trimmig before put all the harvest in a open jar for finishing to dry.
I collected all the leaves, fluffy buds and trimming scraps in a bag and i let them dry.
I harvested the taller plant before the other two because she had matured earlier(with the OG Kush ladies).
Later i put the bag in the freezer and when i collect and dried all the scraps from OG Kush and Dandoverde Haze i did some Ice-O-Lator hash.
I used 250g of trimming stuff and i made 11.50 g of hash, I had use a set of 5 bag and i take the resin from the 160µ - 120µ - 73µ- 25µ bags.
I pressed all the resin in a great block of tasty strong hash.
Always better every time 😊💪
Total harvest ---> 126g only of dense buds and 11.50g of hash.

Likes
6
Share


@ButterfliesLittleFarm
Follow
What can I say in the end except that I am very happy that everything went well again and now I am enjoying the wonderful smoke of Cookies Gelato.
Here is a quick overview of this cycle.
21/06/2022 - planting
14/09/2022 - harvest
3 weeks of vegetation
8 weeks of flowering
15 days of drying
60 years. total yield
1 Cookies Gelato Auto plant
After harvesting, the plant was dried for 15 days, after which I trimmed the flowers and put them in jars to ripen.
I think I've stated almost everything I had in mind. If anyone has any questions, feel free to write.
I have to admit that the grow diaries community is not that active anymore and I'm sorry that it has come to that. I hope that the right things will come into focus again so that the community can grow and not compete.
Thank you all for your support.

Likes
17
Share


@Tazard
Follow
Her tap root sprouted within 12 hours of wetting! I moved her from paper towels to the aerocloner after only one day.
Mokum’s Tulip was the 1st Prize Best Indica, in the Clouds in the City Cup 2019.
She is a Gelato-based feminized seed variety which has a sweet candy scent similar to a Dutch Tulip. She is very strong with mind-numbing effects achieved by crossing selected Gelato and Sherbet genetics. Terpene rich and THC rich, this XXL variety has rock hard buds, heavy yields and an exhilarating high.

Likes
6
Share


@HUMO_Cultiva
Follow
Day 39 from seed!! I’m exited to watch the explosive grow of this genetics soon i will be take some clones or each pheno to take the best and put in the next batch!!! Stay tuned


Likes
19
Share


@valiotoro
Follow
Hello everyone week 1 of flower has passed for this Cherry Cola auto 🍒
Mars hydro FC-E6500 75%
have a great day and wish you all happy growing 😎👨🌾🏻

Likes
2
Share

@taz420
Follow
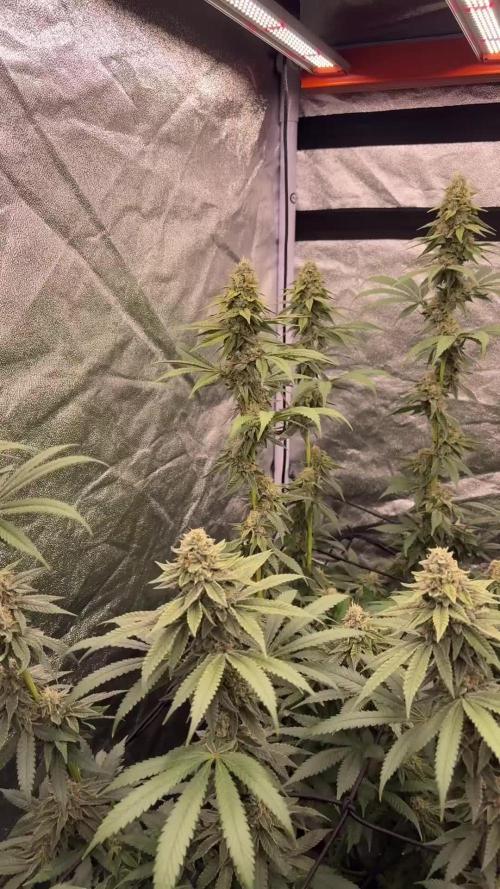
So the MAC 1 smells so strong! It almost smells like Cheetos when you rub your fingers together. Really dense buds and overall turning out to be a good yielder


Likes
42
Share


@KrautFabrik
Follow
Day 69: flush 💦
Day 75: water (no flush)💦 & changed place🔚
Pictures are taken on day 77📸
--------------------------------------------------
She is getting a nice purple 🍇😁
I will chop her next weekend ⚔️


Likes
16
Share


@NAG420
Follow
Start of week 6 the end of week 5 she was just having her pistols come out. She is doing great growing fast I might have to buy bigger tent but will see what happens. Daytime temps are74/76 and nighttime temps 68/70 RH is now at 54%. New I have not even flushed or used sledgehammer because she looking so hungry at times. I did major defoliation on her had some many big fan leafs block lower bud sites to be also did a ton of tie down to try to get the last few stretches out the lower area.


Likes
54
Share


@TheWeedaltor
Follow
Love is in the air 🌪️💚
Have 3/4 degrees less with big fan direct on lamp!
Almost one month and quit growing for this summer

Likes
14
Share


@UnitedStrainsGermany
Follow
Bisschen Stress hat nur noch tropical poison XL denke Block weshalb die nächsten 8tage nur Ph Wasser. Alle sind im selben Zeitraum aber ganz andere Stadien.


Likes
9
Share

@DivineBuds420
Follow
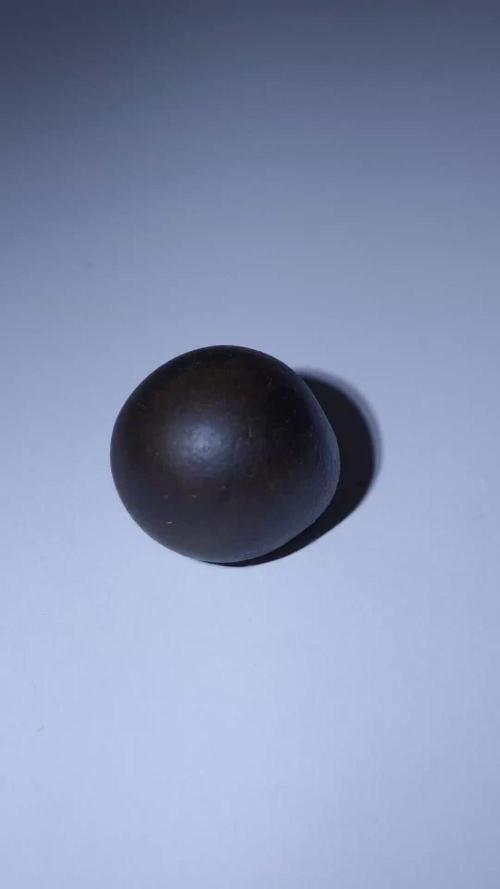
Update – Frisian Dew Trim Hash
Ich habe den Trim aus diesem Outdoor-Run mit der Eiswasser-Methode zu Bubble Hash verarbeitet, inspiriert von Frenchy Cannoli.
Das Material war nicht besonders gut – viele größere Blätter mit wenig bis kein Harz – trotzdem ist gut was rausgekommen.
Der Großteil kam aus den 73 und 25 Micron Bags, in 120/160 war kaum etwas.
Mit längeren Waschgängen wäre evtl. noch mehr gegangen, aber nach ein paar Stunden hat es mir gereicht.
Ich habe das Material getrocknet und zu kleinen "Temple Balls" gepresst.
Update – Frisian Dew Trim Hash
I processed the trim from this outdoor run into bubble hash using the ice water method, inspired by Frenchy Cannoli.
The material wasn’t great – quite a few larger leaves with little to no resin – but still yielded a decent amount.
Most of it came from the 73 and 25 micron bags, while 120/160 had very little.
Could’ve probably pushed it further with longer washes, but after a few hours I called it.
I dried the material and pressed it into small “temple balls.”




Likes
6
Share


@Moss420
Follow
Ended up flushing Mumma for about 10 days - got her ppm down real low. Night before harvest I set the timer so the light would not come back on in the morning before I harvested (I've seen people who swear by this and other who say it doesn't do anything but figured it couldn't hurt). At this point the other plants are pretty disappointing compared to Mumma so they aren't getting as much "love" lol.
