
Likes
Comments
Share


@CordersGreen
Follow
👉DIA : 13/12/21👈
Metodo de germinacion: 👉<< VASO DE AGUA >>👈
seleccionamos las cantidades deseadas de semillas y en un pequeño vaso con agua opmotizada insertamos las semillas para nutrirlas durante 12H, situada en un lugar sin luz, apropiadamente tapada con un trapo.😉
__________________________________________________________________________________________________________________________________________________________________________________
👉DIA : 14/12/2021👈
👇👇👇👇👇👇👇👇👇👇👇👇
una vez pasada las 12 H de germinacion en vaso de agua , depositamos las semillas bien colocadas en un recipiente con papel de cocina humedecido con agua y 1ML de estimulador de raices (TOPCROP).
Esperamos de 1 a 2 días a que salga la raiz de la semilla y ser transportada a los Jiffy😉
___________________________________________________________________________________________________________________________________________________________________________________
👉DIA 17/12/2021👈
👇👇👇👇👇👇👇👇👇👇👇👇
Pues pasados los 3 dias de germinacion en el metodo de papel, vemos que ya salieron a luz las raices y con sorpresa😱 NUNCA habia visto una cosa asin!!
An salido GEMELAS, sii sii !!😵 de una misma semilla an salido dos raices una cosa impresinante!
y damos paso a colocarlas en los Jiffy.
👉Instrucciones:👈
- Colocación de los jiffy en un recipiente con 2L de agua y 2ML de enraizantes de top Crop.
- Dejamos actuar durantes varios minutos hasta que el jiffy se extienda.
- Abrimos un pequeño orificio en los Jiffy para introducir la semilla con el cáliz dejandolo hacia afuera.
- Colocamos en un pequeño invernadero para que tengan la suficiente humedad.
- Ayudandonos de unos foco de pocos waltios, le damos a luz necesaria para esta face de germinacion dejandolas 24 horas de luz.
________________________________________________________________________________________________________________________________________________________________
DIA 22/12/2021
Colocacion de Jiffy en Maceta de 3,25L
👇👇👇👇👇👇👇👇👇👇👇👇
👉Instrucciones👈
-Pasados varios dias vemos que el periantio(semilla) ya se rompió y empezo a salir los cotiledones con una hermosa raiz blanca por debajo del jiffy.
-rellenamos macetas de 3,25L con sustrato de top crop(anterior cultivo).
-introducimos los jiffy en las macetas dejando la plantula bien colocada.
-regamos con 3L agua opmotizada y 1ML/L enraizante Voodoo ADVANCED NUTRIENTS
- Permanecemos con las 24 horas de luz con foco led.
_________________________________________________________________________________________________________________________________________________
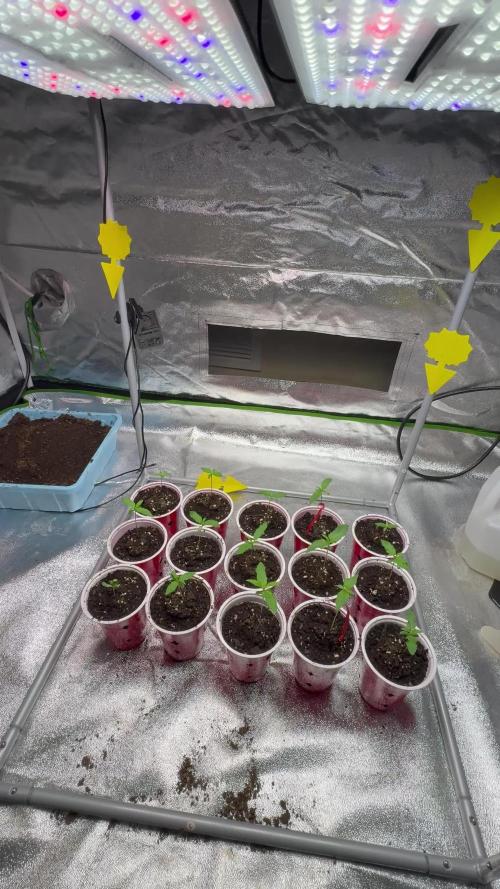
👉DIA 25/12/2021👈
👇👇👇👇👇👇👇👇👇👇👇👇👇👇👇
pasados 3 dias desde que se plantó en maceta. A dado unas respuestas increibles !!👍
las volvemos a regar y a cambiar las horas de luz que se pasarian a 18H

Likes
52
Share


@MrGrow
Follow
29.8.2021
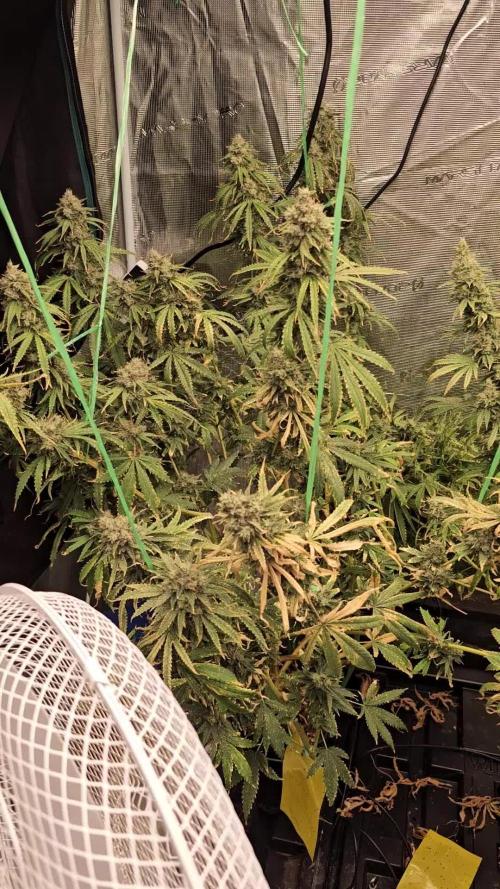
Sono tornato dopo 2 settimane di ferie e ho trovato purtroppo 1 cima dell Lsd con della muffa. C è stato parecchio caldo da noi e non potendo cambiare aria aprendo il box come facevo, ha creato le condizioni ideali x il crescere della muffa. Forse dovrò tagliare anche una cima di una sensi star.
X il resto ho visto che le piante sono ingrassate, siamo arrivati al 116 giorno dal seme e a 52 giorni di fioritura, penso che il raccolto sia vicino🤤🤤
L lsd forse darò uma settimana in più, penso che arriverò a 10 settimane di fioritura.
Aggiornamento alla prossima settimana✌️🏻


Likes
1
Share

@Ninjabuds
Follow
Discount code NINJABUDS: Air cube GROwACE.com
Discount code NINJABUdS: ELUfAH
Everything looks healthy for now. Nothing big to update yet I have not chosen which 6 plants I’m going to keep yet. I’m only going to keep one plant of each strain
Likes
7
Share


@fabialien
Follow
Lunes 11 de marzo 7 am de 2024:
Se dejaran hidratando las semillas por 24 hrs.
Martes 12 de marzo 7 am de 2024: pasamos a papel dejamos por 24 hrs.
Miércoles 13 de marzo 10 am de 2024: revisamos las semillas y vamos preparando macetas pequeñas para transplante.
Miercoles 13 de Marzo 3:30 pm se traspasa a tierra.
Viernes 15 de marzo 11:47 pm 2024, ya que abrieron bien se pone bajo lámpara 100w a 30 cm de distancia, tienen domo protector! El lunes en la nueva semana subimos el avance, hasta el Lunes...
Sábado 16 de marzo 2024, de las 3 semillas la 1 ya abrió completamente, 2 y 3 están por abrir completamente.
Likes
10
Share

@BIG-JAY-AL
Follow
DAY 1
Water 5x300 3x200
Visual:
Last week, it just kept increasing hunger Daily.
Did not want to bump to hard so it took around 3-4 days to hit true EC uptake.
It is coming together nicely.
Comment:
Just keep having the Feeling of it could have been much further by now. It is, what it is.
I believe this stems from bad timing in relation to training and defoliation.
TIME TO BULK AND GET THEM GAINS ICE! 💚🌱
Likes
14
Share


@Hazecat_420
Follow
Están creciendo lindas y sanas, la estructura se va formando sin problema. Ya todas muestran señales de haber tomado de buena manera el cambio de fotoperiodo por lo que ya entramos de lleno a estimular raíces, cambio de fotoperiodo y próximamente engorde.


Likes
12
Share


@FlavoursUk
Follow
The grow was one of the best I've done, the strain itself is awesome, taste, smell and effect are all 11/10. If theres one strain I would grow again it would be this, if you haven't tried it.. it's a must grow. A hidden GEM for sure. Do not miss out!

Processing
Likes
14
Share


@kevgrow
Follow
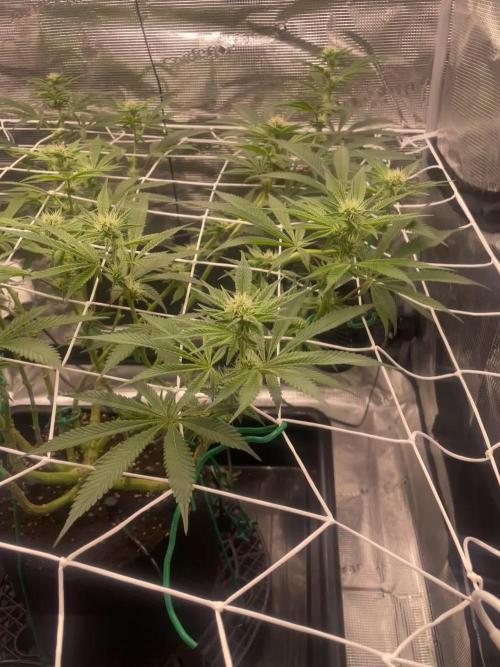
Hey Growers, End of week 3 from seed :)
- From the start of the grow Ive been experiencing small issues with plant #2 but everyday I learn new things and try to figure out what she wants and try to adapt to it. looks like its working slowly.
1st time of transplanting, it was a success.
1st week of nutrients, I will feed 1/3 to start
Likes
13
Share


@IQuSX
Follow
Hi, topman!
Yesterday we had defoliation big leafs, also was make regulation to stem of plant to the same high how its head.
We have about two same weeks for change light of time on 12/12 for Part-Bloom.
We are going to growing big place!
You’ll check and looking at this report!
See you, my dear topman!

Likes
294
Share


@StarLorr
Follow
Welcome to my Ðivine ØĠ Ķush diary.
In this diary:
Seeds: sponsored by Ðivine Șeeds
Media: Promix HP
Nutrients: Advanced Nutrients, Diablo Nutrients.
Light and Weather: Şun☀️and Mother Earth.🌎
___________________________
Feeding:
Sat 22Jun: 6L water not pH'd
Tue 25Jun: 6L water not pH'd
Wed 26Jun: 6L nutrients pH'd 6.5
Thu 27Jun: 6L water not pH'd
Fri 28Jun: 4L water not pH'd
Sun 30Jun: 8L water not pH'd
Mon 01Jul: 4L water not pH'd
___________________________
Weather hasn't been that bad, a cloudy day, a fresh day and night then warm, rain Friday afternoon thru Sunday morning then Sunday afternoon 55 KPH wind gusts 💨
Anti-tilting device seem to hold them down for now😄
___________________________
Thanks for stopping by, likes and comments are appreciated!👊🏻😎
Keep on growin!
Keep on tokin!!!
😙💨💨💨💨💨

Likes
28
Share


@Salgeezi
Follow
Ended up cutting all of the front left plant this week and majority of the back two plants. Guna let the lowers get some light for a few more days. Really noticing all the tiny ass buds. Hopefully I'll make something out of them. First run with a net and I just left way too many branches/bud sites for this size of plants they were. Buds look good though. Flushing last plant and will be cutting in a few days.

Likes
Comments
Share


Likes
23
Share

@kevxyn
Follow
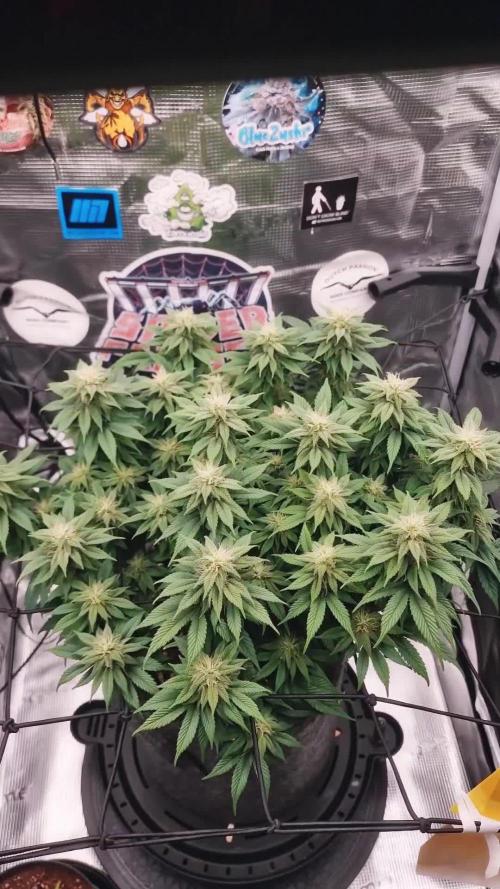
So langsam legt sie mit der Trichombildung los und der Geruch verändert sich deutlich 💚


Likes
13
Share


@CURATI_DA_SOLO
Follow
Questa settimana come è andata? Hehehehe è andata a meraviglia!!! LEI E SEMPLICEMENTE PERFETTA!!! cresce sempre di più le cime si ammassano e diventano sempre più dure! I colori sono stupendi e il profumo di limone mi ha invaso la villa!!! La struttura della pianta e veramente robusta ovviamente dopo un lst molto scrupoloso! Veramente una grande bella signora! Rimango sempre meravigliato con i semi di fast buds, veramente secondo me e la più valida di tutti! Ho visto i tricomi con il mio lumagny 100x e sono ancora bianco/trasparenti e si ammassano sempre di più! Deduco altre 2-3 settimane penso di fare un ultima settimana di nutrimenti e poi via con il flush! Laverò le radici per almeno 10 giorni, voglio un fumo morbido e deciso! Ringrazio voi per essere qui a vedere i miei lavori e ringrazio i ragazzi di FAST BUDS per avermi dato l'opportunità di coltivare le loro genetiche!!! Un bacio a tutti voi! 💪🏼🌈🌱

Likes
19
Share


@Ganjagrandaddy
Follow
Welcome to my Fast Buds sponsored shootout and living organic soil v coco side by side. I also plan to use this grow to my full advantage regarding a few age old nagging questions about methods.
I have had a keen interest in L.O.S ( supersoil) since reading a few threads a while back on how amazing and productive it can be. After too much research and procrastinating I had to give it a go. I have been a decades coco/nft grower and recently threw my hat in the rdwc ring too. I have avoided soil due to the overwatering worry ( heavy handed chimp brain !) and the best potting soil/feeds. Catching up on the advances in indoor soil gardening and organics led me too subcools supersoil recipes to name a few but being a town dweller with farms everywhere around me still drew blanks on a lot of the ingredients needed and where the hell I could even begin to get them from. Thankfully , commercial savvy has now made buying it in ready to use and with a full range of beneficial bacteria ect available in amendments from a grow shop here in the uk. ecothrive have realised the potential for us to dive into this medium with all the mixing , measuring and resourcing. I bit the bullet and £150 later I now have 4 x37Litre pots that will be used for as long as I want to feed the soil for without EVER needing nutrients again potentially. The coco has also had charge mixed in to encourage the bennies to colonize there too. I will be using the shogun nutes that I know do the business with coco to compare with for yield , growth and taste.
I have 3 seeds each of 4 Fast Buds Strains to use as a control for the grow and am journaling each strain in their own diaries. This statement will be used to start each one as the information is identical at this point but following this I will do them individually.
I am now starting their second week since opening the seed packets , straight into soaked and shook root riot cubes and into the heated propagator. They had all showed their heads by end of day 3 and a couple needed helmet surgery to open up without being hindered . I have has them in the prop for a few days but they needed to get settled as they were popping roots out all over the cubes. They have now been in their final pots for 2 days complete and starting their 3rd today at day 8 since planting in cubes. I am impressed with the speed and success of these girls already (12 of 13 germinated) . Well done fast buds.
So here we go folks , any comments , ideas ,questions , advice are always welcome and I hope we can have some fun experimenting with defol v non defol , topping v fimming v bending and any other curiosities along the way. I plan on using a quadline for them all to keep a control for the comparisons too.
Be green folks
Welcome aboard and a huge thank you to Fast Buds for the opportunity to try autos.


Likes
25
Share


@MotherNaturesSon
Follow
Came back on New Years Day to be greeted by plentiful crystal laden flowers and incredibly nice terpene smell. Very glad they did well through the 12 day dry spell, now they can be watered good and well till harvest. One last minor defoliation, then I’ll stick to tying leaves out of the way. Also will begin incorporating the uvb bulbs for about 3 hrs on per light cycle, at about 12” distance from each plant. Cheers all
SideNote: I’ve just obtained a load of new seeds from about a dozen strains I chose for high levels of thc, yield, flavor, and overall quality genetics so expect some good things to come from my page within the next few months. Thanks for looking

Likes
24
Share


@Grnhead
Follow
Just cruising along still. I’ve moved a few branches here or there for even lighting but that’s about it.
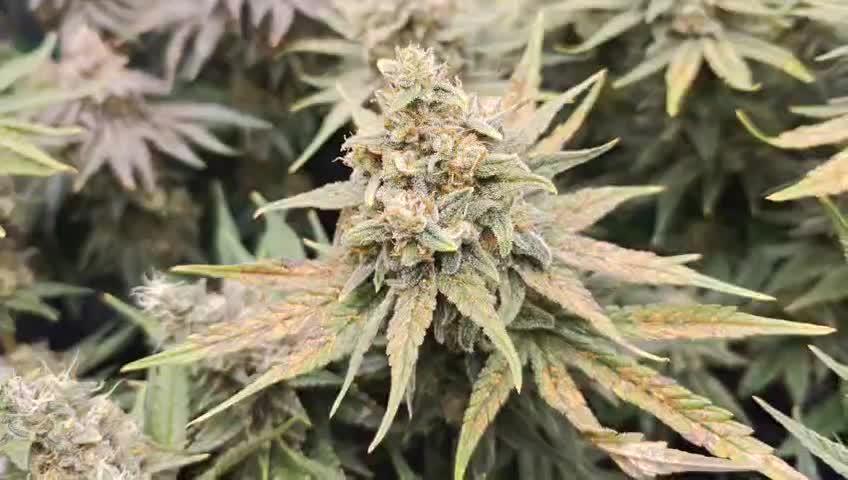
Trichomes are starting to become more prominent, especially in Pineapple Skunk, check out the photos!!
Buds continue to bulk up here or there. I only see amber trichomes on sugar leaves and haven’t seen any on the buds yet. Most are still clear.
Less than half of the hairs are orange so I think my schedule is still on track. I have 2 more weeks before the flush starts. I might start it early if I notice any one of them starting to mature. Since there are 3 plants and I want a single harvest day, I will try and time it so they are spread across the spectrum of early to mid harvest timing.
Thanks for stopping by!

