
Processing
Likes
Comments
Share


@FrightNiteFreddy94
Follow
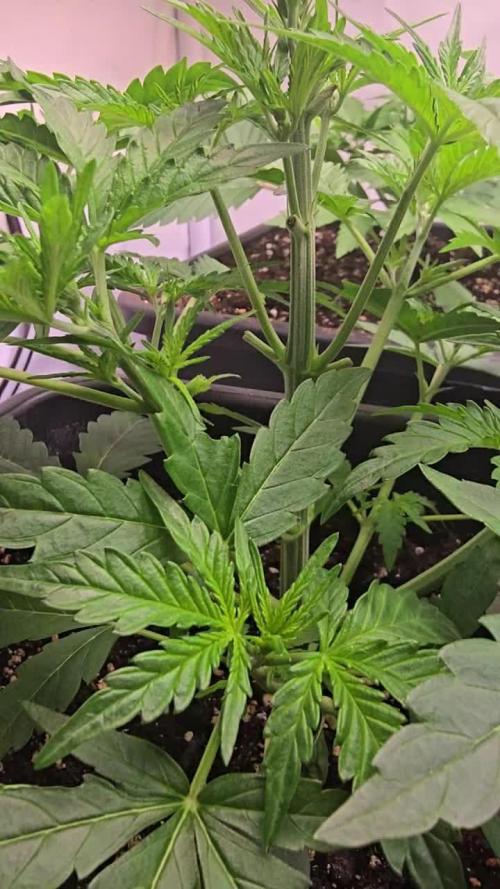
Everything's good buying a 600watt ZNet 4 to add more light!


Processing
Likes
3
Share


@ZEEMAN
Follow
She defo comming along now, still praying for them heavy sticky buds , hopefully another couple of weeks and I think she will be done, each individual bud side branch has been tied out and other lst applied also gave her a defoliation, all of this has had to have a positive effect overall.


Likes
5
Share

@ThatsmyGrow
Follow
🌱 Week 3 – Gorilla Cookies Auto Pheno Hunt
Another week down and the differences between the phenos are becoming more obvious every day 👀🔥
The environment stayed very stable this week with temperatures, humidity, and VPD remaining consistent. Because all plants are growing under the exact same conditions, it’s really interesting to see how differently each phenotype develops genetically.
📈 Current observations:
Several phenos are already reaching close to 30 cm in height
Meanwhile, some smaller phenos — especially Pheno #6 — are still around 13 cm
Leaf structure and overall plant shape continue to vary a lot between phenos
Growth vigor is clearly different from plant to plant now
💧 Feeding & maintenance:
This week the plants received their first proper feeding with around 4 liters of nutrient water.
Some phenos seem to react more sensitively to the nutrients, as a few plants are starting to show slight brown leaf tips, so I’ll keep a close eye on them over the next days 👀
I also removed more large fan leaves to improve light penetration and allow the lower branches to develop more evenly.
📊 Current environment:
Temperature stable around 26°C
Humidity staying between 63–65%
VPD maintained around 1.3 kPa
Light intensity remaining at 35%
Now I’m really curious to see when the first flowering signs will appear 🌸🔥
💬 Which pheno would you pick so far?

Likes
27
Share


@RDWCGrowing
Follow
4/1/2023
Week 7- Day 1 of Veg (Day 59 overall)
Water Change Day!!!
Water was really low it was just above the hump in the Res cutting it close to not having enough water in the system to keep it going. They drank a lot making it close going the full 14 days. I am still going with the previous grows and adding 36 Gallons but even looking at the root I think the SILICA is working and the roots are further along at this point than in previous grows. This next two weeks will watch how much they drink and how low my Res starts getting, and will make a decision on changing the water weekly from here on out or still keep on the plan of every other week until Week 4 of Flower.
Added 36 Gallons
Mammoth SILICA= .5Mil/Gal = 18Mil
CALMAG= .5Mil/Gal = 18Mil
Root Drip= 1Mil/Gal = 36Mil
FloraMicro = 5.4Mil/Gal = 194Mil
FloraGrow = 4.2Mil/Gal = 151Mil
FloraBloom = 4.6Mil/Gal = 166Mil
ORCA = .5Mil/Gal =18Mil
PPM= 536
PH=5.84
PPFD=500
Tent Temp= 76.5
Water Temp= 71.4
Humidity= 58%
4/2/2023
Week 7- Day 2 of Veg (Day 60 overall)
Not much today, PH was at 5.81, I brought that back up to 5.90. I took care of some badly needed defoliation in each of the back sides .. I was able to see some really good clone material to use on the lower backside of each of the plants. I will be taking two clones from each to breed over the next few weeks depending on when I am going to flip them.
4/3/2023
Week 7- Day 3 of Veg (Day 61 overall)
A little FIMing, A little Topping, and a Little bit of defoliation.
Might have to take my clones during the week this week, I am trying to wait until Saturday to hit week 8 but again they are getting all over the place and I need to trim some of the sides and lower areas.
4/4/2023
Week 7- Day 4 of Veg (Day 62 overall)
I decided to take my clones and clean up the lower half of the plants. I took 2 clones from each plant to go into the cloning machine.
4/5/2023
Week 7- Day 5 of Veg (Day 63 overall)
Water Temp is sitting at 73. Right in my ideal range for my setup.
Ideal range 70-74
My Temp Tent is my ideal zone75.6
Ideal for this grow 70-78
The lights are still waiting the switch to flower to get maxed out...
The Humidity is coming in right at 60% I love it..
I took so much off yesterday I figure it was a good day to let them rest.
4/6/2023
Week 7- Day 6 of Veg (Day 64 overall)
I needed to Defoliate some and I topped a little. The plants might force me to flip them soon. Next Wed is the 10 week mark half way through the 20 weeks. The net is Bingo... Which means that If/when the plants hit the net I will have to flip them. The Net is set to the max height that I can let them get based on the Breeders Stretch report 75%.
4/7/2023
Week 7- Day 7 of Veg (Day 65 overall)
#3 is 22 inches Tall, #2 is 19 Inches Tall.
Net is set at 24 inches. Net is also set as my Bingo point, if they hit the net then I have to flip no matter what to account for the Breeders recommended 75% Stretch allowance. I think I am going to have to flip right at the 10 week mark of the Competition which is Wed 12 Apr.
I topped a little, I de-foliated a lot to start getting it ready for the anticipated Flip.

Likes
21
Share


@Mr_Motalovah
Follow
Hello Growers and Tokers! 👋 👩🌾 🧑🌾.🔥💨
These pictures were taken on day 27 of flower.
Super stoked with this strain!
I'd say out of all the ladies in the tent she's the one at took the LST training the best, then again when I started training them she was also the most advanced.
So maybe next time i'll wait a bit more before starting LST. My goal is to get all my plants in this shape, that way I can take up all the space in the tent with colas..
She has a GREAT shape, I'm just in love with how it looks like a garden bush. Almost like a rose bush with the colas popping out. (3rd and 4th picture)
Smell is very potent, don't find it fruity or sweet yet but it seems to be heading that way.. I'm a sucker for sweet flavors.
Trichomes are starting to cover up but doesn't seem like she'll be a frosty one. Hope I'm wrong.
Bud have grown a GOOD bit from last week, good to see the defoliation worked.
I'll be adding an organic PK booster for that extra boom in bloom.
That's it for this week, things are looking promising with this lady! 😍
Stay tuned to see how these buds turn out.
Take care!
One love!

Likes
11
Share


@Papastroumf
Follow
Day 58 : She is fattening her buds as f@@@ck. CO2 stopped for all ladies. As you can see trichomes still are in cloudy period. So she needs 1 week or 2 until chop chop. The first for sure. She is the most mature.
Edit (Day 62) : I watered again with nutrients. She is very stinky and is a heavy smelling lady. I cant identify her smell. After curing it will be more clear. She is full of resin everywhere. Even the pop corns are bathed with resin.

Likes
43
Share


@Hashy
Follow
********************************************
Week 16 Fading (flower week 10)
********************************************
Light cycle=12/12
Light Power=100w 42%
Extractor controller settings
High temp= Day 26c, Night 20c
Low temp= c
Temp step=0c
High Rh= Day 50%, Night 55%
Low Rh= %
Rh step=0%
Speed max=10
Speed min=2
Smart controller settings (during lights on).
Lights on=9.00am
Top fan on=+22.5c
Top fan off=-22.0c
Dehumidifier on=+50% and -26c
Dehumidifier off=-50% or +26c
Smart controller settings (during lights off).
Lights off=9.00pm
Dehumidifier on=+55% and -20c
Dehumidifier off=-55% or +20c
VPD aim=0.6-1.3
DLI aim=30-45
EC aim=0.2-0.5
PH aim=6.0-6.5
NPK(0/0/0)
💧💧💧💧💧💧💧💧💧💧💧💧💧💧💧💧
Method= Autofeed 6 drippers.
Feed=water
Volume=8L
Easy Ph down= 0.02ml/L ( 4 drop total)
Ec=0.2 PH=6.5/6.5
Runs=16
Run times=5min (250ml each)
Gap times=15min×14, 45min×2
Total runtime=80mins (4.0L each)
Total flowrate= 100ml/min (50ml/min each)
Auto start time=10.00am
Auto stop time=4.05pm
💧💧💧💧💧💧💧💧💧💧💧💧💧💧💧💧
********************************************
********************************************
📅1/9/24 Sunday (day 106, day 64 flower)
📋H=99cm D=16cm Dli=38.9 Ppfd=900
📅2/9/24 Monday (day 107, day 65 flower)
📋
📅3/9/24 Tuesday (day 108, day 66 flower)
📋 a few issues through lack of light to some lowers. Plodding along nicely.
📅4/9/24 Wednesday (day 109, day 67 flower)
📋 where she's fading at the top a leaf has died, possible cause bud rot. Will investigate at the end of the week.
📅5/9/24 Thursday (day 110, day 68 flower)
📋 I'm not happy with a main cola, may have got rot because the buds have got so dense and close together, or could be because that particular cola is right near the light and its burned the leaves, I'll chop the top off that cola and inspect it. After inspection there a 8 very dense buds all clustered together and some inside leaves have died and the rot had started to form inbetween 3 buds, only a slight bit of rot but I'm discarding the whole top. Was 52g wet. Because of this and a few other colas have dense buds I'm only going to let her go for a few more days. Had a joint got paranoid and cut 3 more tops off, they was ready and no sign off rot 136g wet from those 3 tops.
Total weight so far 188g
💧
Method= automatic
Feed=water
Volume=10L
Ec=0.2 PH=6.1/6.5 (PH D=0.02ml/L) 5d
Volume left=1L
Volume used=9L (112ml/min)
Volume each=4.5L (56ml/min)
Runoff.
Total runoff=0.8L
Ec=2.4 PH=/6.5
💧
📅6/9/24 Friday (day 111, day 69 flower)
📋 Now in the tent on her own for a short while.
📅7/9/24 Saturday (day 112, day 70 flower)
📋 incrased light power to 125w
********************************************
Weekly roundup.
📋 Obviously I had the issue with rot starting to form on my main top and lost that which I'm gutted about, I could have chopped that off last week really. I'm just letting the lowers mature a little bit longer.
I gave her 3 more days after this week before harvest so next update is harvest. I encoded some pics from those 3 days.
Take it easy.
Back soon with harvest report.
********************************************
Likes
18
Share


@sandokan5_9
Follow
ES: Segunda semana, 26/09/2021 a 03/10/2021, al parecer todo va bien, aun con la duda acerca de como contar las semanas, ya estan soltando un olor ligero lo cual es interesante. No mucho mas que decir, la temperatura se ha regulado bastante, hace mas calor lo cual es bueno.
EN: Second week from 26/09/2021 to 03/10/2021 it seems like everything goes accordingly, still with doubts about how to count up the weeks, the plants are starting to give off an scent which is interesting. Not much to say, temperature levels have been sorted out so that's good.

Likes
12
Share


@Khanos
Follow
I need to take the flowering plant into the 12-12 light period. However, since I do not have enough space, I use 18-6 light time.


Likes
5
Share


@hi_bengal
Follow
Tent was getting really bushy and croweded everything is going great had to defoliate and do some cleaning up on the bottoms getting light to everything.


Likes
20
Share


@MrWolfe
Follow
So this round I just lollipopped and didn’t strip the top at all, with better veg next round it’ll work better but I’m having issues with some plants not quite trellised how I’d like. Everything smells great, BCS,BD and WM are getting fat and PKB is frosty and tight. Watering is more of a chore than I’d like I think I’m just going to use some 5s for the next round . Thanks for following along I hope your buds are fat and frosty.


Processing
Likes
4
Share


@kevb84
Follow
first flower feeding week 1.added a vid.and a vid of next gen of clons.


Likes
7
Share


@Naujas
Follow
the girl is growing little by little, no additional light, only what nature gives:) in the coming days, she will be transplanted into her final pot and will spend all her time on the balcony :) I wonder what will happen with a few hours of direct sunlight, if there are no clouds:).


Likes
17
Share

@Naujas
Follow
it's amazing, this growth looks much better than my first attempt, my decision was to put a smaller pot and change the light - the girl really liked it, FastBuds goriilla cookies with a small space manage perfectly:).


