
Likes
Comments
Share


@Drgreen13
Follow
Coming along nicely, been using a and b, also flower burst. And now I'm using tiger bloom

Likes
24
Share


@TerpTurtle
Follow
Strawberry Truffle - White Truffle x Red Pop & limited seed it came with Chem 91 x Red pop
Likes
8
Share


@Herbman420
Follow
Hi everyone i just put the seed in today . I'm running it with Coco perlite and xpert nutrients will do updates in the week to keep you informed. Thank you for looking at the diary and a remember it's 420 somewhere 🌱

Likes
13
Share


@RSAFirstOrganicGrow
Follow
SO SO SO SO SAD! Will I lose my plant due to those dead leaves? I presumed it might be nutrient burn so I gave her water only.
I am really concerned as to how this will affect her and whether she’ll make it.

Likes
Comments
Share

@Black_Widow
Follow
Привет садоводы и огородники !!!
началась новая неделя и растения стали еще побольше
они активно потребляют воду и выглядят внушительно
хорошие попались экземпляры
Likes
62
Share


@OwlGang_Uk
Follow
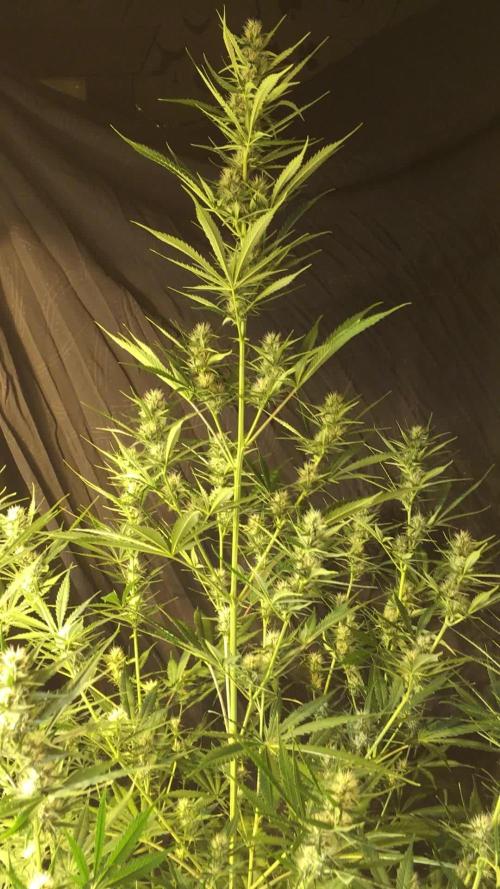
Week 6 - The Purple Power Is No Longer The Tallest In The Forest But It’s Still The Prettiest. The Purple Power Has Been Dethroned By 4 Of The Other Plants. Everyone Except For The Gorilla Glue Is On Bloom Nutrients.
Height:
Gorilla Glue: 19 Inches
Purple Power: 28 1/2 inches
Girls Scout Cookies(3gal): 30 inches
Lemon OG: 34 1/2 inches
Girls Scout Cookies(5gal): 34 1/2 inches
Stardawg: 33 1/2 inches
These Plants Are All Correct Measurements Size May Look Different In Picture Because Of Pot Size.


Likes
7
Share


@Learntogrow818
Follow
Drying and curing always the biggest challenge for me due too constant climate change in my area, living near the mountains have its flaws too..🧐 Oh well still love growing..✌️

Likes
17
Share


@NoProbation4Weed
Follow
day 70
Light hits with around 850 - 1000 PPFD
had nothing to do this week. I just let her finish out.
Terps are already there.


Likes
54
Share


Likes
144
Share


@DevilsBud
Follow
New start of a week FLOWERING
This grow i have seen it all from giants to dwarf that doesn't want to flower to a mutant call mohawk ethos you name it i gots it's lmao couple week ago trow out a male but still all that don't matter because what i have is great to me maybe not perfect but i ain't perfect either
20/4/22
The smell coming out of the tent is one tropical garden very happy so far with results and there hopefully bulking up
Will be posting more photos Tru the week
visit www.marshydro.eu
for your best gear and use the PROMO CODE: DEVILSBUD
Some info about the Marshydro FC-4800
Superb Quality LED Chips: The whole light is composed of 1206 pcs Samsung lm301b and Osram 660nm chips. More than two times as many LEDs are used to drive the grow lights at low currents and to avoid overdrive. Quality is guaranteed and efficiency is up to 2.8 μmol/j.
Even PAR Distribution and High PPFD Output: The multi-light bar design and the densely distributed light chips enable the LED grow lights to achieve the optimum PPFD required for plant growth over the entire effective coverage area.
Specifically Designed Spectrum: To ensure even plant growth, blue and red light are enhanced on the basis of a full spectrum combination. Not only does this accelerate plant growth, but it also improves the yield and quality of the plants at the same time.
Dimming Daisy Chain Function: The dimming function saves on electricity costs and enables brightness from 10% to 100% for the different stages of plant growth. A single master light can connect up to 30 lights in a daisy-chain system.
Business LED Grow Light: The light's wavy heat sink dissipates heat quickly and the IP65 waterproof allows the light to operate in humid conditions. 180° collapsible feature for easier installation. All these features provide favorable assistance for commercial cultivation.
And some tent info
●【Lock All Light Insid】MARS HYDRO Grow Tent Interior is made of diamond mylar. Non-toxic to the environment, no harm to plants. High-quality 1680D canvas being double stitched, (ALL OTHERS BRAND grow tent is 601D canvas) which is tear-proof for perfect light locking, No light leaks or rips at all.
●【Durability Grow Tent】Stable Metal corner adapters and poles are the trustful supporters of the tent. No rusting nor paint-falling. Quick easy tool-free installation. Carries strong heavy-duty SBS zippers, double layer lining to create a light-proof seal.
●【Easy Observation of your Plants】Special peeks window made by double layers of cloths. Observe the growing conditions of your plants without opening the tent and avoid disturbing plants. The peek window also serves to dissipate heat and ventilate air.
●【Removable Tray Keep Clean】The package includes a removable waterproof floor tray to hold soil and fallen leaves. The tray can be taken out easily to wash. Removable and water-proof makes cleaning easy.
●【Good Ventilation&Fast Assembly】 Circular double-sleeved vent holes with adjustable nylon strap for air circulation by exhaust fan, ducting, carbon filter, or reflector. Better allows proper light, heat, and airflow. Quick tool-free installation. Reinforced by a sturdy metal frame to ensure security and stability, supports up to 140lb. Perfectly safeguard your plants to thrive even in winter


Likes
2
Share


@draco
Follow
awesome strain😍🙌 especialy who loves indica))
For the first time I grew such a beautiful bush. Blueberries were really felt in the aroma, but after drying and treatment, the cones acquired the smell of beta-caryophyllene - a very strong smell)) The effect is very relaxing and kills (!), it seems to me that I have delayed the harvest a little, so these bumps are equal to a tranquilizer, in addition, there is also gluttony, as well as a slight euphoria. For 12 weeks from the seeds, with the mode 18 6, LED 200W , 12 liters and with my new favorite fertilizers Advanced Nutrients, it turned out to collect 200 g. = 1gw
I dried it for a day in growbox with ventilation, at a humidity of 60-70%, further along the banks and boxes, dried for about a week, the humidity when weighing 192g,
plucked three times, gram 10-15. When weighing the humidity of the buds ~ 65%
I really liked the gluttonous Straine, the food was 1-2-3 ml per liter, during the vegetation phase, at the flowering stage I poured 4-5 ml of the base. After 20 days, after the start of flowering, there was a defoliation. Harvest - washing with water, and a flavless finish, a day in the dark, also threw ice into the pot.

Likes
5
Share


@Insaniac_0
Follow
Thank you.
Growing cannabis is an art that seems to evolve as you learn it. While it may only take a little knowledge to get started, It seems that this may take a life-time to perfect (doubt I'll ever make that category, but I will certainly try).
So thank-you to the community that Shares, Comments, Follows, and Likes. Your efforts in any of these actions make these journals a worth-while and perfect way for us all to learn and track our efforts. I personally appreciate it.
Also a huge Thanks has to go out to Grow Diaries for making this community even possible. Your efforts to supply the data storage alone is more than enough, but you the fact that you dont stop there and constantly try to improve the experience even more makes this my favorite community to to share on.
And then lastly, but certainly not least, a heartfelt Thank-you to Royal Queen Seeds for your branding/research while making these seeds available to people like me. It gives me confidence in knowing that I am working with great genetics before I even start my grow.
----------------------------
Germination Start and incubation period 3/12/24 to 3/26/24
Transfer Day to Veg Day 6
3/27 to 4/2
Germination:
First note was about the appearance of the seeds. They were smaller than I am used to seeing, but no damage or deformities and look to be in good shape. Germination took 14 days from dropping in water to transplanting into 1 gallon pots. 23hours in a glass of 6.3ph room temp RO water. 2 cracked open a little and I placed them both in paper towels wet with the glass water and pasted to the sides of the glass for 2 days then checked, no progress. So I freshened the water then waited another 2 days and checked, little to no progress. Then checked again 1 day later and finally was able to move them. One looked fully ready and the other seemed less ready. I placed in rapid rooter pods and closed with toothpick tips. 1 popped out of the pods in 1 day but the other did not. So I gave it 1 more day and started my spare seed. After 4 days of water and towels I replaced the dead pod with a growing sprout. Transplant occurred on 3/27
Veg Day 0 to 6
1gal hard tall pots. Transplant went well. The sprouts are smaller than I would like and seem to be stubborn in growth to start but hoping htat changes with soil. One pod was overgrown in the pods and Im hoping it doesn't reflect in the overall plant production.
Video:
Transplant ease.
Transplant to 1 gal pots:
I am using a 50/50, 50%perlite/50%soil with a .5lb of dolomite lime and a .5ml of flora micro added to .5 gallon of RO water (Im mixing 2 gallons of soil total so the water to soil ratio is 1/4 of the total medium volume) to achieve a soil tested ph of 6.4. I am using a 50/50 soil/perlite mix because I plan to use these in auto pots. I also used about 1 cup of the same soil mix water to pour around the plant after transplant; you can see how the perlite rises to the top where I did this. I sprayed two domes and covered - I plan to leave covered for the first week.
Feed:
I kept them under the domes and sprayed every day that I didnt feed them, to keep humidity up while I let them find water in the soil. By the end of the week I took the domes off and took pictures.
Feed this week was another 1 cup of 6.3ph water 5 days after transplant.
Feed plan next week will increase the amount to 2 cups of plain-no-nute water with about 4 days between feeds. I want to see the water run through so if I need to use more than 2 cups I will. The idea is to water deep and through, but then make them search for more before the next feed, hopefully spreading the roots out while doing it.
Veg Plan:
I plan on 8 colas for each plant. So that will be 3 topping days and a total of 7 cuts.
I will want to cut the first time on day 21 if I have 5+ nodes. I will transfer to 5 gallon auto pots with-in 1 week of the first topping. Once I have 3 nodes of new growth past the first topping, I will top those two branches to the first node again. (that's 3 cuts total by this point) Then, after 3 new nodes of growth after that, I will do a last topping on the 4 branches. (4 new cuts added to make a total of 7 cuts and 8 colas)
I will train the branches using LST/HST with tie downs as soon as I can after the first topping day to help maintain the branches growing where I want them to. I will also introduce an adjustable tomato ring after they have settled into the 5 gallon forever pots to provide support and mobility
Hopefully all goes well, and I will have 1 to 2 weeks of growth before flip after week 8.
I think it sounds more ambitious than it really is, but if you follow this journal, we will see together.

Likes
25
Share


@Silverback_Guerilla
Follow
10/31:
I fed today with one, signal, sweet & sticky, beastie bloomz, and silica.
Another batch of top-shelf genetics from Spliff Seeds. They are super frosty, fattening nicely, and smell delicious. One of the MWK's has a lot of purples in her lower flowers...sexy.👍
11/4:
Fed with one, signal, sweet & sticky, beastie bloomz, silica, and humic acid.
Really in love with the big Moonwalker Kush...such a pretty plant....and her sister ain't too shabby either.
Neither Strawberry put on much height, but every branch on them will produce some fatass buds with absolutely zero training...excellent candidate for a single-strain SOG.
Amnesiacs protest with too much PAR or UVB...same with the LCK..their foliage is suffering a bit...


Likes
8
Share


@MrBuenchico
Follow
Aquí tenemos el cultivo de la cepa ansiada desde hace ya un par de años de la cual me he enamorado. Para mi, una de las mejores que he probado.
El cuarto de cultivo trabaja por norma general con un foco 600w de sodio y unos led COB 50w cada uno de apoyo exclusivamente cuando tengo buena producción solar (por donde vivo suele ser lo habitual).
Sistema de cultivo Dutch Pot Hydro.
Riego 15 minutos on 15 minutos off (luz on) 15 on 45 off (luz off)
El cuarto cuenta con una buena equipacion para tener todos los parámetros optimizados. control del clima y control del agua. Biofiltro y bomba de aire en el tanque.
Notas:
Esquejes prematuros con poca raiz
EC demasiado alta 1.5 n/S por no tener la arlita lo suficiente lavada. Ph con mucha correccion (Ph-) para estabilizar en 6.3
Aplicación foliar aceite de neem el 22/05

Likes
20
Share


@Bakeryguy420
Follow
Night fucking queen :) what a damn beautiful plant. Almost at the finish line only getting fed plain water ph to 6.0. Hella important to do so so plants can properly leach out nutrients. She was easy to grow. Was fun to grow. Cant wait to grow this one again maybe next round I'll get the more green pheno. Well see. Either way I am one happy grower as always. ^_^
You can see the bud sites are really starting to fill everyday now. Such a huge difference from last night to today. Really impressed even the lowers are getting chunky :*
Likes
10
Share

@DogDoctorOfficial
Follow
🌸 Week 5 Flower – Frost on the Horizon
We’ve reached the midway mark of flower, and the Mango Kush sisters are entering their true production phase. What started as white hairs and clusters is now becoming recognizable bud sites, with calyx swelling, pistils stacking, and resin glands beginning to form.
Even though the two phenos are still at slightly different paces, both are showing the strength of Mango × Hindu Kush genetics: dense flower set, uniform branching, and a promise of rich aromas to come.
⸻
💧 Feeding Update – Adjusting for Signs & Demands
This week we observed minor leaf spotting, likely an early sign of calcium/magnesium imbalance. With the canopy pushing hard into bloom, demand for structural nutrients rises. To address this, we adjusted the recipe:
Updated Feeding Mix (per liter):
• 🌿 Aptus Regulator – 0.15 ml
• 🌿 Aptus CalMag Boost – 0.35 ml (slight increase for leaf support)
• 🌿 Aptus All-In-One Liquid – 1 ml (reintroduced for balanced NPK support)
• 🌿 Plagron Sugar Royal – 1 ml
• 🌿 Plagron Green Sensation – 1 ml
Why this change?
• All-In-One Liquid provides a steady base of NPK to complement the super soil and ensure no hidden deficiencies appear as flowers bulk.
• CalMag Boost increased slightly to help counter early spotting and reinforce leaf health.
• Sugar Royal & Green Sensation remain to push terpene, resin, and bud density.
🌱 Educational Takeaway: At mid-flower, nutrition must shift slightly from “steering” to supporting. The plant is now a high-demand engine, and small deficiencies show quickly. Adding back a balanced NPK base (All-In-One) ensures pistil and calyx production doesn’t stall.
⸻
🌡️ Environment – Riding the Heat
The room remains lively but challenging:
• 🌡️ Temps: peaking at 31–34°C
• 💧 RH: 50–60%
• 📊 VPD: ~1.8–2.0 kPa
While slightly hotter than ideal, the Mango Kush girls are holding strong thanks to airflow and the resilience provided by biostimulants like Sugar Royal and Regulator. An AC unit is on the way, which will stabilize the climate moving forward.
🌱 Educational Takeaway: High VPD increases water demand, plants drink more, transpire faster, and pull nutrients quicker. This can be beneficial if balanced correctly, but also risky: deficiencies show up faster, and stress can slow bud formation. Monitoring and adjusting is the key.
⸻
💡 Lighting – Mid-Canopy Power Boost
Our lighting orchestra is now running at higher intensity to fuel flower bulking:
• ThinkGrow Model One – deep penetration into the canopy
• 2× ThinkGrow ICL-300 bars – mid-canopy support, ensuring no shadowed sites
• Future of Grow Black Series 600W – full-spectrum coverage
• Lumatek Zeus 465W Compact Pro – evening out the footprint
PPFD is averaging 750–800 µmol/m²/s, which is perfect for mid-flower. The canopy is even, with bud sites developing from top to bottom.
🌱 Educational Takeaway: Mid-canopy lighting like the ICL-300 prevents “popcorn buds” by ensuring lower sites receive enough light intensity to develop properly. The result: fuller plants, less larf, more usable flower.
⸻
🌱 Genetics in Action – Mango Kush Week 5
• Pheno #1 – Still ahead, stacking pistils into early bulking buds, beginning to sparkle under macro view.
• Pheno #2 – Catching up fast, with strong pistil growth and early calyx development. Though she started later, her structure is filling in beautifully.
Both phenos are showing that classic Mango Kush balance: fruit-forward aromas beginning to rise when you brush the flowers, with the Kush backbone promising earthy depth in the final cure.
⸻
🔮 What to Expect & What Not to Expect
✅ Expect this week and next:
• Rapid calyx swelling → buds begin “rounding out”
• Trichome initiation across sugar leaves
• First noticeable sticky texture
• Stronger aroma when handling
❌ Not yet:
• Full frost coverage (peaks Weeks 6–7)
• True terpene explosion (Weeks 7–8)
• Final density (Weeks 7–9)
🌱 Educational Takeaway: Week 5 is often where growers get impatient. Resist the urge to overfeed or over-adjust. Buds are setting their foundation now, the bulk and frost come with time.
⸻
🔄 Recap – The Journey So Far
• Weeks 0–2: Seedlings established, Aptus Start Booster support
• Weeks 3–4 Veg: Rapid branching, transplant into super soil + Aptus Mycor-Mix & Buffer
• Week 5 (Flip): 12/12, stretch begins
• Flower Weeks 1–2: Power Buds introduced, lighting expanded
• Flower Week 3: Flower set established, pistils everywhere
• Flower Week 4: Bulking begins, feeding simplified
• 🌸 Flower Week 5 (Now): Buds swelling, trichomes emerging, All-In-One Liquid reintroduced, environment monitored closely
⸻
🙏 Gratitude
To everyone following along, thank you. Each week is a balance of science, art, and patience, and it means a lot to share this journey together. The Mango Kush sisters are teaching us once again: growth happens in stages, and trust in the process brings the best results.
⸻
💭 Grower’s Note:
“This week felt like the garden finally started to sparkle. The first trichomes are here, pistils are building like fireworks, and even with the heat waves, the girls stand tall. Pheno #1 is racing, Pheno #2 is steady — and together, they remind me that nature never grows in straight lines, only in rhythms.”
📲 Don’t forget to Subscribe and follow me on Instagram and YouTube @DogDoctorOfficial for exclusive content, real-time updates, and behind-the-scenes magic. We’ve got so much more coming, including transplanting and all the amazing techniques that go along with it. You won’t want to miss it.
• GrowDiaries Journal: https://growdiaries.com/grower/dogdoctorofficial
• Instagram: https://www.instagram.com/dogdoctorofficial/
• YouTube: https://www.youtube.com/@dogdoctorofficial
There’s a new series blooming and it’s more than just plants. It’s about process, patience, and paying attention.
⸻
Explore the Gear that Powers My Grow
If you’re curious about the tech I’m using, check out these links:
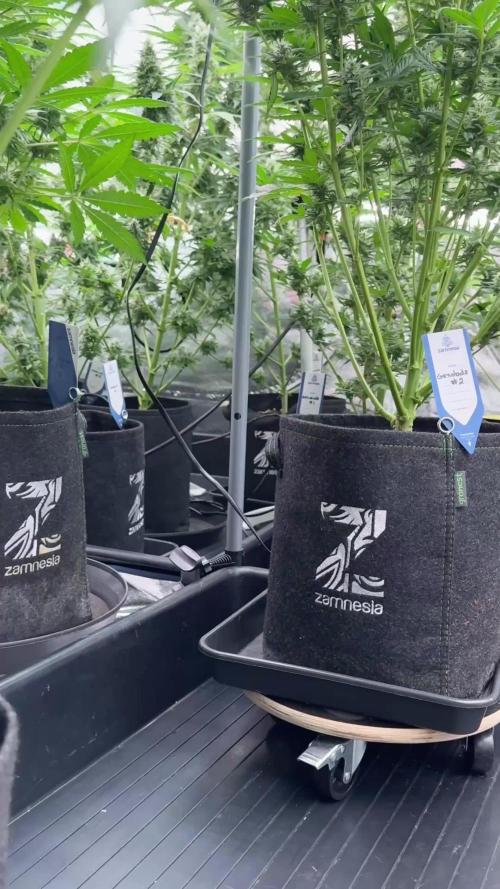
• Genetics, gear, nutrients, and more – Zamnesia: https://www.zamnesia.com/
• Environmental control & automation – TrolMaster: https://www.trolmaster.eu/
• Advanced LED lighting – Future of Grow: https://www.futureofgrow.com/
• Root and growth nutrition – Aptus Holland: https://aptus-holland.com/
• Nutrient systems & boosters – Plagron: https://plagron.com/en/
• Soil & substrate excellence – PRO-MIX BX: https://www.pthorticulture.com/en-us/products/pro-mix-bx-mycorrhizae
• Curing and storage – Grove Bags: https://grovebags.com/
⸻
We’ve got much more coming as we move through the grow cycles. Trust me, you won’t want to miss the next steps, let’s push the boundaries of indoor horticulture together!
As always, this is shared for educational purposes, aiming to spread understanding and appreciation for this plant. Let’s celebrate it responsibly and continue to learn and grow together.
With true love comes happiness. Always believe in yourself, and always do things expecting nothing and with an open heart. Be a giver, and the universe will give back in ways you could never imagine.
💚 Growers love to all 💚

Likes
4
Share


@Coolbeanism
Follow
They popped up, I fed them some Iguana Juice grow, and am making sure they stay wet here at first. YouTube Grow Show Fast Buds Episode
https://youtu.be/jj7ZvAQepHM


Likes
14
Share


@TheCannaProphet
Follow
~ FASTBUDS TESTER #2202 ~
Well friends, here we go on another 'canna-venture' together!
The grow room has had a complete remodel and some upgrades done to it including brand spanking new 4x8 and 4x4 tents and a Trolmaster Hydro X controller along with a new Control Panel.
This tester strain is one of six tester strains that FastBuds has graciously provided me with and I'm looking forward to seeing what this girl has to offer when she's grown to her full potential!
One drawback of 'testers' is I have little to no information on it other than its number and that it's an autoflower... 🤪 But, it's ALWAYS a blast growing them for me because not knowing a lot allows me to just concentrate on the essentials: Light, Environment, Water, Nutrients and possibly a bit of LST... not complicated, just basics like keeping a constant temperature and RH in the tent at a level that gives a good VPD, watering when almost dry and maintaining proper light levels according to their stage of growth.
____________________________________________________________________________________________________________________________________________________________________________________________________________________________________________________________________________________________________________________________________________________________________________________________________________________________________________________
~THE SETUP~
~Initially seeds were lightly scuffed, then soaked for 3 hours in 78℉ distilled water after which they were transferred to moist paper towels laid out in a Jiffy Pellet plastic starter tray with lid. Underneath the tray was placed a Vivosun Heat Mat with Controller that was set to 78℉ where they stayed until their tap roots emerged.
~Planted into Jiffy Peat Pellets that were hydrated with distilled water warmed to 78℉ with a 7.0 ph.
~Once roots emerge from the Jiffy Pellet they're transferred to their fabric pots.
~Grown 100% organic in a 4g Gronest fabric pot and a 3g fabric pot by Wraxly filled with Mother Earth 70/30 Coco/Perlite medium and initially amended with Dr. Earth 4-4-4 / Earthworm Castings / Dr. Earth Flower Girl 3-9-4 and Coast of Maine Stonington Blend Organic Plant Food 5-2-4.
~19/5 light cycle for the entire run with supplemental UVA added during flower. Lights are controlled by a Trolmaster Hydro X controller set for a 15min Sunrise/Sunset simulation.
~Top dressing every 3-4 weeks with slow release dry amendments and Earthworm castings.
~Straight water ph'd @ 6.2-6.8 when needed and bi-weekly Compost Tea's.
____________________________________________________________________________________________________________________________________________________________________________________________________________________________________________________________________________________________________________________________________________________________________________________________________________________________________________________
Weekly Updates:
1/19- Here we go into Week Four of flower and these testers are ON FIRE!🔥🔥🔥
Both testers are in a flower frenzy and are ready to eat! Today I gave both girls their last top dressing with Down To Earth 4-8-4 Flower Mix at a ratio of 2tbsp/g and Coast of Maine's Stonington Blend 5-2-4 Organic Plant Food at a ratio of 1tbsp/g which I simplified by using 1/3 cup of the 4-8-4 and 1/4 cup of the 5-2-4 in the 4g pot and 3/8 cup of 4-8-4 and 1/8 cup of the 5-2-4 in the 3g pot. After working the amendments into the medium, I watered it in with 1g of straight de-chlorinated water ph'd to 6.6 @ 74℉. It will take a week for the microbes to begin breaking it down and will last for 3-4 weeks after that which should coincide with them finishing up, or close to it, enabling them to naturally 'flush' themselves out.
The #1 tester that has had the weird coloring and leaf texture is a beast @ 26" tall and I'm happy that she's come around! In my experience, more times than not I've had plants with issues when they started and debated yanking them but let them stay and all, and I mean every one, have turned out to be epic. I guess it's just dumb luck, or the fact I hate to kill any plants if I don't have to! 😎💚 The # 2 is doing exceptional as well and is beginning to get some purple coloration of the leaves in her flowers!
I've also increased the power to the HLG 650R's the the Trolmaster Hydro X Controller to 75% which has them pulling 990w at the wall and have them hung 32" above canopy. I also starting adding in 4 hours of UVA during the middle of the light cycle for the remainder of flower. I've been monitoring their leaf temperatures and they're running 71-73℉ which is perfect! I have the AutoPilot APC8200 co2 Controller set to 1100ppm with a 100ppm window and the AC Infinity Cloudline T6 controller set to maintain a 74℉ temperature in the tent while the lights are on.
1/21- I'm watering these thirsty girls daily with straight de-chlorinated water ph'd it to 6.6 @ 74℉ and they're both thriving! The #2 pheno stays in a perpetual state of 'praying'.... a VERY happy girl she is and the #1 is showing signs of purple coloration in her flowers!
1/23- I watered/fed both testers today with 0.75g of de-chlorinated water each with GreenGro's Natures Brix, Granular Myco and Flower Finisher mixed in, after which I added 1 tsp/g of unsulfured molasses and then ph'd it to 6.6 @ 74℉. They'll be getting straight water from here moving forward as the medium has enough food in it to support them until they finish.
1/25- Daily watering continued today with both girls receiving 0.75g of straight de-chlorinated water ph'd to 6.6 @ 74℉.
OMG they're both looking fantastic with both looking tall and proud with a beautiful purple coloration expressing in their flowers and even into the leaves of the #2! I'm really looking forward to Week Five of flower where these ladies should really start to strut their stuff! 😍💚
😎💚 Thank you for checking out my passion in life! Please visit as often as you wish and I hope you enjoy this journey as much as I know I will! Grow Strong! 💪😎🤙