Likes
Comments
Share


@Kitties_and_Colas
Follow
~_~_~_~_~_~_~_~_~_~_~_~_~_~_~_~_~_~_~_~_~_~_~_~_~_~_~_~_~_~_~_~_~_~_~_~_~_~_~_~_~_~_~_~_~_~_~_~_~_~_~_~_~_~_~_~_~_~_~_~_~_~_~_~_~_~_~_~_~_~_~_~_~_~_~_~_~_~_~_~_~_~_~_
1/30/22
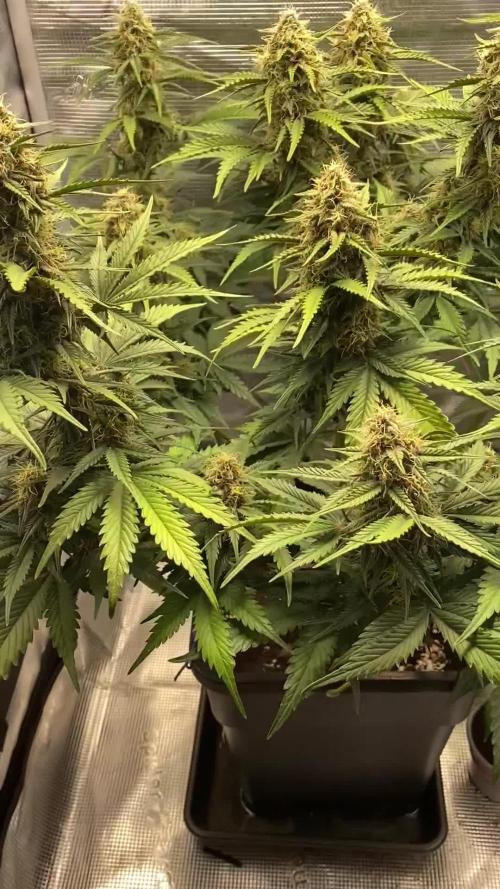
😻 7th week of veg and everything is going beautifully!!..lots of growth (comparatively) in the last few days..all plants have a great color, we've been feeding a little with nearly every watering and they seem to be responding to it well to it.. they're still on the small side for being over 6weeks old but seem perfectly healthy besides this...we're still debating flower, it may be another 2 weeks before we flip (unless we're hit with an unexpected growth spurt). We did some pruning, removing any lower leaf touching media, small side growth and a few large fans draping new branch sites... The MarsHydro is hanging at 29" entire veg and we're still getting fat stalks (tons of red), but we intend on closing the distance come flower...I'm hoping for a lot of growth this week, fingers crossed!😼🤞Thanks as always for dropping by and happy harvests everyone!!
❤️💡🌱😽💨
⚡Mars Hydro/SP-3000⚡ Specifications ⚙️:
Diodes: Samsung LM301B / Osram 660nm (960 total!)
Driver: Meanwell 300watt 🔌 (300W±5% @AC120V-277V)
PPF: 824umol/S ☢️
PPE: 2.8 µmol/j 〰️〰️
Lifespan: >50k hrs ⌛
Weight: 10.1 lbs (4.6kg)
Veg Coverage: 3 x 5 ft 🌱
Flowering Coverage: 2 x 4 ft 🌼
-The SP-3000 uses an aluminum heatsink (no fan) and the driver can be placed outside the tent 🌡️⬇️
-IP65 waterproof ratings, tolerant to high humidity grow environments 💦 ..
-Up to 15 can be daisy-chained together and all controlled from a single light!
💡~💡~💡~💡~💡
~_~_~_~_~_~_~_~_~_~_~_~_~_~_~_~_~_~_~_~_~_~_~_~_~_~_~_~_~_~_~_~_~_~_~_~_~_~_~_~_~_~_~_~_~_~_~_~_~_~_~_~_~_~_~_~_~_~_~_~_~_~_~_~_~_~_~_~_~_~_~_~_~_~_~_~_~_~_~_~_~_~_~_


Likes
10
Share


@barlobruz
Follow
7/6/2021
- Trimmed lower fan leaves as they were being blocked completely, and a few tips were yellowing.
- Continuing to lightly bend the upper branches so the lowers can catch up.
- Bought some Gaia Green veg + bloom dry fertilizers as I expect I'll be flipping to flower soon.
7/7/2021
- Watered in a little bit of Gaia Green's veg fertilizer.
- Foliar fed w/ DIY kelp extract.
- Yellowing/browing on a new leaf, can't identify what it is.
- Staked down the branches on the upper mains this evening to open her up for more light penetration, she was gettin' real bushy.
7/9/2021
- Trimmed out middle to expose canopy

Likes
14
Share


@MrJones
Follow
Fastbuds Smoothie Auto
🔸🔸🔸05/03/2023🔸🔸🔸
Day 73 - Above Ground
📝Sunday 07.02.23 - The girls are very small but doing very well for their size, not sure why sometimes autos get stunted, the buds are hard as rocks and have an amazing smell!
📝Wednesday 06.28.23 - The buds continue to pack on weight and ripen, the smell in the tent is amazing, fed with a Mayan tea from Humbolt Nutrients, loved the way it looked, they have great products.
🔸🔸🔸🔸🔸🔸🔸🔸🔸🔸
▪️Grown By: MrJones
▪️Medic Grow Smart 8 LED / Settings 60% & F1
▪️@medicgrow420
▪️@fastbuds_genetics_official
▪️@gaiagreenorganics
▪️Soil - ProMix HP
🔸🔸🔸🔸🔸🔸🔸🔸🔸🔸
📝Smoothie Auto is the result of a cross between Somango and Blueberry, and really brings out the best of both worlds; a well-statured plant ideal for all types of growers. Reaching up to 23% THC, this strain delivers an uplifting giggly high. Not to mention its exceptionally fruity taste making it an ideal choice for extractions.
▪️Bud Appearance Fruity, sticky, resinous buds, as potent as they are tasty. Rock-solid nugs that’ll crumble when touched.
▪️Smoke Report Balanced, yet Potent. This strain blends a euphoric head high with relaxing body effects. A great strain for a sun-time smoke, a weekend getaway, or a relaxed afternoon with friends.
▪️Plant Appearance A well-structured plant that will grow a large main cola accompanied by some lower side branches, somewhat resembling an Indica, yet still with a good average inter-nodal spacing. During the later weeks of growth, some can expect purple hues to appear on the leaves.
🔸🔸🔸🔸🔸🔸🔸🔸🔸🔸

Likes
7
Share


@TheCannaHouse
Follow
6/21/22-Presoak 24hrs
6/22/22-Damp Paper towel 24hrs
6/23/22-Popped and placed into medium.. watered with 2oz+- water
6/25/22-Germination!!


Likes
1
Share

@Rhah420
Follow
PK 13/14 Kur ist vorbei. Die Pflanzen sehen gut aus, haben nur zuviel Blatt Masse. Sollte ich sie noch einmal anbauen, dann ohne Netz und mit mehr entlaubung. Ich denke sie werden in 2-3 Wochen geerntet.

Processing
Likes
1
Share


@Lukazw
Follow
Semanas finales endulzado los cogollos con melaza y maca peruana.
Likes
Comments
Share


@BruWeed
Follow
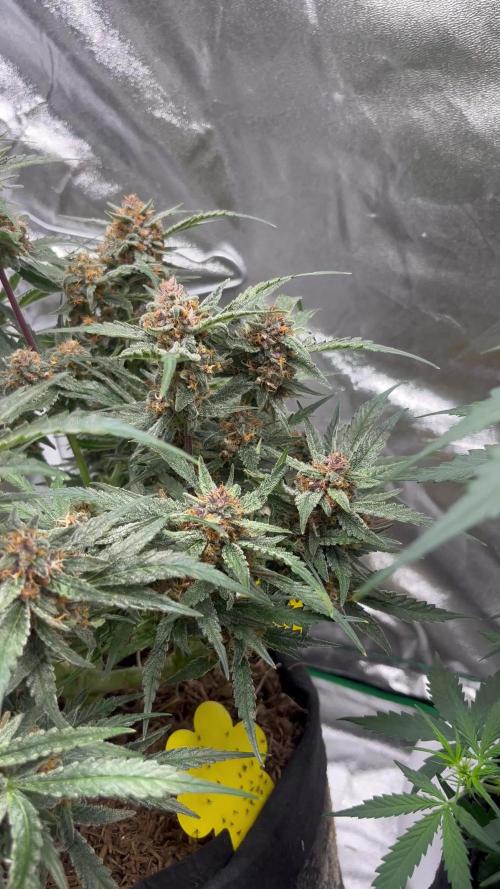
11/10 - empezo su quinta semana de floración.
Se encuentra perfecta, su olor es muy fuerte y esta muy resinosa.
No tuve ningún problema hasta el momento. Su evolución fue muy rapida en comparación a otras geneticas que cultive.
Aprox le faltaría un mes mas para ya poder podarla, los pistillos se encientran muy blancos por el momento.

Likes
Comments
Share

Likes
101
Share

@SmallGrowz
Follow
Am Blütetag 74 wurde dann geerntet.
Die Blüten hingen jetzt 6 Tage und waren zwei Wochen in den Gläsern.
Die kleiner im 1l Topf hat 12.5g auf die Waage gebracht. Die große gute 84g.
Bin mit dem Ertrag sehr zufrieden👍🏼
Zuckerblätter werden dann noch zu dry sift gemacht welches eventuell gepresst wird. Auch ein paar Buds werden sicher zu rosin verarbeitet.
Danke an an alle die diesen grow gespannt verfolgt haben! Love u Growmies💚😎

Likes
132
Share


@Crashoverite
Follow
Hi all👨🌾👋
Welcome to my another week update
Hope everyone keeping well and having a great week 🧑🌾🤤
Week 2
Feb 9 - Feb 15
Very easy and steady week. Kitana and Aphrodite doing absolutely fantastic. Watered 2 times this week with approx. 300 ml each and on Feb 12 introduced foliar feeding, at start with few drops of biobizz fish mix in 100ml solution. They responded flawlessly😁🤤🧑🌾
Have a great and successful week everyone ✨🍀
Much appreciate all your likes, follows and comments. 🙏💚❤️💜
Peace and love brothers and sisters 👨🌾✌️💚
Links
https://2fast4buds.com/seeds/TROPICANA-COOKIES-AUTO
https://www.biobizz.com/
https://fishheadfarms.com/
Likes
5
Share


@alafmalaf
Follow
This week is getting closer but still not close to the size I want pre flower.
I turned down the lights and got some fertilizer to see if I can coax them to grow up. I think I've been light shocking them.
12/25
I hiked down the light and got the some fertilizer and you can see the diff in just one day of fertz and less light, more humidity


Likes
31
Share


@Mrs_Larimar
Follow
2024-07-20
I'm focusing solely on the Indoor Girl in this report. The Outdoor Girl will receive a separate update
once she shows more signs of flowering. This week's photos showcase the Indoor Girl's journey
from start to finish, and she's been an absolute joy to grow - truly an easy-going plant.
I'm fascinated by her structure, which boasts a perfect ratio of leaves to buds.
Remarkably, I never had to remove a single leaf to improve light exposure. I only topped her twice
to open up the canopy. She grew vigorously and effortlessly, requiring just some nutrients and top dressing to keep her happy
during the transition to flowering. Her daily water intake was consistently around 1 liter minimum, with only four feedings throughout the entire growth cycle.
The result is a plant crusted with trichomes - glittery and gluey, perfect for extraction. Harvesting was a breeze
due to the ideal leaf-to-bud ratio. I've kept her remains and continue to water and feed her in an attempt to revegetate.
Meanwhile, her outdoor sister is thriving in a hot and sunny environment.
I adore her aroma profile, which features only the most pleasant terpenes. The scent is reminiscent of various citrus fruits
- pink grapefruit, orange, mandarin, and tangerine - with a creamy touch that's reminiscent of a delicious dessert. There are also floral notes of lavender.
I'll continue documenting the Outdoor Girl's progress here. I'm certain I'll grow this strain again, as it has proven to be stable,
well-composed, superbly structured, and delicious.
Well done, Seedsman!
Likes
148
Share

@squalino
Follow
🌿 Journal de Culture : Mac 1 – "Spirit" (Plante #2) – LE HARVEST (Récolte)
#Dryrocket
Date du jour : 11/07/2026
Âge de la plante : J+91 (Semaine 13 - Jour de récolte)
Taille réelle : 170 cm (mesurée du sol)
Évolution :
Le cut final d'un monstre sacré extraterrestre
Nous y sommes ! Après 13 semaines de suivi côte à côte, le jour de gloire est arrivé pour Spirit. Aujourd'hui, samedi 11 juillet, les ciseaux ont chauffé pour le grand Harvest. Le résultat est tout simplement irréel, c'est un truc de malade !
? Le Grand Cut & L'Épreuve du Manucuring
Un travail de titan :
Commencé à 7h du matin, le manucuring s'est terminé à 2h du matin, avec seulement 4 petites pauses de 1h.
C'était extrêmement long et pénible car les têtes sont tellement denses que les petites feuilles étaient logées tout au fond. Mais le résultat en valait chaque seconde.
Une taille impressionnante :
Une fois sortie de la tente pour la mesurer en réel, Spirit affichait pas moins de 170 cm de haut depuis le sol et 140 cm depuis le pot . Une stature monumentale, presque ma taille, ce qui est totalement exceptionnel pour une variété autofloraison.
Solidité confirmée :
Contrairement à sa sœur, Spirit est restée fièrement debout jusqu'au bout grâce à la robustesse incroyable de ses branches.
🛸 Des Fleurs Extraterrestres & Pesée Humide Monstrueuse
Le verdict de la balance :
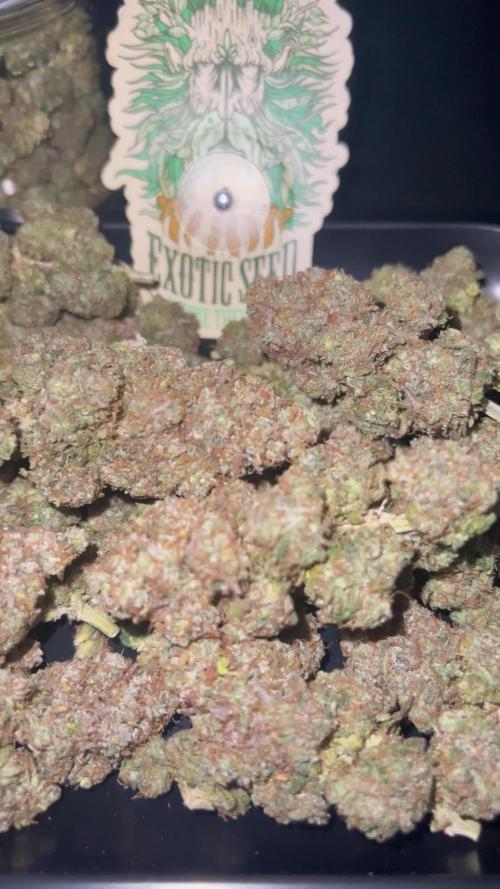
C'est ma plus grosse récolte jusqu'à présent... Spirit affiche un score hallucinant de 694 grammes humides !
Les plus grosses têtes ont été posées en premier sur la balance dans la vidéo, et le poids est impressionnant.
Aspect des buds :
Je n'ai pas de mots pour décrire ces têtes. Elles sont énormes, denses comme jamais et complètement saturées de trichomes. En raison de la chaleur et de la proximité de la lumière en fin de run, la cime ne fait plus de simples foxtails mais de véritables tentacules de résine, accentuant son look d'alien.
plusieurs têtes mesuraient plus de 50 cm de long .
Préservation génétique :
Lors de la manucure, j'ai trouvé 3 graines précieuses au cœur des branches.
Elles sont gardées très précieusement pour voir si je pourrai retrouver exactement cette même génétique dantesque lors d'une prochaine session.
🌬️ Paramètres & Stratégie de Séchage
La récolte de Spirit est officiellement divisée en deux secteurs pour s'adapter à mon environnement :
Secteur DryRocket (Le Test Final) :
Les plus grosses têtes, massives et dures au toucher, sont placées dans l'appareil DryRocket avec mon dernier sachet disponible (prévu pour un demi-kilo de weed). C'est le test idéal pour sécuriser le cœur de ces buds compacts.
Ancien Secteur :
Toutes les autres têtes, plus petites et secondaires, sont réparties de manière classique.
🙏 Remerciements
Un immense merci réitéré à @mia_biotabs et à Mrs_Larimar pour ce programme de nutrition Biotabs et les conseils qui ont permis d'obtenir ces têtes géantes, dures et résineuses. Et bien sûr, un grand merci à
@Dryrocket :
l'appareil est en place pour le test final sur les plus gros morceaux de cet alien ! Merci à tous d'avoir suivi les aventures de Spirit pendant ces 1🌿 Journal de Culture : Mac 1 – "Spirit" (Plante #2) – LE HARVEST (Récolte)
#Dryrocket
Date du jour : 11/07/2026
Âge de la plante : J+91 (Semaine 13 - Jour de récolte)
Taille réelle : 170 cm (mesurée du sol)
Évolution : Le cut final d'un monstre sacré extraterrestre
Nous y sommes ! Après 11 semaines de suivi côte à côte, le jour de gloire est arrivé pour Spirit. Aujourd'hui, samedi 11 juillet, les ciseaux ont chauffé pour le grand Harvest. Le résultat est tout simplement irréel, c'est un truc de malade !
? Le Grand Cut & L'Épreuve du Manucuring
Un travail de titan : Commencé à 7h du matin, le manucuring s'est terminé à 2h du matin, avec seulement 4 petites pauses de 1h. C'était extrêmement long et pénible car les têtes sont tellement denses que les petites feuilles étaient logées tout au fond. Mais le résultat en valait chaque seconde.
Une taille impressionnante : Une fois sortie de la tente pour la mesurer en réel, Spirit affichait pas moins de 170 cm de haut depuis le sol. Une stature monumentale, presque ma taille, ce qui est totalement exceptionnel pour une variété autofloraison.
Solidité confirmée : Contrairement à sa sœur, Spirit est restée fièrement debout jusqu'au bout grâce à la robustesse incroyable de ses branches.
🛸 Des Fleurs Extraterrestres & Pesée Humide Monstrueuse
Le verdict de la balance : C'est ma plus grosse récolte jusqu'à présent... Spirit affiche un score hallucinant de 694 grammes humides ! Les plus grosses têtes ont été posées en premier sur la balance dans la vidéo, et le poids est impressionnant.
Aspect des buds : Je n'ai pas de mots pour décrire ces têtes. Elles sont énormes, denses comme jamais et complètement saturées de trichomes. En raison de la chaleur et de la proximité de la lumière en fin de run, la cime ne fait plus de simples foxtails mais de véritables tentacules de résine, accentuant son look d'alien.
Préservation génétique : Lors de la manucure, j'ai trouvé 3 graines précieuses au cœur des branches. Elles sont gardées très précieusement pour voir si je pourrai retrouver exactement cette même génétique dantesque lors d'une prochaine session.
🌬️ Paramètres & Stratégie de Séchage
La récolte de Spirit est officiellement divisée en deux secteurs pour s'adapter à mon environnement :
Secteur DryRocket (Le Test Final) : Les plus grosses têtes, massives et dures au toucher, sont placées dans l'appareil DryRocket avec mon dernier sachet disponible (prévu pour un demi-kilo de weed). C'est le test idéal pour sécuriser le cœur de ces buds compacts.
Ancien Secteur : Toutes les autres têtes, plus petites et secondaires, sont réparties de manière classique.
🙏 Remerciements
Un immense merci réitéré à @mia_biotabs et à Mrs_Larimar pour ce programme de nutrition Biotabs et les conseils qui ont permis d'obtenir ces têtes géantes, dures et résineuses. Et bien sûr, un grand merci à @Dryrocket : l'appareil est en place pour le test final sur les plus gros morceaux de cet alien !
Merci à biotabs pour leurs engrais incroyable
Merci à growers choice pour leurs belles génétique
Merci à tous d'avoir suivi les aventures de Spirit pendant ces 13 semaines !
on se voit pour la Pesée final et le hash prochainement. ❤️❤️❤️❤️

Likes
4
Share


@TheSurfBud
Follow
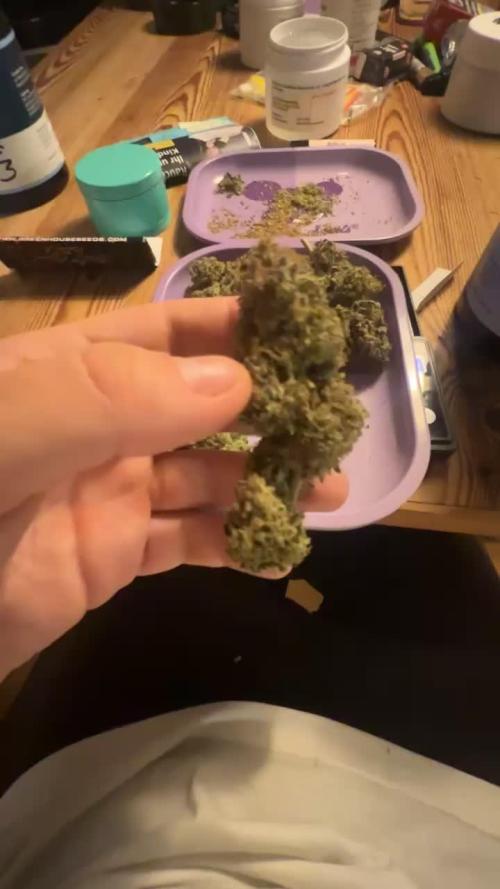
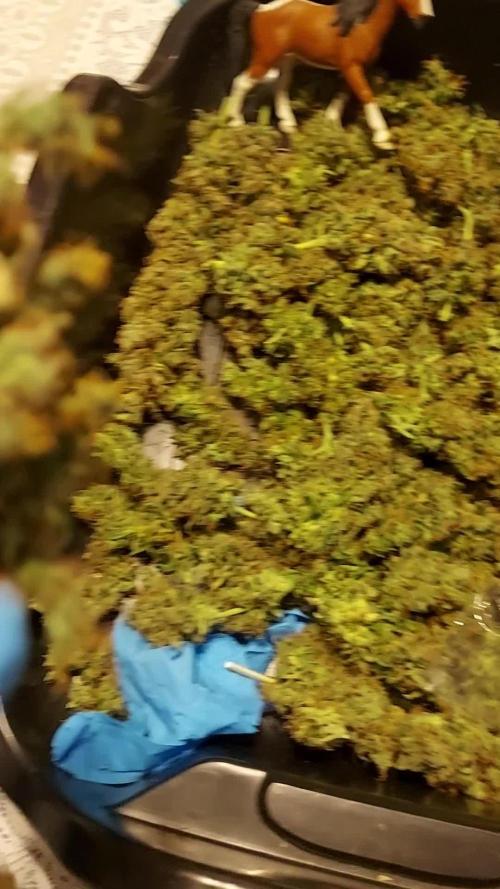
Zkitzz Auto has impressed me.
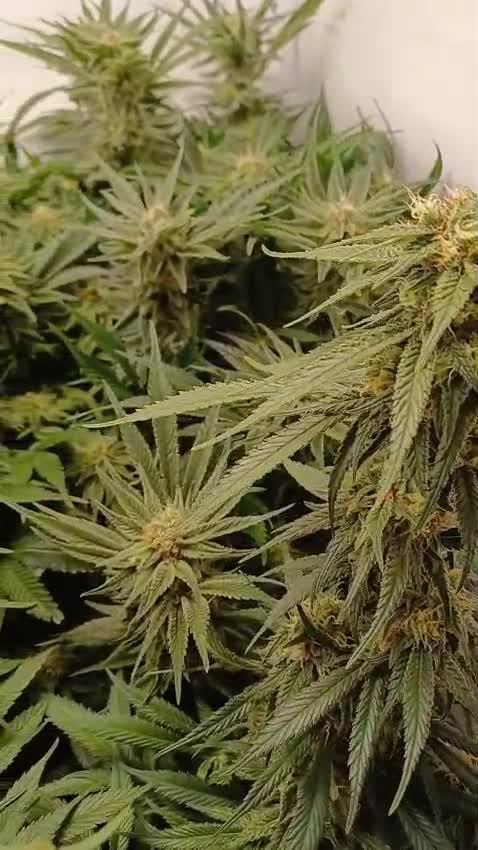
Massive chucks of solid dense bud rich in trichomes. Coke can size main colas and all side branches not far behind in size.. brilliant grow of top quality looking herb..
Can wait for the smoke test..
Happy growing friends 🇦🇺🇦🇺🇦🇺


Likes
9
Share


@420Guru
Follow
I was lazy with changing water for the first two weeks but I change water weekly and it looks like she’s enjoying what I’m feeding her. Although one plant is growing after than the other.