Likes
Comments
Share
@Mikes
Follow
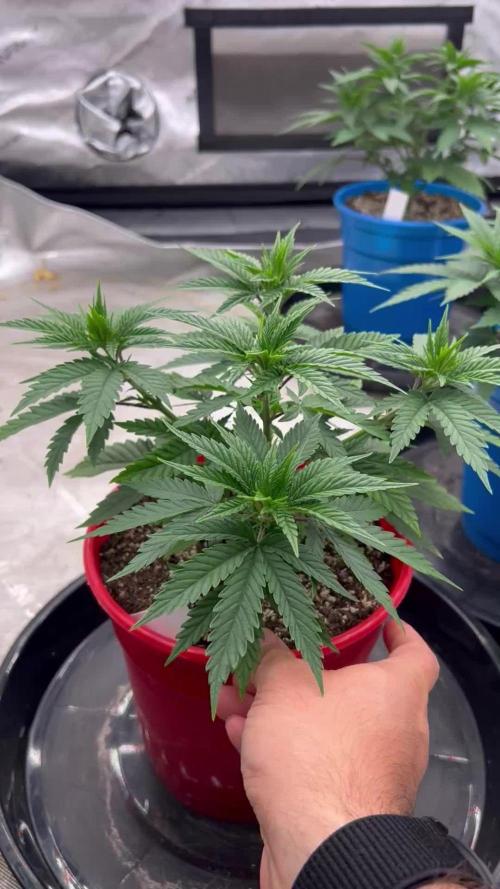
Just started the 12-12 with carbon load and this thing sprouts like crazy...
Likes
20
Share
@gr3g4l
Follow
nada que resaltar. Una más entre el montón. igual 70gr. en seco no más como comenté antes, las auto no siempre gustan pasados unos meses curando y cansado de tenerlo por ahí me decidí por hacer hash con hielo. 9,1gr de 100 gr. áprox de cogollitos
Likes
19
Share
This week I just let them do their thing. They seem to be bouncing back after the transplant I did last week. My OCD is getting to me though with the uneven canopy. They seem to be happier tho so I’m happy.
Likes
77
Share
@deFharo
Follow
Bienvenidos amigos, he cumplido 20 semanas de vida, 12 de floración y dos como reina del jardín!! 😍... mi nombre creo que es Amnesia, soy algo olvidadiza 😵, mi apellido es Kush y desciendo de antiguos linajes Haze y Kush, soy fruto del mestizaje de plantas emigrantes y reúno en mis genes las mejores sativas de dos continentes...llámame AKU!! 😘 y si te acercas a mi... te regalaré aromas complejos e intensos, a incienso, madera y frutas ácidas que recuerdan a lima y pomelo. Esta semana he bebido 2909ml de agua de riego, un 11% menos que la semana anterior. Una semana de paz, mis flores continúan creciendo, mi masa foliar se mantiene casi intacta y saludable, me alimento principalmente de los nutrientes y minerales del sustrato, que mis amigos los microorganismos solubilizan y mineralizan... mientras siga creciendo mi cultivador no me cortará... no quiero hacerme mayor 🤸‍♀️🌾👸 01/05/21 Hace cuatro días que me hicieron el último riego, he tardado un día más de lo normal en consumirlo, porque ha hecho un poco de frío. Hoy he tomado una mezcla suave de riego para que a mis flores no les falten nutrientes (PK): Hidrolizado potásico de leonardita (Humato) con fósforo (Húmicos, fúlvicos, PK) al 1%, aderezado con Microorganismos de Montaña Activados con minerales y nutrientes (MMA Plus) al 1,5% y endulzado con melaza. PH: 6.54, EC: 1.0. 1700ml. 05/05/21 Hoy mi cultivador ha decidido regarme, por ahora, con menos cantidad de agua, para poder regarme cada 3 días en vez de cada 4, de esta manera, el sustrato tendrá más cantidad de oxígeno y los microorganismos harán su trabajo en mejores condiciones aeróbicas. Mis hojas se mantienen muy saludables, muy lentamente están amarilleando, mis flores mantienen pistilos blancos y no hay síntomas adversos, yo me encuentro muy bien y cuando necesito comer se lo pido a los Microorganismos que siempre tienen nutrientes y minerales a mi disposición. Riego con inoculación de MM para acelerar el proceso de disolución y mineralización de nutrientes del sustrato: Agua de montaña con Microorganismos de Montaña Activados (MMA Basic) al 3% con Ormus al 0,5% y melaza. PH: 6.46, EC: 0.88. 1300ml. ..How the hell did I get here so soon I don't wanna grow up... Hasta la próxima semana amigos... SALUDOS A VUESTRAS PLANTAS!! 👸🐅🌲 ================================= 🙄☮️👇🙏👌🤛👍👉👉👉❤️💜❤️👈👈👈🤜👌🙏👇☮️🤩🖐️🏻 =================================
Likes
6
Share
Delta 9 cada 10 días empezando con 0,5 foliar i acábando con 5ml por litro hasta 4 riegos Terpesyn 1 ml todo el proceso
Processing
Likes
52
Share
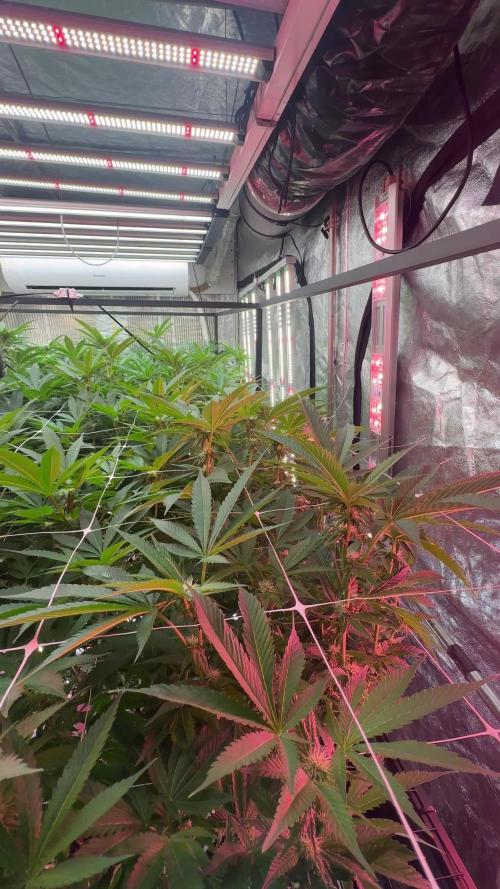
The week starts Monday Jan-27, being day 27 of flowering. Plants are looking very good and healthy, albeit some bigger buds at this stage is missing. Carried out more minor defoliation, only trimming fan leaves on one side of a bud site in alternate fashion. Strategy is to expose more bud sites to light. Leaves are getting sticky and glistening brightly. The canopy has a few branches stretching out typical of Sativa genetics. Hoping the bud sites grow bigger soon filling up the space. Feeding a high EC nutrient mix whilst monitoring run-off EC which remains below feed EC. Light is maintained at 30cm above the canopy, with daily fertigation at lights on - watering just under 3L per day. Maintaining an average RH in the space at 50%. ---- updates for prior 4 weeks -------------------------------------------------------------------------------------------------------------------------------------------------------------------------------------- ----------------------------------------------------------------------------------------------------------------------------------------------------------------------------------------------------------------------- The week starts Monday, Jan-20 still flowering away. Bud sites are beginning to take form and the ScrOG setup looks full, ready for the development of some large buds. Removed a few more leaves from above the canopy which were blocking bud sites below. Also cut small stems (with bud sites) below the canopy from both plants which were unlikely to grow strong. It's now looking clearer below the canopy. The canopy is still thick with beautiful luscious green leaves typical of an Indica. Run-off EC has been slowly rising over the weeks but still under the feed EC - will be keeping my eyes on this. Light is maintained at 30cm distance from canopy, with daily fertigation at lights on - watering almost 2.5L per day. Maintaining an average RH in the space at 50%. ----------------------------------------------------------------------------------------------------------------------------------------------------------------------------------------------------------------------- The week starts Monday, Jan-13 in flowering stage. The plant is growing thick and fast, with very short node intervals creating a thick canopy. Carried out substantial defoliation of almost all the big fan leaves and a few little stems that were not likely to make it above the canopy. Avoided defoliating the major cola branches. This encourages the plant not to waste resources on a node which is only going to produce “popcorn” buds. The plants reacted well to the defoliation and were looking good by the end of the light cycle for the day. The net is completely full and this will be the last week of applying any LST as part of the ScrOG setup. Light is maintained at 30cm distance from canopy, with daily fertigation at lights on - watering almost 2.5L per day. Lowered the average RH in the space to 50%. ----------------------------------------------------------------------------------------------------------------------------------------------------------------------------------------------------------------------- The week starts Monday, Jan-06 in flowering stage. The net is filling up nicely with the ScrOG process being enjoyable - just tucking branches nicely under squares once stretched enough. The Indica dominant strain is really shining with incredible dense growth and thick branches that don't bend as easily as it's Sativa neighbour. Light is maintained at 30cm distance from canopy. ----------------------------------------------------------------------------------------------------------------------------------------------------------------------------------------------------------------------- My grow setup includes; - Secret Jardin DS120W tent (120cm x 60cm x 180cm) placed inside the bedroom. Passive intake of air is from a closed off section of the room where the central heating boiler sits - the intake is warm air (20 degC.) and fairly dry (40% RH) during the winter months. - Mars Hydro SP250 LED light - extraction fan - AC Infinity Cloudline T6 - ventilation fans - aquarium heater - small oil heater - small dehumidifier - 20L Airpots and 3.5L general pots for seedling stage - Canna Coco substrate and nutrients - pH and EC/TDS meters - Thermo/Hygro meter
Likes
Comments
Share
Weird bud growth, hoping what look like fox tails fill out real well in the future. Have been saturating well and going lighter with the fertigation on this plant, in the future I think going into flower I will just cut the n part of my feed completely unless I see deficiency of some sort. As the bloom component still has some n in it. 7/26 Read EC in base at 2.5, definitely acceptable. Will continue not giving N to this plant, while the rest get get A.B.E. 3/3/1.5
Likes
44
Share
**Encontrarás la traducción a español al final de la descripción** From/Desde: 10/05/19 || To/Hasta: 16/05/19 From day/Desde día: 78 || To day/Hasta día: 84 You can find the Money Maker Diary here: ** Podéis encontrar el diario de las Money Maker aquí:** https://growdiaries.com/diaries/25667-gorillamakingmoney-gorilla-vs-money-m -----IMAGES & VIDEOS----- 5 - HomeMade Organic & Cheap CO2 generator (more info in week summary) 9, 10, 11 & 12: The bud on the right is a Gorilla one, the buds in the left or/and in the middle are Money Maker ones. 15 - Same Gorilla plant buds, one affected by CO2 in the roots and the other not. -----WEEK SUMMARY----- The smell is more sweet and intense every day, friends that came home turned them eyes into crystals when they see this little babys. The size isn't awesome, but the high ammount of buds full of crystals plus the strong sweet aroma makes them awesome. Buds are growing and fattenning very very well. This week i added a boost of HomeMade CO2, i never measured the results of this invention so i can't give CO2 measurements. This method is widely used in home aquariums and there is where it comes from. For those interested i'm going to write here more detailed instructions. The 4 liters i've made will last for about 2 weeks. ---NEEDINGS--- - 250 ml Bottle - 6~10 l Bottle - 400 g Sugar / l water - 1 Envelope of organic baker's yeast / l water (CHEMICAL WILL NOT WORK) - 3 mid plastic tubes 40~50 cm - 1 short plastic tube 5~6 cm - 4 tube adapters - Hot glue to seal adapters The process of creating CO2 is simple, mix water, organic yeast and sugar in a bottle, and the sugar will free CO2 in the process of fermenting to alcohol due to the yeast. 1. Make a hole in the center of the big bottle cap, insert an adapter and secure it with hot glue 2. Make 3 holes in the small bottle cap and glue the other 3 adapters 3. Link both caps with one of the mid tubes and insert the other tubes on free adapters 4. Insert a short tube in the bottom of the small cap in the adapter that came from the big cap 5. Watch the Video!! -----WATERING CALENDAR----- Plants are beginning to drain the pots a bit faster so from now on i will raise the water ammount on each watering day 0.25 l. 11/05/19 - 1,5 l with All week nutrients -(Nirvana & Blombastic) also Big Bud half dosed @ PH6.4 & 2 E.C. 14/05/19 - 1,5 l with Bud Candy, Big Bud, Nirvana, B52, Bud Factor-X, Sensizym & Blombastic @ PH6.4 & 1.5 E.C. *****ESPAÑOL***** -----IMÁGENES Y VÍDEOS----- 5: Generador de CO2 casero, barato y orgánico (más info en el sumario semanal) 9, 10, 11 & 12: El cogollo que sale a la derecha es de una Gorila, el de la izquierda y/o el de en medio son de una Money Maker 15: Dos cogollos de la misma planta, uno afectado por CO2 en las raíces y el otro no -----SUMARIO SEMANAL----- El olor es más dulce e intenso día a día, los amigos que vienen a casa a verlas se quedan ojipláticos al verlas. El tamaño no es una maravilla, pero la gran cantidad de cogollos llenos de cristales añadido al aroma que entra por las fosas nasales las hacen increíbles. Los cogollos crecen y engordan de maravilla. Esta semana he añadido un boost de CO2 casero, nunca he hecho mediciones de los resultados por lo que no puedo darlas. Este método es ampliamente usado en peceras caseras y de ahí saqué la idea. Para aquellos interesados dejo aquí instrucciones más detalladas. Con los 4 litros de agua que he preparado yo da para unas 2 semanas. ---NECESITAMOS--- - Botella de 250 ml - Botella de 5 a 10 litros - 400 g de azúcar por litro de agua - 1 sobre de levadura de postre orgánica (LA QUÍMICA NO FUNCIONARÁ) - 3 tubos de plástico de tamaño medio 40~50 cm - 1 tubo de plástico de tamaño pequeño 5~6 cm - 4 adaptadores para los tubos - Cola caliente para pegar y sellar los adaptadores El proceso de generar CO2 es simple, mezcla agua, levadura orgánica y azúcar en una botella, y el azúcar liberará CO2 en el proceso de fermentación a alcohol. 1. Haz un agujero en la tapa de la botella grande, inserta un adaptador y séllalo con cola caliente 2. Haz 3 agujeros en el tapón pequeño y haz lo mismo con los otros 3 adaptadores 3. Conecta los 2 tapones con uno de los tubos y conecta los otros 2 tubos a los adaptadores restantes 4. Conecta el tubo pequeño en la parte libre del adaptador del tapón pequeño que viene del tapón grande 5. Mira el vídeo -----CALENDARIO DE RIEGO----- Las platas comienzan a secar los tiestos un poco más rápido, asi que de ahora en adelante incrementaré 250 ml de agua adicionales en cada riego. 11/05/19 - 1,5 l con todos los nutrientes semanales -(Nirvana & Blombastic) BigBud mitad de dosis @ PH6,4 & 2 E.C. 14/05/19 - 1,5 l con Bud Candy, Big Bud, Nirvana, B52, Bud Factor-X, Sensizym y Blombastic @ PH6,4 & 1,5 E.C.
Likes
17
Share
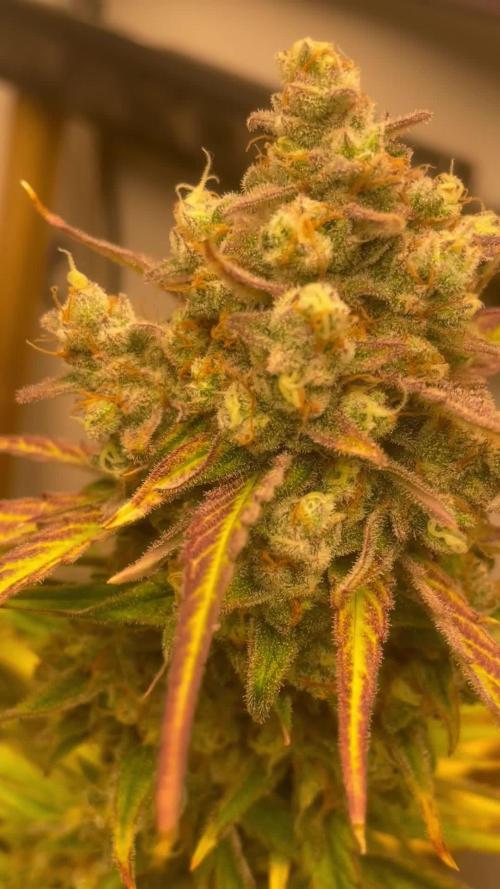
Well the buds are starting to join together. She smells insane and is pure resin. Not much meat on here she is a skinny plant with very nice colours.
Likes
44
Share
@I_and_I
Follow
Disaster strikes, I find bud rot in a couple of the biggest colas of the centre plant, I remove the colas, salvage what I can, i now understand I have too little airflow for the number of plants in the tent, I am vigilant with looking for more bud rot, which I find in the biggest colas of the small stout indica plant, I presume its mostly indica from its shape, I remove, salvage and begin to dry what I can save I install another more powerful fan on max speed with acoustic duct to keep fan on max speed, I install another fan to blow across the plants 5oo, humidity drops, everything looks good again to go forward, no further signs of bud rot
Likes
2
Share
- DAY 36 (09/07) In recent days I cut the two older pairs of infected leaves. The day after the previous feeding with Micro-Grow-Bloom, light rust-colored spots appeared on some old leaves, especially at the edges. I will show you better in the following days. At the moment they seem to be few. Everything that I will do relevant in the days of this week I will update it here in Week Comment. I am open to advice, I would be happy if you comment with what you would do in my place. - DAY 41 (14/07) TOPPING & FEEDING I topped the tip as in the photo. After that, I irrigated 1.5 liter of water with: - 0.75ml Micro - 0.75ml Grow - 0.75ml Bloom (Always with some lemon juice, not much, I want to trust the PH perfect technology adopted by the manufacturer) Solution PH: range 6.7/7.0 In the same evening I sprayed the usual mix of neem oil. (neem oil, water, potassium soap and lemon juice) Day/night air temperature on average for this week: Day 30-32 °C. Night 20-22 °C.
Likes
26
Share
Joa, die Gelato ist super stable. Gebrochener Hauptstamm. Egal. 2 mal, auch egal. Sie ignoriert es einfach. 😍 Sensi Seeds Good looking girl. Duftet hervorragend. Aus dem zelt kommt eun frischer Bananen angehauchter treibhausduft. Sehr angenehm.
Likes
7
Share
Alles super mein Training diese Woche war hart deswegen ist sie langsamer gewachsen dafür brauchte sie 2-3 Tage Regeneration ich hab sie mal verglichen Mit ein paar anderen aus dieser grow Community ich bin sehr beeindruckt von Euren aufzuchten aber ich muss sagen ich bin irgendwie paar Tage voraus trotz hartem Training Also wenn ihr Lust und Zeit habt vergleicht einfach mal selbst und Bildet Eure eigene Meinung sagt mir Was ihr denkt positiv wie auch negativ im Fine With that thx already and stay save and high!!!!!me stay save high!!!!enjoy life 💯💯
Likes
23
Share
Bonjour à tous les padawans et maîtres jedis Pour la germination j'utilise la technique du sopalin Pour faire germer vos graines dans du sopalin, vous aurez besoin : Un Tupperware avec couvercle Du Sopalin, ou autre quel papier de cuisine qui soit épais et qui retienne l’eau Un verre d’eau Si c’est l’hiver, vous placerez le Tupperware près d’une Box ou d’un Modem pour donner un peu de chaleur Étapes de la germination: faire germer vos graines de cannabis dans du sopalin La première chose à faire est de tapisser le fond du Tupperware avec du sopalin, 2-3 feuilles suffiront. Si vous ne mettez qu’une feuille, elle captera peu d’eau et pourra sécher, vous mettrez donc plus de feuilles que pas assez. Une fois les feuilles placées, versez l’eau du verre dessus, mais pas trop, juste de quoi imbiber toute la surface couverte par les feuilles. Vous aurez ainsi l’eau suffisante pour faire germer les graines sans avoir besoin d’essorer la feuille de papier. Une fois les feuilles humidifiées, mettez vos graines par-dessus, et recouvrez le tout avec une autre couche de quelques serviettes. Une fois en place, humidifiez cette nouvelle couche. faire germer vos graines de cannabis dans du sopalin Lorsque vous graines seront placées entre les 2 couvertures de feuilles, fermez le Tupperware hermétiquement pour que l’eau reste bien dedans et que l’ensemble ne sèche pas malgré la chaleur. Si vous êtes en hiver lorsque vous mettrez vos graines à germer, ou que les températures sont inférieures à 20°C, vous placerez le Tupperware sur votre Box ou modem jusqu’à germination, mais toujours en évitant le contact avec la lumière. Si vous êtes dans une zone au climat tempéré ou chaud, vous n’aurez qu’à placer le récipient avec les graines à l’ombre dans une armoire ou une caisse de rangement. Toutes les 24h, vous devrez vérifier l’état d’avancement de la germination. Si quelques-unes sont sorties mais pas d’autres, prenez celles qui ont germé pour les planter, laissez les autres dans le Tupperware et vérifier de nouveau le lendemain.
Likes
5
Share
Taste like sour and grapes 10/10 , Big solid buds :)
Likes
35
Share
Venga familia, va la septima semana de vida y primera semana de floración de estas Frosted Guava de Zamnesia. Añadimos la malla de Scrog hace una semana, lleva una apical y ahora ya pude colocarla. Que color que sanas se ven como se nota que Agrobeta es de lo mejor, las niñas están de 10. La humedad está en su punto, y por fin puedo controlar la temperatura en 25 grados. Os comento que tengo un descuento y para que compréis en la web de Zamnesia de un 20%, el código es ZAMMIGD2023 The discount 20% and the code is ZAMMIGD2023 https://www.zamnesia.com/ Mars hydro: Code discount: EL420 https://www.mars-hydro.com/ Agrobeta: https://www.agrobeta.com/agrobetatiendaonline/36-abonos-canamo Hasta aquí es todo, buenos humos 💨💨💨.
Likes
5
Share
@coolesrat
Follow
Missed a watering one week , sorry for the small amount of yellow leaves but it all smells amazing :) . Hoping by adding magnesium sulphate in the feed I’ll be able to bring back some of the colour in the foliage, but other then that everything looks and smells great ;) enjoy!
Likes
7
Share
Semana de cosecha! Al fin el tan esperado momento momento se aproxima y no puede tener una mejor pinta! Realmente he quedado maravillado con la belleza de este fenotipo muy parecido al que promociona el banco en su portal, así que muy satisfecho por eso. Solo esperar a que se seque bien el sustrato y estaremos cosechando estos bellos frutos 🤩😍