


Likes
14
Share


@eldruida_lamota
Follow
Venga familia que ya viene la cosecha de estas Punch Pie de RoyalQueenSeeds , que ganas que tenia ya de darles machetazo.
No veas que pinta que tienen estas plantas.
Las flores aparte se ven bien resinosas.
a sido una genética con la que disfruté mucho cultivarla, es algo complicada cultivarla pero merece la pena si eres cultivador con experiencia no te será problema cosechar.
Agrobeta:
https://www.agrobeta.com/agrobetatiendaonline/36-abonos-canamo
Mars hydro:
Code discount: EL420
https://www.mars-hydro.com/
Hasta aquí es todo , espero que lo disfrutéis, buenos humos 💨💨.


Likes
16
Share


@Mo_Powers
Follow
i actually wanted to harvest it at the end of the week, but i will give it another week to ripen. the trichomes are not yet at the stage i would like them to be. so far i have not discovered any mould. due to the changeable weather and the sometimes very high humidity, it is quite possible that it will develop. unfortunately this happened with my white widow. let's hope that she continues to do well and that i will be able to harvest her.

Likes
59
Share


@Ezzjaybruh
Follow
————-DAY 22 of flower—————-
Alright stretch is all wrapped at this point. Did a little bit of defol just cuz things were getting cramped on the interior of the plants.
Having to really watch run off on these girls.
Couple signs of mildew 🤦♂️
Ugh - been months since I’ve had a lick of mildew and it starts up now. Lots of reasons probably - weather and shit outside. Just turned furnace on for the first time it’s kicking up all types of shit from inside the ducts.
Upped ArmorSi cuz silica is supposed to help with WPM.
Pheno 1 & 4 are largest two.
Pheno 1 has more lateral branching into even canopy.
2 is middle child as far as size.
3 caught up actually after some late stretching.
All are about the same nutrient wise except for 1 - she’s the odd one out as far as morphology in some respects. Also as I started saying is showing different needs as far as nutrients. Showing some calcium deficiency in the last week.
Overall so impressed with these genetics and results thus far.
——————- Day 26 ——————-
Stacking and putting weight on.
PK boosted
3 first to show some purps in buds. Littttle tiny bit in 1 as well.
Frosty as hell
WPM seems at bay

Likes
7
Share

@GoodTimesOrganics
Follow
Hi liebe Community and Welcome Back! 💚
Slush Mint Cake von Dutch Passion
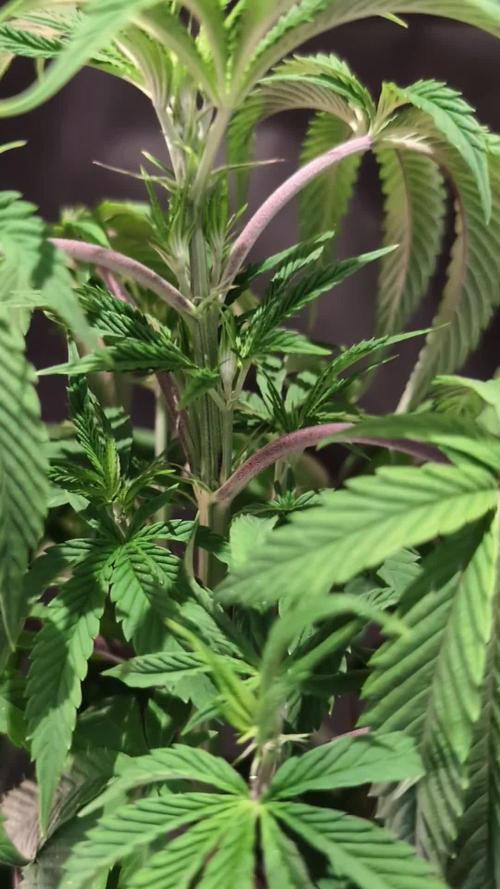
Die Pflanzen gedeihen prächtig und endlich konnte ich ein Weibchen identifizieren!
Diese wurde nun in ihren neun Liter Endtopf gepflanzt.
Erfahrungsgemäß wird die Woche nun noch zwei Wochen im Wachstum bleiben und dann in die Blüte übergeleitet.
Ich habe bereits die untersten Triebe entfernt und auch daß untere Blattwerk rausgenommen.
Die Wuchsform ist kräftig und Energie geladen.
Die Seitentriebe spreizen sich schön ab, was nach der Geschlechtsbestimmung gut für das Topping ist
Die Bedingungen im Growschrank sind für die Wachstumsphase Top!
—————
🌞 Temp: 26
🌚 Temp: 18°C bis 19°C
💨 RH: 64%
VPD: 1,1 kPa
💡ppfd: 330 mpm
—————

Likes
8
Share


@Green_Coffee
Follow
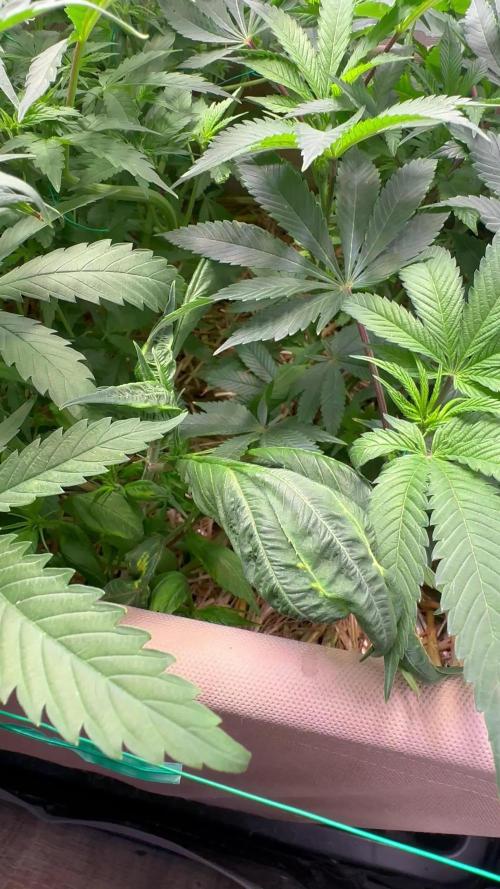
First buds appeared this Wednesday! Still continuing with shed time at night; I'm still dwelling how/when/if I'll stop this. From start to stop, I can get the plants out in the morning in 7 minutes, and put them away at night in 5. It's also time I'd love to get back. But it also could prevent them being seen by casual weed thieves, as well as saving them from frequent night rains in Sept. But they're also soon going to be getting sticky which will suck for handling them.
Speaking of, I'll probably pick a separate shirt to use while doing this, as even tying them up a bit more today has probably made it so I'll reek of weed until I change.
Speaking of tying them up, the video allows one to see trees in the background getting tossed around in the wind, while they don't have too much movement. And I love my windchimes :) .
Still watering 5 gallons every 2-3 days. Today was pretty cool; only a high of 26C.



Likes
17
Share


@CanadianFillmore
Follow
Welcome growfessors to week 4F in the 4x8.
LSD, Green Crack and Divine storm are showing the most discoloration, however the bud sites continue to bulk up and frost is showing.
Both Mandarin dreams strains, 4 of pheno 1 and 2 of pheno 2 all look good, with a bit of discoloration starting to show.
A bit of defoliation and removal of any dead leaves. Not much else to say, they look happy and a bulking up nicely.
Tune in next week growfessors for another episode 👽🌳💚


Likes
11
Share


@Krissci
Follow
Day 5 - lollipopping and removing dead fan leaves.
Harvest is very close.



Likes
34
Share


@420DeepGrow
Follow
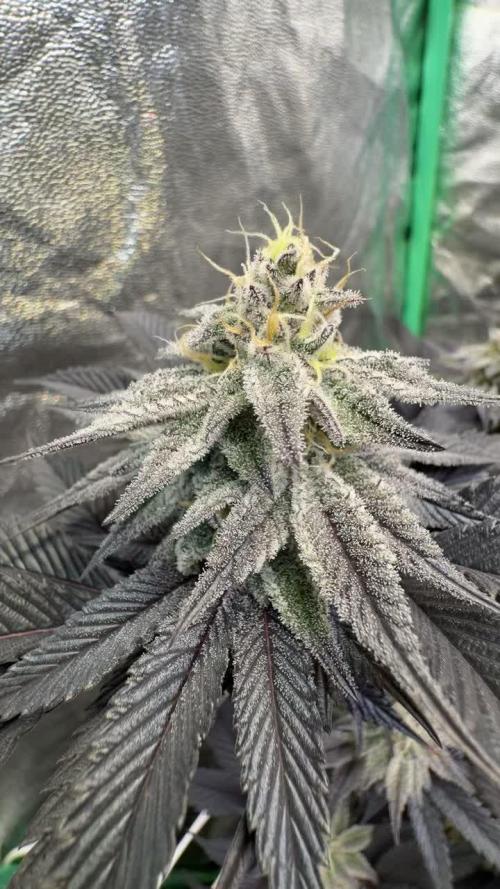
La primera semana a ido bien, destacar que la próxima vez, estresaré lo mínimo posible a las plantas, ya que si quieres una cosecha rápida y saludable lo mejor creo es no estresar a las plantas, nada de los stress ni mierdas, dejarla desarrollar como si estuviera solita.
📅 Día 8: 🔹Pulverizo las hojas con Rootbastic de Atami a 0,15 ml/litro.
🔹Aparición primeras preflores.
📅 Día 9:🔹 Última pulverización con Acti Vera y Alg-A-Mic a 1 ml/litro respectivamente. A partir del día 11 no se le aplicarán más abonos vía foliar para controlar la humedad en el cuarto de cultivo y así evitar que se disparen estos niveles de humedad.
📅 Día 10🔹Última pulverización con Special THC PLUS.
📅 Día 11🔹Riego según la tabla de nutrientes y bajo la dosis de agua ya que me he pasado con el riego. Aplico 350ml e iré subiendo cuando note que no dura 24h mojado.
🔹Cambio los platos de las macetas por una bandeja de 80 x 80para así poder hacer un mejor riego y no molestar a las plantas, ha entrado justa. La pongo sobre una mesa de metal de 60 x 60 cm.
📅Día 12:🔹 Low Stress
📅 Día 13:🔹Riego según la tabla de abonos BioBizz.
📅 Día 14:🔹 Conecto el CO2 a 630 ppm para ver si estiran un poco más.
Processing
Likes
6
Share


@Flydope21
Follow
Week 2 veg. Starting some LST this week. Pretty new to this so hopefully all goes well!

Likes
10
Share

@CrackinBeans
Follow
Mephisto and bighead going into darkness for 48-72 hrs. Then the chop. Big bomb is the last one standing in the 5x4 will begin flushing soon


Likes
4
Share


@Mr_Pgrow
Follow
3 weeks into flower and she has the tent all to herself, delighted I went for a 2 plant grow, at least I was still left with one.
She has benefited from more space and is looking very healthy and lush.
Compost tea extraction again this week and has her fan leaves praying 🙏.
Likes
24
Share


@WetAndSmelly
Follow
May 02
Entering preflower, I think I don't have much training time ahead but I'm sure I'll be able to get her even and clean. Some small branches are trying to pop out under the already 6-7 ones but I just can't get light on there, we'll see later on if I harvest in sequence!
This won't be the most successful grow but it will have been a realllllyyy instructive one. Next one if there is soon will most likely give better result.
So far, without being too harsh, I think she's doing great still. Might not be in the most perfect healthy state but it's not a big deal in the sense that she's still pretty happy right now and that's fine with me.
From start she has been on 24 hour non stop and I don't see any problem with it. In any case you are sure to not halt her growth by doing so and each one of these led should consume about 6 watts. On 8 we get to a grand total of 48 watts which is very fine. Current light setup might have been upgraded to a potential increase in yield of 25 to 35 % I'd guess. But for the price I paid for all of this, it's very much worth it. Doubling the light setup would raise me to a 100 watts, and light coverage would be sufficient to grow 4 autoflower. Since I only have one plant I'm keeping it on the not too expensive side without sacrificing too much, but a third setup of 4 led with 2 reptile UV led would probably increase significantly the final quality and quantity. In any case, even tho I can say it has pained me to train her since she's so small and bushy, I would probably keep this strain around for sentimental reason, I really see value in life itself and this plant is part of mine, eheh. Good night guys.
May 03
I think I can notice 4 pistils growing out of the main head. Magnification from camera. It took me another hour or so to train her but I think it's worth it. I'm at about 9 new heads that are getting a good amount of light, I don't know what will happen to the other smaller ones under these 9s, we'll see if they have time to produce anything ^^. Funny expectation, if the branch don't stretch a good inch from today to 4-5 days in the future, this is gonna be chaotic there xD. Aye aye, I'll be away from pretty girl for roughly 2 day. I gave her about 350 ML of water 2 days ago. Since she has shown minor sign of problems relating to soil ph, I gave her 1 part decarbonated Perrier with about 2.7 part neutral water. Perrier is made from source water which contain macro-nutrient essential to plants. It's PH is also officially cotted at 5.5. There is debates on whether or not carbonated Perrier would be beneficial to a plant, but here I choosed to play narrower. I'm still spraying her with water once in a while. I am progressively lowering the frequency since she is approaching flowering and I don't want the humidity level to raises to much, for any question just message me. Aight, guud night.
May 05
Just came back, she need water, it's obvious to me since I know her grow rate which has been slower the past 2 day it seems, pot feel lighter and soil dry ^^. I'm a little bit sick and I just came back so I'll relax a bit and take care of her later tonight. I'll try giving her 600 ml of water this time, she's getting bigger and with flowering approaching I think it's time to look for a increase. Fan leafs did increase in volume from the newly trained branch, but it feel like she has been going at 75% of her speed, but it might also be her entering flowering phase so slowing her vegetative growth, I'll post more picture after training of her later tonight, good night ;)
May 07
I have read somewhere that cannabis plant often go for a good stretch before the flowering really kick in and I think that's what she's heading for. I am quite satisfied with the current evenest of each tops, I am expecting the main branch to grow higher even tho she's pretty much equal for now. I think it's normal and as long as possible I'll pull her down from the need of light coverage but everything should be fine, I don't think there will be any problem with the light. I am really looking forward to see how high she will stretch. Ideally, I don't want her to grow too big, but I am very interested in the idea of her being full of tops. The bigger the branch, the better nutrient are delivered and if light is managed correctly, you'll end up with a bigger harvest, bigger colas. So far I gave her nutrient 1 time, she got nitrogen toxicity because the soil is in fact rich enough for pretty much the whole grow, when I bought my fertilizer I thought about the fact that autoflower grow pretty much all in one at the same time but with that soil, I should have gone for something more on the P and K side. I am considering buying a new small amount of fertilizer for cheap, that is better adapted to my need. I do have little worries about micro nutrients but I do believe I am stressing a bit for nothing. In worst case I'll just answer to her need which is totally fine. Have a nice day !

Processing
Likes
26
Share

@eldruida_lamota
Follow
Que pasa familia, hemos vuelto para actualizar las skunk que ya tenemos cosechadas.
Que gran genética, y muy típica entre fumadores de hierba, un crecimiento más indico pero floración lenta bastante lenta, en teoría se supone que es Sativa, 17% thc en la tas con un tamaño medio pequeño pero flores mi compactas y dulces, un cultivo ni fácil ni difícil, sin más, bastante neutral para los cambios climáticos algo sensible con el aspecto alimentación.
La recomendaría en verdad, sobre todo para aquellos amantes del dulce.
Nos vemos en próximos proyectos fumetillas

Likes
48
Share


@GERGrowDesigns
Follow
A Special Project from Germany and Welcome to Flower Week 4 of GoodTimesGenetix Blue Cream Haze
I'm excited to share my grow journey with you from my
GoodTimeGenetix Seeds .Im the First Person outside my Friends Company who got hands on this Strain .
He Managed over a long time to Cross these Strains:
-Blue Dream (Blueberry x Super Silver Haze - Female)
-Ice Cream Haze (Gelato x Wedding Cake x Crockets Haze - Male)
They Done a lot of Tests for a Nearly Perfect Stabilisation of this Genetic and Feminized them aswell .
This one is Professionell Created In Germany , Growed in Germany and presented To the World on Grow Diaries.
Here’s what I’m working with:
• 🌱 Tent: 120x60x80
• 🧑🌾 Breeder Company: GoodTimesGenetix
• 💧 Humidity Range: 60
• ⏳ Flowering Time: 8-9 Weeks
• Strain Info: 23%THC
• 🌡️ Temperature: 26
• 🍵 Pot Size: 20
• Nutrient Brand: Hy-Pro
• ⚡ Lights : 600W x 2
I would truly appreciate every bit of feedback, help, questions, or discussions – and of course, your likes and interactions mean the world to me as I try to stand out in this exciting competition!
Let’s grow together – and don’t forget to stop by again to see the latest updates!
Happy growing!
Stay lifted and stay curious!
Peace & Buds!
Likes
3
Share


@GrowBro87
Follow
Ja das spülen ist in vollem Gange und zeigt bei der ersten Pflanze bereits Wirkung. Trichome sind überwiegend milchig, warte jedoch noch etwas ab und checke täglich. Die 2 Pflanze hängt der ersten seit Beginn an hinterher... ich denke diese wird etwa eine Woche länger brauchen als die 1 Pflanze. Schade eigentlich, da ich beide gemeinsam im Zelt trocknen wollte.
Likes
Comments
Share

@Hempel420
Follow
Weekly Update: Keeping My Hands Still (Kind Of), Cam Casualties & Delaying the Flip
Another week down inside the tent! I actually managed to keep my fingers somewhat under control over the past few days. At least for a little while. Here is how the week played out:
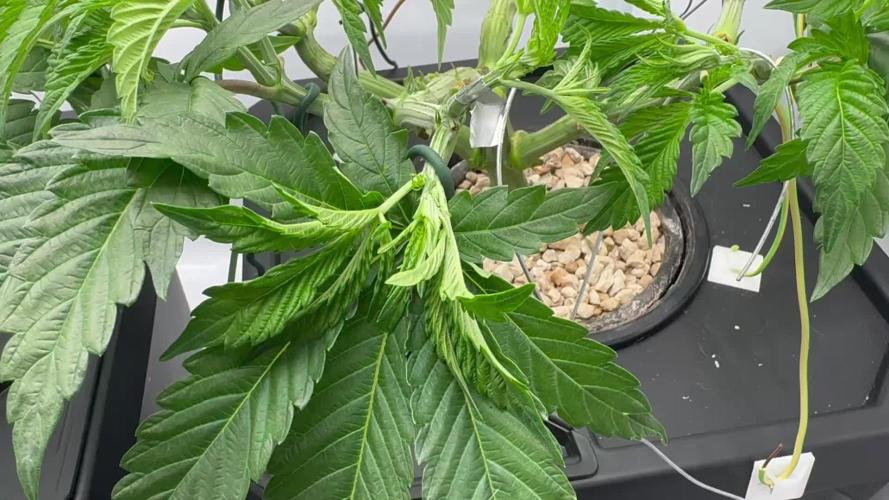
Mid-Week Routine: Light Defoliation
Over the course of the week, I did a few light defoliation sessions here and there to keep the canopy tidy and let some light down into the lower nodes.
Speaking of footage: when I went to check the camera recordings today, I had to realize that the grow-cam officially bit the dust and didn't record a single frame this week. So unfortunately, no time-lapse clips for this update because the camera has passed away. RIP!
Today, Sunday, Diary Day: The One-Handed Curse Strikes Again
I almost made it through the week without breaking anything! But of course, right as I was tinkering with the plants today, I managed to snap a shoot on Plant #2. Well, almost completely off. I slapped some tape around it immediately, and now I'm just hoping for a miracle healing session.
Since Plant #1 was already running on taped-up injuries and Care Bear support, both plants are officially wounded warriors now.
The Plan:
Because of today's little mishap, my original plan to flip to flower today (Sunday) is officially scrapped. I want to give them a couple more days to recover in peace. The switch to 12|12 is now postponed to this coming Wednesday.
Let's see if I can actually keep my hands off them until then. Stay tuned!

Likes
25
Share


@MotherNaturesSon
Follow
Probably looking at next week for a tentative flush and harvest. Some leaves starting to yellow from maturation, and pistils are getting to where they need to be, with some new white ones still being thrown up on both plants. The smell is strong and exquisite, pungent and sweet. Resin production also looks to be coming along nicely, covering leaves alongside frosty trichomes. Quite a few buds and whole branches have that snow covered look that can’t be beat. Won’t be able to hand water this week so leaving it to the auto waterer with reduced nute concentration. Cheers
