The Grow Awards 2026 🏆 


Likes
Comments
Share


@MadeInGermany
Follow
Flowering day 44
since time change
to 12 / 12 h
Hey guys :-)
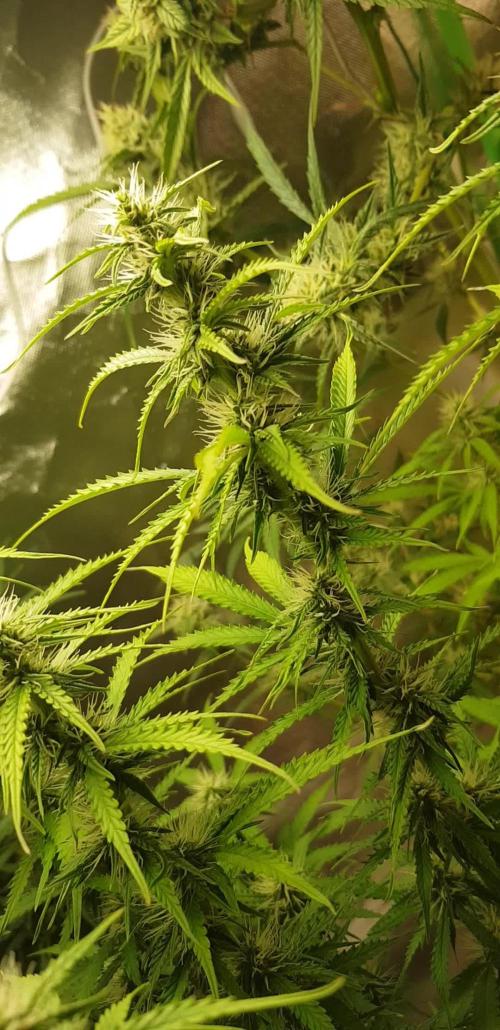
The buds are becoming incredibly beautiful and smelling better and better ☺️.
Today there was again the full load of food and will be slowly driven down as soon as it comes to an end :-)
Was watered 3 times a week with 1.2 l each (nutrients see table above)
Otherwise everything was cleaned.
Have fun and stay healthy 💚💚💚
👇🏼👇🏼👇🏼👇🏼👇🏼👇🏼👇🏼👇🏼👇🏼👇🏼👇🏼👇🏼
You can buy this Nutrients at :
https://greenbuzzliquids.com/en/shop/
With the discount code: Made_in_Germany you get a discount of 15% on all products from an order value of 100 euros.
👇🏼👇🏼👇🏼👇🏼👇🏼👇🏼👇🏼👇🏼👇🏼👇🏼👇🏼👇🏼
You can buy this strain at :
https://www.exoticseed.eu/de/hanfsamen/hippie-therapy-cbd
Water 💧 💧💧
Osmosis water mixed with normal water (24 hours stale that the chlorine evaporates) to 0.2 EC. Add Cal / Mag to 0.4 Ec Ph with Organic Ph - to 5.8 - 6.5
MadeInGermany
Likes
48
Share


@Northerngrowers
Follow
Gran genética cultivada de manera totalmente orgánica.
Sin grandes necesidades ni complicaciones en el cultivo, pero a tener en cuenta la poca tolerancia al exceso de nutrientes.
Buen desarrollo en crecimiento, gran ramificación con distancia internodal media.
Impresionante el cambio a color morado fuerte en las últimas semana de floración y gran cantidad de tricomas en las flores.
Fuerte aroma afutado y sabor dulce, con una buena pegada.
Totalmente recomendable.
Likes
33
Share


@Oyziphar
Follow
Not much to do this week. Plants are doing great ! Lots of trichomes. Very frosty 😍
Since a few weeks the leaves have small spots. They are not insects, not spider mites. But I don't know what it is.
Started to add BioFinale PK 0.5ml/500ml water/24l pot.
Likes
6
Share


@SAC87
Follow
Hey Growers.
Things around here are going great. These buds are fattening up super nicely, the smells are starting to overpower my lone carbon filter. It’s almost time to get the second one fired up. The buds are getting frosty and the trichomes are big and gritty like fine sand between your fingers. I’m loving all the changes I’ve made to make this as easy as possible. I still have a couple weeks to go so I’m pumped to see how big these girls can get.
Happy Growing 🌱
Likes
16
Share


@Max1973
Follow
Day 38 - they are still alive ? interestingly keep these mazar seedlings still
alive in seedling stage... going to setup a little dwc project, see what happens...
Day 39 - decided to build 7.5L DIY DWC 's ......
👍😎
Likes
30
Share


@ktkoi
Follow
Day 60: Using LST and FIM Lemon's canopy looks great all the sites exposed to light. Orange is getting taller.. so we'll see how it'll end up. The yellowing leaves might actually be light burn they're pretty close to the light, but the sugar leaves are a bit more protected. I might go back to 20:4 in terms of light schedule or lower the shelf. Smell wise even Lemon's non sugar leaves have a very lovely scent. I'll get back to the scent profile another day.
Likes
3
Share


@The_Lonely_Farmer
Follow
So I have decided too pot up the 3 toronjaz girls into bigger pots, 1 because the older girl needed it but 2 also because I feel they needed space and a new home too stretch their roots out 🌱
The above blend will hopefully help these girls soldier through these first crucial weeks, let's keep our fingers crossed 🤞
I'll be doing light lst over the next week for the older girl, maybe top her end of week 3 maybe 4 depending on how she grows 🌱
Light feeds slow and steady will do as new too aptus buy I hope I can do well with them as they seem really simple too use and also their website has lots of usefull info incase I'm in need 🙏👏👊
These will be tidied up and given this space too their selves once my fastbuds testers in the back there are ready for new pots and their new space I have waiting 🌱
Likes
13
Share


@STAYINGONMYMAINCBATORUNTWO
Follow
Smoke report! 10/10/20 tastes are tropical with a citrus hint and pine! Also tastes like it has some gas on it too can feel the power in every blast! Feels like euphoric a lot of day dream happy thoughts great for music and day smoke puts you in the best of moods! Not much to say on a negative as it tastes so good your mouth waters lol but could say makes you very very sleepy 😴 thank you for popping by check out them tones and fades 😍
Was amazing to grow! Ran into no problems along the way she literally just grew and grew! She showed her beauty from early and was shining through colours of purple/red even on the leaves! And her smell “oh my” is exclusive like sherbet and citrus and fruit and candy! I’ll add more photos after cure and also a smoke report! Want to allow this to cure about 2 weeks before I even try her!
Likes
75
Share


@Pungolian
Follow
Letting mother nature do her thing, lol. Im learning a lot . Got my pots tied down to the deck and supported with other dirt pots and water jugs, lol. I wonder how big they would be if I planted them in the ground! Going to half to hire help come harvest time lol
Likes
7
Share


@DrewbieDoobieNoobie
Follow
week 3 of flower looks like they are hungry. Last week I Lolly popped the bottom 1/3 of the plants for air flow and to push the energy to the tops. I have a theory that the potassium is low in the media due to flowering I was going to wait till the 4th week of flower to give them a topdressing. but I think I will mix some PK booster in the next watering and fertigate the pots from the top, so the plants have immediate access to the PK for flowering.
let me know what you think after watching the video image section.
take care for now,
Likes
Comments
Share


@GERGrowDesigns
Follow
Welcome to Flower Week 4-5 of Divine Seeds Auto White Widow
I'm excited to share my grow journey with you all as part of the Divine Seeds Autoflowering Competition 2025. It's going to be an incredible ride, full of learning, growing, and connecting with fellow growers from all around the world!
For this competition, I’ve chosen the Feminized Automatic strain: Auto White Widow
Here’s what I’m working with:
• 🌱 Tent: 120x60x80
• 🧑🌾 Breeder Company: Divine Seeds
• 💧 Humidity Range: 50
• ⏳ Flowering Time: 58 Days
• Strain Info: 20%THC
• 🌡️ Temperature: 26
• 🍵 Pot Size: 3
• Nutrient Brand: Narcos
• ⚡ Lights : 200W x 2
A huge thank you to Divine Seeds for allowing me to be a part of this amazing competition and Sponsoring the Strains. Big thanks for supporting the grower community worldwide! Your genetics and passion speak for themselves!
I would truly appreciate every bit of feedback, help, questions, or discussions – and of course, your likes and interactions mean the world to me as I try to stand out in this exciting competition!
Let’s grow together – and don’t forget to stop by again to see the latest updates!
Happy growing!
Stay lifted and stay curious!
Peace & Buds!
Likes
2
Share


@eldruida_lamota
Follow
Vamos familia, actualizamos la primera semana de floración de estas Runtz de MSNL.
La temperatura que estuvo entre los 24-26 grados y humedad dentro de los rangos correctos.
Cambiamos esta semana el ciclo 12 horas luz, 12 oscuridad, estiraron bien y ensancharon bastante también, el color es verde sano.
Se nota que los nutrientes de la marca Agrobeta hacen sus funciones.
También realicé una poda de bajos que yo si las veo necesarias para explotar después la flor.
- os dejo por aquí un CÓDIGO: Eldruida
Descuento para la tienda de MARS HYDRO.
https://www.mars-hydro.com
Hasta aquí todo, Buenos humos 💨💨💨
Likes
4
Share


@gothboiclique
Follow
Buenas, hoy subo mi primera semana con las Juan Herer! Me siento muy emocionado, este es mi primer cultivo de exterior. El cultivo lo empiezo en interior y para fin de septiembre lo trasplanto afuera directamente en la tierra. A ambas plantas le puse un nombre particular, #1 Gina Herer, #2 Juana Herer.
Likes
3
Share


@CaptonianMoneymaker
Follow
Looks like buds r going slow super cheese is on track nice rop colas
Likes
307
Share


@Ju_Bps
Follow
Hello growmies 👩🌾👨🌾🌲🌲,
👋 Let's go for the flowering, stretch Started, hope can stay under control, we can start to see the first pistils,
Plant look happy.
Weather start to be really cold, and worst next weeks, we'll see how turning.
💪 Keep Working on the canope, removing leaves and under buds site.
🕑 Now 12/1
💧 Give water each 2/3 day
And vaporise plant with water + Plagron Roots (1ml/l)
1.5 l Water + Roots + Bloom + Zym + Sugar Royal (1 + 3 + 1 + 1 ml/l)
PH @6
💡Mars Hydro - FC 3000
50% 43 cm.
Mars Hydro Fan kit
Setting 5
Have a good week and see you next week 👋
Thanks community for follow, likes, comments, always a pleasure 👩🌾👨🌾❤️🌲
Mars Hydro - Smart FC3000 300W Samsung LM301B LED Grow Light💡💡
https://www.mars-hydro.com/fc-3000-samsung-lm301b-led-grow-light
Mars Hydro - 6 Inch Inline Fan And Carbon Filter Combo With Thermostat Controller 💨💨
https://www.mars-hydro.com/6-inch-inline-duct-fan-and-carbon-filter-combo-with-thermostat-controller
Anesia Seeds - High Mars 36% THC🌲🌲
https://anesiaseeds.com/product/high-mars/
Likes
6
Share


@TerpTurtle
Follow
4x4 #1 | Plants are starting to stack bud formations, in week 5 flower
4x4 #2 | Plants are starting to show pistils this week & a active stretch, in week 2 flower
Gyat is very easily managed and both phenotypes are looking great, even the 'finicky' plant
Scat Queen is a herm, I'm still going to run them.. they look good other than. The pheno in week 5 flower smells really good and overall structure is nice but is seeding and I'm seeing the 2nd pheno starting to show similar traits.. this experiment shows it's just not a stable cross from Elev8.
Did some shuffling & added a smaller plant, Sherbie Truffle by Detroit Seed Co in the front right next to Gyat to the left -it is a few weeks behind the others but will fill the space nice. ( Scat Queen back left, Gyat back right and front left, Sherbie Truffle front right )
Keeping the flow smooth growmies 😎
Likes
10
Share


@Chrisandweed
Follow
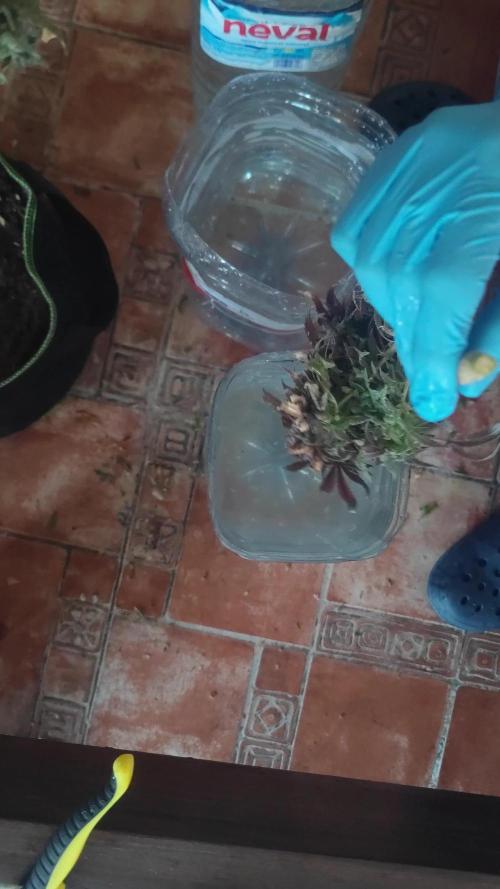
Bueno, ayer hice el último riego, mas cantidad de lo habitual, y ya cuando seque, se corta, supongo que actualizaré fotos, conforme avance la semana, del corte y posterior proceso ya que dado que hubo araña y ciertos problemas, voy a hacer el budwashing que habitualmente hago,
Ultimos dias de esta planta, estos ultimos dias he notado un ultimo engorde de los cogollos que hasta se están cayendo del peso! Muy muy muy toop la variedad, encantado es poco. Pero bueno, no corramos de mas, cortaré y en un par de semanas finalizaré el diario con los cogollos ya secos y manicurados + la opinion de haberlos probado aunque no estasen aún curados para ese entonces.
Edit 12-02-2026: CORTADA! ya puesta a secar en el tendedero xD dado que en el armario había algo de araña aunque no habia afectado a todas las plantas (a esta no) , he decidido hacerles budwashing a todas no sin un petique que me centre y buena música 😁. (Al final aceptó a poner su voz 🙄😂). Normalmente subía fotos del proceso, en esta ocasión, aunque sea un poco mas tedioso, he subido un video del proceso.
Cuando seque finalizaré el diario y subiré las fotos de los cogollos manicurados.
Aclaro, la he puesto a secar en el tendedero pero metido al armario ya sin luces y tal XD solo ventilador oscilante y extractor con el filtro, que solo con el corte la he liado en la calle 😅😂😂😂
TENGO UN P*TO HYPE CON ESTA! jajajajajaja quiero manicurarla y verla azul! Está morada pero la voy.... VAMOS a ver azul! 😂😂
Likes
16
Share


@Mrg7667
Follow
About day 38 i am just realizing that i am stupid and been feeding the biogrow for cocoa coir 🤦♂️ way iver nuting with soil it says never to go over 1ml/L
So i will be flushing for at least 1 or two waterings. Looking for the tip burn to stop spreading and the tips to not look like there clawing


