
Likes
Comments
Share


@JBoBz
Follow
Hello to everyone stoners, here ends our adventure with our Orange Barb, there was some problem at the beginning due to a poor germination, but in the end it recovered well and I was rewarded with 30g of one of the best weed ever smoked!👽


Likes
9
Share


@Doctor_Gonzo
Follow
-5/28/23 Start of Week
--Week 10/Flower 4
-5/31/23 (Day 74/flower 25)
--Observations: temperature is rising during the day and the night isn't dropping as low as I would like. Already starting to get clustered again.
--Comments: seems to be okay with the increasing heat, don't see any problems yet and hopefully wont. shade leaves are starting to push their way into the middle area again, will try not to remove unless the become a problem.
-6/3/23 (Day 77/Flower 28)
--Observations: shade leaves still pushing their way into center, buds still growing and starting to form calxes.
--Changes: will no longer be spraying after today, will also start giving more water
--Comments: today is the last day for spraying this plant, watering will be increased to compensate. may have to remove some of the shade leaves pushing into the center area next week, will be extremely selective if I have to remove anything from this point on. lemon basil is starting to tower over the cannabis, will be removing some to give space between them.
-6/3/23 End of Week

Likes
1
Share

@Organic_G
Follow
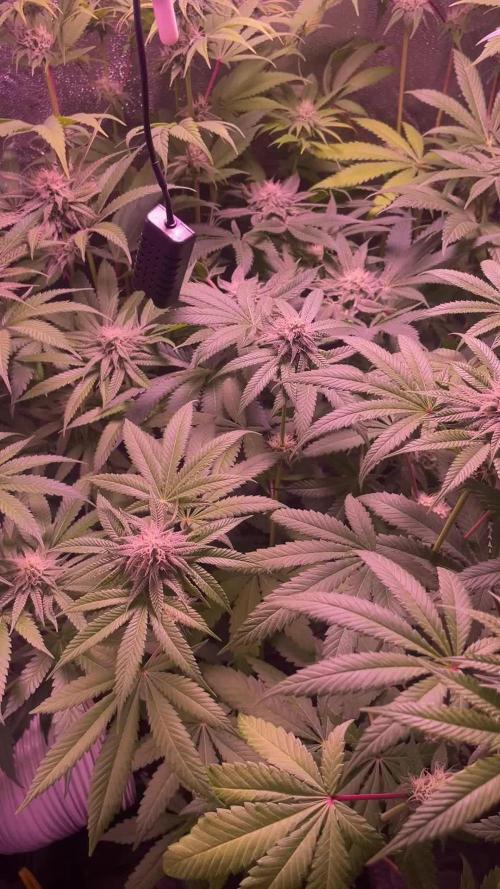
Wachsen wirklich perfekt, keine Mängel, super fette Stämme, extrem vital und gut am Stacken die Ladys…
Die Automatics sind auf einem Rekordrun wenn es so weiter geh, für 2. Woche Flower sind die extrem robust geworden…
Likes
16
Share


@GRow_M8s
Follow
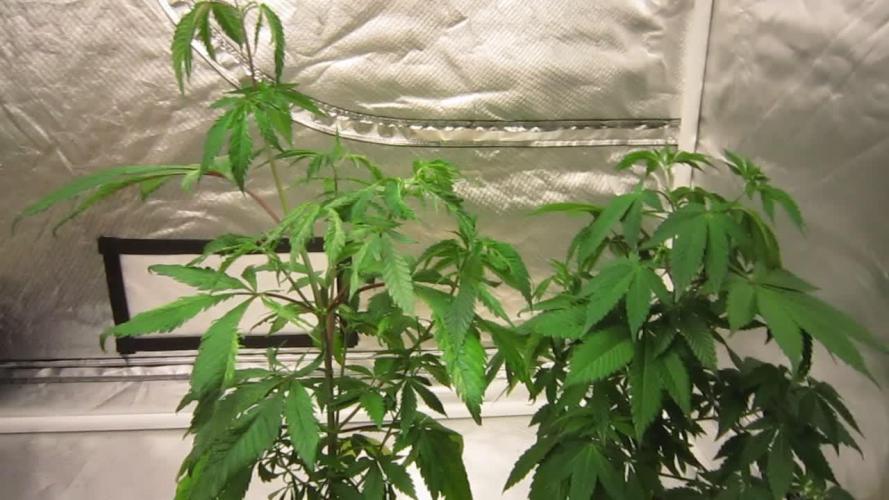
* MephHeads for 1st time, really excited about that.😁
* we're gonna try the LST technique.
~ Grow tent : 1m×1m×2m.
~ Soil : allmix biobizz 65% + Bioterra plus 25% + perite extra 10%.
~ Seedling soil : Bioterra plus
~ 6 plants { 3 Sstomper, 2 GWK n 1 SODK (5 days later) }.
* Only tap water, co2 tablets, microorganisms and snake poison(foliar spray) until week 4.
* No chemicals ✋🛑 only tap water.
● One stomper has issues and its already stressed ( we had to put more soil over it ).

Likes
72
Share


@BodyByVio
Follow
Day 65 : officially 1st day of flush . Changed the reservoir with fresh water and 1.2g/5 gallons of Yucca extract and 5ml/gallon of Cleanex from Botanicare .
Day 68- I did some defoliate. Few more days until harvest.


Likes
25
Share


@GreenHouseLab
Follow
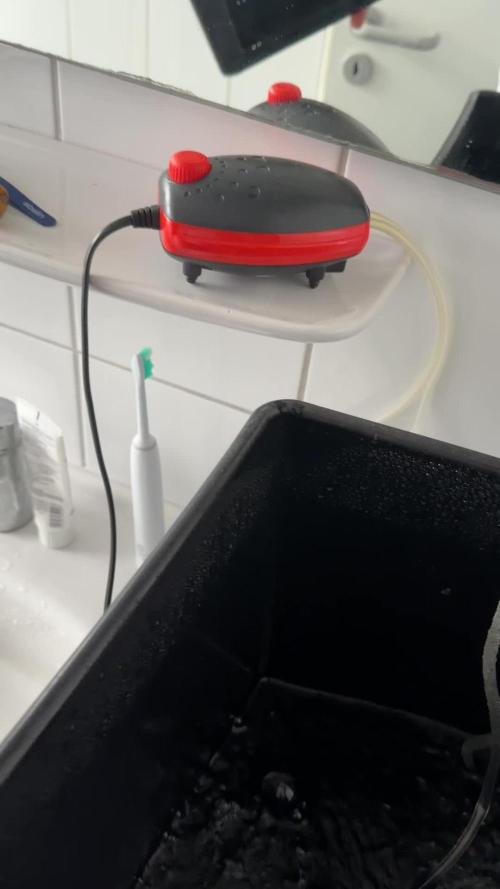
She is ready to rock into flowering, it’s going to be a 🤡 show here in this tiny 3x3’ in about 3-4 weeks. Already you can see there isn’t much room. She received heavy foliar of Mg. Found out my organic calmag only consisted of 1% Mg not sufficient and obviously even at minimum recommend was not sufficient. Using all these root stimulants also are making her drink and absorb at an unbelievable rate. At 6 weeks tomorrow she takes in 2.3L per day!!!
Automatic watering system would be welcomed with recommendations, Stay safe and keep it green!

Likes
4
Share

@Chucky324
Follow
Hello This is the end of week 6 and the beginning of week 7 of veg.
I posted a question about plant #1's leaves last week on the questions page... and the answers were...
It's a Cal-Mag deficiency or A Mutation with 1 or saying it's tabaco mosaic and get it out of the tent quick.
I gave a 1/2 tsp of www.wollallo.com powder, (check it out) it got lots of Cal-Mag in it and other good minerals. To see if the Cal-Mag helps...
I might not keep plant #1 it's getting big and growing lopsided with the mutated leaves.
Plant #2 is doing good and looking normal.
OK. Be Great...
Chuck.

Likes
Comments
Share

@Krautis_IndoorFarm
Follow
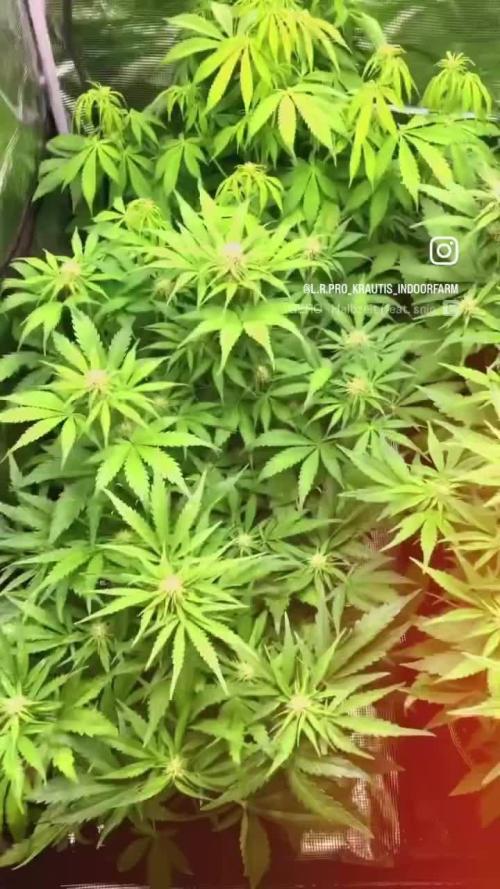
🌿 Update nach 6 Tagen! 🌿
Die Pflanzen machen sich wie immer richtig prächtig 💪
Heute gab’s wieder angepasstes Wasser 2,5 L pro Pflanze mit einem pH-Wert von 6,5.
Gedüngt wurde diesmal mit dem kompletten Sortiment von Bio-Bits, nach dem Blütewoche 2 Schema.
Ab morgen startet Blütewoche 3 wir haben also fast schon Halbzeit, Wahnsinn wie schnell das geht! 😍
Nächste Woche steht dann wieder Top-Dressing mit @panova25.de an.
Die Ladies, die ihr hier seht, stammen natürlich wie immer von meinem zuverlässigen Partner @ganjafarmer.seed 🌱
Bis dahin Leute lasst gern ein ❤️ und ein Follow da!
Euer Krauti ✌️


Likes
14
Share


@Xpie77
Follow
Because she's a herma I'm not going to do much about it. I took away all the balls and she is growing not so beautiful as I wished for.
Likes
25
Share


@Gutismoke102
Follow
Transplanted the girls into 1 gallon pots and feed them some compost tea I brewed up. They seem to be taken it well no issues or signs of stress so I’m happy for now. Also foilar sprayed some neem oil to prevent gnats Stay tuned the girls are growing great


Likes
16
Share


@jahredi
Follow
Had some severe drooping on one side of the plant. It was kind of weird, but most likely nothing.
I was under watering quite a bit in an attempt to make sure I didn’t flush out the benes and nutrients of the super soil. Ironically, I might have killed all the benes. Lol.
Either way, they’re getting about 2.5 gal every other day now. Growing strong.
Untied the LST ties to move them and rearrange the greenhouse but then plot the dang trunk putting them back on, so i taped out up and left them untied. I’m sure it’ll be fine.
Just did another spinosad treatment. Haven’t seen any more thrips since the first treatment 10 or so days ago. Saw a leaf hopper in there though 😡

Likes
25
Share


@XperencdGmanXG
Follow
finally they are in flower! Yay final foliar spray applied. They are still smelling like chocolate and peanut butter. Did not get 1 drop of rain this week. It is getting so frustrating plants are 1/4 what they should be this year.
Likes
8
Share


@Cowboy
Follow
I over water this past week but got back on track ,it took about 2 day for her to come back around,, but a great week

Likes
56
Share


@Prilyfe13
Follow
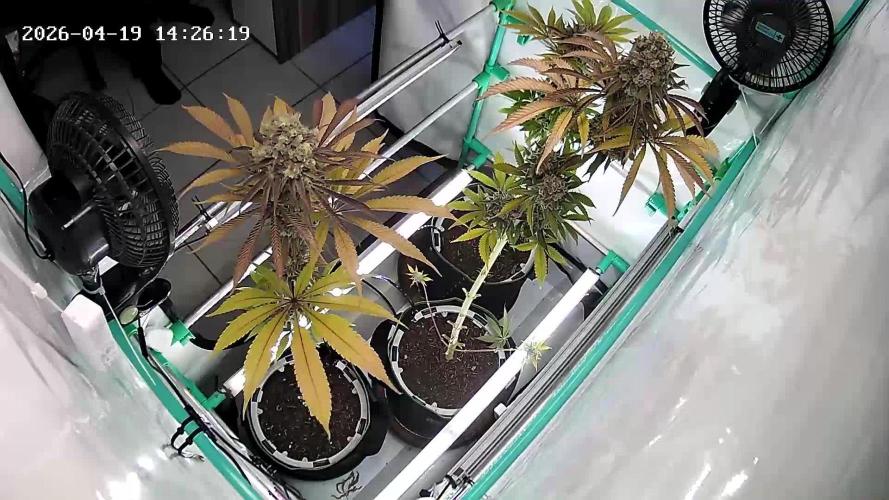
May 24, 2024 Day 99
This is the last week for these ladies. They have until the end of this week and then harvest no matter what. I'd much prefer to harvest them sooner, but I don't have space in my dry tent. It's only a 2x2 and the Tropicana Cookies just finished up and will be in there for about 7 days.
Banana Purple Punch A needs a half gallon of water today. She's not done yet and she's all dried up. So I'll give her that half gallon of plain water today PHed to 6.1 and that's it. She should be dry again in a week.
I'll be checking trichomes today as well. I'll update when I finish up.
Banana Purple Punch B is amazing. She smells wonderful and now with the Tropicana Cookies out of the tent, her aroma can shine. Wow.
I'll be checking trichomes as well today.
She also finished up her reservoir but she's still pretty moist. It must have emptied yesterday. This may last the week. I'll need a few days for her to dry out as well. So I might have to add a bit more water. Maybe a quarter gallon? Just enough for her to last the rest of the week. I'll see how she is tomorrow.
The environment is still a bit wonky. The humidity is still in the mid 50's% with the temp being around 73°. It's currently at 76° and 57% humidity.
Grow System Environment:
Temp: 73.2°
RH: 56.7%
VPD: 1.17 kPa
May 25, 2024
It's rainy today and naturally, the humidity in my room is stupid high. So in the tent the humidity is back to 60%. I'll be opening the tent door again every couple of hours today.
Banana Purple Punch A is starting to look like a hot mess. Tops are starting to flop over and there's a super weird fade going on. Leaves that just curled up and turned super dead yellow. Some of the leaves are showing purple, and the tops are getting purple hues. Still a bit of a mess.
Banana Purple Punch B is getting more and more purple. Her leaves are starting to lighten up as well. We can certainly see the start of the fade. The tops have nearly all purple sugar leaves. The buds are still pretty green. I wonder how it works with this one. We shall see over the next 6 days. I might have to add a half gallon of water to her reservoir. She's already a bit too dry to last the week. So I'll do that later today I think. Maybe first thing tomorrow.
Harvest time is 6 days away now. Both ladies are looking super close to being done. Hell, I may even go past the ideal time by a couple days. That's perfectly fine. I could use a good sedative.
The environment is back to being an absolute mess. The temp is at 75°, which is fine. But the humidity is back up to 60%. Hopefully I can get the humidity to drop a bit.
Grow System Environment:
Temp: 75.1°
RH: 55.1%
VPD: 1.30 kPa
May 26, 2024
These 2 are shaping up to be some heavy yielders. Both have massive buds and are on their way to being fully done. Another 5 days I think and they will be ready for harvest. However, I may have to keep them in there for a few extra days. The Tropicana Cookies in the dry tent are taking a bit longer to dry than I anticipated.
Banana Purple Punch A looks great. I ended up using a piece of a plant tie to prop up one of the most leaning tops. Looks great now. Much more light penetration to the lowers.
Banana Purple Punch B is absolutely amazing right now. MASSIVE buds that weigh a whole lot. She finally has a distinct purple look to her. And it's just getting more and more purple. When she is done, I believe she will have some beautiful foliage and lots of dark purple leaves.
She got about 1/3 of a gallon of water today to the reservoir. She was dry and she has much too long to go before she should be that dry.
The leaves are all starting to turn a bright green and fading into deep purples and yellows with orange. Fall foliage indeed.
I'll also be doing a full defoliation in 3 days I think. I want to clear as much foliage as I can before wet trimming. It doesn't seem as though wet trimming will be all that bad. There's sugar leaves, but they are big instead of plentiful. So it should be pretty quick. Drying may pose an issue. If the humidity keeps up like this, I'll have a lot of trouble keeping it below 62% in the dry tent. We have a few days left anyway, so maybe it will go back down by then.
The light is the same. I did take the DLI today and the average is about 40 mol/m²/d, so that's fine. I'd much rather it be closer to 36 mol/m²/d, but then it would interrupt the Sour Diesels in the tent that just started to flower.
The environment is really off today. It's super humid out and it's showing and killing my good vibes. The temp is a bit low at 73°. I would prefer it to be 75° during the day. It helps with all the plants in the tent. Oh well not won't stay low for long. It should start to creep up later today. The humidity is still super high at 63% today.
Grow System Environment:
Temp: 75.2°
RH: 60.9%
VPD: 1.15 kPa
May 27, 2024
Both ladies got a half gallon in their reservoirs today. Both were way too dry for now, sona half gallon should last them at least the night. Just 4 more days and we can harvest. Unless this humidity doesn't let up, then I have to wait even longer for the Tropicana Cookies to dry. AND risk mold! Damn it!
Banana Purple Punch A is starting to get floppy. I hooked some of the tops to each other so they will stand. A couple outer branches were starting to fall as well, so the were also tied up. Hopefully that solves the issue for the next 4 days. Maybe 5 or even 6 now. Too long in my opinion.
She doesn't have much in terms of fading but it's starting at least. Her leaves are all messed up. So I'm not bothering with the fade honestly. If she fades, she fades. I'll be defoliating in 2 days anyway. Then wet trimming, so the leaves aren't really a thing to bother with now.
She also has lowers with white pistils. They are developed, but the pistils are still white. Those are going to change in. Matter of days.
Banana Purple Punch B is shaping up to be the best plant of this run. She's actually the shortest, but has the best structure and the most solid buds and a lot of them. She's also doing quite well in her final days.
Her leaves are turning dark purple with the lowers turning bright green. She got a quarter gallon of water yesterday and drank it up almost immediately. I think I'll have to keep her watered for the next couple of days. She will certainly dry out quickly when I stop watering, so I think she will only need a couple days to fully dry out.
Currently, she is about 34% soil moisture content. Not bad at all. It might go up to 45% with the half gallon, but no higher.
I haven't done trichomes in a few days. I may get a video in today or tomorrow. Both plants could use a good viewing. Not that it matters, as I have to schedule my harvest, regardless of doneness. But we'll check them for science.
The environment is back to being the bane of my existence. Seriously, it's driving me insane. So the humidity is WAY up at 65% with the temp being around 74°. It's horrible. I really don't want to keep opening the tent. It just takes away precious light space.
The average night temp was also high at 70° with the humidity still being up at 64% I have no idea how these ladies haven't gotten bid rot or mold. Maybe it's because it's like a wind tunnel in there. Exhaust on full power, two 6 inch oscillating clip fans facing each other. There's no space untouched by some sort of airflow. It's not a heavy wind, but like a light breeze.
Update: I finally took some trichome videos and was a bit surprised at what I found. Both plants have tons of cloudy barely any clear and a good amount of amber. The extra 4 to 6 days may be a bit too long. We shall see. Some of the lowers still have white pistils and only have amber trichomes on the leaves. So there's time for them to finish up. We'll see how this works out.
Grow System Environment:
Temp: 74.3°
RH: 60.8%
VPD: 1.11 kPa
May 28, 2024
Very late entry today. I was quite busy wet trimming Banana Purple Punch A for the chop.
Yep, you heard it. The chop. One of the Tropicana Cookies finished drying today and I thought it was time to harvest her. So she got a full wet trim and is hanging in the dry tent.
She weighs in at a total of 22.26 oz wet hang. She has heavy buds, so the weight retention should be impressive. Maybe 5 oz? Maybe 4. Not bad.
Banana Purple Punch B will be harvested when the last Tropicana Cookies is done. That should be in about 4 to 5 days. Currently I have her moved to the back of the tent with the Sour Diesels taking over the rest. She looks great. More and more purple.
The environment is still crazy. Super high humidity and nothing I can do about it. I've tried AC, no AC and just started the heater. Something has to work.
Grow System Environment:
Temp: 72.5°
RH: 63.2%
VPD: 0.98 kPa
May 29, 2024
Nothing to do today.
Banana Purple Punch A is on her first day of drying and I expect it to take 10 to 14 days based on the current environment in the dry tent.
I did put a dehumidifier in there to help clear it out. It won't be permanent. Just until I can get the humidity back down to 60%. Then it will come out and go back in the 3x3. This will then help regulate the humidity for Banana Purple Punch B.
Banana Purple Punch B looks great! She will be harvested whenever the dry tent has a free spot. Should be in about 4 to 6 days, unless the humidity drops below 60% and then maybe 3, but I doubt it.
I also finally was able to take her off the risers and it worked a charm. The Sour Diesels in the tent aren't being overshadowed anymore and she is at a perfect light distance.
With the drop of the risers, the canopy DLI is now 38 mol/m²/d. Over the next few days, it should make the buds even more purple and dense.
The 3x3 environment is around 63% and at 73°. Still super high. The dehumidifier should start working soon. We will see a small drop in humidity. Maybe a jump in temp, but I need to get the humidity down somehow. The temp is nice and low for this lady, but not great for the other plants. I'd rather it be around 75° or even better 74.5°.
Because I was able to remove the risers from Banana Purple Punch B, I finally could lower the light for the Sour Diesels. The DLI is at 38 mol/m²/d with the power at 60%. Looking great!
Grow System Environment:
Temp: 73.3°
RH: 63.2%
VPD: 1.01 kPa
May 30, 2024
Lots to do today. Well, this afternoon. I finally pulled the final Tropicana Cookies out of the dry tent and now it's ready for Banana Purple Punch B. I may actually leave her in the dark for a day or 2 just under her sister plant that is currently drying.
Banana Purple Punch A is enjoying her second day of drying. It's actually a bit dry in the tent now. A good day out. But a bit too dry for a solid week. It should increase when I put her sister in the tent. She still has a good way to go. Maybe another 8 days if I can push it that far.
Banana Purple Punch B will be getting fully defoliated this afternoon. Then I think I'll put her in the dry tent for a day or 2. A nice dark period to stress her out a bit. Not to mention it will increase the humidity a bit in there as well.
I'll do a full wet trim in a day or 2 when she is done with the dark period. It should also give her time to fully dry out her container. And give a final push in trichome production.
I'm not going to bother with the environment today. It won't matter until tomorrow. Then I'll get dark tent data.
Grow System Environment:
Temp: 72.4°
RH: 57.1%
VPD: 1.13 kPa
Processing
Likes
40
Share


Likes
12
Share


@Big0zGrower420
Follow
Day 49 and moving along. Wanting to run these 21 more days max, the Jedi cookies I think I can take to that point but one of the CBD crack might be done sooner. Other than that things are chill, wanting to see some bud growth this week.
Likes
12
Share


@CanadianFillmore
Follow
Flip mode squad in the house! LSD and Green Crack move to the 4x4 room, under the Samsung strip's. Both plants were topped and defoliated. All four ladies look happy and healthy, I can't wait to see how they grow under this light.
Thanks for stopping by growfessors 👽🌳💚

Likes
7
Share

@Organic473
Follow
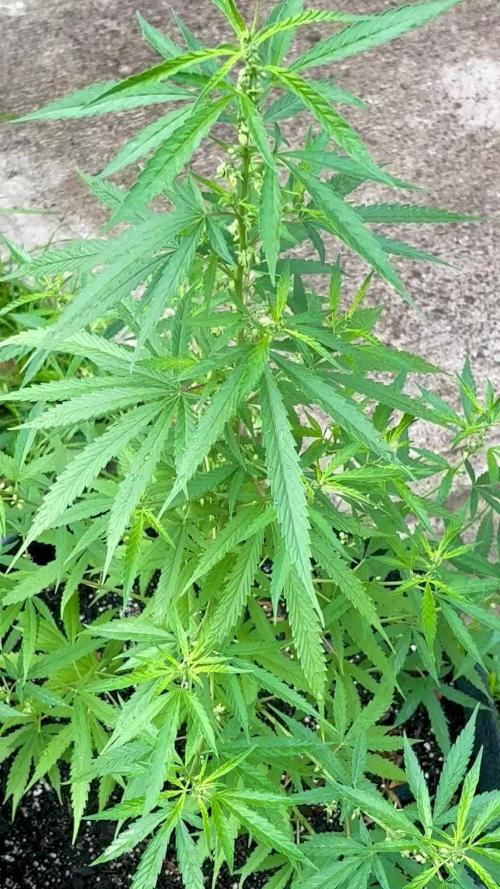
As I predicted this male is showing off and I am happy to get the pollen.
