


Likes
Comments
Share


Processing
Likes
6
Share


@Alejangrow
Follow
Had to keep them in veg for another week while something finished up in the flower room. ⏰ cant hurt right. 🤷♂️🏽
did some more cleaning up to prepare them for the flip. ✂️

Likes
142
Share


@MadeInGermany
Follow
Hi everyone 🤗.
The tent bursts at the seams 😍.
The buds are getting bigger and bigger :-).
The blue chesse pheno 1 is harvested this week 😎.
next week both Tangie Kosher Kush will be harvested :-) everyone else needs something 😊.
I wish you all a nice week, stay healthy 🙏🏻 and let it grow 🌱


Likes
25
Share


@Cannabis_King
Follow
She was a dream to grow she is super frosty and the buzz is very cerebral and a fast onset and ending 4 hrs later with a good couch lock I am very pleased

Likes
44
Share


@DutchFarmer
Follow
I found an awesome strain with four seeds and tested three of them. The smell was pure vanilla gas—super stinky and strong. Phenotype 1 was the best, with amazing density and a frosty look. It was a heavy yielder too, giving over 7 ounces from a 1-liter COCO. The terpene profile is incredible, tasting just like cookie dough. Would I grow this strain again? Definitely! I even saved a clone. I'd rate it a perfect 10/10

Likes
3
Share


@a_weed_session
Follow
Looks like most of the stretch has stopped for both plants. There appear to be two slightly different phenos with one slightly taller than the other. The shorter one seems slightly further along with a bit more flower development and some frost starting to show.
I've done a couple rounds of defoliation to get some better air flow and light to bud sites. I also went through and pinched off most of the lower bud sites that were not going to get sufficient light to develop.

Likes
6
Share


@RegadorDeCactus
Follow
NITRO HAZE #BIGGER:STRONGER:FASTER
#OUTDOORGANG
Ah sido una muy buena semana, aunque veo un crecimiento lento. Cabe decir que estamos acá próximos a entrar a invierno y quizás mucha agua no deja expander raíces.
Esperando todo mejore y siga excelente
27 de mayo LUPITA GUARDIANA DE MIS PLANTAA
Se ve crecimiento en sus hojas pero no en su tamaño, espero esta semana hacer un riego de Micorizas-Wonderland. Va super sana sin rasgos de pestes ni de bichos.
D53 Lento crecimiento pero debe ser que hay muy baja temperatura y mucha humedad de noche y eso mantiene la tierra muy humeda sin necesidad de riego.
D54 30 mayo Aplico jabon potasico porque vi unas arañas rojas y normalmente tenia mariposas blancas pequeñas (Mathania leucothea), espero funcione. Aplicare dos veces mas durante la vegetacion.

Likes
20
Share


@Elysian_gardens710
Follow
This week has gone smooth. Ahsoka has finished her stretch and is focusing on growing her flowers (at least that's my newbie guess at what's happening) up till now she has done great with only Real Growers Recharge. But the stretch used up her nitrogen she is turning lighter and lighter green. We fed the bloom nutes hoping itd be enough nitrogen. Should we give her some grow formula? I dont want to give her a toxicity! 😬
Other than that she looks to be doing great! No smell really. I unhooked a few LST cables because she is starting to harden up.Thanks for looking and please leave a like! Or more importantly q comment especially if u have any advice! Thanks!!!
Stats:
Ohahu(not reccomended)4x4 tent
1gal water pitcher
Fox farms happy frog soil
Optic 8+ LED
Durabreeze carbon filter
4" inline fan

Likes
26
Share


@MuckmanMelts
Follow
Really Babied these girls and shows the capability of some strains under optimal conditions. Especially throughout flower. Progress is becoming very noticeable. What a great experience making rosin!

Likes
165
Share


@Tropicannibis_Todd
Follow
💩Holy Crap Growmies We Are Back💩
So what do you say we have some fun 👈 We got some EXOTIC SEEDS 👉 👻👻👻MONSTERMASH👻👻👻 😛
Well my friends we are just at the 28 day mark and as you can see shes doing great 👈
👉 So now i felt i need to start training her over to maximize her growth by doing some LST 👈 Just noticed she's starting to preflower 😛
Lights being readjusted and chart updated .........👍
👉I used NutriNPK for nutrients for my grows and welcome anyone to give them a try .👈
👉 www.nutrinpk.com 👈
NutriNPK Cal MAG 14-0-14
NutriNPK Grow 28-14-14
NutriNPK Bloom 8-20-30
NutriNPK Bloom Booster 0-52-34
I GOT MULTIPLE DIARIES ON THE GO 😱 please check them out 😎
👉THANKS FOR TAKING THE TIME TO GO OVER MY DIARIES 👈

Likes
10
Share


@BodyByVio
Follow
This week I top all 8 Green Poison ( 4dwc and 4 coco ) clones. They look healthy and happy and few days later I already start to low stress training (LST) them.
Likes
28
Share


@Budcrack
Follow
End off week 11, concluding week 7 off flowering:
Hi(gh) Guys! Thanks for viewing my weekly update (i hope again?)! The girls are doing great. I have to come back on a previous statement, i said that 3 girls are ahead of the rest and up for an early harvest, although that is both true, actually there straight on schedule, and i think the rest is behind. The manual on this strain says they need 9 weeks and flowering week 7 is now concluded. They start to gain weight all three and the stems are beginning to bend. This upcoming week they will get their last nutrients, but week 9 they will only get water, so i can flush properly for the upcoming week and a half. End of week 9 they will be terminated, because my vaporizer is idle for too long already!
As for the rest, they will need at least 2 or 3 weeks longer, because everywhere i look i see loads of white hairs, and i’m seeing forward to show you some off my biggest nugs ever! This is my first time on this website and i’m having a lot of fun. Earlier i'd grow my best round ever with 9 Gorilla Glue #4 ladieboys, what nice buds did they produce. But i guess the OG is going to be at least as close. That’s good for me because this is my favorite strain.
Please leave a comment, and like my post. My account needs a little more love!
Please come and see for another update next week.
(p.s. sorry for that shakie video, I was sitting on top of an little pebble with my knee, but I liked the video anyway…)

Likes
Comments
Share

@sellem
Follow
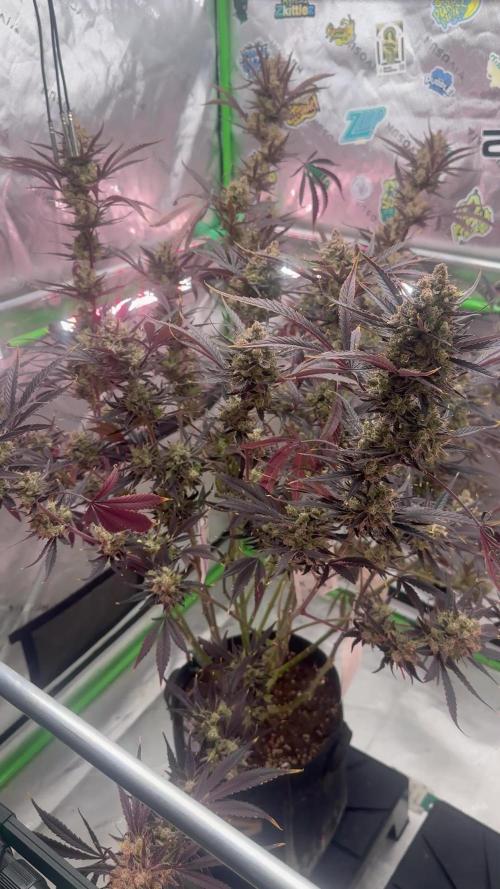
Week 3 saw her getting transplanted into her forever-home, a 20L airpot. Also, same as with my whiteberry, instead of using stakes or topping to train her, i heavily defoliate the fan leaves of the main stem for now. Whiteberry took to that very, very nicely, lets see how she will perform with it. However, so far, everything is looking a-ok
Watered her 800 ml 1ml/L Power Roots, 2.5ml/L Grow at the beginning of week 3, then 3 Liters after the transplant on Day 17. Transplanted into the same plagron terra lightmix, amended with some rice husks and limestone, as well as a good dosage of mycorhizzae for the roots. So far, so good 😎



Likes
49
Share


@masterofsmeagol
Follow
7/11 Got half in of rain last night. Glad I didn't water. Ph of rain water is very acidic. Added supports to the blueberry cheese in the 50. I just used string and went diagonal and attached to the cage. Wrote a ton but it disappeared. Anyway looking at previous diaries I was wrong about senescence. It wad the life cycle of those earwigs that did that to my plants (see other diaries). This soil mix is amazing. These plants gave only gotten like two small feeds of big bloom. I showed my commercial buddy and I'll keep it between us what was said but it made me feel really good. I'm considering either expanding the cage in one direction with some lumber I already have or moving a couple outside tge cage. That way I have more room. He said he's seen plants structurally similar reach huge heights (14f) so I'm just trying to avoid future problems. I at least need to get the trellis on. I hope poor that's food enough. Did a real nice video this morning but nothing wanted to upload and it just uploaded the same one twice. I'll try again and hopfully it will go up. If not I'll put it up tomorrow.
7/12 Dad has surgery this morning. I did a quick video and took some pictures. I need to do some rearranging with the plants and cut a pallet to fit in the back. Then I can put a vertical trellis up. Haven't decided if I'll add on to the cage, remove a couple plants or just rearrange things but I'm leaning towards the later. They will need water again and I'm wondering if I should start nutrients but everything looks so good. By this time on past diaries I'd be losing all my leaves bu now. MI think it wad part ear wigs and part to many nutes. This soil mix is taking these plants through veg. I'll probably do a feeding soon but it will be organic and it will he small like a big bloom or ancient amber. Im leaning towards not using growbig this year as my plants seem to be doing great without it. We'll see. I'll keep this updated.
UPDATE: Went back over and gave plants a full watering. Some were slightly drooping. I was going to add nutes but decided against it as I didn't see any deficiency. So far NO Earwigs! I comed through the plants and I did find a jpn beetle which I happily killed. I mixed up 8 gallons of water and gave it to the 11 plants so it wasn't quite a gallon a plant. I need to rearrange the plants so I have room to move around. I also need to cut another pallet and use the spaces I'm not. Trellis needs to go up.
7/13 I think I've got the watering amount down. Now just to find how often which will depend on weather. I've watered very little this year. They loved that gallon. I was going to use big bloom and kelp me/you but looking at my garden I decided not too. My buddy asked what i was addingvthings for and to wait fir what i added to do what I wanted it to do. I see no nutrient deficiencies so why add anything? I think this soil mixture will get me all tgexway through veg. I dont plan on using much in fliwer either. Definitely good genetics. I really need to cut that palley and move the 1 10gallon to the far back coener. It will open thibgs up so much better. The garden looked so beautiful this morning. Getting very aromatic. I started untangling trellis netting but had to leave. I'll update what I do. Happy growing folks
UPDATE: Went back over as I had a slight intuition that I needed to check the garden. I found and killed at least 7 jpn beetles. That's what's been making holes. They tried to escape and bounced off a tarp but I got it. I went through the interiors and found two pillars. If these beetles are gonna be around I'm ordering a net. I'm also close to positive I'm going to extend my cage in the back a few feet. Things are getting unmanageable in here. My buddy said I'll be having problems soon if I don't do something. I'll document what I decide to do.
7/14 Found ONE jpn beetle in the garden this morning. I can manage those well enough. The birds help too. I check my garden multiple times a day so I manually remove many pests. However I've noticed some thrip damage on a leaf and a leafhopper damage on "A" leaf so there are "some" pests around but not enough to spray shit. A couple wasps were doing there job while I was there. Supposed to get thunder storms after three and tonight. Supposed to get over a half inch of rain tonight. I lifted the bags and decided to hold off and let mother nature take care of it as the bags weren't totally dry. Only problem I really have is space. I AM moving that 10gallon (that's the same size as some 20's) in the back. There's 27in not being used and a few feet the other way. My buddy cautioned me that I'm going to have problems since my plants are so crowded. I agree with him. I spoke with me father and we have most materials to extend my cage four feet in the back. I think that's my plan. I'll extend the structure before the stretch then I can put up the supports. We'll see how this goes.
UPDATE: Went back over to check the girls as I had a feeling I ought to. When I got there I saw that a couple of the blueberry cheese were pretty light (liftng the smart pot) but the others seemed to be fine. ONE 10th planet was light like that and the purple punch in the 10 gallon was as well. Each plant thar needed it got at least a half gallon of water. I'm waiting to see if we get the thunderstorms and the half inch of rain. I watered the MASSIVE blueberry cheese in the 50 but I only gave it 1 pitcher which is like 1/4 gallon or so. Don't know why I even gave it that. Looked fine but the soil WAS pretty dry. Next year I'm giving myself way more room. I was running trying to chase these jpn beetles. This time I have the dawn and water and a measuring cup to knock them in. This ain't my first rodeo. I did notice some bright yellow streaks on a leaf edge and I'm hoping it's not septoria. I doubt it but I have an anxiety disorder and I worry. I hope I can get the cage extended sooner rather than later. It's getting hard to move in there and more importantly I can't take any more plant pathogen problems. I'm considering starting a plant doctor regimen just to be safe.
7/15 Got a bunch of rain last night. No jpn beetles in the garden and not really much damage. I did notice this (I think it's leaf hoppers) that leave those dots close together on a leaf so it appears I've got a variety of pests. I'm considering how to approach this. I mean the damage is very minimal but I don't want it to get out of hand. Another thing I need to look out for is leaf septoria or any other fungal pathogens. I believe that has been part of my problems in the past. I think that's what caused my earlier grows to drop all their leaves so quick. I think I'm being overly cautious but its very crowded in there. With my father just getting out of surgery the girls will need to wait a little bit before before I can extend the cage. I could still cut the pallet and move the 1 10gallon and that would give more room. I rearranged a LITTLE BIT so they have a little more room but I've really got to get this cage extended.
UPDATE: IT Rained so hard I had to pull the car over. We hydroplanned the whole way home. After working ob my house I went to see what the damage would be like. NOT A SINGLE BREAK THAT I COULD SEE. I took a video but since the wifi here sucks I'll have to upload it tomorrow. Walking around in the cage even if I cant get it extended I think I'll be OK. It obviously will open me up to lots more issues but at the very least I can reorganize before I build on. The 10 gal purple punch would fit perfectly in the back and I have a pallet I can cut to fit it in place. Putting that one back and pulling the others forward will be much better than what I've got going on now. I'm also thinking about running an extension cord and putting fans under the canopy or at an angle to keep the wind moving. Just thinking outloud. However after that storm the girls looked as happy as I've ever seen them. All happy praying to the sun, thankful for the much needed rain. Mother nature does a pretty good job with out me messing with it. I've noticed a couple interior lowest leaves turn yellow and die like a nitrogen deficiency but everything else is fine. Also noticed a leaf that looked like a p deficiency but again, it was the VERY bottom leaf on ONE plant. Again the rest of everything looks fantastic. I'll keep an eye out for anymore nutrient deficiencies and if anyone that reads this sees some please let me know. I should've taken stills since they looked so good but I got it on video.
7/16 It POURED last night and throughout the day. TORRENTIAL rain. The branch breaking sheet rain that us outdoor growers learned to fear. My plants aren't trellised currently. I know what I need to do now. I have a pallet to put in the back corner and I'm moving the purple punch in the 10 there. And pulling others forward where there's more room. Then when I extend it (it's gotta be done this week) everything g will be in their proper place and I can just throw on a vertical trellis. I also noticed more (leafhopper) damage on a leaf. Different leaf of the same plant so I'm considering spraying something. I have a number of products but I was trying not to use them. Luckily I have these diaries so I can look back and see certain plants reactions to certain nutes or fungacide/insecticide/nutes and the doses used. I haven't been using much but if my plants will remain cramped I'm going to start the plant doctor. I'm seeing more pillar damage too but BT is super narrow so I'm thinking when I fo spray for pests I might use cap jack and be done with it. Then I can apply the BT in flower if it's necessary. I took a video but I have to wait until tomorrow to upload. I took a quick snapshot though.
7/17 Despite the torrential rain I don't have any breaks. I'm noticing more pest damage though. Another leaf on the same plant had those closely shaped round circles. I forget what pest it is but it's there. Caterpillars are there I'm sure so I may do a preclcentative spray. Just unsure what I'm going to use. I lost a COUPLE very bottom interior leaves that look like they just got used up. After this rain I think think the plants might benefit from a feeding. Probably next water after they dry out. I REALLY need that cage extended. I expressed that today and it should be done this week. I'm looking for pallets today. I have the little one that I can put in the back which will allow me to move the 10 gallon and move the other forward. That will help some but I need more room. I'll update as I go.
UPDATE: GOT A SMALL PALLET AND IT FIT PERFECT IN THE BACK ROW. I MOVED THE PURPLE PUNCH IN THE 10 GALLON ONTO IT. I SHIFTED A BUNCHVIF THINGS AROUND. I ROTATED ON BLUEBERRY CHEESE 180 DEGREES SO IT WOULD FIR BETTER. CROP ROTATION IS GOOD ANYWAY. I TOOK VIDEOS AND YOU CAN NOW SEE THE ROWS MUCH BETTER. 2 WITH 3 and 1 WITH 4. IT'S SIGNIFICANTLY BETTER THAN IT WAS. I CAN GET AROUND ALL SIDES OF EVERY PLANT NOW. GRANTED THE LARGE 50 IN THE BACK IS GOING TO HAVE SOME TROUBLE BUT ILL JUST STAKE IT TO THE CAGE. IT WILL GROW TOWARDS THE SUN ANYWAY. IM SUPRISED I DIDN'T LOSE A BUNCH OF LEAVES AFTER THIS RAIN. MOVING THINGS AROUND AND LOOKING ON THE INTERIOR OF PLANTS I FOUND A COUPLE LEAVES THAT HAD BEEN USED UP. I REMOVED A COUPKE LEAVES THAT HAD DONE THEIR JOB. I'LL UPDATE AS I GO ALONG.

Likes
11
Share


@Bread_n_Buds
Follow
Sorry for the absence guys from the sixth week the plants began to mature a little prematurely and in advance and I was engaged in two weeks of harvesting and tight hassle because in practice they were all or almost all seeds. With most I still managed to stop at the first ones that form on low flowers, with others like Fullgas I managed to seem not to have even one. Growing FUllgas was an honor for a truly fantastic and voracious plant to grow. It has bloomed well, quickly and is truly fragrant. I'm not very familiar with terpenes yet but this one has the predominance of my favorite. Wow what a smell. I did a toppin g at 16 buds and they all grew together, some barely kept standing at the end but here we are, the young lady is beautiful, clean and dry in the room. I would like to recommend it to everyone.
Music of the week Bus to Bus to keep me active and operational during operations.
Light >> Marshydro SP3000 AT 90% of Power
Tent >> Marshydro 120x60x180
Check IG >> https://www.instagram.com/marshydro_aliexpress2/
Buy >> marshydroled.aliexpress.com
https://shop.greenhouseseeds.nl/
Fullgas! Franco Loja Rest in Peace.

Likes
19
Share


@RDWCGrowing
Follow
Week 1 Day 1 - 8/12/2023
1st Water change Day! Such a special time it is when you remove the little bit of Nutes that you gave them as an appetizer and you give them their first real meal.
Added
39 Gallons of Water to my system
SILICA= .5mil/Gal = 19.5 = 20mil
Root Drip = 1mil/Gal = 39mil
Cal Mag= .25mil/Gal = 9.75 = 10mil
FLoraMicro= 3.0mil/Gal = 114mil
FloraGro = 2.0mil/Gal = 78mil
FloraBloom = 2.0mil/Gal =78mil
ORCA= .5mil/Gal = 19.5 = 20mil
Week 1 Day 2 - 8/13/2023
Everything is looking good the roots are making thier way to the water and the new grow is looking nice and green.
Week 1 Day 3- 8/14/2023
Everything is right on track, they are looking beautiful and in the praying postition all leaves happily lifting towards the light.
Week 1 Day 4- 8/15/2023
Looking beautiful today and looked like she could use her first haircut.. gave her a TOP off. Roots are laying in the water everything is looking right on track..
Week 1 Day 5- 8/16/2023
walked in and the humidity was under 60.... ohh noooooo.. So I added 2 humidifiers to the tent and attached them to my InkBird controller which is set to 62. She had roots nicely in the water.. this grow is on!!!
Week 1 Day 6- 8/17/2023
Humidity was a little low this morning, so I refilled the humidifiers. Other than that, the temp looks great, the PH looks great, the PPM looks good the plant is in the praying position and all damage from the little drowning seems to have been fixed. Happy Happy.
Week 1 Day 7- 8/18/2023
Yay.. week 1 in the books, roots in the water growth has started first hair cut given and both side nodes are growing. Everything is looking good and on track.. A lot better than week one of the last grow when I had them drowning week 1.
Really excited on how this grow is going to come out.
Likes
4
Share


@Staffedition
Follow
Привет друзья.
Наше знакомство продолжается с новым фотоцветущим растением от Smail_Seeds сорт TROPICANNA POISONZKITTLEZ XXL F1 reg.
Сегодня растению 107 дней.
ГОТОВИМСЯ К ХАРВУ
Перевёл на 12/12 1.10.2023
Растение очень хорошо развивается, ни каких сбоев в генетике не наблюдается😀
Сорт выводим сами.
Смотри мой профиль, у нас всегда есть что то интересное.
Не забудь поставить лайк❤️, если понравилась как прошла неделя
И читайте наш TELEGRAM: https://t.me/smail_seeds
#Smail_Seeds 😀


Likes
11
Share

@ShinWeed
Follow
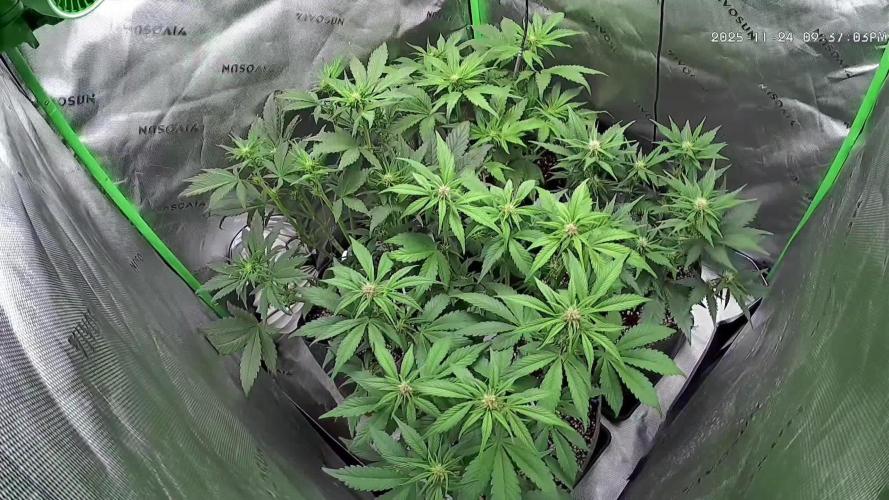
Die Woche leider wieder wenig Zeit, dafür aber eine Zeitraffer.
Nächste Woche wieder wie gewohnt!