
Likes
Comments
Share


@BudsBanditUK
Follow
Not much going on, the buds are getting fatter. There is now a faint smell. Some buds now getring some colour. Still taking feed probably at least 2 weeks left.


Likes
13
Share


@Herbz_Unkraut
Follow
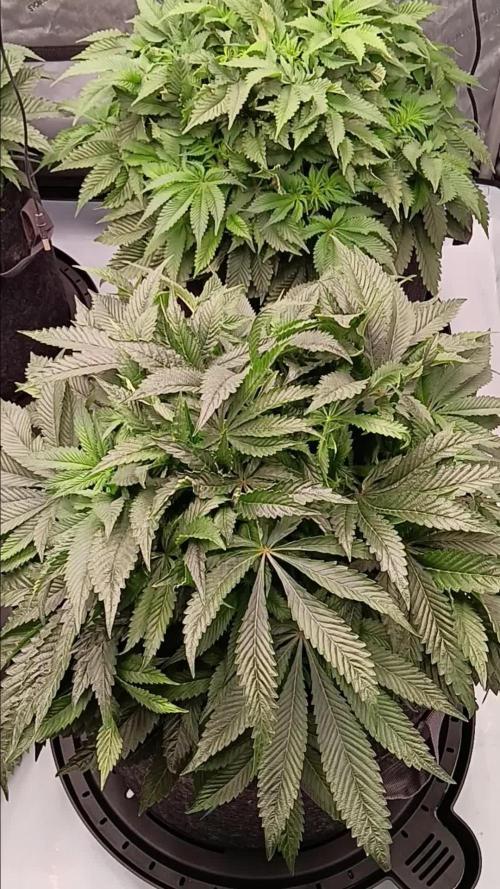
Defoiled alot of leaves underneath and some of the leaves that put shade on budsites
Also defoiled for reducing RH and increasing airflow

Likes
56
Share


@Wicked_Stix
Follow
Been a smooth week for the most part. Started them on some armor si and humic/fulvic acid. I thought the twisted helix had a root issue but after watching the growth there is a genetic issue with this this plant. The branches are growing abnormal and she is not happy. I will probably be switching them to flower at the end of week 4 and I have a sour sorbet that will be making an appearance when I flip them to flower. She has been vegging in a different room for about 6 weeks. I will be doing a little training throughout next week to get them spread out.


Likes
4
Share


@Uk420time
Follow
Coming along nicely .. introduced pk slowly and seems to be doing a really nice kob along with the boost .. how long left you recon guys ?? 3 or 4 weeks ? ... Happy growing grhomies 🤟❤️

Likes
114
Share


@DeaneR
Follow
Week 3 of Flower😀.
Another 2 inches in height this week.
She has decided to take on the shape of her grow space 😃... now more square shaped.
I'm real happy with her so far. Getting covered in "white sugar".
I started using a fertilization technique coined as "trickling", (Canna PK 13/14 @ 0.33mL/L = 1.25mL/US Gal of water) for a light PK boost this week. .
With another 5 or 6 weeks of flower left, it should be an exciting finish!
Thanks for stopping in!
Peace,
DeaneR😎

Likes
31
Share

@Wicked_Stix
Follow
The bubble bomb is short and stout. She is looking happy. Gave her a flush and fresh nutrients. Pulling a couple leaves every couple days to keep light penetrating and spreading her out as she grows. Will be switching them to flower in a week.

Likes
Comments
Share


Likes
5
Share

@BunnyBud
Follow
I noticed some small spots on the leaves, and they seemed to be calcium deficiencies, but otherwise everything was ok.
Likes
72
Share


@Roberts
Follow
Auto Maxi Gom is still flowering, and looking kinda crappy. I have had this happen once before like this. I dunno if it is genetic or something I did. I plan to finish her out, and use flower for infusing. Thank you Medic Grow, Xpert Nutrients, and Seeds Mafia. 🤜🏻🤛🏻🌱🌱🌱
Thank you grow diaries community for the 👇likes👇, follows, comments, and subscriptions on my YouTube channel👇. ❄️🌱🍻
Happy Growing 🌱🌱🌱
https://youtube.com/channel/UCAhN7yRzWLpcaRHhMIQ7X4g
Likes
14
Share


@StewartBloom
Follow
Okay so I'm trying something new, since I've gone away from a switch to water for the last week flush I harvested the tops and best smalls and packed the cannatrol full. I'm giving the under growth a bit more time to rippen before I harvest that for the the freezer. If this turns out to be a bad idea I'll not do it again in the future. The last long video is what's left in the tent right now. Let me know if any of you have experience doing this.
Updated with a bunch of pictured of dried and cured. Ended up with 186g of beautiful flower. 72g of untrimmed smalls I'll make into RSO, I have a lot of back and nerve pain and RSO hands down the only thing that brings me actual relive, I'm late to the party on this one but I set a side part of the grow for it now.
I let the under canopy and shorter tops go another 10 days feed at half strength and I'm glad I did, it ripened up nicely and definitely got a lot of color. I forgot to get pictures of that harvest but I will when I pull it from the freezer to wash. My test jar of this washed at 4+% (the last picture). Last update will be results of that wash.
Last update on this one, I added a couple hash/rosin pics at the end. She washed from plant to rosin at 4.03% the terps are musky skunk, sweet pastries, and fresh Linen. I'd definitely grow this one again.
Likes
5
Share


@Staffedition
Follow
Полёт отлчиный. Пошла вторая неделя.
Растение себя чувствует комфортно.
Развиввается хорошо
Likes
25
Share


@BudHaks
Follow
Apologies for not updating last week, I have just been really busy!
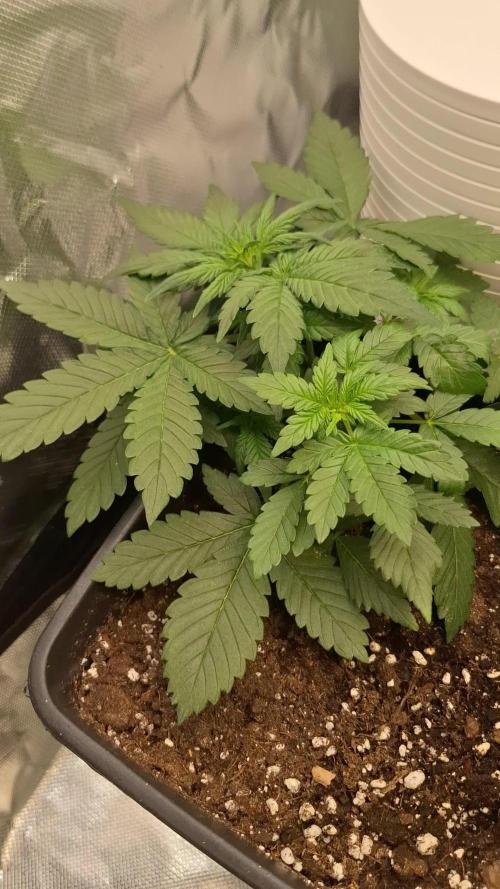
These last couple of weeks have been great - her growth is coming along very well. There are no signs of any deficiencies as of yet, what is your opinion!
In regards to defoliating and lollipopping - what growth would you suggest I get rid off?

Likes
28
Share


@cheetah844
Follow
Hasn't done much vertical growth, seems to be more horizontal growth now.
I topped and defoliated every plant. I'm trying to form them into canna-bushes. Hopefully I'm doing the correct training procedures to make them all grow that way both indoors and out.

Likes
10
Share


@DeepRootsGrowTrees
Follow
ROYAL QUEEN CBG AUTO
ROYAL QUEEN SEEDS
WEEK #11 Overall
WEEK #6 Flower
This lady made some big dense buds and just looks amazing as she's coming to the end of her grow cycle I've had no issues with this CBG plant easy to grow and a nice producer!!
Stay Growing!!!
Royal Queen Seeds
ROYAL QUEEEN CBG Auto


Likes
11
Share


@Luv2Grow
Follow
Day 71 - Starting week 11 today and this could possibly be her last week or maybe one more. Still has a bit of white pistils but they’re fading away. I’m mostly focusing on the trichs though and still still a few clear in there but not many. She’s probably at about 90-5-5, milky, amber, clear so I’m just gonna keep an eye on her for now. She did get 2 gallons of plain water tonight and I’ll check trichs again when she’s dried out.
Day 73 - Might give this girl another full week but not sure yet. Waiting for her to dry out and still checking the trichs and she’s not ready just yet, colors are amazing though.
Day 74 - Nothing much new today, just letting her go until the trichs are to my liking. Will probably give her another round of water tomorrow and thinking she’ll get the axe in about a week or so.
Day 75 - She’s not quite ready for the chop yet so gave her a gallon of water with 40ML of Sugardaddy and 2.5ML of Magical for the final 7ish days.
Day 76 - A lot of trichs amber’d up last night and looking like I’m going to give this girl a couple more days, gonna wait for her to dry out then will chop her down. Other than that, she looks and smells gorgeous.
Day 77 - The end of week 11 and looking to chop her a few days into the next week, probably New Year’s Eve but we’ll see how she looks and may end up doing it before hand.

Likes
9
Share
@TeDcz
Follow
Zdarec, týden v květu za námi a holkám se daří. Dnes výměna aktivního zavlažování za systému vysoce absorpčních knotů od AC Infinity, tak uvidíme jak to bude fungovat.

Likes
9
Share


@Tmasm
Follow
Zamnésia, obrigado por fornecer genética para testes.
Entrega segura, dentro do prazo e muito discreta, como você pode ver nas fotos.
Experiência para possível plantio em massa, dependendo dos resolvidos.
1 BISCOTTI (SEMENTES DE ZAMNESIA) FEMINIZADO
Conforme diário já na 3 semana.
1 JEALOUSY (SEMENTES DE ZAMNESIA)
Conforme diário já na 3 semana.
1 SUNSET SHERBET AUTOMATIC (SEMENTES DE ZAMNESIA) FEMINIZADO
Já germinada, e com 1cm
Panta está linda, crescendo bem.
Gosto muito do desempenho dela, barraca com condições mínimas, mas para ela tudo bem.
Primeiras fábricas da Zamnésia, estou impressionado com a qualidade dos produtos.
Visite www.zamnesia.com, você ficará surpreso com a variedade de produtos, todos da mais alta qualidade.
O diário será atualizado toda semana, espero que gostem (eu também).

Likes
9
Share


@BLAZED
Follow
Week 11 (26-8 to 1-9)
26-8
Temps: 20.5 to 26.1 degrees
Humidity: 50% to 56%
27-8
Temps: 20.7 to 27.3 degrees
Humidity: 50% to 56%
Watering: Both 1500 ml. (Only Calcium) EC: 0.4 PH: 5.6
Defoliated both plants
Dry Weight: Both 2.6 kg.
28-8
Temps: 21.5 to 28 degrees
Humidity: 51% to 56%
29-8
Temps: 23.3 to 27.4 degrees
Humidity: 55% to 62%
30-8
Temps: 19.9 to 27.7 degrees
Humidity: 50% to 60%
31-8
Temps: 20.2 to 26.6 degrees
Humidity: 50% to 55%
1-9
Temps: 21.1 to 29.1 degrees
Humidity: 49% to 55%
Watering: Both 1000 ml. EC: 1.4 PH: 5.6
Dry Weight #1: 2.5 kg. #2: 2.3 kg.
Recalibrated my PH pen and it was only 0.1 off, so i dont think the leaf problems are PH related.