
Likes
Comments
Share


Likes
15
Share

@Radagast_
Follow
10.08.
Girl Scout Cookies
Day 107#
The plant has recovered, but has not completely healed yet.
This morning it started to form crowns and will probably enter early flowering tomorrow or today.
Two days ago she received half a dose of boost and a dose of bloom, and this morning bloom again.
The day before yesterday was the end of her 15th week.
Stay High and Keep Growing!!!

Likes
9
Share


@Mr_nugs_lover_David
Follow
It's been a beautiful plant to grow, I thought she was gonna be a little bigger, however she has produced an amazing quality flowers, very sticky, terpy and stinky, the citric aroma it's absolutely wonderful just because of that I could grow her again and again. You definitely need to try this strain if you lovd weed.💚🌱🤤
Likes
2
Share


@Fruitsofireland_37
Follow
Just started plagron green sensation along with alga bloom on the pineapple express and BlackBerry autos bu fast buds. They are putting on weight now and are a pleasure to grow.check out fast buds people...


Likes
38
Share


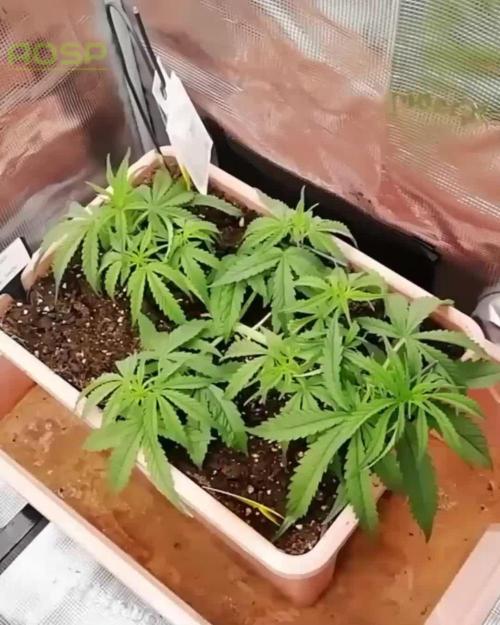
@Green_Mountains
Follow
A lot going on this week!! Feeding 3 quarts every Sunday and Wednesday at this point. I did a light defoliation on Monday and did a more thorough defoliation on Friday! I opened up a lot of bud sights and it shows in the pics from late in the week!!
I just turned the fan and carbon filter on. Temps are currently holding at 73-74F and the humidity is between 43-45%. I'm very happy with that!
I hope to keep them both happy!!
Enjoy!

Likes
34
Share


@Hempface86
Follow
Idk 🤷♂️ 🤷♂️ i've seen people with similar phenotypes, so I know it's not anything i've done.. Usually I am raving about Zamnesia Seeds but this grow was a real letdown. Especially because it's a contest grow, and I had put so much into it.. not very happy.The plant was ugly from the beginning.. deficiencies from the beginning.. and she's gotten the same treatment every plant I ever grow gets .. she produced a lot .. i just don't know how good it's going to be... Not a sugar leaf on the whole plant... No sweet smell .. i'm just glad this grow is over......... Okay, now that it's dried for a couple days. It's official, this grow was a complete waste of time.. I'm not gonna smoke one b off the entire plant. It's all going in the freezer for butter. It's absolutely trash.It's all larfie ruderalis 💩 .. no more autos

Likes
7
Share


@Dictator
Follow
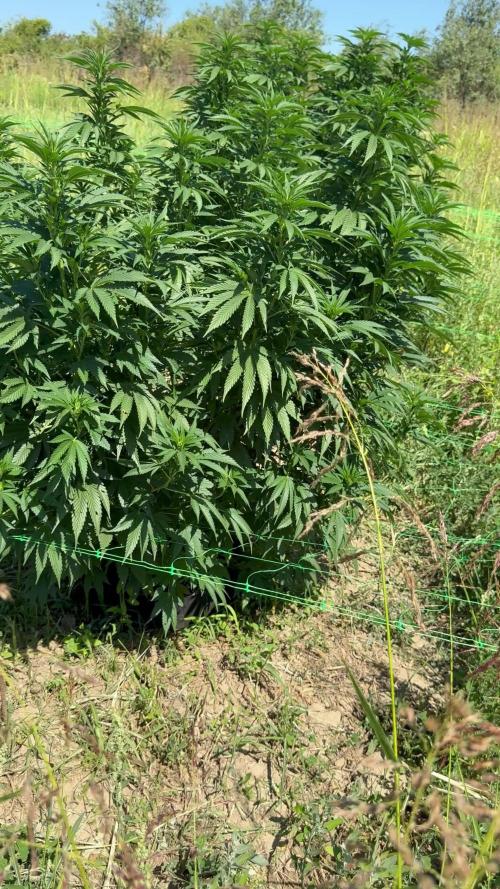
This beautiful girl has started to grow actively, I'm going to give it a shot soon, she's feeling good🌱

Likes
6
Share


@urbanmitchell
Follow
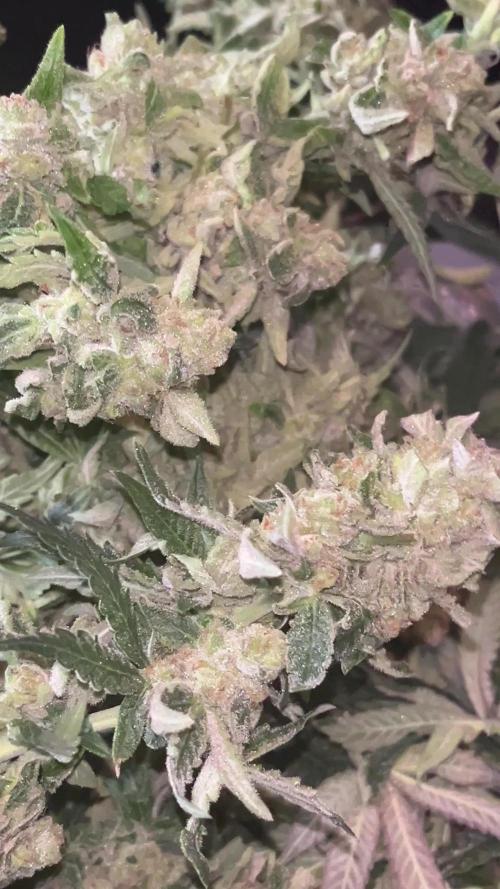
my god the frost on the leaf and the swell is like the blueberry note aroma whit the dosidos and the background this baby i will keep it for the next batch clone done under the light other tent

Processing
Likes
3
Share


@XxBILLZAxX
Follow
Increased their food by a tad. Looked perfectly health raised to about 1900ppm.
Again spider mites at it crawling up every leaf and creating a colony. I thought it was over until I sat there nearly every night finding the f*****s and rubbing the leaves with the spray.
Defoliation was needed ASAP due to them stretching nicely. Started slowly from the bottom up. (repeated this process every 3-5 days.)

Likes
5
Share


@Ninjabuds
Follow
The Gas Tax x Obama Runtz plant is looking really good. It's got these super pretty leaves and it's stretched a whole bunch. I think it might be my favorite plant in the tent.
The new year is off to a frosty start! We've had snow falling for what feels like forever. My kids are loving it, of course. They're building forts, having snowball fights, and turning everything into a winter wonderland. It's been a lot of fun to watch them enjoy it.
All this snow is really making me think about how quickly time flies. It feels like just yesterday we were celebrating the holidays, and now here we are knee-deep in winter. I'm looking forward to warmer weather, but for now, I'm enjoying the quiet beauty of fresh snow.
Likes
24
Share

@Momentum
Follow
Bei der Hash Burger ist mir klar geworden, dass der Leafly Strain of the Year Titel sich nur auf das Endprodukt bezieht. Vom Growing her performt sie eher klein und graziös, wird sicher aromatisch und ist ne schöne Pflanze, aber der Wuchs ist nicht die erwartete Bombe bis jetzt.


Likes
30
Share

@All_our_small_plants
Follow
Bewässerung: 500 ml jeden 3 Tag in der siebten Woche
pH-Wert: 6
EC-Wert: 1,8 mS/cm
Temperatur: 30ºC
Luftfeuchtigkeit: 55%
Schädlingsbekämpfung: im Moment haben wir keine Anzeichen das es was zu bekämpfen gibt, sobald die ersten Anzeichen da sind werden wir handeln :), aber zur Sicherheit haben wir wieder ein paar Raubmilben an die Pflanzen gehenkt.
PPFD: 600 µmol/m²/s
DLI: 38 mol/m²/Tag
Düngemittel: Sie bekommt CalMag von BioBizz zu Prävention. Ab Tag 18 haben wir angefangen sie mit einem Mineralischen NPK Dünger (NPK 10-4-7) zu Gießen .
Besonderheiten: Sie ist nun seit einer Woche im Großen Zelt und macht sich ganz gut.
-Tag 37 heute wurde sie wieder entlaubt und wir haben das LST fortgeführt, sie sieht sehr gut aus. Außerdem hat sie wieder Wasser mit Dünger bekommen 😌
-Tag 40 wie man auf den Bilder erkennen kann ist sie nun in der Vorblüte und wird die nächsten Tage in die Blüte wechseln.
-Tag 41 Letztes LST angewendet nun wird nur noch entlaubt und Gegossen :)
-Tag 42 Heute nur Wasser gegeben.


Likes
8
Share

@GREENPHOENIX6262
Follow
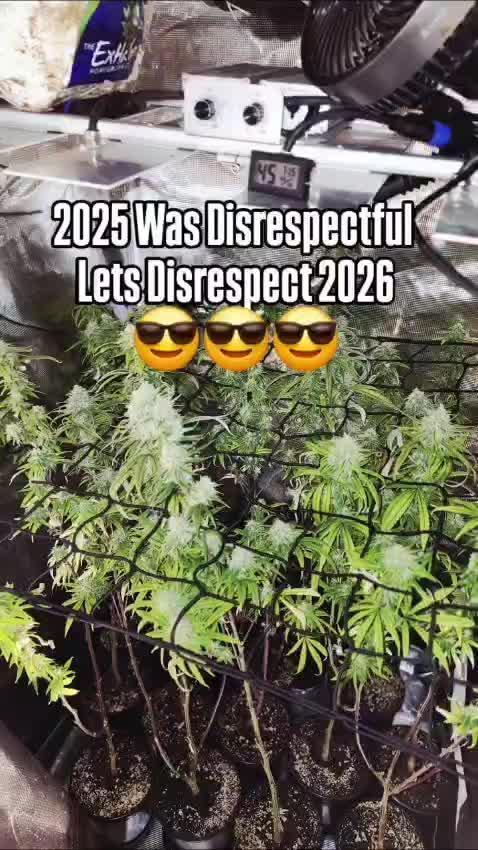
12/30 - Dropped the 3x3 net for spacing - Micro dosing Silica and Green Planet through harvest - Sick plants have bounced back and are flowering accordingly - Update concluded 😎😎😎😎


Likes
6
Share

@Mr_nugs_lover_David
Follow
It was such a nice experience for me with this strain, first time ever growing her, she had a little bit of long internodes and thought she wasn't gonna be very productive, however the nuggets are so so hard and compact and the quality is just brutal, doesn't even look like she's s been outdoor grown, I love this strain for the rare strong smell like very sweet and floral with that strange diesel notes mix the sweet tones, I would love be growing her my whole life, I definitely will keep growing this lady FOR SURE!. thank you so much and hope you guys enjoy! 💎🙏🔝💚

Likes
8
Share


@Inceptionist
Follow
Milky Dreams got harvested 16/11 and I'm planning to let her dry for 14-21 days before trimming and put them in glass+boveda (58%) and grove bags for final cure.
Drying conditions are as follows:
16-18°C
55-60% RH


