


Likes
Comments
Share


@Jessemon1106
Follow
She is a great strain thus far. My tent has been getting a bit hotter in the summer. Just a bit of issue though. Can't wait to try this one. Such a sweet candy smell.

Likes
12
Share


@Amboss
Follow
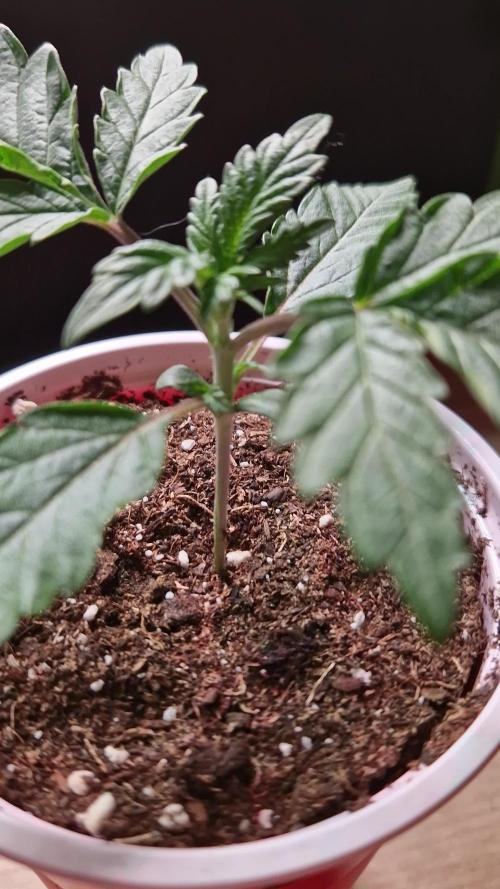
2te Woche beginnt.
Bisher läuft es glaube recht gut …
Die kleinen wachsen brav …
Habe mal 2 weitere Nutrients hinzugefügt und Versuche den VPD Wert irgendwie konstant zuhalten 🙈👍
Dank 4 Blumat Classic pro Topf reicht ab und zu bisschen sprühen aus dem Befeuchter… heute das erste mal die kleine Pflanze abgedeckt und ganz leicht von oben die trockene Erde mit den neuen Nutrients zusätzlich befeuchtet.
Mal schauen was sie so bewirken …

Likes
10
Share

@TrickzGrowz
Follow
Servus Moin!
Die Blucci OG entwickelt sich super. Ich bin gespannt, wann ich sie toppen kann und mit dem Training starten kann.
Likes
47
Share


@KilgoreTrout
Follow
Everything is looking great. Except one pheno of the purple kush. Flowers aren’t stacking, still quite small especially in comparison and it’s not at all purple. Hopefully it’ll catch up during p/k week. which starts in a few days.
Most of my leaves are praying everything is healthy and happy.


Likes
12
Share


@Richie_Ostrich31
Follow
day 36. light schedule was 12/12. only for this day
tops looking yellow ish. so i suppose its because of the lack of light
plus it stretch quite a bit. back to 18/6 then
day 37. topped with RO water, 1 quart, pH to 6.0
growth spurt is real. havent seen much like this before
day 38. topped with another RO water, 1 quart, pH to 6.0
reservoir water level is decreasing rapidly
kinda have to change reservoir before the weekend. noted to self
day 39. nothing much really
day 40. decided to change the reservoir.
water level is low, the reservoir came back at pH 5.2, 360ppm
plant is drinking a bunch and needs more nute
new regimen was still the same, 600ppm
done some light defoliation just to clear some foliage
day 41. nothing much still
day 42. topped with RO water, 1 quart, pH to 6.0
plant is vigorous, but havent started to flower.
is hydro take this long to flower? i mean it stretch almost double it size since last week
and there's NO PISTIL AT ALL. NONE AT ALL. checked every one of them
im running outta space, 16 inches left to the light

Likes
11
Share


@GERGrowDesigns
Follow
Welcome to Flower Week 8-9 of Divine Seeds Auto Black Op1um
I'm excited to share my grow journey with you all as part of the Divine Seeds Autoflowering Competition 2025. It's going to be an incredible ride, full of learning, growing, and connecting with fellow growers from all around the world!
For this competition, I’ve chosen the Feminized Automatic strain: Auto Black Op1um
Here’s what I’m working with:
• 🌱 Tent: 120x60x80
• 🧑🌾 Breeder Company: Divine Seeds
• 💧 Humidity Range: 50
• ⏳ Flowering Time: 8W-10W
• Strain Info: 25%THC
• 🌡️ Temperature: 26
• 🍵 Pot Size: 0.5l
• Nutrient Brand: Narcos
• ⚡ Lights : 200W x 2
A huge thank you to Divine Seeds for allowing me to be a part of this amazing competition and Sponsoring the Strains. Big thanks for supporting the grower community worldwide! Your genetics and passion speak for themselves!
I would truly appreciate every bit of feedback, help, questions, or discussions – and of course, your likes and interactions mean the world to me as I try to stand out in this exciting competition!
Let’s grow together – and don’t forget to stop by again to see the latest updates!
Happy growing!
Stay lifted and stay curious!
Peace & Buds!

Likes
2
Share

@Davesflavours
Follow
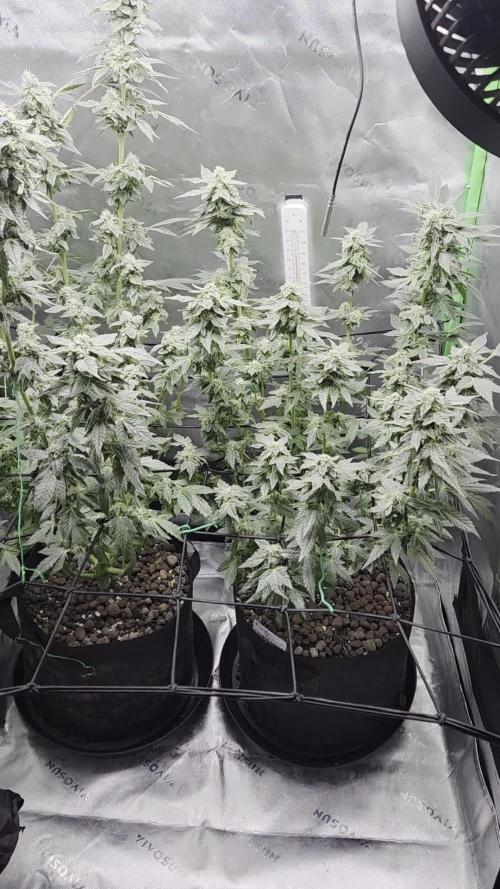
Can't complain with another good week!
More pistils are starting to turn orange and buds are looking good and healthy, I've got no burnt tips and so im guessing the nutrient mix is balance nicely after removing the silica after it kept reacting with the mix.
Done another defoliation to get that light where it's needed, im very happy with these two plants as they are only my 2nd and 3rd plants I've ever grown.
Thanks for stopping by✌️

Likes
107
Share


@MrJones
Follow
I was very impressed with the yield from 1 plant, 88 Grams, the smell when you open the curing tote is phenomenal, the buds have plenty of trichomes, and get you stoned as hell. I grew this plant in y super coco, with only a few late flower top dressings, straight forward and very easy. I would recommend these seeds to anyone!


Likes
25
Share


@pifflestikkz
Follow
Day 22
25/07/24 Thursday
Still no Feed/water since Tuesday.
Been a humid and overcast two days so not as much evaporation as normal.
All plants happy and healthy 💚
Video updates
Day 23
26/07/24 Friday
De-chlorinated watering pH 6 with 5ml calmag to 5L water.
Watered each with 250ml and had small run off.
I will continue to feed/water with small run offs to help prevent salt build ups.
Video update.
Day 26
29/07/24 Monday
Nice feed today, using de-chlorinated tap water pH 6.
They each had 300ml with small run off.
All looks incredibly happy and healthy!
The Auto Kabul that was mutated and twisted has pulled herself through and is just a bit shorter than the others.
Day 28
31/07/24 Wednesday
End of week😁
De-chlorinated water pH 6 today with Plagron pk13-14 5ml to 5L
Plagron power buds 5ml to 5L
Used 300ml of the 5L solution.
I will be using these on water days from now on as they are advised to be used every irrigation.
We'll see how they perform 💪💚

Likes
17
Share


@420DeepGrow
Follow
Gracias al equipo de AnesiaSeeds, Marshydro, XpertNutrients y Trolmaster sin ellos esto no sería posible.
💐🍁 Sticky Boof:
Prepárate para dejarte llevar por Sticky Boof, nuestra última obra maestra que está poniendo el listón muy alto para los amantes de las índicas. Nacida del legendario cruce de Super Boof y Cadillac Rainbow, Sticky Boof es una potente planta con un asombroso 80% de dominancia Indica que promete una relajación sin igual.
Prepárate para un viaje épico con el asombroso 37,5% de THC de Sticky Boof.
Sumérgete en una cosecha abundante con Sticky Boof, que produce hasta la friolera de 500 g/m² en interior y 800 - 900 g por planta en exterior. Esta variedad es generosa y está lista para llenar tu alijo de cogollos de la mejor calidad.
Sticky Boof es todo rapidez y eficacia, acelerando el tiempo de floración en sólo 7 u 8 semanas.
💡TS-3000 + TS-1000: se usaran dos de las lámparas de la serie TS de Marshydro, para cubrir todas las necesidades de las plantas durante el ciclo de cultivo, uso las dos lámparas en floracion para llegar a toda la carpa de 1.50 x 1.50 x 1.80.
https://marshydro.eu/products/mars-hydro-ts-3000-led-grow-light/
🏠 : Marshydro 1.50 x 1.50 x 1.80, carpa 100% estanca con ventanas laterales para llegar a todos los lugares durante el grow
https://marshydro.eu/products/diy-150x150x200cm-grow-tent-kit
🌬️💨 Marshydro 6inch + filtro carbon para evitar olores indeseables.
https://marshydro.eu/products/ifresh-smart-6inch-filter-kits/
🍣🍦🌴 Xpert Nutrients es una empresa especializada en la producción y comercialización de fertilizantes líquidos y tierras, que garantizan excelentes cosechas y un crecimiento activo para sus plantas durante todas las fases de cultivo.
Consigue aqui tus Nutrientes:
https://xpertnutrients.com/es/shop/
💻 Trolmaster Tent-X TCS-1 como controlador de luz, optimiza tu cultivo con la última tecnología del mercado, desde donde puedes controlar todos los parametros.
https://www.trolmaster.com/Products/Details/TCS-1
🍣🍦🌴 Xpert Nutrients es una empresa especializada en la producción y comercialización de fertilizantes líquidos y tierras, que garantizan excelentes cosechas y un crecimiento activo para sus plantas durante todas las fases de cultivo.
Consigue aqui tus Nutrientes:
https://xpertnutrients.com/es/shop/
📆 Semana 4:
Los cogollos se siguen formando poco a poco y ellas comienzan a llenarse de resina.
Creo que al haberla puesto tan pronto y debido a la luz solar ha entrado en floración antes de lo previsto.
Continúo con las dosis de nutrientes recomenda por el fabricante.

Likes
2
Share


@growerfromnc
Follow
She has begun flowering stretch more lst
Pre buds formed 4 days later flowering in full effect

Likes
10
Share


@AUTOBUDDHA
Follow
Explosive week of growth! These ladies more than doubled in size in just one week!! The Blue dream matic is starting to show pre-flower right on schedule. These photos were taken on day 27.
Coco loco by Bush doctor is absolurelltely, positively, THE TRUTH! no nutrients added, and these girls are absolutely beautiful lush green. Already building heavy stalks! Just LOVING the T5 VEG lights!! Absolutely CANNOT wait to see how these beautiful birches rip under the HID lights!
Still no training. Which is completely out of the normal for me. I train ALL of my autos.
I believe I have decided to try them straight ul this run, under intense light. I will use only very light LST and defoliation toward flower. Both of these strains can be finicky about stress, so were gonna go very low stress but high attention on this grow. (Leaf tucking and defoliation)
Also, check out my Gorilla Glue #4 grow that I have running simultaneously. Employing the same tactics on those.
One strain will go under 1000 watt hps.. The other strain will go under a brand new HLG 650R.
Likes
2
Share


@EtnoGrow
Follow
all grow normally and in good health without the presence of pests, they all grow normally and in good health without the presence of pests, in the following week we will practice some apical pruning and lts or a similar technique experimenting haha


Likes
17
Share


@ILoVeThiSpLaNt
Follow
Ultimi giorni per una pianta mentre altre due sono a seccare. Qua foto e video delle prime tre piante tolte. A settimana prossima 😊
Processing
Likes
42
Share


@Dunk_Junk
Follow
A solid 13cm vertical growth this week but look at how much she has bushed out!
I think she's going to make a very nice adult plant.

Likes
6
Share

@Salokin
Follow
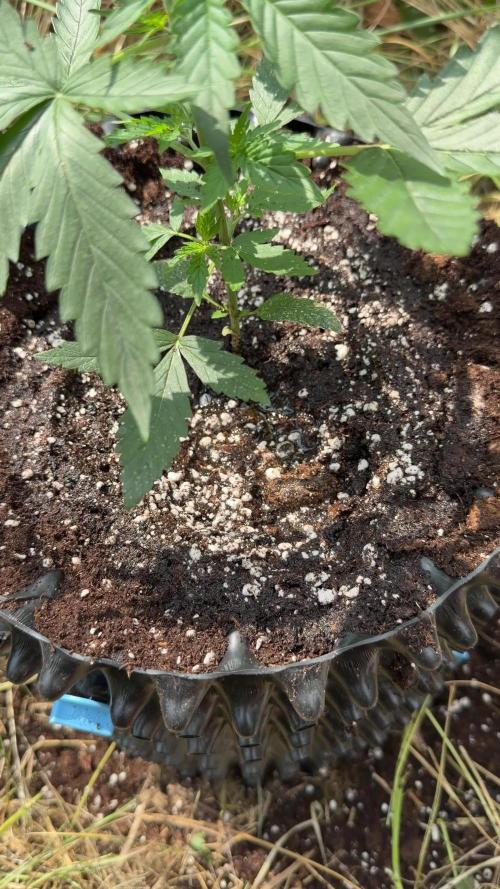
Week 4 | Jealousy Marker
Decision made. After the comparison period, one plant clearly outperformed her two siblings in vigour, structure and overall development. The other two have been discarded, and the winner has now moved outside — straight into a 5L airpot, bottomless, set in the garden next to the 46 Kush. Ran short on the bigger pots this time around, so she's starting outdoors a size down from the others — being bottomless though, roots can push down into the native soil below as she grows, so the smaller pot footprint isn't a hard limit.
**RootX** was applied again at this transplant, delivering mycorrhiza (*Glomus intraradices*), *Trichoderma harzianum*, 13 strains of *Bacillus spp.*, humic acids, amino acids and vitamins straight into the new root zone — giving her the same strong start outdoors that got her through the indoor selection phase.
Last recorded indoors before the move: Week 4, height 15cm, light schedule at 17 hours, EC 1.5 mS/cm, pH 6.2. Now she's outside and adjusting to natural light and the elements.
Updates every Sunday. Stay tuned.


Likes
6
Share


@Kardo
Follow
Hat einen sehr starken Haupt Ast und hat viel potenzial sie zeigt sich super
Likes
16
Share


@Chocolopeison
Follow
Comenzando la semana 4 de floración y a las nenas le dimos una bienvenida para que comiencen de lleno esta fase de engorde.
Estos día bajamos a 2 riegos por día. Normalmente hacemos 3. Ya a mitad de semana volveremos a los 3 riegos.
A las nenas le sacamos prácticamente toda las hojas de abanico, ahora tenemos muchísima más penetración en la planta. Quizás tengamos problemas de altura pero ya estamos buscando la manera de resolverlo.

