
Likes
Comments
Share


Likes
4
Share


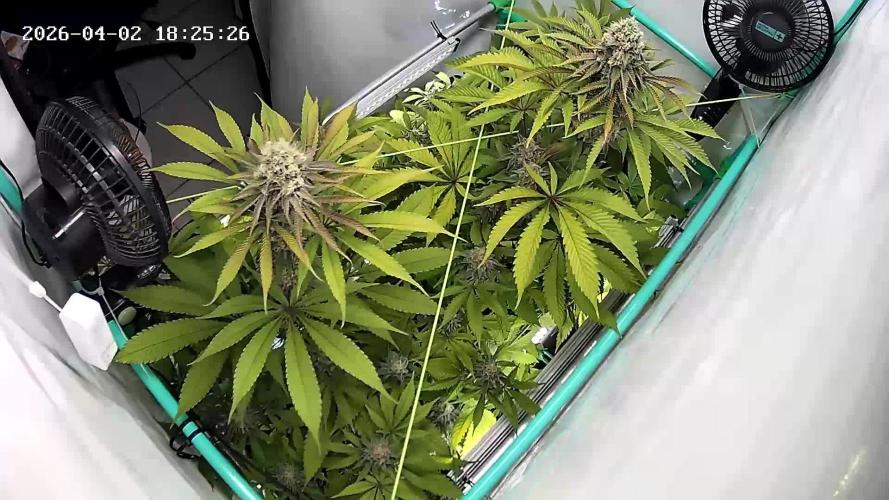
@TiRobotProds
Follow
Bientôt passage en 12/12 plante verte saine. Petite mais bien formé typique indica.

Likes
39
Share


@Mastr
Follow
Only 1 plant is flowering while other 2 still on veg witch is good
Day 23 come along and I just start using bloom and topmax and try my best on lst training want to get max yield off each Plant finger crossed 🤞
Day 24 still not flowering for other 2plant witch it very good I'm not rush and I glad they can grow up to max yield
Today i have mate around and he couldn't believe they only 24days from seed next week they will be double in size or even bigger will keep pic and video daily on this stage due very fast grow in preflowering
Day 25 come along and she grow so fast guys when I wake up I check them I see alot different I feed them with silica on every watering till day 35 (when stop grow in size )this run be come very very big size of autoflower let see guys
Day 26 I start bring down grow nuts and add more bloom I feed
1ml silica
.5 calmag
2.5 bio grow
2ml bio heaven
2ml acti vera
1 alg amic
1ml bio bloom
.5 top max
I just use silica every other watering also I feed with the 1.5 L nut everyday
Will reduce bio grow and then day 35 I'm going to stop feeling with grow

Processing
Likes
14
Share


@CommanderCannabis
Follow
Roots continue to grow the older roots are stained from the color of the solution. I also topped her. no problems this week. This is my first time trying the TOP technique. I topped her two days ago and am seeing good growth. I think the 5 gal bucket is better than the crappy Rainforest 66 reservoir I used in the first grow. I have gotten good at controlling the A.B.L.E. Grow Chamber's Air and humidity using different settings for the ventilation or humidifier. I currently have humidity at @48%. and temps go from 21 to 24 C.

Likes
21
Share


@Excalibur
Follow
09 October 2018 -
Day 106
Crystal was trimmed and nugs left for a week to fill out.
10 October 2018 -
Day 107
pH good
11 October - 2018 -
Day 108
Kolas are dense and thick
12 October 2018 -
Day 109
Removed from Tent and hung.
13 October 2018 -
Day 110
Drying nicely , Humidifier added .
14 October 2018 -
Day 111
Further trimmed and added to discs for overall ventilation
15 October 2018
Day 112
Rotating Tiers to make sure we dry evenly

Likes
9
Share


@JoeyGonz
Follow
Peyote slowed down a bit, Broke a couple mains like a tool while doing some Lst bending. But she is moving along again. White widow is kicking ass and just going nicely. Great flower development all over her.. Blacksugar small but still moving slow with that tight pinch in the lower trunk. But the ladies are healthy and happy so I’m happy. Gonna start germinating orange creamsicle soon to follow these up.


Likes
15
Share


Likes
3
Share


@OldskoolHed
Follow
Finishing up this week. Started flush and will be chopping at 8.5 weeks. Had to tie up all the mains to keep from flopping over. Smells amazing.
Likes
12
Share


@2Stones1Bird
Follow
Checkout my Instagram @smallbudz to see the Small budget grow setup for indoor use, low watt, low heat, low noise, step by step.
21/12/2019 - Fed her 1.5l of 6.4PH water with 0,5ml of each: Grow, Bloom and Max, and 1ml of each: Heaven, Alga-mic and Vera, noticed almost no run off, I use about 1/3 of the nutrient dosage on the chart, to achieve about 200/300PPM (500 scale).
Did some light pruning also.
Likes
52
Share


@HazeyBobby
Follow
The week starts Monday, Dec-9 in vegetative stage.
Started lowering the distance from the light to 45cm (18") over the coming week.
The extraction fan on its lowest setting is too strong for the current growth environment so the humidity levels have been rather low (35% -> 50%). An attempt to stop/start the fan with 30min intervals caused both temp and humidity levels to swing wildly. The environment inside the tent is now stable, albeit low temp and humidity levels since the fan has been left to run continuously.
Added a large tray of water with an aquarium heater warming it to raise the humidity level inside the grow tent. And added a large hanging wet towel. Both methods helped.
The plant is recovering very well and stretching in its growth. The side branches are reaching out to the light.
Starting to increase the frequency of fertigation to daily as the plant seems to be sucking up water/nutrients well. Run-off was measured at EC 0.94 and pH 6.2.
Topping at 5th node - start of LBH’s Famous ScrOG Tutorial.
Cut the stem above the 4th node. The topping should probably have been done a few days ago but I wanted to see the plant recover first.
Likes
293
Share


@Ju_Bps
Follow
Hello growmies 👩🌾👨🌾🌲🌲,
👋 Girls keep growing on this last veg week.
💪 Continuing Defoliation, lst, preparing scrog and daily fighting with this big leaves 😅
🕑 I've removed 3x 2h 💡 during the week, now 12/12.
💧 Give water each 2/3 day
And vaporise plant with water + Plagron Roots (1ml/l)
1.5 l Water + Roots + Grow + Zym + Sugar Royal (1 + 4 + 1 + 1 ml/l)
PH @6
💡Mars Hydro - FC 3000
43% 43 cm
Mars Hydro Fan kit
Setting 4
Have a good week and see you next week 👋
Thanks community for follow, likes, comments, always a pleasure 👩🌾👨🌾❤️🌲
Mars Hydro - Smart FC3000 300W Samsung LM301B LED Grow Light💡💡
https://www.mars-hydro.com/fc-3000-samsung-lm301b-led-grow-light
Mars Hydro - 6 Inch Inline Fan And Carbon Filter Combo With Thermostat Controller 💨💨
https://www.mars-hydro.com/6-inch-inline-duct-fan-and-carbon-filter-combo-with-thermostat-controller
Fast Buds - Gorilla Cookies FF🌲🌲
https://2fast4buds.com/us/seeds/gorilla-cookies-fast-flowering
Likes
48
Share


@MrJones
Follow
These buds are all dense, frosty, and the smells are just a very sweet thick aroma, of sugary sweet fruits, berries, and citrus, harvested on 10/30/21 these ladies spent 3 weeks in the dry tent at 65F and 60 % RH, then another week in the curing totes, before they were spun and cleaned - I am just blown away with the quality of this harvest!

Likes
4
Share

@Jabbamo
Follow
_____________________________________________________
Do. 2.4.
- 3,2 Liter pro Pflanze gegossen (ca. 50ml Drain)
- 1L Nährlösung per Hand angegossen
- 8L Nährlösung per Gießsystem
- 0,5L klar spülen zur Systemreinigung
1,2 ml / Liter "Calmag"
1,5 ml / Liter "Bio Grow"
4,0 ml / Liter "Bio Bloom"
4,0 ml / Liter "Top Max"
Ph 6,2 / 800 ppm
_______________________________________________________


Likes
16
Share


@Green_DSL
Follow
Week 5 flowering (a week is 5 days)
I lowered the longer branches trying to give as more light as possible to the plants, correct some top branches direction and defoliate a little bit.
Both plants keep developing some beautiful flowers with beautiful hairs and trichomes on buds and leaves. This week I started using Overdrive in my feeding blend.
Advanced Nutrients for coco professional program (I calculated EC of every single nutrient and made a custom dosage program for every week according to a more realistic EC value - check nutrients in my diary).
Plants are doing well, leaves are beautifully green without signs of nutrients burns, excess or deficiencies.
They are watered every day in the morning with fertilized water.
My daily routine is to correct the training of the branches, removing unwanted popcorn/bottom growth and removing leaves that covers buds and leaves that don’t perform well (i.e.: leaves at the bottom that will not take light).
🌱
Likes
25
Share


@PrairieFrostGrow
Follow
***** Week 7 Veg - January 16/21 to 22/21 *****
Week 7 will be their last week being able to take them out of the tent😟 SCROG netting going in on the weekend ahead. Not really a lot to report this week as the girls are doing well and I am just wanting their side branches to grow longer to help filling in the canopy anyway. Performed more LST this week and bending over the branches daily. Didn’t do any HST this week, will once the net is in and I have a better visual of how the branches need to bend.
They have come a long ways over the last 2 weeks when you look back at pictures. They have filled out with more side branching and other than battling a little purple striping on the main stems they seem pretty happy. Leaf colour is good and should be in good shape for the flip soon. Will go through all of week 8 before flipping so hopefully week 9 will be transition week and week 10 the start of flower.......have to get through next week first though😀👍
Switching over to tap water again. I have been struggling with calcium and magnesium deficiencies on all grows for the last year. I can’t seem to get the right amount added back to the RO water I use in all feedings. So running with straight water again now. Ppm coming out is 325 so I will work with that. Going to explore my own RO system in the house rather than bottled water, a system that adds back calcium, magnesium, and iron. It’s been flowing okay for the first week and will continue on for now. Using RO water I have been feeding full strength on the nutrients and have been working on backing them down a bit to compensate for the starting point of 325 now.
They have continued to be fed once a week roughly and supplemented with calmag and microbes.
Little more detail.......
Jan 16/21, Day 43 Veg
- 3L each of full line at full strength in RO water
- 1150ppm and 5.8pH given to the girls
- didn’t add any other nutes other than IPP line.
Jan 17/21, Day 44 Veg
- dry out day
- pulled down all the girls again tonight to train them outwards.
- side branching doing very well on Candyland girls.
Jan 18/21, Day 45 Veg
- 3L for each girl today with tap water and CalMag @ 1ml, Microbes @ 2ml, Nature’s Candy @ 1.5ml
- 700ppm and 5.7pH is what that works out to.
- have to use a considerable amount of pH down to adjust the tap water, over 6ml in 16L
Jan 19/21, Day 46 Veg
- measured the girls today and Candyland1 is 14” tall and CL2 is 13” tall. They were topped already😀
- dry out day for the girls.
Jan 20/21, Day 47 Veg
- 2.5L each with plain tap water
- 295ppm and 5.8pH.
- all the girls are looking big and bushy today.......they are ready for flip soon.
Jan 21/21, Day 48 Veg
- dry out day for the girls.
Jan 22/21, Day 49 Veg
- pulled all the girls down again......repeating the same LST each day manually rather than tying down for now.
- this should be water day but leaving for today as I am going to lolipop the lower branches and a heavier leaf stripping tomorrow.
- will feed tomorrow as they will benefit more.
Very solid week ETS......the girls are taking off and expect to see lots of leaves popping out over the next couple of weeks😀👍 Work on reducing the small stresses they seem to be experiencing more next week.......continue tap water and give a feed with Epsom Salts new week.


Likes
12
Share


@cookingwithninja
Follow
day 49 just pure water phed down.
it is day 51, morning before lights on, I might chop today. I use a zero water filter pitcher got off walmart. My humidifier is only a sonic wave. If you use regular tap water it will get gunky in a sonic humidifier. If you have a heat humidifier that boils the water the mist should be clean. These are the 2 types of water humidifiers. Researching best water filters this "zero water" also comes with a free ppm meter! yay! Other water pitcher brands; the water still has ppm. So water misted will still have ppm contamination. You can easily used distilled water only, and reverse osmosis. I just fill a 4gal office water jug with the pitcher and fill my humidifier when needed. I do not use a humidifier in my entire grow up to this point when I chop, I need the perfect rh or this whole effort can fail. growing up to this point only requires 20% effort, chopping now for the 2 weeks dry is this 80% of crucial determination, succeed. A lot of tasks are required today for a clean chop. I feel confident, observed my cross seeds with pink paradise and one with a slightly open caylex looks dark enough for successful germination. I figured 8-16 seeds may be created, 3-4 buds were potentially pollinated. Many growers don't understand when creating genetics with female/female there is a slight chance of herm. You lose 50% of your genetic function. Just water last 2 days, no humic no folvic, 1st time entire grow ha!
There is a lot of cleaning to do, remove the trees, clean the entire tent and environment with bleach water, hacksaw.
I am very proud of my grow. I have sampled 3 of the strains, dr. thunder legit made my lips numb but it could have just been the terps removing my skin cells from the sticky filter, no lie. This is my best grow to date. I did this for you, and to document hype or not under the best conditions I could give my plants, full max potential, although I wish I had more lights, I am not looking for industrial lol, this is how I grow. Learn a lot on youtube and podcasts there is many good content and I may dab into it. You can have a room full of growers and you have 1 seed in your hand, they will all tell you that their way is correct ;) and the best way. Oreo is stinky AF, Bridal is just amazing glad its massive, just not into sativa but the test seemed slight sativa with majority indica, pink untested, dr, thunder just a lip numming plant aha, its very nice, all 4 amazing appeal like advertised, and excited for next run. Either crosses from this or other copycat genetics.
I will give you beautiful glamout shots today, the sizes of the plants, My guesstimate bridal 1lb, thunder 1lb, pink, 0.4lb, bridal 0.5, I am ambitious off 640w lm301h, and 4x 20w blurples daisy chained.
day 51 4 chopped see you in a few weeks :D

Likes
90
Share


@CRiSPrGrow
Follow
I'm really digging the Chem OG, squat plants with those trademark thick thick thick indica leaves, clearly it's gonna be a heavy smoke lol Wasnt able to get the juices flowing this week, hopefully next week i'll get the smart protein into feed. Started training some of these, did two more defoliations (total of three light defos so far) ... and then flipped them 4 days ago. the f-ing landlord has been attempting to enter the lab according to my security cameras lol, motherfucker !!!! anyway i have to pack up the lab, hopefully i'll be able to complete the grow cycle , but for sure i'll have to move the grow op ... that's my problem, sure but it also means that i'll have to wait in order to set up my perpetual cycle... and of course i cant really take cuttings if i'm moving the lab... why must people be so curious? really wish there would be at least a bit more tolerance around this hobby just so i can sleep peacefully at night... in the mean time , I lowered my lights to 22cm, i heard from someone (forgot who) that it's a good thing to get the lights closer when you flip so that the plant gets that extra energy for the stretch. I'll let know how that works out ! Any comments or suggestions are welcome , veg is over so it's gonna get interesting - drop me a message if you want ! that's it 🚀

Processing
Likes
4
Share


@TehSnow
Follow
Finally the cold front has arrived and temps dropped considerably into comfortable levels 22-26 which are perfect for flowering. You can have high temps if you have enough fans blowing at the plant buzt the increčased perspiration can kill your plants through a nutrient burn as they have to take up more water from the res.
