


@Green_Hornet
Follow
those pictures are from day 22 of flowering
added some additive PK 13 / 14 from Plagron
And a small closet tour video :)
enjoy



@InsideAz
Follow
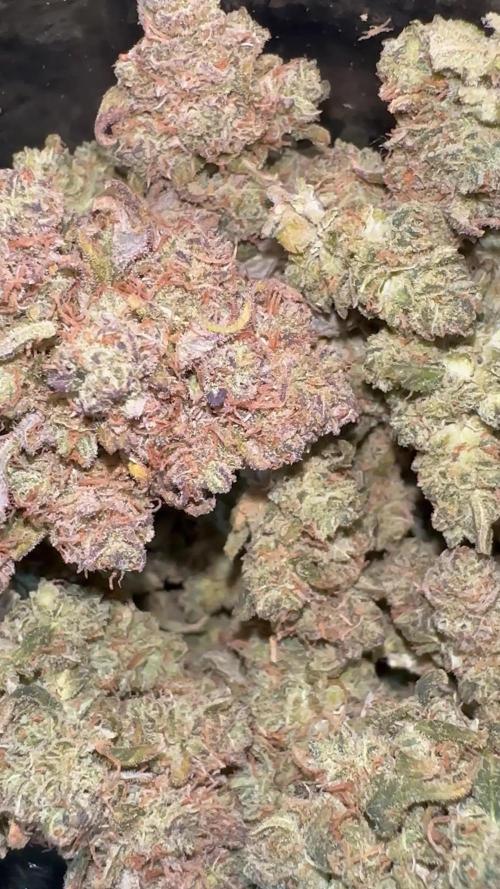
It’s been over a month of cure and I’ve been dipping into the stash frequently. Love this strain as a mid day smoker or even morning times. It produces a strong but not overpowering cerebral high allowing you to go about your day as planned, just in a better perspective. Very creative enabling and hyperfocus inducing. Smells very sweet and berry like, seems strain review for a few more details


@WhiteWidow
Follow
Updated the official lab result for this specific plant... thank you spliffseeds, its great to know what youre smoking...
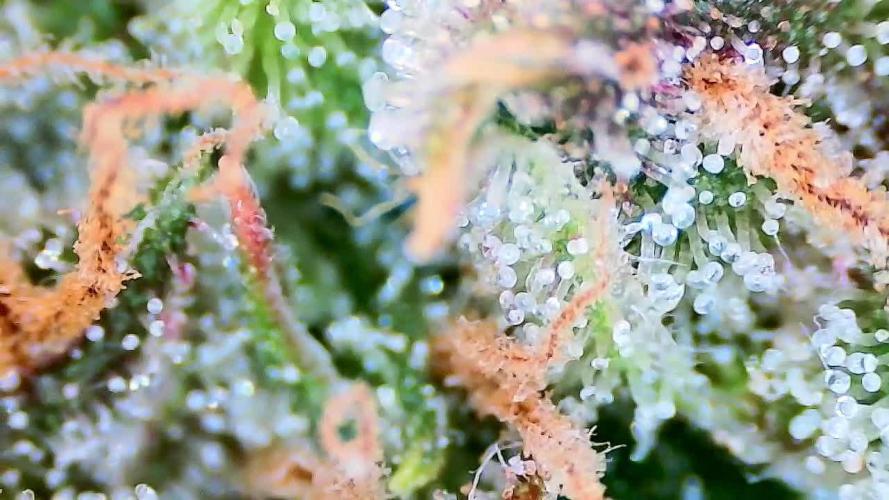
Its amazing how a 55 cm plant can yield 120+ grams of dank dry buds, important here was the training and filling the cannopy, scrog net would help me in terms of supporting her coz as you see on pics i harvested her after 3 days of no liquid and she just fell down coz buds were to heavy... and throughout the process i had problems with holding branches in one piece lol so i had to do all the funny bondages with green wire, sadly i dont have pics coz i couldn make a clear photo of how and what did i connect together.


@Prilyfe13
Follow
What a journey! We started out with a fungal infection or dampening off. Either way, she survived to bring some of the hardest buds ever grown. Very impressed. The resilience of thos one is something to note. Currently the plant is in control of the humidity. But it won't be for very long. Not once the exhaust fan kicks in to max power.
The temp is stable at 61° f. Humidity is at 62%. Now 63 and climbing. 🤔. I adjusted it. And it won't stay still. It either plummets or spikes up. A tiny opening in the door dropped it super fast. While closing it up spiked it in the mid 60s. I'm trying to level it out at 55%. The temp is perfect. I should be able to do it. I can tweek it until it works properly.
.so I just pulled the roots out of the bucket. I had a whole bunch of goopy shit all in the roots in buried in the pebbles. What the hell is that? I'm trying to find out right now. It was all black and nasty. It smelled like soil. Not strong or anything, but like I didn't use soil. Anyway, I did use carboflush and it turned the water a super dark brown. Maybe that's part of it. Or maybe that was the problem all along. Black root rot? Root rot at all? The roots seemed fine. Just the sludge all in their business. How should I have cleared that out if I saw it? Dump plain water through the hydroton? I think I'll do that for my next run. Once a week top off into the hydroton. Makes sense. It should keep the roots clean?
12/16/2025
Day 1 of drying Papaya Cookies and the environment looks great. It swings a bit, but doesn't go over 61% and I haven't seen it go under 45%. I know it's a big swing, but the temp is solid at 61° and it's in range. I expect it to be a bit more controlled in a few days after the plant dries out a bit. You know, when she has less control over the humidity.
The goal is 61° and 53% humidity. I'm pretty sure I can keep it at 60%, but maybe I want 55%. I'm thinking 55% because it's the top of the ideal range and it still matches the temp. So it should I perfectly.
So for the setup. I don't think I properly explained it yesterday. The 2x2 is connected to the 3x3 with a 4" duct. You can see in the picture that the hose is installed on the top of the 2x2 and to the upper 6" port on the right side of the tent. There's a reason I'm telling you this. The 4" charcoal filter is on the left side of the tent. If it were on the right side I'd have to attach the dry tent to the left side of the 3x3. The goal is to exhaust the dry tent with the whole 3x3 circulating air throughout, before exhausting the dry tent. Instead of the filter being right above the port, sucking in way too much from the dry tent and neglecting the rest of the 3x3. It makes sense in my head. So far it's seems to be working. The air in the tent has been exhausting just fine. With the 2 circular fans running at level 7 dynamic mode, it moves the leaves just enough and mimics the outside world quite well without any harsh gusts.
I wonder. Seeing as though a cannabis plant needs to be pollinated, and it goes airborne, wouldn't having larger gusts of wind help a healthy cannabis plant to grow bigger buds as to catch the pollen? That makes sense to me. Don't overdo it, just a few little gusts just like September and October. At harvest season. I bet that will do something. Maybe I'll turn the speed up to 9 and see what happens. Wind burn on these leaves is the least of my problems. Plus, it'll be fine. Don't you worry.
Maybe she'll produce more trichomes and bulk up a bit more. It makes total sense. Without wind burn, just under where it would start to happen, I bet she will finish up nicely and have added a bit more bulk too.
12/17/2025
Day 2:
The humidity is bouncy. It stays in range from 46% to 61% I'd like to see it stabilize at 55%, but I don't think I'll see that until I have a bit more control over the space. It's funny. To bring the humidity up when it's low, I open the main tent and the air doesn't get pulled out of the dry tent making it more humid. I open the dry tent a little to drop the humidity. Either way, it's in range and the temp doesn't move at all. It warmed up here for the day and the temp went from 61 to 64 and holding steady.
Nothing else to report.
12/18/2025
Day 3 of drying and we are looking great! A lot of her smell has changed to a sharp pungent scent. Meh. I know it's gonna be back to some insanely good smell very soon. After all it's only day 3.
I woke up to the humidity hovering around 47% I was kinda hoping it would stay between 50% and 55%. No matter, I added a bowl of water to help keep the humidity up a bit. Hopefully it keeps it under control at 55%. Other than that, nothing else to report.
12/19/2025
So day 4 and I had to add a mini humidifier to the dry tent. It was dropping below 50% and I want it around 53%. The temp is 60° f. So now the humidity is at 54° and is leveled out. I'm guessing maybe 7 days? 10 to 12 days is what I'm going for. The longer the better, but I also have another plant that has to go in there and they won't fit together.
The only reason I'm concerned with it is because I'm starting new seeds today or tomorrow. Probably today and I'll be needing the 3x3 in the next week or 2. This little lady will be done by then, but my other plant might have to dry in the 3x3 and that'll take 10 to 14 days. By then the seedlings will be ready for their buckets. Or well, no. They will be ready for their buckets in about 10 days. If not less. Maybe 8 days. I usually add them to the final container just before the roots really start coming in. That way I'm not shocking them too much when they hit the medium.


@Slobasian
Follow
Stacking up on my plant genetic options for mothers and what to grow out green house diary coming soon with some of these plants. I ready for ethos genetics to enter my tent and green house


@Cogollo_eu
Follow
**Encontrarás la traducción a español al final de la descripción**
From/Desde: 10/05/19 || To/Hasta: 16/05/19
From day/Desde día: 78 || To day/Hasta día: 84
You can find the Money Maker Diary here:
** Podéis encontrar el diario de las Money Maker aquí:**
https://growdiaries.com/diaries/25667-gorillamakingmoney-gorilla-vs-money-m
-----IMAGES & VIDEOS-----
5 - HomeMade Organic & Cheap CO2 generator (more info in week summary)
9, 10, 11 & 12: The bud on the right is a Gorilla one, the buds in the left or/and in the middle are Money Maker ones.
15 - Same Gorilla plant buds, one affected by CO2 in the roots and the other not.
-----WEEK SUMMARY-----
The smell is more sweet and intense every day, friends that came home turned them eyes into crystals when they see this little babys. The size isn't awesome, but the high ammount of buds full of crystals plus the strong sweet aroma makes them awesome. Buds are growing and fattenning very very well.
This week i added a boost of HomeMade CO2, i never measured the results of this invention so i can't give CO2 measurements. This method is widely used in home aquariums and there is where it comes from. For those interested i'm going to write here more detailed instructions. The 4 liters i've made will last for about 2 weeks.
---NEEDINGS---
- 250 ml Bottle
- 6~10 l Bottle
- 400 g Sugar / l water
- 1 Envelope of organic baker's yeast / l water (CHEMICAL WILL NOT WORK)
- 3 mid plastic tubes 40~50 cm
- 1 short plastic tube 5~6 cm
- 4 tube adapters
- Hot glue to seal adapters
The process of creating CO2 is simple, mix water, organic yeast and sugar in a bottle, and the sugar will free CO2 in the process of fermenting to alcohol due to the yeast.
1. Make a hole in the center of the big bottle cap, insert an adapter and secure it with hot glue
2. Make 3 holes in the small bottle cap and glue the other 3 adapters
3. Link both caps with one of the mid tubes and insert the other tubes on free adapters
4. Insert a short tube in the bottom of the small cap in the adapter that came from the big cap
5. Watch the Video!!
-----WATERING CALENDAR-----
Plants are beginning to drain the pots a bit faster so from now on i will raise the water ammount on each watering day 0.25 l.
11/05/19 - 1,5 l with All week nutrients -(Nirvana & Blombastic) also Big Bud half dosed @ PH6.4 & 2 E.C.
14/05/19 - 1,5 l with Bud Candy, Big Bud, Nirvana, B52, Bud Factor-X, Sensizym & Blombastic @ PH6.4 & 1.5 E.C.
*****ESPAÑOL*****
-----IMÁGENES Y VÍDEOS-----
5: Generador de CO2 casero, barato y orgánico (más info en el sumario semanal)
9, 10, 11 & 12: El cogollo que sale a la derecha es de una Gorila, el de la izquierda y/o el de en medio son de una Money Maker
15: Dos cogollos de la misma planta, uno afectado por CO2 en las raíces y el otro no
-----SUMARIO SEMANAL-----
El olor es más dulce e intenso día a día, los amigos que vienen a casa a verlas se quedan ojipláticos al verlas. El tamaño no es una maravilla, pero la gran cantidad de cogollos llenos de cristales añadido al aroma que entra por las fosas nasales las hacen increíbles. Los cogollos crecen y engordan de maravilla.
Esta semana he añadido un boost de CO2 casero, nunca he hecho mediciones de los resultados por lo que no puedo darlas. Este método es ampliamente usado en peceras caseras y de ahí saqué la idea. Para aquellos interesados dejo aquí instrucciones más detalladas. Con los 4 litros de agua que he preparado yo da para unas 2 semanas.
---NECESITAMOS---
- Botella de 250 ml
- Botella de 5 a 10 litros
- 400 g de azúcar por litro de agua
- 1 sobre de levadura de postre orgánica (LA QUÍMICA NO FUNCIONARÁ)
- 3 tubos de plástico de tamaño medio 40~50 cm
- 1 tubo de plástico de tamaño pequeño 5~6 cm
- 4 adaptadores para los tubos
- Cola caliente para pegar y sellar los adaptadores
El proceso de generar CO2 es simple, mezcla agua, levadura orgánica y azúcar en una botella, y el azúcar liberará CO2 en el proceso de fermentación a alcohol.
1. Haz un agujero en la tapa de la botella grande, inserta un adaptador y séllalo con cola caliente
2. Haz 3 agujeros en el tapón pequeño y haz lo mismo con los otros 3 adaptadores
3. Conecta los 2 tapones con uno de los tubos y conecta los otros 2 tubos a los adaptadores restantes
4. Conecta el tubo pequeño en la parte libre del adaptador del tapón pequeño que viene del tapón grande
5. Mira el vídeo
-----CALENDARIO DE RIEGO-----
Las platas comienzan a secar los tiestos un poco más rápido, asi que de ahora en adelante incrementaré 250 ml de agua adicionales en cada riego.
11/05/19 - 1,5 l con todos los nutrientes semanales -(Nirvana & Blombastic) BigBud mitad de dosis @ PH6,4 & 2 E.C.
14/05/19 - 1,5 l con Bud Candy, Big Bud, Nirvana, B52, Bud Factor-X, Sensizym y Blombastic @ PH6,4 & 1,5 E.C.


@GrowLegend
Follow
Bien aquí esta el día esperado la cosecha, es mi primer cultivo y considero que lo logre. En muchos medios de lectura y en especial en vídeos mencionan que no puedes esperar mucho es tu primer cultivo. En mi caso es falso y lo demuestro ya que si aprendes, investigas por cuenta y lees lo suficiente, obtendrás un alto porcentaje de que los resultados se den. Muy contento con mi plantas y sus tonos morados. Puntos a mejorar tener una carpa de cultivo y por su puesto un extractor de humedad para que baje la humedad preferiblemente a 45 grados
Vendrán mejores contenidos y cosechas mas abundantes. Gracias a todos por su vistas y comentarios. Saludos y bendiciones!


@BubatzSherrif
Follow
Grow Diaries Report: Flower Week 1 – Stretch Madness & Heavy Grooming 🌿🚀
Week 9 – Flower Week 1 Update
The flowering phase has officially kicked off, and wow, this plant is on a mission to touch the sky! The stretch this week has been intense, with the plant shooting up significantly. To manage her vigor and focus her energy on bud production, I’ve had to step in with defoliation and additional lollipopping.
This Week’s Highlights
Massive Stretch: The plant stretched dramatically this week, filling up the vertical space in the tent.
Defoliation: I removed a significant amount of fan leaves to improve light penetration to the lower branches.
Lollipopping Redux: Further cleaned up the lower parts of the plant, focusing her resources on the top colas.
What I Did
Lollipopping: Removed more of the lower branches and leaves that were unlikely to contribute to bud production.
Defoliation: Took off some large fan leaves to improve airflow and light exposure throughout the canopy.
Nutrients: Continued with the bloom feeding schedule, ensuring a balance of phosphorus and potassium for flower development.
Environment Management: Adjusted the light height to prevent light burn and tweaked the fan placement to improve airflow in the now more open canopy.
Observations
The plant’s stretch has been both impressive and challenging, but the defoliation and lollipopping seem to be working. The top canopy looks well-lit and primed for flower development. No signs of stress from the grooming, which is always a relief during such an aggressive stretch.
Challenges
The rapid vertical growth is pushing the limits of the grow tent. I’ll need to monitor her closely to prevent overcrowding or light burn.
Next Steps
Keep monitoring the stretch over the next week—potential supercropping if necessary to control height.
Fine-tune the nutrient schedule to ensure the plant has everything it needs as bud sites develop.
Maintain low humidity to reduce the risk of mold or mildew during early flowering.
Conclusion
The first week of flowering has been an explosive start! The stretch is real, but with proper management, she’s looking set to develop some fantastic buds in the weeks ahead. 🌟
Any tips for managing a stretch-happy plant in a tight grow tent? Drop your advice below! 😊



@LoganatorDude
Follow
Well finally by day 80 the heavy rain is over and we are looking at afternoon showers, but sunny hot and humid until then. Well, relatively humid. About to finally get in there and tying some branches and picking little sucker branches that I don’t want. Branches appear as suckers to me when they’re more than likely located lower on the plant or at the interior in a way where it would grow with less light or grow inside the plant and congest the airflow, again with less light.
I fed her a 2 Gallon Heavy Feeder mix. It will be watered in with tsp water that is 156 PPM @ pH of 8.5. Normally ALL waterings are done with an incredible amount of water from the garden hose that is from a well. I intend to feed with soil amendments and top dressings, however localized feeds or things like worm castings tea is coming up. I also foliar fed her one evening with phosphates, and the fulvex which is basically magnesium and fulvic acid with a yucca wetting agent. I want to help her to spread those roots!
I know it sounds like a lot of molasses. But I’ve never had issues with large doses in these situations outdoors. The plants and microbes go bonkers for the stuff!
Also that feed water went in strong but as it was watered in with the regular water, it diluted the tds quite a bit.
Literally the following day, I am noticing what looks like more than preflowers. Is she really starting to flower an entire month early?! Last week er so, we had those 4 days of really cold, dark, rainy weather, that came after some nasty hot and super dry weather. Multiple plants have begun to flower on me! I suppose there is no problem getting an early start with things. But not this!
I don’t want to go back and forth! She can be in vegetative stage and grow bigger and spread her roots. Grow and prepare for flowering stage. Then go into flowering stage and STAY in flowering, 100%. Not something crazy like: stop veg(preparing for flower) and just flower out with what was developed, then 2 weeks later realize it was too early and go back to Veg, only to jump right back into flower! I don’t want some kinda of chaotic misdirection of energy, for most likely some weird results. But we shall see.
All I can say is, if she is going to flower, then flower hard! Don’t turn back.



@HumanCompanion
Follow
14nov25, 2pm. 3 weeks, 22 days (now is the beginning of week 4) since dropping helmet.
LST training continued with the next pair of real leaves, i.e. at the moment 2 pairs of real leaves (lacerated) leaves are being bent down by hooks, why? to promote side buds' growth.
Substrate: 22C;
Air: 25C;
Humidity: 55%;
Distance to upper lamp (Mars Hydro): 25cm;
Distance to blurple Venom 80W: 23 cm;
Lighting intensity: 50%.


@JeyGanesha
Follow
Inizio 5 settimana di veg.. ancora una settimana e poi in fiore
Oggi 6/2/2025 passato a 12/12


@Natrona
Follow
Sponsored grow
***DIVINE SEEDS *****
*****OPIUM*****
Week 5 This week 5/5-5/11
Germination April 6.
Vegetation
Week 1 water only
Week 2 water only
Week 3 added recharge and TPS1 increased ppm to 570.
Week 4 continues with recharge and TPS1. I added Fox Cal mag increasing ppm to 685 - 805.
Week 5
TPS1 9ml/gal
Recharge 5 ml/gal
Fox Cal-mag 5 ml/gal
This was an exciting week for my ladies. It started out with the usual feed and defoliation and training. With my upcoming vacation, I am going to be hardening off these ladies to relocate to their outside location. I checked the expected weather forecast for the week. Looks good to start hardening off. Partly cloudy with temps in the low to mid 80s just like in their tent. So that’s good. Night temperatures were in the 50-60s. This is much cooler than what they are used to as our house is at 73. They need to get used to what mother nature will provide. Our summers are hot and humid. I had planned to bring the plants back in the sunroom but since conditions were similar, I let them stay outside every night. And every night but 2 it rained. I did not water or feed nutrients this week.
I am attempting the scrog technique on all plants. I am using a peony cage as the support structure. The cages are about 2 feet high. This may not be enough side or top support as she grows and may have to resort to tomato cages.
Took pics May 6,9, & 11 Opium is a vigorous lady. She will be my glamor girl. She is taller and has the typical sativa structure and has space between the nodes. There is not much leaf growth, so I don’t defoliation much. Her nodes are close but starting to spread out a bit. They remain even and balanced which show she is still in vegetation.
Thank you @DivineSeeds
Thanks for the visits, likes and comment, I appreciate all the plant love💚.
Have fun & love what you grow 💚
Sending you good vibes of love, light, and healing 💫
💫Natrona 💫
DIVINE SEEDS
***OPIUM***
Harvest:1000 g/m2
Divine Seeds developed Opium as a new champion strain, unprecedently powerful and loaded with unbelievable quantities of resin. Certainly, no average genetic base could be behind such brilliant parameters! Several Afghani Indica landraces, recognized as most potent and resinous, were bred together with a mighty Brazilian Sativa which Opium inherits its bright berry taste from. Then a great deal of work followed aiming for the highest THC level and endurability as well as a branchy structure that would provide maximal yields. Now we can proudly title Opium the best Indica you could dream of growing!
Indoors these plants mostly stay mid-height (1.5 m), reaching up to 2.0 m out of doors. Depending on your height limitations, Opium flourishes universally in grow boxes, balconies, green houses and terraces. Due to its Afghani parentage, this strain can stand hot weather if provided enough water and some shadow. Responds well to any training techniques: ScroG and SoG, LST, topping and FIM, supercropping. The start of blooming is marked with a rush of growth, when plants stretch almost 1.4x. Expect heavy colas that often require additional supports. Whilst ripening, Opium gives off a pungent earthy stench with fruity and berry undertones, also a bit of pine. Ready for outdoor harvesting in October.
The stoning psychedelic impact of Opium is like being hypnotized (unless you’ve had too much, then it feels more like a blackout). Stone-lovers will appreciate every minute with Opium: its spicy taste immerses your mind into daydreaming, while the body rests flat. Recreation with this psychedelic Indica means silent tripping from one insight to another. Mighty enough to kill chronical pains, Opium is also medically efficient against insomnia, nausea, appetite disorders, muscle spasms, headaches, irritation, fatigue, panic attacks, epilepsy. Best consumed at night time, the effects keep going for up to 4 hours.
Equipment and nutrients
Pots: 5gallon Air pots
Soil Fox Farm Happy Frog Amended with worm castings, dolomite lime and mychorihiza Recharge
Seeds provided by Divine Seeds
Divine Seeds breeding company
The link to Opium Feminized Seeds
Opium - Divine Seeds breeding company
The link to Opium Auto Seeds
Auto Opium - Divine Seeds breeding company
=================================
Equipment: AC Infinity
CLOUDLAB 844 – Advance Grow Tent 48”x48”x80”
CONTROLLER 69 PRO – Grow Tent Controller
CLOUDLINE LITE 6 - Inline Fan 6"
IONBOARD S44 – LED Grow Light Board 400W
CLOUDRAY S6 – Oscillating Circulation Clip Fan
Carbon Filter 6” 4


@DogDoctorOfficial
Follow
behold the epic conclusion of my Medusa F1 odyssey! Week 11 brings us face to face with an absolute masterpiece – our mighty Medusa in all her glory. She has blossomed into a cannabis goddess, and I can't help but feel a mix of pride and hilarity.
So, picture this: with scissors in hand and a grin on my face, I bravely took the plunge and performed the cosmic haircut of the century. I snipped the entire girl, leaving her looking like a botanical version of a cool, upside-down pineapple cake! It was a sight to behold, and I couldn't help but laugh at the quirky transformation.
With our Medusa delicately suspended upside down, she's now getting ready for her final act of drying. It's like she's doing an acrobatic performance, waving her buds at us from above. Who knew cannabis cultivation could be so entertaining!
In all seriousness, though, our Medusa's buds are absolutely mesmerizing. They've reached their peak density and glisten with an abundance of trichomes. The colors are a true botanical wonder, like a vibrant firework display against a night sky.
Speaking of trichomes, I continue my daily trichome investigation with the precision of a detective. Each day, I observe those tiny resinous diamonds, searching for the magical moment when they're just right – cloudy with a hint of amber.
And the aroma, oh the aroma! Terpenes fill the air with an intoxicating fragrance that makes my nose dance with joy. If only we could bottle this cosmic perfume!
Before I conclude, I must extend my heartfelt gratitude once again to Royal Queen Seeds. Their Medusa F1 genetics have granted us this cannabis goddess, and I can't thank them enough for this delightful journey.
As we prepare for the final chapter, drying and curing our Medusa to perfection, I invite you all to join me in celebrating the whimsy and wonder of cannabis cultivation. Let's cherish this upside-down adventure, savor the captivating colors, and delight in the celestial magic of our Medusa F1.
As always thank you all for stopping by and for supporting me on this journey, i am super passion about growing and fell blessed to have you all with me on this new journey <3 <3 <3
Genetics - RQS MEDUSA F1
Ligth - LUMATEK ZEUS 465 COMPACT PRO
Food - APTUS HOLLAND
All info and full product details can be find in can find @
https://www.royalqueenseeds.com
https://aptus-holland.com/
https://autopot.co.uk/
https://lumatek-lighting.com/
With true love comes happiness <3<3<3 Always believe in your self and always do things expecting nothing and with an open heart , be a giver and the universe will give back to you in ways you could not even imagine so <3<3<3
<3 <3 <3 Growers love to you all <3 <3 <3
Medusa F1
Medusa is a true F1 hybrid created from pure, inbred cannabis lines. She boasts uniform grow traits, mouthwatering aromas and flavours, and plenty of potency. If you're looking to bring stable, elongated plants into your room, tent, or garden, look no further. Mouthwatering Aromas, High Potency, and Mid-Size Plants
Though she won't turn you to stone like the mythical goddess after which she's named, Medusa F1 is bound to get you plenty stoned in her own special way. Combining genetics from inbred lines deriving from Sugar Magnolia, a thick and sweet indica, and American Beauty, a fast, fruity hybrid loved for its well-balanced, positive high, the result is an autoflowering F1 variety that produces fresh flavours, a unique cannabinoid profile, and large yields.
A very aromatic cultivar with a vibrant concentration of terpenes bearing notes of fresh mint alongside an upfront peppery kick, backed up by hints of fresh fruit, berries, and tangy fuel. Her thick, frosty flowers consistently produce high levels of THC and CBG, as well as high concentrations of myrcene, ocimene, farnesene, and caryophyllene. As a result, Medusa F1 has strong effects that relax and stone the body from head to toe (brought on by particularly high concentrations of myrcene and farnesene) while motivating the mind with an uplifting, creative, and motivating kick (thanks to high concentrations of ocimene).
Medusa F1 seeds produce elongated autoflowering plants with long, strong branches and well-spaced internodes. Plants regularly grow up to 80–85cm tall and boast a fast flowering time of just 42–45 days (72 days from germination to harvest). Thanks to her genetics, Medusa F1 produces plenty of thick flowers with big, swollen calyxes that make for very easy trimming. Medusa F1 is very stable, handling stress and unfavourable growing conditions with ease, though she is somewhat susceptible to Botrytis, so make sure to keep tabs on the humidity in your grow room/garden


@ScrogFreak
Follow
I finally broke a pound with a single autoflower! Couldn’t have done it without AGLEX cob led’s, Remo Nutrients, and coco coir. They’ve changed my game completely!
This grow started off as a pretty standard grow. I did absolutely no training until the veg period was winding down, and pre-flower was beginning.
As the SCROG net went in, a little later than planned, numb fingers due to cervical spinal issues, and a poorly time muscle spasm, I snapped the main stalk...disaster right? Apparently not! They’re tough plants! Within a day or so she was perked up and sending up new colas from all the growth nodes now exposed to the 2000w AGLEX cob led’s. These lights have transformed my grow process, and increased my yields by over 300% compared to my old led’s, and only draws 408w from the wall. 1.23g/w is quite satisfactory
I didn’t have much tucking to do this grow after the original SCROG. Due to the fact I was a little late getting the SCROG net in place, she didn’t have too much stretch left in her, she certainly fattened up quite nicely though, almost too much so in places. The front left side of the SCROG net got awfully crowded with huge buds packed tightly together. Lesson learned...keep the branches spaced apart slightly further, and maybe allow slightly more vertical growth of the colas to allow slightly better light, and air flow penetration. My issue is I only have 6 foot ceilings in my tents. The ceiling in my grow room is only a little over 6’2”. I managed, through SCROG techniques, without topping or fimming, to keep the top of my canopy 24” from the floor. This allows plenty of space above for the AGLEX cob, and exhaust fan.
After last feeding I flushed with just Ph’ed water for 5 days, then gave the plant 48 hours of darkness, to rid itself of chlorophyll before harvesting on November 4th and hanging in a drying rack. It’s still curing in jars but after trying a few samples, it’s an awesome strain, and hits hard.
It’s not as hard as it sounds to fill a 4x4 tent with a single autoflower, and still pull 18 ounces (504g) out of that tent. With simple SCROG technique, defoliation, quality grow medium you can achieve the same results. Of course you’ll need an AGLEX 2000w cob, but for an 18 ounce return on a $300CAD light, in 3 months, it’s a no brainer folks! You won’t find a better light under $300 Canadian. You’ll also need a quality nutrient line, and it’s hard to go wrong with the Remo Supercharged Kit. The proof of those 2 products quality are in my harvest.
I hope this has helped improve your own grows somehow :) Head over to YouTube and visit my channel, just search for Scrog Freak, or click the link below. Drop a like and subscribe, more videos and logs to come! Recently entered a Gelato OG Grow Off and will be posting updates and instructional videos there. Check it out! Thanks and good growing!
ScrogFreak
https://www.youtube.com/channel/UCDFY6EjqIMqv2peq1d1eM1Q


@Hydro_Bins
Follow
This week compromised of vertical growth (still) and development of the bud sites.
Pistils are in full production, and buds at the nodes have doubled in size this week!
The girls are drinking steadily from 10L to 13L daily by the end of the week. Defoliation continues on a seems-to-be weekly basis.



@StickyHands
Follow
Flowering Day 28
So far, everything looks good, and the buds are stacking well.
Today was hopefully the last time I had to supercrop.
In a few days, they'll be getting compost tea again.


@AsNoriu
Follow
Day 82. First one from Mimosas is ready ! Mini of all mini trim jail's ;))))))
Day 89. First in jars !
Day 92. Trim jail .... One will be great producer, other waste of time a bit ...
Day 102. All job done with them.
Happy Growing !!!


@Le_Duc_Du_Bud
Follow
Salut amis cultivateurs ✌️✂️🌿
Aujourd'hui je pose la nouvelle semaine 🗓️
Comment vous dire que je suis impressionnée ❗
Les plante ce développement a merveille voyait par vous même 🙏
Elles ont fortement grandi, je suis monter a 1.5L par plante, elle consomme la totalité des nutriments et me le montre très très bien 😍🤗
Merci Kannabia 🙏 encore des variétés merveilleuses 😊
J'espère que dame nature sera me récompense 🌿🍁
Pour plus d'informations par rapport à ces génétique, je vous laisse cliquer ici :
https://www.kannabia.com/fr


@Ninjabuds
Follow
The Blackberry Moon Rocks are looking promising. One of them is growing into this beautiful little bush, and I think it's almost ready to harvest. The other plant is stacking up buds, but I'm thinking it's still a couple of weeks away.
The past few weeks have been so beautiful, watching the plants grow and change. It's amazing how something so small and fragile can turn into something so strong and vibrant. Now that they're getting ready to bloom, it feels a little bittersweet. I'm so excited to see the finished product, but I'll definitely miss having them around while they're growing.
