
Likes
Comments
Share


@ItsCannaDog
Follow
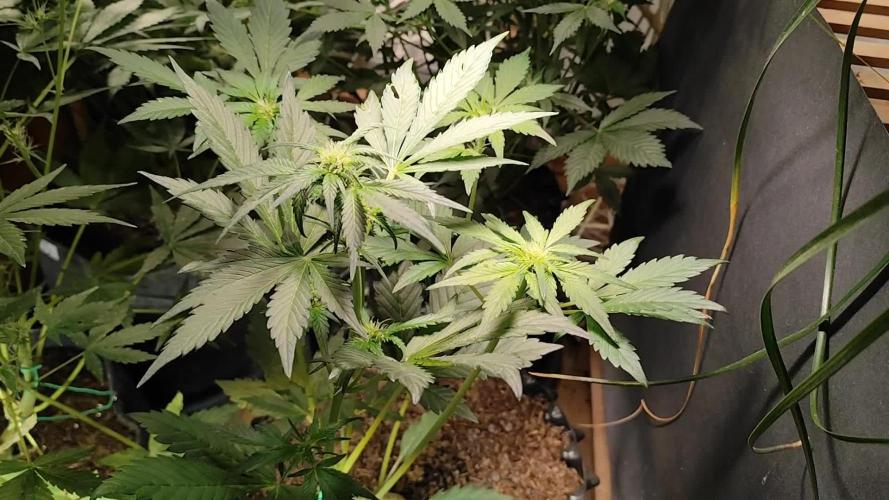
This is the start of week 4 of flower. Raised my light to the maximum height, have it on 100% full spectrum and 50% red and ir. Noticed some yellow tips with a little curling, thought it was light burn, but now think it may be over nutrients so I lowered nutrients to about 75% of what they recommended to see maybe it will help. Other than that not much else I did, besides letting these girls grow.

Likes
6
Share

@Growbody
Follow
Herzlich Willkommen zu meinem neuen Grow mit der Frostbanger Auto F3 von 2Fast4Buds. Die "Eltern" sind (GG4 Auto F6 x Bruce Banner Auto F5) x Sour Diesel Auto F5 und das ergibt eine F3 feminisierte dreifache Polyhybrid Autoflower. Klingt schonmal heftig. Der Strain ist beim Autoflowerworldcup 2025 zur stärksten Autoflower gewählt worden. Mit dem Versprechen, süsse, cremige Aromen zu produzieren, muss ich diese Pflanze testen.
Die 20 Liter AirPots 7th gen., die Sonnenerde Bio Hanferde, BioBizz Wurmhumus, Sonnenerde Bio Faser, BIONOVA x zamnesia MonsterBud Mix Living Soil, zamnesias SmartStart und Plagrons Seedbooster Plus werden bei diesem Grow wieder verwendet.
Tag 30: Die Frostbanger Auto F3 von 2Fast4Buds fängt schon an zu blühen. Nochmal etwas LST angewendet. 1,0 Liter Wasser.
Tag 32: 1,5 Liter Wasser.
Tag 35: Sie ist diese Woche fast 20 cm gewachsen. 1,0 Liter Wasser.
Schön, dass du dich für meinen Grow interessierst. Freut mich, wenn du wieder reinschaust 👋😎


Likes
7
Share


@Green_fingers
Follow
Just been chopped toon al the lower branches off and put them away separate but will update on the total yield


Likes
37
Share


@MG2009
Follow
Happy gardening.
07/21/2018
Wow unseasonably cold last night got down to 48° brrrr. No signs that the cold bothered the girls posting photos in a min.. And video. Phew took me awhile to upload.
07/24/2018
Mid week update
Back to hot and, steamy summer weather.
#1, tops are just about 39.5", going to try to get all super cropped to about 30", I expect that they will be double their size at harvest.👍.
On a side note hours of light will soon be at 14.5 hope they initiate flowering,as it will give me almost 3 months of flower!👊
#2 is 43.5" looking like a Christmas tree,still some supercropping to spread out the lower layers.
#3, is 35.5" And no training just picking her dead,yellowing leaves
#4, is 41.5" also no training #5, is 30" , and still stinkiest 😎 of all gonna take a clone today.
Likes
Comments
Share


@Cultivandomedicinanatural
Follow
Por una parte tenemos la que llamaremos Biscotii 1:
Tiene un tamaño monstruoso, que tuve que doblar en varias ocasiones el tallo porque no me daba más el foco para subirlo. De hecho una de las ocasiones me quemo una hoja del puntal y un pelín la puntita y como se puede ver hizo que la punta parezca un monstruo!! enorme, grande y de forma especial.
Hay gente en instagram que me pregunta que si lleva anabolizantes jajaajja lo más parecido a eso es los nutrientes de plagron!!! Que las revienta a las pequeñas
Esta tiene unos tonos morados que la hacen muy atractiva y una resina generosa. El olor es fuerte y la altura estirada es una pasada!!
Por otra parte la Biscotti 2:
El tamaño es inferior que la anterior, pero no por eso diría que poco productiva... Tiene un central que da miedo igualmente, los satélites son una pasada llena de resina.
En esta ocasión no tiene tonos morados, pero tiene mayor resina.
En general ambas dos tapan la botella de litro y medio de agua, prieta, olorosa y con resina para aburrir!!
😍😍😍😍😍
El peso le pondré en seco en cuanto lo pese 😇


Likes
2
Share

@JeyGanesha
Follow
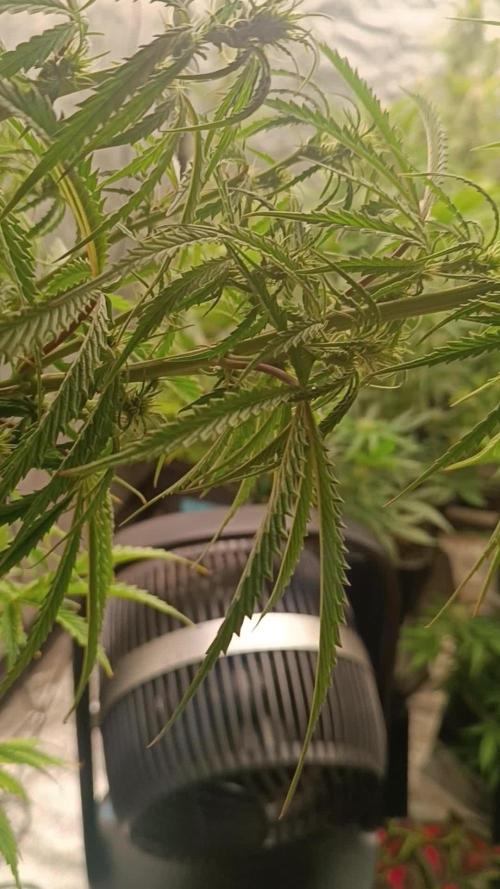
Questa runtz continua a crescere in altezza,. Oggi lunedì 22 dic. L'ho dovuta ripiegare ancora.. gli ho fatto un altro HST sennò passa i 2 metri di altezza 😉🤣😂😘
Likes
19
Share


@Changman
Follow
The ladies are taking their training extremely well and are on their way to showing us their true colors. Next week will become revealing so stay tuned Hadeda Members one and all

Likes
1
Share


@Kern420
Follow
Die Woche über haben sich die Blüten weiter entwickelt. Die Trichome wurden mehr und man fängt an erste Terpene zu riechen.
Wir haben Donnerstag (BT 21) stark entlaubt und schauen jetzt wie die Pflanzen wachsen.
Wir gießen weiterhin durchschnittlich alle 4 Tage 1,5 L
Likes
Comments
Share


@SirNutalot
Follow
First day in flower and they looking good but there some burnt leaves from to much fertiliser is my diagnosis

Likes
21
Share

@MG2009
Follow
01/27/2021
Flowering going well
Flowering #2,#3,#6 #6 is a week ahead of#2,#3 will put others in on week 4 for a staggered harvesting
01/30/2022
watered with fungal tea and some aloe mixed in for amino acids and other goodness. Well see how she progresses in 4 days
Also working on some banana peel tea to give a boost of potassium if I do next week it should be available for week 6-7.
Ps.
Fuzzy Mellon (bag seed male)
I will pollinate one lucky branch on #6 as she is my favorite. But number 3(tall and lanky one) will get pollination of one branch as well.
I can't wait to see how they recombine with fuzzy melon smell mixed with burnt rubber and model glue and pine.
#2 no pollination (smaller one) #5 (bonsai) and #8 are males. So 3 female out of 8 seeds. Going to make some feminized seeds next time,so I'll have plenty of female's for a staggard harvest.
Likes
13
Share


@Lfuego22
Follow
Good week. On day 50 I Defoliated. Removed lowers, Taped up the room for light blockage
Day 56 from
Complete reservoir change
Room temp/humidity- 67/70
Plant temp/humidity-70/65
CO2 level-922
CO-47
Water ph- 5.9
Water ppm- 1200
Water temp- 73


Likes
142
Share


@MadeInGermany
Follow
Hi everyone 🤗
This week it looked more and more astonishing after opening the box a wonderful sweet smell wafts through the room 👍.
A few days ago the Blue Cheese Phenotype 1 was harvested and placed in the dark room :-).
This week both Kosher Tangie Kush phenotypes will be harvested 👍.
Next week the Blue Cheese phenotypes 1 and 2 will be harvested ;-) everyone else needs a while 😀.
I wish you all a nice week, stay healthy 🙏🏻 and let it grow 🌱👍


Likes
3
Share

@zenderman
Follow
27/3/26.day 50 from germ.beginning week 8.
watered with 2l water with 4ml calmag xtra.
28/3 2ml Bud Candy.
this strain is fantastic and unbelievably fast .
1/4/26.lollipop"

Processing
Likes
Comments
Share


@Mr_nugs_lover_David
Follow
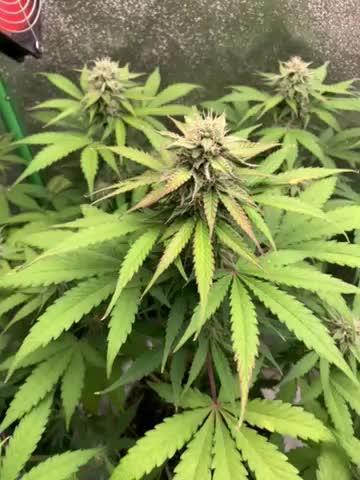
She's looking very beautiful in her 3rd week of flower right now,I'll be topping her on her 4th week probably.looks very healthy,I think she's loving the soil organic mix I prepared for her,

Likes
45
Share


@Wastent91
Follow
Ehi ragazzi come va ?!!! Allora questa settimana le notizie non possono essere altro che positive!! Il cal/Mag che ho aggiunto ha dato i suoi frutti, la ragazza ha iniziato a riprendere un colore verde più scuro e molte foglie nuove sono nate per soppiantare le altre che erano in deficit di calcio piene di macchie caratteristiche,che ho provveduto a togliere , nel frattempo le cime hanno ricominciato a produrre nuovi fiori e nuova resina . Ho deciso di dargli un altro tea di compost, il quale l ultima volta è stato a dir poco miracoloso! Posso già notare che la pianta si sta nutrendo, ho comprato due floracare per tenere sott occhio precisamente umidità e fertilità del suolo e sono due settimane che li utilizzo e funzionano davvero bene!! Penso proprio che questa stia diventando una delle migliori ragazze che abbia mai cresciuto! È un esplosione di vita ed energia che mi sorprende da un giorno ad un altro una crescita così veloce e intensa davvero impressionante! Di sicuro merito della sinergia di bio tabs e della qualità della luce Mars hydro che sta continuando ad avere la stessa intensità di quando la ho acquistata penso! Be' cosa devo dire sono davvero orgoglioso di questi risultati, significa che l erba ricambia il mio amore per lei!! Buon 420 legalize weed over the world!