


Likes
3
Share


@Joaka
Follow
ya se comienza a sentir un olor intenso, como se tenia previsto las black jack estan evolucionando sumamente rapido, ya comienzan a explotar en resina.

Likes
67
Share


@Hashy
Follow
Grow diary 11 Stage 4
Days 31-40
Day 31 Turned power up to 85% on the mars hydro ts1000. Mines one of the old ones you need to stick a screw driver in to alter it.
Day 36 Removed the single finger fan leaves and the 1st 3 fingered leaves.
Day 39 Removed the 4 fan leaves from where she was topped last week.
The start of this stage we hit a heat wave, day after day of heat. I had my humidifier on most of the 9 days. The tent didn't hit the temps I thought it would so that means I have my loft under a bit better control. The plant really kicked into gear this week, around day 34 she started to explode in growth. So far I have only done some lite defoliation by removing some of the 1st leaves that weren't getting any light anymore. The wedding glue went into pre flower before the rest of the grow, she looks like she might have slightly to much nitrogen or that could just be the colours she is going to show. She 3rd nicest at the moment.
TEMP
Max 32.2
Avg 26.5
Min 21.9
Humid
Max 71.2%
Avg 58.4%
Min 50.3%
VPD
Max 2.32
Avg 1.44
Min 0.85

Likes
12
Share


@Bluemels
Follow
Tag 25: Die Fat Banana scheint klein doch sie versteckt noch ein wenig ihre Arme. Sie ist sehr kräftig.
Tag 30: Ich beginne mit LST und scrog.

Likes
55
Share


@BodyByVio
Follow
Just got done with trimming the 4x4 @greenhouseseedco Super Silver Haze / @blimburnseeds Silver Surfer Haze tent.
The final yield is exactly 1000g plus some (kind of a lot)that I smoke in the last 2 weeks 😃
Also got 6, gallon size ziploc bags filled with good quality trim for concentrate.
To be honest I was expecting a little more but keeping in mind that this grow I did not supplemented with bottled CO2 I think I’m good with the results.
Definitely I enjoyed a lot this grow and I’ve learned even more.

Likes
75
Share

@RockoCalenberg
Follow
🌱 Tag 88 | 🌸 Blütetag 44
Drei Pflanzen, drei Persönlichkeiten
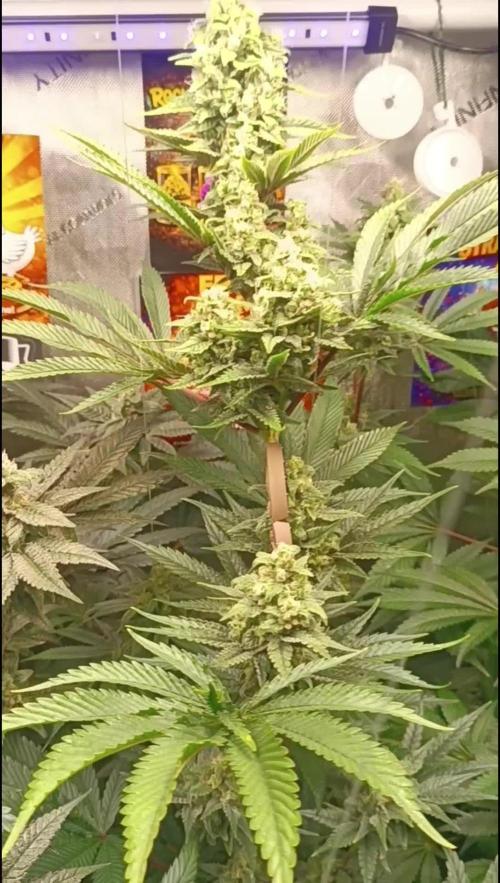
Während Strawberry AK und Chicken & Waffles zunehmend kompakte Blütenstrukturen ausbilden, bleibt die Fruit Bomb Punch ihrem sativalastigen Erscheinungsbild treu. Ihre Colas wachsen eher länglich und speerförmig heran und wirken deutlich unruhiger aufgebaut als die der beiden Konkurrentinnen.
Die Fruit Bomb Punch ist sozusagen der Struwwelpeter im Feld und zeigt am deutlichsten, dass sie ordentlich frühstückt. Als größte Verbraucherin im Grow hinterlassen die ständig wechselnden Bedingungen bei ihr auch die sichtbarsten Spuren. Trotzdem arbeitet sie unbeirrt weiter an ihren XXL-Buds und legt Woche für Woche an Blütenmasse zu.
Die Strawberry AK bleibt der ruhige Vermittler zwischen den Extremen und zieht ihr Programm ohne großes Drama durch. Sie entwickelt ihre Blüten kontinuierlich weiter und hält sich dabei angenehm aus jeder Diskussion heraus.
Die Chicken & Waffles hingegen steht weiterhin tiefgrün im Zelt und wirkt, als würde sie sich über das ganze Klima-Chaos der letzten Woche eher amüsieren. Frech grinst sie in die Kamera, als hätte sie von all den Schwankungen überhaupt nichts mitbekommen. Während die anderen beiden hier und da kleine Spuren der wechselnden Bedingungen zeigen, macht sie einfach stoisch ihr Ding und sieht dabei aus, als wäre alles exakt nach Plan gelaufen. 😄?🌱
Auch beim Klima gibt es Neuigkeiten: Der lange erwartete Luftentfeuchter ist endlich angekommen und wurde direkt ins Setup integriert. Nach den feuchten Wochen zuletzt war es höchste Zeit für Verstärkung. Ob er am Ende der erhoffte Gamechanger wird, muss sich allerdings erst noch zeigen. Für den Moment heißt es beobachten, Daten sammeln und schauen, was der neue Mitspieler im Team tatsächlich leisten kann.
Auch wenn die Bedingungen zuletzt nicht immer ideal waren, stehen die drei Damen insgesamt besser da, als man es nach einer Woche Wetter-Achterbahn erwarten würde. Die Buds stacken weiter, die Harzproduktion nimmt sichtbar zu und beim Öffnen des Zelts wird man inzwischen von einer ordentlichen Terpen-Wand begrüßt. 🍓💥?🌱
Day 88 | 🌸 Flower Day 44
Three Plants, Three Personalities
While Strawberry AK and Chicken & Waffles continue to develop increasingly compact flower structures, Fruit Bomb Punch remains true to her more sativa-leaning appearance. Her colas are growing longer and more spear-shaped, appearing noticeably less uniform than those of her two competitors.
Fruit Bomb Punch is somewhat the wild child of the field and makes it most obvious that she enjoys a hearty breakfast. As the hungriest plant in the grow, she also carries the most visible marks of the constantly changing conditions. Nevertheless, she keeps pushing forward, working relentlessly on her XXL buds and adding more flower mass week after week.
Strawberry AK remains the calm mediator between the extremes. She quietly goes about her business, steadily developing her flowers without creating much drama along the way.
Chicken & Waffles, on the other hand, is still standing deep green in the tent and looks as if she's rather amused by all the climate chaos of the past week. She keeps grinning cheekily at the camera as though she hasn't noticed any of the fluctuations at all. While the other two occasionally show small signs of the changing conditions, she simply carries on as if everything is going exactly according to plan. 😄?🌱
There is also some news on the environmental front: the long-awaited dehumidifier has finally arrived and has been integrated into the setup. After the persistently humid weeks, reinforcements were long overdue. Whether it will turn out to be the game changer I'm hoping for remains to be seen. For now, it's time to observe, collect data and see what the newest member of the team can actually bring to the table.
Even though conditions haven't always been ideal lately, all three ladies are looking better than one might expect after a week of weather-related ups and downs. The buds keep stacking, resin production is visibly increasing, and opening the tent now comes with a proper wall of terpenes. 🍓💥?🌱




Likes
30
Share


@Roberts
Follow
Runtz auto is growing well. I just lst, and defoliated her. Everything is looking good and she should start flowering soon. Thank you Plagron, Medic Grow, and Zamnesia seeds. 🤜🏻🤛🏻🌱🌱🌱
Thank you grow diaries community for the 👇likes👇, follows, comments, and subscriptions on my YouTube channel👇.
❄️🌱🍻 Happy Growing 🌱🌱🌱
https://youtube.com/channel/UCAhN7yRzWLpcaRHhMIQ7X4g.

Likes
31
Share


@BigBadLion
Follow
Heeey! 👋
Another update! :D
This week I made another transplant, this time from the drink cups to a small 3.5 liter pot and I also applied some more mycorrhizas to my babies! 😃 From both of them Pistachio seems to be the one who's developing faster and Matcha is trying to catch her sister. The plants ended with about 19500 lumens! Couldn't rise them more because of heat issues 😟
The only tricky part this week was when I decided to add a bit of growing nutrients to my plants so I ended up watering them a lot after the transplant and the results were quite shocking! I barely added 2ml of total nutrients per liter but the runoff water I got was around the 1400 ppm which all honestly scared me a lot! That's way too much for two young plants (and I believe some of the excess nutrients can be seen on Matcha) nonetheless they are still developing so I'll just continue with water for now till they start to lose color (the Light Mix I used should have enough 'food' for at least 2 weeks, so that's good I believe!
Besides that everything went well. I'm using tap water for my humidifier and its sediments are being thrown into the air by it, but so far it seems my plants are doing well.
During the last 4 days the plants developed a lot in their new pots so I'm quite happy for that! If things go well next week I'll be moving them to their final container!
Thanks everyone for reading! I hope you'll all enjoy my new timelapses and photos! :D
Processing
Likes
23
Share


@TheFairyBudMother
Follow
6-10 I’m assuming this is calcium or potassium deficiency?
6-12 Pot felt light. Watered/fed & defoliated. Took a few scalps and wired a few branches to the flower grid to spread them more evenly.
Likes
79
Share


@Terp1
Follow
08.07.2023
Tag 64
an #1 hab ich leichten Magnesiummangel festgestellt, es gab heute beim Gießen eine kleine extra Dosis CalMag und ein Blattspray mit Epsom Salz
- ansonsten entwickeln sich beide hervorragend
- ich habe 2 Secret Jardin Cossmorrow 20W Bloom mit ins Zelt gehangen, um die langen Budsites zu bedienen
- das bringt ganz schön Temperatur ins Zelt
Alles in Allem bin ich sehr zufrieden bisher -> vor allem mit der Entlaubung. Das sieht jetzt richtig gut aus.
Likes
9
Share


@Sejnik
Follow
Provedl jsem extrémní defoliaci své jungle. odebral jsem téměř všechny trochu větší listy pro snížení vlhkosti, lepší proudění vzduchu. Světlo nyní svítí na všechny květy.
Bohužel jsem narazil na nějaké škůdce které jsem před defoliací objevit nemohl . Většina napadených listů byla odstraněna a zbytek jsem postříkal vývarem z tabáku.
Likes
35
Share


@Mz876
Follow
First of all I’d like to give a big thanks to Ganja Farmer Seeds for this opportunity to try out their genetics . Also thanks to Mars Hydro for this TS1000 I was able to grow them under . The grow was super fast . These babies were the fastest flowering strain I’ve grown so far . I’ll be back once they’ve dried to give their dry weight and trimmed bud pics .

Likes
15
Share


@Messypies
Follow
amazing growth this week from all 3 plants. The peanut butter cookies is recovering from the transplant. Both the auto cheese and auto cinderella jack have both started to show signs of flowering and have bushed out incredibly well. The pbc has had its first top done and has started growing 2 extra nodes.
07/08/2020 - training has been done on all the autos. They have recovered extremely well and seem to not be slowing down. Finally starting to see the type of flowers I have been striving for. After a semi unsuccessful first grow, this has been a huge relief. Both autos are now showing signs of going into flower so I will try to stop LST unless any unruly branches form.
The peanut butter cookies has now started to fully recover from the transplant and topping. Will now allow this to flourish and grow as big as it wants as both autos should be done before its too big (hopefully)


Likes
4
Share


@PurpleBeen
Follow
Ready for a short drying period of about 7 days, with humidity around 45% and a temperature of 24°C. After that, I’ll weigh the final yield

Processing
Likes
3
Share


@DBanned
Follow
June 12, 2020
Week 7
I added some manure to all the pots.
2 of the plants aren’t growing much so Im leaving them to grow, and see what happens.
Plants were a bit too wet from previous thunderstorms, now waiting for them to dry out so I can try and bring their ph down.
Thank you and happy grow🌱
June 14, 2020
Plants started to dry out so we added ph down water and authentik Veg nutrients 4-3-2 by nutri+. Ph’s mix equivalence was around 5.8 So we brought the ph up to +/- 6.4
For ph Up we used sodium bicarbonate(baking soda).
And used 1 litre of water per pot.
Thanks happy grow!!!
Likes
3
Share


@Wiggsix
Follow
Jue19mayo
Hermosa por donde se la mire.
Vie20mayo
Hoy se hizo una defoliación intensa sacando hojas satélites q no suman, y poda de bajos..
Sab21mayo
Entrenando ramas con impresiones 3d, para no andar atando las ramas..
Mar24mayo
Linda y fuerte..
Vie27mayo
Se realizo una nueva defoliación de la cual no saque fotos..

Likes
6
Share


@Magical_Surgeon
Follow
After you found some good sector and clone it you let the mycelium grow and fill almost all the petri dish like I did last week.
So now you're ready to move forward.
Making grain spawn!🍄🍄
For grain you can use Organic Rye Berries, but you can also get away with wheat berries, or brown rice or even corn kernels(which I used myself) !
And you'll need some mason jars or honestly I used some jars that I had home just clean them very well and sterilise before using
Making a grain spawn can be broken down into 6 easy steps.
🍄Hydrate Grain By Soaking
🍄Make Specialized Lids
🍄Simmer, Drain and Dry The Grain
🍄Sterilize
🍄Put your agar in the jar
🍄Colonize
🍄Soak the grain by placing it in a bucket, covering in water, and leaving it for 12 -24 hours. Easy.
🍄Drill 1 hole on top of the lid. Right in the center and cover with a small dab of high temperature silicone sealant, and leave it overnight to dry. And your jars are done. There other diff types for different methods like liquid culture etc. But I'm just going roughly through what Ive done.
🍄The next step is to simmer the grains on the stove. This will thoroughly hydrate the grains, and will soften them to make them easier for the mushroom mycelium to consume.
Cook soaked grain on the stove for about 15 minutes. You don’t want to cook it too long, because eventually all the grain will crack and you’ll get some mushy grain spawn. We don't want that. 🧐After the grains have simmered on a low boil, you’ll need to drain them off. What I did is I drop them in the sink with the drain cover on. The grains will drain over an hour or so, after which you can go ahead and fill your jars.
🍄Once your jars are filled, they need to be sterilised.This kills off all the other nasty contaminants in the grain cover the lids in tinfoil (to prevent water dripping into the lid) and then just pressure sterilise them for about 90 minutes at 15 psi.
🍄After that let them cool down. Get your SAB, wipe down the walls with some alcohol wipes and place the jars inside. And wait untill they will be warm to the touch... not hot and painful 😤patience is key. Bring in your plates that had been stored by you in a dark place. And what u have to do is sterilise your scalpel and just accurately and efficiently decide your mycelium into about 10 pieces and quickly place them in your jar. And complete for every jar u make. You have to be very quick. The more you keep you're jar and your agar plates lids open the more cans they will get contaminated. There certain technics you can see online..
🍄Ones you're done close all your jars lids tight and Jake your jar so the mycelium pieces will mix around the jar and place them in the dark place to colonize. And just keep waiting... 😅 Untill the mycelium will conquer your grain. Keep your eyes on the jars, any weird smells or colour during the waiting time.. because that would mean you got a contamination going on. Oh yeah and when about 55% of your jar is filled with mycilium shake the sh*t out of it so it will break the mycilium inside and make spread more faster.
Likes
11
Share

@MindFlowers68
Follow
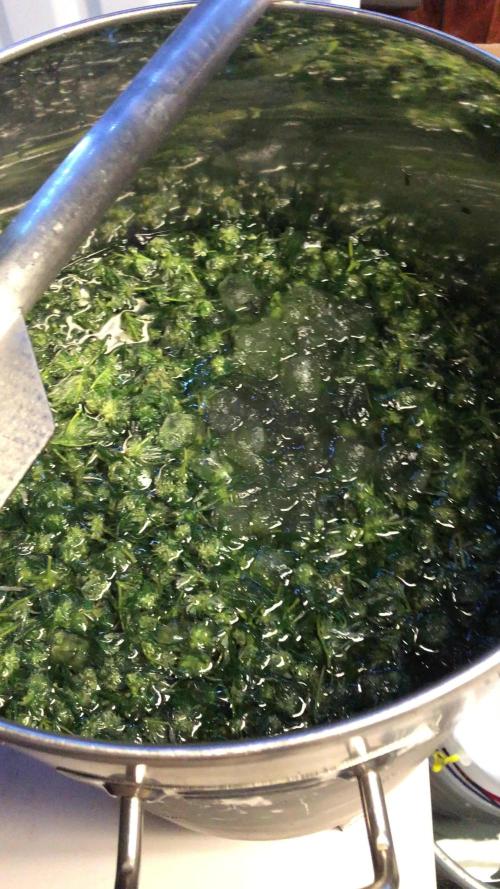
I did harvest this for bubble hash as fresh frozen but after my first two runs, I'm not so sure about that lol. There's definitely a bit of a learning curve, especially handwashing and not the coldest temperature yet to work with although I did get the studio down to 45°. I think I'm probably just gonna do some edibles with this or something. I'm going to convert the wet weight to the dry weight would be just to get an idea.


