
Likes
Comments
Share


@grazi2706
Follow
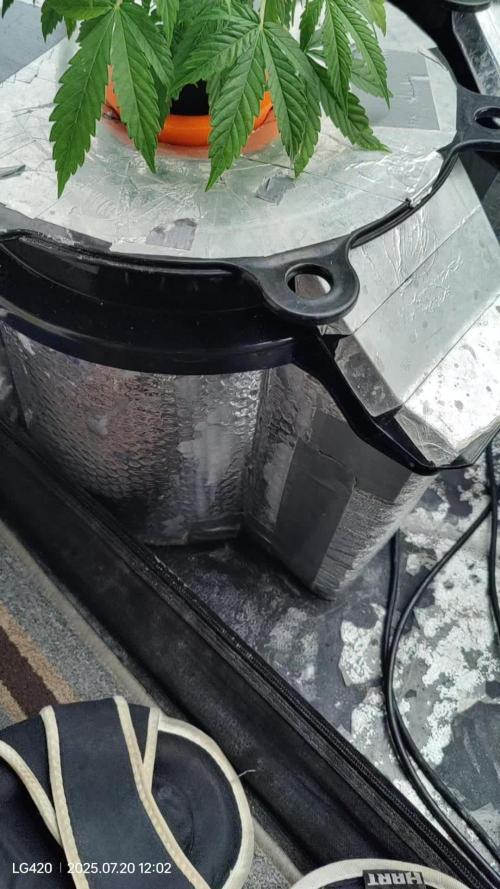
It's been awhile since my last update. I was having major problems with another grow and neglected my updates on this one. I've got another week or 2 left most likely. The purple is just starting to come in now.
I had some spider mites a few weeks ago, but Dr zymes was able to take care of them for long enough until harvest. Some tall and fat colas are starting. Should get a decent yield considering the awkward 1x3 grow space. I took a monster crop clipping about a week ago that has rooted. My plan is to grow one of these in a 3x3 scrog for my next grow.

Likes
29
Share


@CannbellFarms
Follow
Mon 06/12/22
- defoliated majorly again, hopefully for the last time this time haha, looking good though! Heavy nug production begins!
Tuesday
- uploaded video 24 hours after defoliation all plants look amazing!

Likes
6
Share


@rvabudman
Follow
Graduated, and am off from work for a few weeks, so went overboard on photos. Plant is doing well, leaves are starting to turn yellow (strain trait).
Can't wait for the harvest and being able legally gift my xmas ornaments to my cousins during our "cousins walk" at our family xmas party.


Likes
37
Share


@DogDoctorOfficial
Follow
🌱 Germination Journey with Terpyz Mutant Mentha de Croco 🌱
Hey Grow Fam! Today kicks off an exciting adventure with Terpyz Mutant Mentha de Croco genetics. I’ve got 10 regular seeds ready to sprout, and I’m looking forward to discovering some beautiful female phenotypes—and maybe even a standout male for potential future breeding. It’s been a while since I’ve worked with regular seeds, so I’m thrilled to dive in!
Germination Process Overview:
Here’s a step-by-step rundown of the germination setup and process, with a special focus on the equipment and nutrients that are helping these seeds thrive right from the start.
Step 1: TheCannaKan Germination Pod 🌱
For germination, I rely on TheCannaKan—a device I’ve come to love and trust. It’s designed to create the perfect microclimate for seed germination, and within just 24 hours, the seeds started showing signs of life. By the 32-hour mark, they were all ready to be transferred to the next stage! I can’t recommend this gadget enough for anyone serious about getting strong, early growth from their seeds.
• Why TheCannaKan?
• Humidity Control: Ensures seeds stay hydrated without oversaturation.
• Stable Temperature: Maintains an even temperature around the seeds, so there’s no shock or stalling.
• Enhanced Oxygenation: Keeps fresh air circulating, helping prevent mold and ensuring seeds don’t suffocate.
Step 2: Transfer to Root Riots & Aptus Holland Supplements 💧
Once the seeds were sprouted, I transferred them into Root Riots, known for their excellent water retention and structure that encourages strong root growth. Root Riots also have a pH-balanced, spongy texture that makes it easy for roots to penetrate, promoting sturdy, healthy root systems.
At this stage, I started using Aptus Holland’s Regulator and Startbooster at 1ml/L each. Here’s why I chose these products for early growth:
• Aptus Regulator (1ml/L): Helps strengthen the plants against environmental stresses by supporting cell wall structure. It’s a fantastic choice for giving young seedlings an early boost in resilience.
• Aptus Startbooster (1ml/L): This product provides essential microbes and nutrients that stimulate root growth and early plant vigor. Especially for regular seeds, the early root development makes a noticeable difference in later growth stages.
Step 3: Lighting with Future of Grow (FOG) LED at 200 PPFD 💡
For lighting, I’m using a Future of Grow (FOG) 600W LED. For the germination stage, I’ve dimmed it to around 200 PPFD (photosynthetic photon flux density), which provides just enough light for healthy, strong seedling growth without overwhelming them.
• Why Low Intensity?
• 200 PPFD ensures that young plants aren’t exposed to too much light, which could cause stress or stunting. This level of intensity is perfect for encouraging healthy development without risking “stretching.”
• The FOG LED provides a balanced spectrum tailored to plant growth, setting up these young sprouts for success as they grow.
Step 4: Environmental Control with TrolMaster Tent X Controller 📲
For monitoring and control, I’m using the TrolMaster Tent X Controller, which lets me dial in every aspect of the environment to make sure these little ones have the perfect conditions for germination and early growth.
• TrolMaster Benefits:
• Precision Control: Adjust temperature, humidity, and lighting all in one place.
• Notifications: Sends updates in real-time to my device, so I can make adjustments as needed without being physically present.
• Consistency: Maintains stable conditions around the clock, reducing stress on seedlings and ensuring they’re thriving.
Grow Tips & Reflections:
Germination is one of the most crucial stages in a plant’s lifecycle. Starting with strong genetics like Terpyz Mutant Mentha de Croco, combined with a solid germination setup and the right nutrients, creates the foundation for a successful grow.
💡 Quick Tips for Fellow Growers:
• Hydration Balance: Don’t oversaturate! Moisture levels should be high enough for the seeds to sprout but not so wet that they drown.
• Light Management: A low PPFD for young seedlings prevents stretch and keeps nodes tight, preparing them for a healthy vegetative phase.
• Environment Consistency: Use a reliable controller like the TrolMaster Tent X to manage your settings, and consider monitoring tools for real-time adjustments.
Shout Outs to the Community:
Big thanks to Terpyz Genetics for these incredible seeds, Aptus Holland for their top-notch nutrients, Future of Grow for the stellar LED lights, and TrolMaster for the amazing controller. Also, shout out to all of you in the growing community—you make this journey exciting and filled with endless learning. Let’s keep growing and sharing together!
That’s it for the germination update! Next up, I’ll be monitoring growth closely to identify strong females (and maybe a standout male for breeding). Stay tuned for updates on our Mutant Mentha de Croco adventure—this is just the beginning!
Genetics - Mentha De Croco
https://terpyz.eu/products/menta-de-croco-fern-type?_pos=1&_sid=e9237cbcb&_ss=r
DogDoctorOfficial Discount Codes @ terpyz.eu - DOCTOR 15% off
Nutrition - @aptusholland
https://aptus-holland.com/
Led Power @ F.O.G. Future Of Grow
https://www.thefuturofgrow.com/en/online-store/BLACK-SERIES-600-p489093171
Controls @ TrolMaster
https://www.trolmaster.eu/tent-x
As always thank you all for stopping by, for the love and for it all , this journey of mine wold just not be the same without you guys, the love and support is very much appreciloved and i fell honored with you all in my life
With true love comes happiness Always believe in your self and always do things expecting nothing and with an open heart , be a giver and the universe will give back to you in ways you could not even imagine so
Growers Love To you All 💚


Likes
17
Share


@Chucky324
Follow
Hello. This is the end of week 1 and the beginning of week 2 of flowering.
Everything is going well this week. The plants drank up all the nutrient solution and had about 3 1/2 gallons of rainwater each and I see the soil is still a bit damp today.
As I walked around the tent I had just closed for the night, I saw where some of the stitching had stretched a bit and was letting in a bit of light. Got the duct tape out and fixed it so it's very dark in here now.
This is the 4th season for the tent and it's starting to show. I've had to sew up some seams where the zipper is tight and broke the stitching.
But I think It's worth it. I'm finished before the powdery mildew starts here and I get to flower under the full strong sun, rather than in the weaker fall sun.
I traded 2 clones of of mine for, I think he said Double Chocolate Chem. I'll have to look on seedfinder.eu and see what I got. He said it was indoor stuff (I think he meant it gets powdery mildew outdoors) and it's really good!!!
I'll do a final trim/prune at 2 1/2 to 3 weeks into flowering. So nothing planed for this week except for lowering the bamboo cage/net so it will hold more buds up.
Be Great. Chuck.

Likes
3
Share

@GermanNoob
Follow
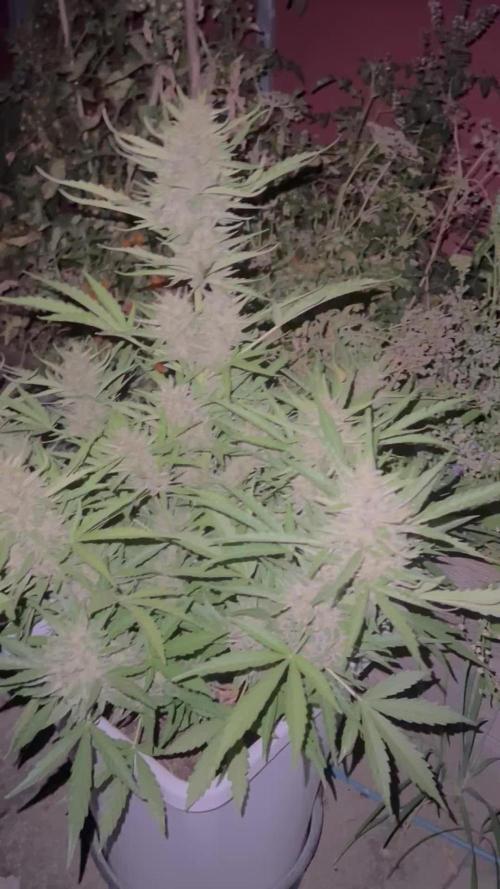
This plant is perhaps the best autoflower I grew so far. Despite my limited experience i think the genetic performed exceptionally well.
I did basically nothing to it in terms of nutrients or training and it turned out so good. Especially at night the frost is so nice.
I harvested the top part, because a lot of amber trichomes were visible already. The lower buds still need at least a week I think.
Will keep you posted with the rest of the harvest and a smoke report
Happy growing
Likes
17
Share


@gottagrowsometime
Follow
Week 6 of my Runtz Fem Green Sensation test with/without using Plagron soil. The mother will be raised on Xpert Nutrients. And then when I take clones in the next week or 10 days. I'll be growing them as close as possible using Terra line from plagron.
Days 35-40
Plant is really starting to push. Making sure to not the soil dry up. I only topped yesterday, so I'm hoping the nodes will start growing now. Giving me 4 sets. 1 row ( 2 sets/4 clones) will be taken. And from those 4 the 2 best rooted will be grown very similar to this using Plagron & of course Green Sensation with & without. I'll be using separate 9L pots once rooted to give them a good few weeks of veg without any need to uppot to bigger veg pots delaying the veg. Xpert Nutrients continues its amazing job. Seeing real growth now pushing it on. I won't bother doing any major fan leave removal until their nodes develop a bit more. Nutrients have been kept low. As its only been put in fresh grow mix a few weeks back. Mainly my focus is on roots, calmag & silica for stress. As you can see. I'm getting a very nice pheno for cloning.
Day 41-42
She's moving along at a much quicker pace since topping 3 days ago. I think I'll have to remove fan leaves. As it continues focusing on growing leaves. I gather this is, was it been rootbound. But, she's moving now.
Shout out to Zamnesia & Plagron for the gear. & also for Xpert Nutrients whose Nutrients are powering the mother.
DISCOUNT CODES BELOW
20% off Zamnesias entire catalogue with code: ZAMMIGROW2024
20% off XPERT NUTRIENTS & KANNABIA with code: GGST
20% off Oringal Sensible Seeds with code:


Processing
Likes
17
Share


@kcartel
Follow
in the passport of the variety itself, exactly 63 days of color are written, but still look transparent, I’ll wait until the end of the week;
Likes
16
Share


Processing
Likes
38
Share


@GardenSchool
Follow
February 2, 2021 (Week 4, Day 29): The plants grew enough overnight to top at the third node. This is the second and last time I'll be topping these plants - this is the Nebula method of manifolding. I also took off the second node of each growth stem as well as the original fan leaves. I've pressed them in my plant press to save the memories of my experience with my first grow. I also redid the LST on every plant. The new growth sites I've pinned to the fan leaves. I really enjoy doing LST, it's quite therapeutic to figure out just how to support the plant without harming it. I think I am getting great lateral growth so far. The main growth stems are swelling a lot at the bases. Medium is still wet from yesterday - lightly tilled about a half inch of top soil. I've turned down the humidity another 5% this week. I'll keep it there most likely until I start the flowering cycle. Averaging 60% rH and 78℉. Plants are happy, and I am happy. 😸
February 3, 2021 (Week 4, Day 30): Plants are looking good this morning. The nitrogen toxicity in Unknown 2 is beginning to subside. Now Unknown 1 seems to be having a nitrogen toxicity as well - slight leaf curling at the ends with a very lush and dark green color. I am assuming this soil is still very hot. As I've lowered the humidity I suspect more nutrients are being sucked in through the roots instead of transpiration through the leaves. I think the plants are going to take a little bit to get used to the hot soil, but I bet once they do they'll be as happy as ever. Medium is still slightly moist this morning, no watering. I tilled a half inch of top soil again to keep everything aerated. Most likely will water tomorrow or the next day. My LST seems to be holding nicely. I tied down Unknown 2's first growth tips as the fan leaves have finally straightened out after the topping yesterday. New growth tips are emerging nicely from the third node of each lateral stem. Averaging 60% rH and 77℉. Nothing else to report for today.
February 4, 2021 (Week 4, Day 31) : Growth looks good overnight. I think this second topping is confusing the plants a bit. Lots of bulking of the stems, but not much lateral growth. I have a feeling they'll take off over the next few days. They're still growing really well. I posted a grow question last night having to do with little white bead-like structures growing on the surfaces of the leaves on every plant. I was concerned it may be a mold or fungus starting to grow. I did a bunch of research and it seems to be early trichome development called "sessile glands". I still have the question open and I am trying to get confirmation. Really hoping if they're trichomes that's a good sign that these plants are going to be frosty. I uploaded some pictures to show the development. Over night they started to grow everywhere on the leaves - hopefully they really are just trichomes and I am being over-vigilant. Better safe than sorry. I watered the plants today without nutrients; 3 liters per plant pH'd to 5.8. Runoff sitting at ~6.5 pH now which is much better. I'll continue to run 5.8 pH solution until I see the pH of the soil come down to at least 6.2-6.3. Tomorrow I'll most likely have to defoliate a bit and tie down the second sets of growth stems, as they're beginning to stretch and grow vertically. Averaging 60% rH and 76℉. Happy growing all! 😸
February 5, 2021 (Week 4, Day 32): The plants are exploding with growth now. I defoliated the fan leaves from the first node on every plant and tied down the growth stem for lateral growth. These plants are meaty as hell. The stems are thickening really quickly and I am getting tons of foliage and stem growth. The third nodes are starting to come around. I think I figured out the "mold" issue I thought was starting. They're definitely trichomes, not mold. I touched the leaves that were sparkling and my fingertips got sticky, oily, and reeked of weed - so that's great news. The smell in my grow room is getting stronger every day. While defoliating this morning I found my first pre-flowers on Gelato 1! It looks like all the plants are female, but Gelato 1 threw some pretty pistils at me to get my attention. Seems like the plants are reaching maturity. Depending on growth over the next few weeks it may be time to switch to flower soon! I am aiming for about 16" in veg before switching. Seeing these pre-flowers made me so anxious for flowering. Unknown 1 and Unknown 2 are doing great as well - all the signs of the nitrogen toxicity have subsided. Unknown 2 has more trichomes on the leaves than any of the other plants, and its foliage is a beautiful deep green. They are either different phenotypes or different strains entirely as the two of them are growing and looking quite different. Unknown 1 is much lankier so I suspect a different strain. Unknown 2 is especially squat and I suspect it's 100% indica or close to it. Medium is still wet. Averaging 60% rH and 77℉. No other news today.
February 6, 2021 (Week 4, Day 33): Last 24 hours I have seen at least an inch of lateral growth per growth stem on each plant. These girls are absolutely loving life from the looks of it, they're growing incredibly fast. I redid a bunch of LST today. Had to move every tie up one node. Medium is still moist. Lightly tilled half inch of top soil. Gelato 1 is shooting out more pre-flowers. Thanks to my wife we have new friends that have joined us in the smart pots. 😸 Averaging 60% rH and 75℉. Happy weekend everyone!
February 7, 2021 (Week 4, Day 34): These girls are chugging right along. Tons of great lateral growth every 24 hours at this point. Having to adjust LST pretty much every morning to accommodate for the crazy growth. Gelato 1 is a freak of nature - the fan leaves are gigantic. Defoliated again today; took the fan leaves from the third node of each plant. Will be defoliating the first node of the secondary growth stems tomorrow most likely. Medium is slightly moist. Tilled the soil again. Will be watering tomorrow morning most likely. There's still a little dropping at the ends of the leaves so I will hold off on nutrients until all nitrogen toxicity has subsided. Averaging 60% rH and 77℉. Nothing else for today.
February 8, 2021 (Week 4, Day 35): Watered today with 3 liters of 5.8 pH filtered water per plant (no nutrients) - runoff around ~6.7-6.8 pH. Will most likely resume nutrients upon next feeding depending on how the plants look. Defoliated entire first node from center four growth stems and tied down third nodes. Readjusted outside LST. The plants are almost to the outside of the pot which is when I'll switch to vertical growth. Unknown 1 is very close to being let loose, it's also pre-flowering now. Gelato 1 is now covered in pre-flowers - it's definitely a happy plant. Unknown 2 is still the runt of the group but also appears to be almost 100% indica by how stout it is. It's showing sex but no pistils yet. All three plants seem to responding well to mainlining and the stress isn't making them skip a beat. Stems are getting huge. I downloaded an app on my phone to check how well my lights are doing and, if the readings are accurate, I am very impressed with these lights. I've read cannabis can handle around ~65 DLI, so I am right where I need to be. Averaging 60% rH and 78℉.
That ends week 4 of veg. Time is flying. Hoping to switch to flower in two weeks for a total of six weeks in veg. Getting super stoked to switch over! Happy growing everyone! 👽

Likes
10
Share


@BodyByVio
Follow
After 21 days in turbo cloner I transplanted 4 Sweet seeds Green Poison into 1 gallon plastic pots filled with Cana coco. Few days later I transplanted another 4 clones into DWC!
Stay tuned!
Coco feed at 700ppm
Dwc feed at 480ppm

Likes
34
Share


@JonnoSA
Follow
The plants are happy and on cruze control. Apart from daily defoliation I'm just letting them do their thing. No nutrients or boosters have been added this week🤙
Ok and still contending with bladdy LOAD SHEDDING !!!!!! 2-4 hours of electricity turned off by Eskom NATION WIDE!!! I'm currently sitting in the pitch dark tying this🤙 Google it.. totally sucks


Likes
4
Share

@burnout
Follow
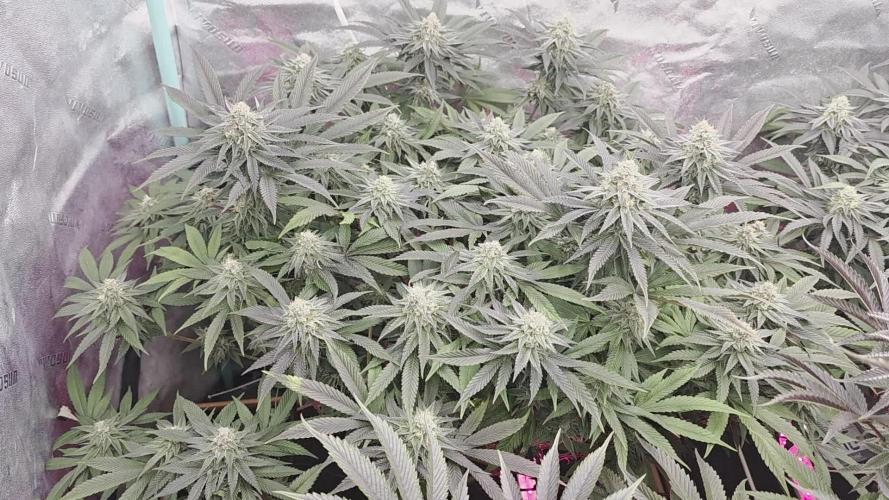
Start of week 6 day 42. Neon Icon #1 and #3 starting to mature with darkening pistils, #2 still all white hairs. Caddy Runtz plants still are maturing. Top watered again each with one gallon water mixed with 1/2 teaspoon Recharge, 1 teaspoon build a bloom, and 2 oz peach ferment. Added two gallons water with 1 teaspoon coconut powder to each reservoir, will do that again mid week. This may be the last week of feeding build a bloom and ferment, will see how they look next week, possibly one more week.

Processing
Likes
25
Share


@HH501
Follow
good evening green and sticky thumb friends. today the child enters the 13th week and probably tomorrow, also for reasons of time and perfumes, with Christmas just around the corner .. I will go to the collection.
Certainly I did not expect large quantities, but mine was more an outdoor experiment to see if despite the temperatures this og of my friends of the noborder was resistant to low temperatures (we also arrived at an exposure of 5/8 degrees). I managed to complete it despite the unwelcome visit of some insect and its defoliation.
Likes
6
Share


@Tezza2
Follow
This week has been fun still no problems with the grow no deficiencies this has been a easy grow like always for me.i need to do a defoliation on the plants today sometime