




Likes
3
Share

@Jungle_James_Grows
Follow
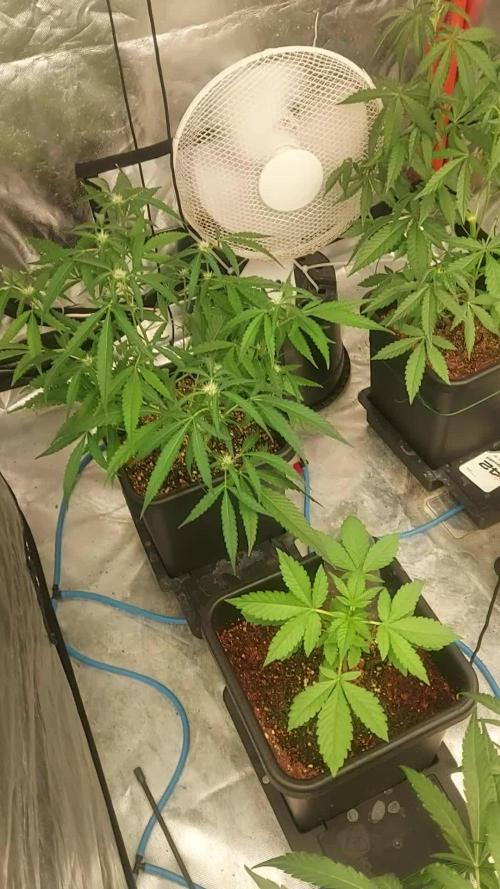
They have certainly got the flower stretch going on. Tied them all down again to expose the bud sites.
Likes
24
Share

@Oyziphar
Follow
😅
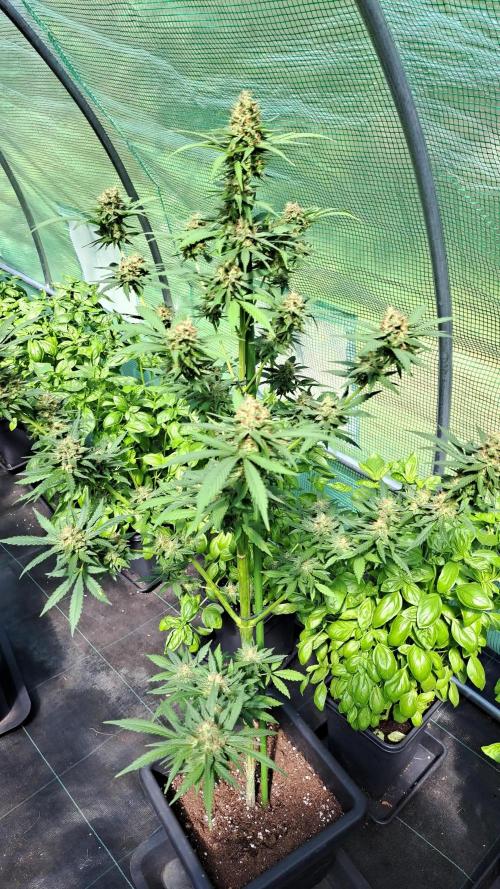
Another Hot Week 🌶️🌶️🌶️
High temperatures 🌡️🌡️🌡️and lots of sun 🌞🌞🌞 and no rain 🌧️
➡️ The buds are ripe and ready to harvest 🌰
➡️ Exquisite aromas of sweet mandarin, clementines, lemon verbena, and oranges. 🍊🍋
➡️ Just a little water at the beginning of the day 💧💧💧
📍 Plant #1 (140cm) is the biggest plant and probably the best yielder. Huge fat buds 😆
📍 Plant #2 (128cm) is also a very nice plant, but slightly less fat buds
📍 Plant #3 (111cm) is less impressive plant. Her pistils are orange-brownish-red, therefore clearly a different phenotype than the others
Eight week of Light Deprivation
👉👉👉👉Every morning at 9:00 am I move the plants to the greenhouse.
👉👉👉👉Every evening at 9:00 pm I move the plants (together with some other strains) inside the growroom (which I don't use in the summer)

Processing
Likes
18
Share


@TheItalianGrower
Follow
Hi guys, this week has been great for plant growth..they are 85cm tall and I think they will grow a little longer. You can see the future buds that will be covered with flowers.
From this growth I am learning that the FIM technique is better because the buds will all be at the same height and look much more (as you can see in plant number 4). Pistils begin to appear and in the next week I hope to see more pistils.
Stay Tuned 🦍

Likes
10
Share


@Barzenegger
Follow
The plants were stretching a bit, pretty much as expected - except for the Sour Strawberry. I don't know if it was due to it getting a bit less light since it was much shorter, but it tripled its size and overtook all of the other plants in height.
OK. I guess I could have flipped 2 weeks earlier?
Anyway, stretch was almost over, flowers started forming. Some of the plants still looked a bit meh and yellow-ish, but overall the growth during stretch looked healthier than the previous 1-2 weeks.


Likes
25
Share


@Only4passion
Follow
They look healthy I’m really happy with this grow , totally receptive to lst n hst even topping the main top accidentally she recovered really fast 💪💪


Likes
14
Share


@eldruida_lamota
Follow
Que pasa familia, vamos con la cosecha de estas Gorilla Zkittlez Auto de FastBuds.
Por dónde empezar, es una autofloreciente que es normalita de cultivar, tiene un periodo corto de crecimiento y de floración igual no es largo, o igual tendría que haberla dejado alguna semana más no entiendo bien.
En cuanto a la alimentación , pues la aplique una vez por semana y a sido suficiente, se a comportado bien en interior, la flor pues no es muy prieta porque no deja de ser una autofloreciente, pero es una flor que va repleta de tricomas.
El periodo de luz pues de principio a fin a 18 horas, fue suficiente para completar el ciclo de vida como esperaba.
Agrobeta:
https://www.agrobeta.com/agrobetatiendaonline/36-abonos-canamo
Hasta aquí todo, Buenos humos 💨💨💨


Likes
36
Share

@Growbody
Follow
Meine lieben Freunde und Freundinnen, Brüder und Schwestern im Geistigen und Tatkräftigen, herzlich Willkommen zum Greenhouse Summer Outdoor Grow 2026.
Der erste Strain des Outdoor Grows den ich Euch vorstellen werde ist die Purple Lemonade FF von 2Fast4Buds, eine 60% Sativa die laut FastBuds etwas nebulös als eine Kreuzung aus purple und citrus Cali Genetik beschrieben wird. Egal, sie soll sehr fruchtig und zitronig schmecken und könnte schöne Farben bekommen. Außerdem soll Sie eine kurze Blütezeit haben. Hier ist die URL:
https://2fast4buds.com/de/seeds/purple-lemonade-fast-flowering#description
Der zweite Strain der im Set mit dabei ist, ist die Mimosa x Orange Punch fem. von Barney's Farm, die ihre Genetik und den Taste bereits im Namen trägt, eine 65% Indica, die laut Barney's "ein wirklich sensationelles, zitrusähnliches und mandarinenartig-süßes Aroma" haben soll. Auch sie könnte interessante Farben bekommen. Hier die URL:
https://www.barneysfarm.de/mimosa-x-orange-punch-552
Last but not least, der dritte Strain ist die Chocolate Sherbet fem. von Grower's Choice, eine 70% Sativa, deren Eltern Chocolope x Sunset Sherbet sind. Auf den Geschmack bin ich schon jetzt gespannt, cremiges Haschisch. Mit bis zu 240cm könnte sie die größte im Greenhouse werden und würde dann bis zur Decke wachsen. Hier ist die URL:
https://www.growerschoice.nl/de/chocolate-sherbet.html#description
EDIT:
Nachdem die oben aufgeführten Pflänzchen nicht so recht loslegen wollten, habe ich mich entschlossen, fertige Stecklinge von Hanfgarten aus Österreich dazuzubestellen. Die Stecklinge kommen in die Mörtelwannen, die selbst gezogenen kommen in die bereits bewährten 15 und 20 Liter ROOTiES. So kann ich die auch mal direkt in die Sonne stellen.
Der erste Steckling ist die Blueberry von Hanfgarten, eine 80% Indica, einer Kreuzung aus Afghan Indica x (Thai Sativa x Mexican Oaxacan Sativa), die nach 8 Wochen Blüte Mitte Oktober fertig sein soll. Außerdem soll sie fruchtig, beerig und süß schmecken. Auch hier gibt es eine URL:
https://www.hanfgartenshop.de/blueberry.html
Der zweite Steckling ist die Runtz, ebenfalls von Hanfgarten, ein Hybrid aus Zkittlez × Gelato, die auch nur 8-9 Wochen Blüte hat, mal sehen. Wenn sie ein ähnliches Aroma hat wie die Wurlz bin ich happy. Die URL:
https://www.hanfgartenshop.de/runtz.html
Der dritte Steckling ist die Super Lemon Haze, eine 80% Sativa von Greenhouse Seeds, deren Genetik von Lemon Skunk x Super Silver Haze stammt. Mit 9-10 Wochen Blüte steht sie wohl mit am längsten im Greenhouse. I💖Haze und hier sind die URL's:
https://www.hanfgartenshop.de/super-lemon-haze.html
https://shop.greenhouseseeds.nl/feminised-cannabis-seeds/1-seed-pack/super-lemon-haze/?variation_id=604
Auch dieses Jahr gibt es wieder etwas Neues:
Mir ist vor einigen Wochen im Baumarkt ein Foliengewächshäuschen begegnet. Die Aussicht, meine Schätzchen immer im Trockenen zu Wissen, lies mich sofort (also sofort nach einem Recall mit meiner Liebsten) zuschlagen. Danach war nur noch ein teilweiser Umbau unseres Gartens nötig, einen kleinen Weg anders verlegen, ein Fundament ausheben, Bordsteine zersägen, 2 Zentner Beton verbuddeln, Löcher bohren, verdübeln und verschrauben ohne das der Beton ausplatzt, einen haufen Astwerk vom Wein opfern und viel Rasen neu anlegen, das war's schon fast.
Neu:
Sind auch die zwei 90 Liter Maurerbottiche, in denen sich meine Pflanzen wohlfühlen dürfen, 4x soviel Platz wie im letzten Summer Outdoor Grow. Zur Drainage habe ich Rheinkiesel 9-18 verwendet. Da drauf kam mein altes Erdmischungsrezept mit frischem Kompost von Piluweris, Lehm, den die Wühlmäuse ständig in unserem Rasen aufwerfen und Sand aus'm Kieswerk mit gaaanz viel Staub drinne, praktisch Gesteinsmehl. Auch hier gab's was Neues: Hornmehl zusätzlich, hatich früher schon verwendet und ganz vergessen. Der erste Sack Sonnenerde Hanferde wurde mit der oberen Schicht meiner Mischung vermischt. Der zweite Sack kam dann blank obendrauf.
Neu:
Für mich ist auch die angewendete Keimmethode noch neu, die Samen zuerst in einem Marmeladenglas mit temperiertem Wasser mit Zusatz von Wasserstoffperoxyd keimen zu lassen. Das ist jetzt das dritte Mal, dass ich diese Methode anwende. Der Vorteil daran ist die superschnelle Keimung, der Keim schaut tatsächlich bereits am nächsten Tag aus der Schale und nach ein oder zwei weiteren Tagen haben sich die Keimlinge von der Samenschale befreit. Das weitere Vorgehen bereitet mir noch Probleme. Ich verwende immer noch die SmartStart Plugs von Zamnesia die ich praktisch halbiere, also von oben nach unten einmal Mittendurch. Dahinein lege ich jetzt den Keimling und klappe die zwei Hälften dann zusammen und pflanze den Plug in den Topf.
Neu:
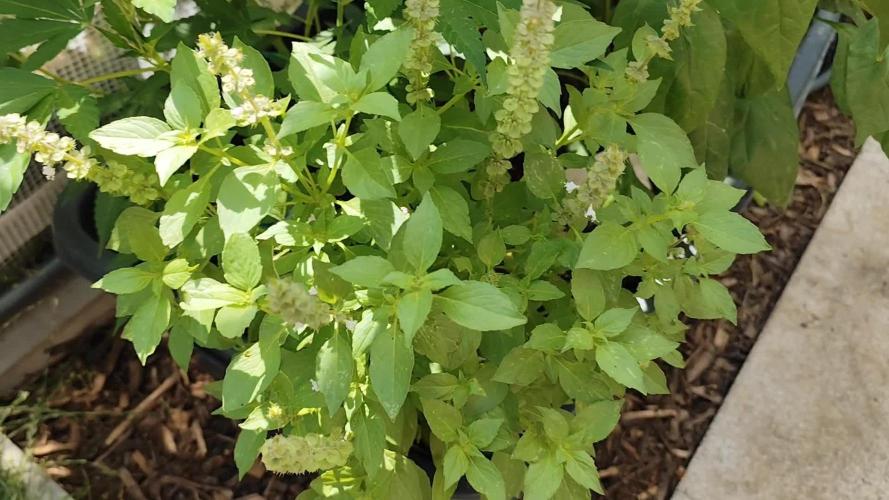
In die Wannen kommen zusätzlich Gäste als da wären erprobte und neue sowie überwinterte Chilisorten, verschiedene Basiliken oder -kums, Weiße Melisse, Roter Klee, paar Blumen und so.
Tag 56: Der Tag nach dem Mondhöchststand, Blütetag am Anfang der Pflanzzeit ist der ideale Tag um die drei Grazien umzutopfen. Da die Chocolat Sherbet von Grower's Choice als Sativa am größten werden wird, bekommt sie den 20 Liter ROOTiES Wide Version Stofftopf, die Mimosa x Orange Punch von Barney's Farm bekommt den 15 Liter ROOTiES Stofftopf und die Purple Lemonade FF von 2Fast4Buds bekommt den 20 Liter Air Pot mit frischer Bio Hanferde von Sonnenerde. Alle 3 habe ich schräg eingepflanzt und alle 3 hatten sich schon am Abend erholt.
Tag 58: 28°C, im Greenhouse 38°C alle Türen und Fenster sind offen 🔥
Tag 59 bis Tag 63 werden es 36°C - 38°C. Gewässert wird mit 5-10 Liter Brunnenwasser pro Mörtelkasten, entsprechend in die Töpfe. Es gibt den ersten Greenhouse Gurkensalat 🥒
Eins kann ich versprechen: It will take a very, very long time 😃 Schön das du es bist, der mich begleitet 👍😎




Likes
76
Share


@TheFattyMcCoy
Follow
Hey yall!
Super stoked to show yall some beneficial nematodes in my soil. Lots of other beneficials in there, the nematodes are the most fun to me! Love to show yall what Korean Natural Farming and JADAM can do.
This is all Natural, all organic, all homemade inputs. I just want to prove to you all, the entire community, and the entire cannabis industry that you don't need to drop money on your inputs. You can source everything yourself!
Remember, Bottles are for Babies! 🍼 👶
You don't need to buy into anything, you don't need to invest in anything, but YOURSELF!
You are the most valuable tool, you are the most dangerous thing on this Earth 🌎
I want to be a resource to everyone and anyone who is willing to be open minded and learn. It doesn't matter your background, where you live, what color you are, or what is in your past. Your future and the future of this Earth is in your (our) hands. Togetherness over oneness
Anyways, weekly compost tea applications and quality compost gets you gold!
Also hand crafted inputs with love makes a huge difference. Use what you have near you, if you are wildcrafting inputs, be sure to not take from nature without giving back. Recycle, use less chemicals, pour your extra compost tea in your community.
We can stop this wild climate change, but we can seriously slow it down, almost completely if we all do our part.
I hope these posts inspire you to go down that rabbit hole 🐇 🐰 and get your hands dirty.
Use and reuse the same soil, use larger pots or go in a living bed if possible.
Have fun and learn something each day, pass on love ❤️ 😍 learn from your mistakes, that is what makes us stronger. No matter the mistake in your garden, or in life, we can always learn something new about life and ourselves.
You are not alone on this journey, I got your back, and I truly believe in you.
Peace and blessings to all!
❤️ 💙 💜 💖 💗

Likes
14
Share


@Shellshocked
Follow
Skipped a week so that the weeks in the diary were the same age as the new plants also took over my wife's aquaponics ak auto flower that is 4 weeks old so ill add that into the grow. The aquaponics plant was in rough shape it was showing huge signs of cal mag def. So I went to the local fish store and bought a cal mag substitute that's safe for fish also dropped the ph to 6.1 she had it at 7+ (not her fault ph metre broke )now plant looks great 1 week later after pulling off all affected leaves. Nothing new with the girl sco8t cookies except I fed today 1 gsc starting to lighting up
Processing
Likes
3
Share


@Bloom_Room_By_Jared
Follow
4/16: I’m really not happy with her....she really needs to start swelling up
4/17: seeing a little deficiency with her gave her a little cal-mag bump
4/19: I took off 5 leaves that had patches on them


Likes
8
Share


@Delta_9NPK
Follow
Ciao!
Questo è il mio primo EP su Growdiaries sono davvero entusiasta!
Oggi 8 febbraio ho messo a germinare le tre piccole di casa Barney's.
i semi sono posizionati all'interno di un vassoio da germinazione sto usando un tubo riscaldante e una centralina InkBird per la temperatura così riesco a mantenere la temperatura sui 22/23°C con un RH %80
Sto usando il metodo del fazzoletto umido, spero che in 24/48 ore la radichetta spunterà dai semi!
Oggi 09/2/2023 tutti e i tre semi hanno germinato! Successo del 100%
Mi colpisce il vigore della Tropicanna Banana!
Invece la gelato mi da l'aria che sarà una bella signorina capricciosa! Come si sul dire ogni riccio un capriccio🤣
Ora i semi sono stati inseriti nel soil per la precisione Ligthmix della BIOBIZZ con un aggiunta di micorizze per la precisione Mycos di Xtreme Gardin!
Ho nebulizzato con acqua decantata e ph6.3.
11/02/2023
Ed eccoci con il nuovo aggiornamento del Ciclo TheBarney's!
Le piccole sono tutte e tre spuntate neo tempi previsti sono davvero felice per la loro vigorosità!
La Tropicanna è la Gelato presentano un piccolo problemino nel staccare l'embrione del seme dai cotilodoni, per darle una piccola mano ho nebulizzato a distanza un pò d'acqua.
Ho evitato di provare a toglierlo con una pinzetta per paura di danneggiare le piccole plantule, sono sicuro che riusciranno da sole a risolvere questo piccolo fastidio.
Ho deciso di accendere la lampada impostandola all'incirca al 20% (60W) a una distanza di 50cm circa.
Non ho un misuratore di PPFD per mia sfortuna sarei stato più preciso nel impostare la potenza e la distanza della lampada😓 ho impostato il classico ciclo di luce 18/6.
Ho aggiunto un ventilatore oscillante della Secret jardin per smuovere un pò l'aria.
Ora con tanta pazienza e amore aspetteremo la loro crescita! Sono davvero curioso di vedere quanto tempi ci metteranno ad entrare nello stadio di Vegetativa!
12/02/23
Ciao a tutti growers eccoci qui con un nuovo aggiornamento sul cultivo TheBarney's!!
Le tre piccole si sono allungate un pochino, ho deciso di fare un piccolo refill con terreno e dare una piccola nebulizzata.
Oltre a questo le ho tolte dal box di germinazione e aggiunto un umidificatore collegato a una inkbird per mantenere costante un Rh tra il 70% 80%, pian piano abbassero l'umidità fino a stabilizzarla sui 65% 70% di RH.
Per il resto nulla di nuovo...
Ci sentiamo prossimamente per nuovi aggiornamenti sulle piccoline rimanete connessi e lasciate mi piace🙏💚
17/02/2023
Ecco un nuovo aggiornamento sul ciclo TheBarney's!
Le piccoline pian piano crescono, oggi concludono la prima settimana come plantule!
Si sono un pochino allungate e per sostenerle o fatto un piccolo refill di soil e ho irrigato con 15ml a testa di acqua con ph6.3 e Herba power (Ammendante) 0.5ml per Litro d'acqua.
Per questo aggiornamento è tutto ci sentiamo prossimamente!
20/02/2023
Eccoci con EP nuovo sul ciclo TheBarney's!
Le piccole oggi hanno subito un travaso le ho messe in airpot da 3L e irrigato con acqua ph 6.3, ammendante (herba Power) e un estratto di alghe (Herba Sweed) EC 0.45
Esattamente oggi sono 10 giorni che si trovano nello stadio di Plantula, le prime foglie a 3 punte stanno sbucando speriamo presto di vedere quelle a 5/7 punte e finalmente si inizierà con la fase vegetativa!
Tutto sommato le vedo in salute hanno un bel colore, il vigore della Tropicanna e della Gelato mi sta sbalordendo!
Per ora è tutto! Al prossimo aggiornamento 💚


Likes
10
Share

@Miketama
Follow
Day 86 ❄️ Northern Lights Auto – Harvest Update (Fresh Frozen & Dry)This specific plant was grown all by itself in its own pot (unlike the other pot where I had 2 plants sharing the space)
Total Wet Weight: 190g
Dry Flower: 91g of unexpectedly dense buds have been set aside for a traditional dry and cure for smoking.
Fresh Frozen: 65g of prime material went straight into the freezer for a future bubble hash extraction run.
Waste: The remaining weight was trim and non-resinous fan leaves.
Final Thoughts: Totally surprised by the incredible bud density on this run! I am extremely satisfied with the results of this cycle, especially considering the dialed-in light hours and my setup focused on recycling the soil and organic nutrients. Can't wait to see how the dried flowers smoke and how the fresh frozen performs in the wash.

Likes
6
Share

@420DeepGrow
Follow
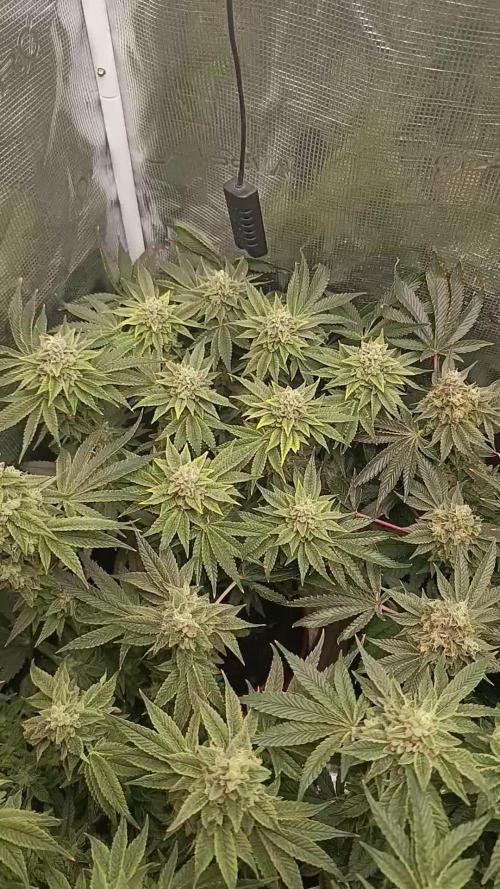
📆 Semana 9
El engorde continúa su curso, con los cogollos ganando densidad y peso de forma constante, apretando bien los cálices y acercándose poco a poco a su forma final. La estructura ya está completamente formada, centrando ahora la energía en la compactación y el volumen.
La resina sigue acumulándose en capas más gruesas, aportando un aspecto cada vez más cubierto y brillante. El perfil aromático se vuelve cada vez más complejo, combinando notas increíblemente ácidas con matices de lavanda, melón y un fondo amaderado que empieza a marcar el carácter final de la genética.
Seguimos creciendo fuerte 💪!