


Likes
Comments
Share


@Bwright_315
Follow
Wow what a difference a week makes. The one I topic thriving a d growing with no issues.
The one that was last week losing all it fan leave seem to be making a great recovery and looking better the ever

Likes
19
Share


@Naujas
Follow
everything turned out very well :) and it's only with 50w and with 40x40cm space :) It was an interesting journey with her, a slightly different cultivation and old mistakes were discovered :) the flowers are not dense, but they are really very, very sticky :) I'm happy:)

Likes
46
Share


@Roberts
Follow
Drunken Bitch Slap has been growing great bbn under the Hortibloom Solux 350. I just changed her solution today. She is in the midst of bulking now. Super frosty and sticky buds. It looks like vg it is gonna be a excellent smoke. She probably has about 3 weeks left till harvest. Everything is going great. Thank you Hortibloom, and Aeque Genetics. 🤜🏻🤛🏻💪🏻❄️🌱
Thank you grow diaries community for the 👇likes👇, follows, comments, and subscriptions on my YouTube channel👇. ❄️🌱🍻
Happy Growing 🌱🌱🌱
https://youtube.com/channel/UCAhN7yRzWLpcaRHhMIQ7X4g

Likes
18
Share


@The_Lonely_Farmer
Follow
The cycle of the strain is really easy too grow given the correct conditions.
Overall great strain too grow I found a few issues having a mixed strain photoperiod/autoflower tent whichbin future will not be happening again.
Flower at end not all there the heats being experience has been hard too control but stil pushed through.
The younger bonsai got the chop days earlier with the older tropicana too follow, I'll be returning too the tropicana ff range too run only ff range too get full potential in future and focus on those solely.
The end flower was hit with high heat but has been put in for a long cure too see what we can save wheather that be for rosin or flower 🌱
Dry weight after the high heat it's been put through was roughly 38gran for the older girl and just over 26gram for the shorter bonsai with around a total of 64 excluding testing smoke what not...
Processing
Likes
20
Share


@French__flair
Follow
Dernière semaine de croissance.
Changement de solution fait le dimanche 22/11 car le ph commençait à descendre en dessous de 6.2 et cela faisait 1 semaine que j'avais fais le précèdent changement.
Le PH lors du changement était de 6,8. Il est monté jusqu'à 7.5 mais je laisse le filtre faire son oeuvre. Il est actuellement à 7.1 et continue de descendre naturellement.
carence en fer. Ajout d'une dose supplémentaire de Sensi CalMg
Edit au 25 :
Malheureusement ce que je sentais venir est arrivé, saturation en N.
Le Ph et l'EC continuaient de baisser tous les deux. Les parties basses des plantes étant sombre et ayant une carence en fer sur la partie haute (puisque élément mobile), j'en ai déduit que c'était une carence en fer induite par une surfertilisation en N. J'étais à un EC de 1, je suis revenu à 0,8 le mardi 25 au soir. La bioponie est très capricieuse au niveau de l'azote. Le mercredi 26 le ph remonte ce qui signifie qu'on a stopé le processus de dégradation du N. Je devrais changer la solution mais je dois passer bientôt en flo donc j'ai enlevé de l'eau et rajouter, histoire de tenir jusqu'au prochain changement de solution qui est prévu samedi sauf si la situation dégénere de nouveau avec le PH.
Last week of growth.
Change of solution made on sunday 22/11 because the ph was starting to drop below 6.2 and it's been 1 week since I made the previous change.
The PH at the time of the change was 6.8. It went up to 7.5 but I let the filter do its job. It is currently at 7.1 and continues to drop naturally.
iron deficiency. Addition of an extra dose of Sensi CalMg
Last update :
Unfortunately what I felt was coming has happened, N saturation.
Ph and EC both continued to drop. As the lower parts of the plants were dark and iron deficient (on top because is mobil nutrient), I deduced that it was an iron deficiency induced by N overfertilization. I was at an EC of 1, I came back to 0.8 on Tuesday evening the 25th. Biopony is very capricious in terms of nitrogen. On Wednesday the 26th the ph goes up which means that we stopped the N degradation process. I should change the solution but I have to float soon so I removed some water and added more, to hold until the next change of solution which is planned for Saturday unless the situation degenerates again with the PH.
Ultima semana de crecimiento.
Cambio de solución hecho el domingo 22/11 porque el ph empezaba a bajar de 6.2 y ha pasado 1 semana desde que hice el cambio anterior.
El PH en el momento del cambio era de 6,8. Subió a 7.5 pero dejé que el filtro hiciera su trabajo. Actualmente está en 7.1 y sigue bajando naturalmente.
deficiencia de hierro. Adición de una dosis extra de Sensi CalMg
Ultima hora :
Desafortunadamente lo que sentí que venía, la saturación de N.
El pH y la EC continuaron bajando. Como las partes inferiores de las plantas eran oscuras y con deficiencia de hierro, deduje que se trataba de una deficiencia de hierro inducida por la sobrefertilización de N. Estaba en un EC de 1, volví a 0.8 el martes 25 por la noche. La bioponía es muy caprichosa en términos de nitrógeno. El miércoles 26 el PH sube, lo que significa que detuvimos el proceso de degradación del N. Debería cambiar la solución pero tengo que flotar pronto así que saqué un poco de agua y añadí más, para mantenerlo hasta el próximo cambio de solución que está previsto para el sábado a menos que la situación degenere de nuevo con el PH.


Likes
13
Share

@Ribemarti
Follow
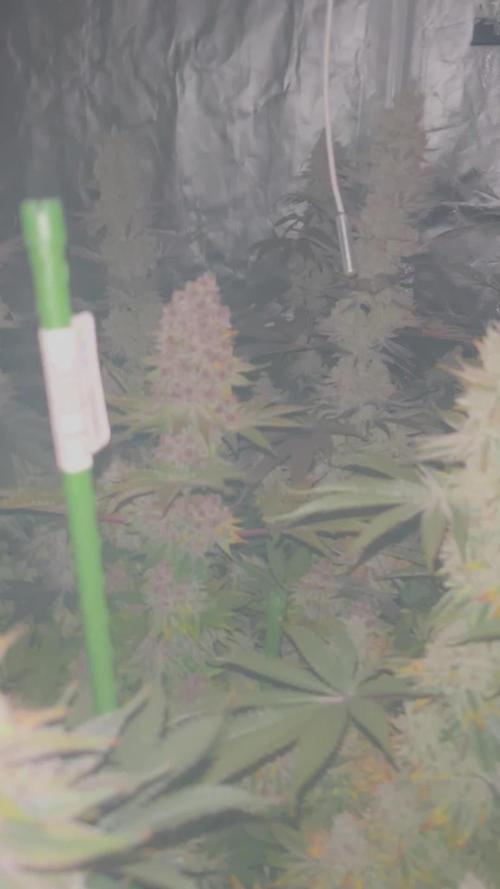
Feliz año nuevo,Ya he cortado 4 plantas, quedan 19 que estare cortando durante esta semana, estos ultimos dias he bajado la temperatura a 19 grados para que acaben de sacar su color,estan duras como piedras, llenas de resina y huelen un monton

Likes
3
Share


@LAShugars
Follow
Added a few 6ft bamboo poles for support. She’s going to be a thick girl ❤️
She already smells pretty loud! Can’t quite describe it yet other than mouth watering.


Likes
119
Share


@Tropicannibis_Todd
Follow
💩Holy Crap Growmies We Are Back💩
Well growmies we are at 63 days in and everything is going as good as can be 👌
👉 So even with some major issues in the early stages , shes bounced back as good as expected 👍Or better 👈
Lights being readjusted and chart updated .........👍Even with early major issues due to the soil/medium she's come a long way 👈
👉I used NutriNPK for nutrients for my grows and welcome anyone to give them a try .👈
👉 www.nutrinpk.com 👈
NutriNPK Cal MAG 14-0-14
NutriNPK Grow 28-14-14
NutriNPK Bloom 8-20-30
NutriNPK Bloom Booster 0-52-34
I GOT MULTIPLE DIARIES ON THE GO 😱 please check them out 😎
👉THANKS FOR TAKING THE TIME TO GO OVER MY DIARIES 👈
Likes
218
Share


@DevilsBud
Follow
NEW WEEK 7 OF FLOWERING
CRITICAL BY RQS
Woohoo soooooo excited 💪🏻🤯🤘🏻
I am normally not so excited with certain things but these grows have definitely made me get excited every new week . It also calms me down a little bit with stress and helps calm my nerves somewhat. Also normally not very talkative to others but with the nice community of growers we have here it makes you want to start conversations and it helps knowing you get trolled etc .
Tomorrow First day update
Day 42 of flowering Critical
Hallo guys/girl's not a lot to say it's a waiting game now critical will be cut down earlier then the cookies gelato will . i can take 100 of the same photographs but it gets a bit boring so I will update every day but maybe not ram it full with photos . The Critical are doing good getting very nice looking buds but has a way to go for sure and they are drinking a lot! I made Video again so enjoy 🤘🏻🤘🏻
Come look at my other diaries! I appreciate it a lot 🤘🏻
visit www.marshydro.eu
for your best gear and use the PROMO CODE: DEVILSBUD
And you will get a nice discount.
Day 43 flowering Critical
This morning with lights out i gave a nice batch of advanced Nutrients It's overdrive time . So far so good humidity good temp good plants looking good. What those grower want more 😎 . The marshydro TS-1000 is doing a great job nothing to complain about top notch TS series has all the new light functions and technologies with affordable prices and different sizes to fit all kinds of grow scenarios and grow needs. Their aluminum reflective hood design is our patented design, to decrease light loss and increase light efficiency.
Come look at my other diaries! I appreciate it a lot 🤘🏻
day 44 flowering critical
Nothing really to say other then it's going good and smell like a
Day 45 flowering Critical
Critical looking good i am really excited about the cookies gelato because we don't have it here . But the buds on the critical are looking very nice . gave this morning the nutrients they need .today i got package delivered and i was stunned what was in it 🤯🤯🤯🤯🤯🤯🤯🤯 i will reveal later on but holy hell that made my day and probably week 😂😂 only thing i can say is 8X5
Day 46 flowering Critical
Also the Critical are drinking good a little Les then the other ones but gave the Critical 1L pH 6.6 water. Also learned i wish lesson to not remove ScrOG netting this far in. Trying to cut netting From the middle and went for the critical plant to cut around plant didn't like that and was waving all the way the wrong way so i ditch cutting netting further rookie mistake but only one little bud got lost in the process . At least i learn not to do that again lol try to video the tricomes on snapped little Bud
Come look at my other diaries! I appreciate it a lot 🤘🏻
Day 47 flowering Critical
One critical that i cut out of the net is dangling a little but but nothing to worry about yet maybe after the buds get heavier but now it's still safe 👍🏻
Day 48 end of week 7 flowering Critical
It was more interesting week for the critical cutting the net this far in the grow not a good idea but have learn from it.
On to the next Week Growmies
Also want to thank everybody for the comments likes etc you know who you all are 👍🏻😍👍🏻
visit www.marshydro.eu
for your best gear and use the PROMO CODE: DEVILSBUD
And you will get a nice discount.

Likes
88
Share


@Kitties_and_Colas
Follow
~_~_~_~_~_~_~_~_~_~_~_~_~_~_~_~_~_~_~_~_~_~_~_~_~_~_~_~_~_~_~_~_~_~_~_~_~_~_~_~_~_~_~_~_~_~_~_~_~_~_~_~_~_~_~_~_~_~_~_~_~_~_~_~_~_~_~_~_~_~_~_~_~_~_~_~_~_~_~_~_~_~_
❤️💡🌱😽💨
It's been a pretty good week, buds are stacking up super fast and i really like the spacing on 2 especially (one is a little too tight)..
We were getting some yellowing on the tops so we dimmed the light to 60% (from 75%).. a light meter would go a long way here lol.. no new calcium def spots though so i think we're finally good there.. we recently bought a 5x5 tent to replace this 4x4 and hope to have it up by next week! Thanks for dropping by guys and happy harvests!
~_~_~_~_~_~_~_~_~_~_~_~_~_~_~_~_~_~_~_~_~_~_~_~_~_~_~_~_~_~_~_~_~_~_~_~_~_~_~_~_~_~_~_~_~_~_~_~_~_~_~_~_~_~_~_~_~_~_~_~_~_~_~_~_~_~_~_~_~_~_~_~_~_~_~_~_~_~_~_~_~_~_

Likes
30
Share


@CanadianFillmore
Follow
Welcome growfessors to another weekly update on the outdoors grow! LSD and Green Crack are budding nicely, with LSD slightly a head. Both ladies got fed Gaia Green power bloom and they got a big drink of water.
Thanks for stopping by growfessors 👽🌳💚

Likes
40
Share


@Chubbs
Follow
420Fastbuds
Apricot Auto/Week 3
What up grow fam. Weekly update for these stunning girls. Up to this point they've been growing picture perfect . Not really doing anything special besides still feeding nutes every other watering 500ml. I'll double the feed this week taking it to 1000ml/1 liter per every other day. Not seeing any burn signs from introducing nutes so will keep that the same strength. All in all Happy Growing
Likes
23
Share


@adam_pawloski87
Follow
This week went very well! One will be getting cut an hung to dry while the rest finish up with one more week of flush ! These ladies are smelling so lovely I hope you all enjoy! Stay tuned for next week! Cheers 😤💨💨💨💨💨


Likes
15
Share


@eldruida_lamota
Follow
Esa familia, otra cosecha más, no tan contento esta vez la variedad en si está buena pero su cultivo es algo complicado y no está estabilizada la genética, los días de floración son más de 55 días como dice el banco,más de 3 meses de floración con estos ejemplares...
Pero mereció la pena esperar el colocón es bastante fuerte, para mi que , sativa dominante a mi parecer, 24% de thc , cruzada entre cookies x OG Kush , muy productora en general. Así esto es todo , pronto más trabajos, buenos humos familia.

Likes
44
Share


@Haoss
Follow
Active flowering began 😈, I gave fertilizers from the second week of flowering
Likes
2
Share


@PatriciaGant
Follow
and every day we come closer to harvest hmmm time is torture now. best grow i ever done nutrients controlled only once in week plant very vorgiving all my mistakes. awesome. i bend the side down and well im breake it so i hope he will survive and i call it planed HST.
Likes
4
Share


@SamDo
Follow
🇺🇸 Grow Journal – Week 12 | Pineapple Upside Down (Veg)
Week 12 of veg — the Pineapple Upside Down is cruising steady and looking stronger than ever.
I’ve been letting her just do her thing, focusing on recovery and structure before deciding if I’ll top her later.
At this stage, it’s all about patience and letting her build up natural vigor.
Nutrient-wise, still running the Athena Blended line, holding the mix at EC 1.4.
I’ve been experimenting with Athena Balance, and I have to say — it’s impressive.
My base water pH usually fluctuates between 6.3 and 6.8, depending on the day.
I add 1 ml of Balance, which actually brings it up close to pH 9.3.
Once the nutrients are mixed in, the solution drops back down to around pH 7–7.2,
and from there I fine-tune it with a touch of pH Down to land right around 6.0–6.1.
I allow a gentle drift down to 5.8, but whenever it hits that mark, I bump it back up slightly to keep things steady around 6.1–6.2.
Honestly, Athena keeps the reservoir incredibly clean — crystal clear every time.
It’s one of those small details that really makes a difference when you’re running hydro long-term.
Temperatures are holding around 22–23°C, with humidity between 70 and 75%,
which keeps the environment perfect for steady vegetative growth.
She’s lush, healthy, and just waiting for her turn in the flower tent —
if I had more space, she’d probably be flipping already.
That’s about it for this week — nothing flashy, just solid progress and patience.
Can’t wait to see how she performs once she hits flower.
Thanks for following along, growers — see you next week! ✌️🌿

Likes
4
Share

@Budette_Botanics
Follow
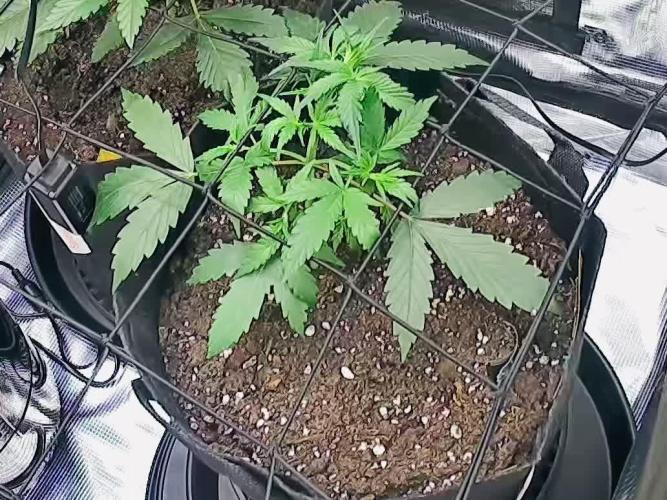
Much better week of growth, applied some LST, which helped a lot. The net has helped continue to help the light reach the new growth, and also even out the canopy. She was getting quite over crowded, a lot of leaves were shading the new nodes, and tucking leaves was doing more harm than good.. so we had a defoliation. Hopefully that will help going forwards. I’m very intrigued to see what I end up with come harvest, it feels like it could go either way at this moment. Time will tell!