


Likes
30
Share


@valiotoro
Follow
Hello everyone week 4 of flower has passed for this Skywalker haze auto 💥
Mars hydro SP-6500 75%
Same feeding schedule
have a great day and wish you all happy growing 😎👨🌾🏻

Likes
9
Share


@Headies
Follow
So I have spider mites. I screwed up so much i think this is going 15 weeks. Lost coast to the rescue! time to finish these buggers off

Processing
Likes
4
Share


@CrookedyNook
Follow
Sadly, this week might be the end of this grow. We had a water pipe break. Flooding in the house. Releasing mold and allergens in the air that are making me have to leave the home. Made worse by floor dryers. Post cancer, my immune system is still weak. I’m bringing in an environmental inspector. I need to find out if the plants are affected. Or, if they would have ill effects on me. 11/28 - I’m going to keep going for at least the experience. I’m not quitting. We will have anything harvested checked. Or, I’ll just dispose of it. I haven’t decided. I can’t find a clear answer on safety issues. Let’s see what happens!
Likes
10
Share


@StickyFingah420
Follow
Día 72 desde el nacimiento y es así como va tomando su forma final esta hermosa planta, la producción de resina y colores es hermosa, los aromas que expele a fresas y crema casi se puede saborear, una locura total.
BUENOS HUMOS! 👽
Likes
4
Share


@ChrisFunk
Follow
Week 3 of Flower for the FX3 #1 and Lucky 13, the FX3 #2 and Sergeant Sherbert have just started flowering this week after moving from the Veg Tent Into the new 150x150 tent.
The Greenhouse food has been amazing completly stress free and the plants look amazing especially in combination with the Autopots! Gonna do a good defoliation and clean up the lower a bit. Stay tuned family and happy growing!!!


Likes
6
Share


@Jack_Greenstalk
Follow
if i grew this again i'd make a mother plant, take clones and veg for short time and flip sooner then I did this round. Although people say lec 315 can be 18 inches from canopy (exactly where the platinum yeti was when finished stretching) the trichomes were just milkying up at day 66 of flower prob can run this one a little longer then i did to increase yield a bit more to allow buds to fatten out more and go more to amber trichomes.
Smell: Gas ⛽ on jar opening. Ground up has Vanilla 🍪 perfume
Taste: Movie theatre butter 🍿 fuel⛽ baked buttery vanilla cookies 🍪
Medical Effects: night time smoke! crazy couch lock, very sedating, helped me sleep😴 strong pain reliever. narcotic type high, slows thoughts down to clear focus calm. I felt glued to my chair more then any strain I've ever tried before. Great stress reliever
Notes: refer to this one as the "purple pheno" One of the most attractive smelling strains I've ever come across👃👀 when you smell it you want to smoke it. after smoking it you want to smoke more of it... but its pretty potent so this one is likely to end your night once you start on it!😎👌💨😴😴 yielded 23 grams of flower dry
#3 green pheno-
Smell: Lime with subtle skunk & burnt rubber
Taste: Lime peels and burnt rubber
Medical Effects: Very Sedating, stress reducer. slows thoughts down
Notes: stayed green entire grow, yield 22.4 grams dry flower
Likes
28
Share


@eldruida_lamota
Follow
Que hay familia, vamos con la tercera semana de floración de estas Apple Fritter de Zamnesia.
La temperatura está entre los 21/24 grados, la humedad está entorno al 55%, y el ph lo mantengo ahora al principio en 6.2, el foco por supuesto está enchufado 12 horas , tener tienen que crecer fuertes.
Y aparte añadimos nutrientes de Agrobeta, que no puede faltar semejante gama.
Todo correcto hasta ahora, ya cara a la floración veremos cómo avanzan las próximas semanas.
Os comento que tengo un descuento y para que compréis en la web de Zamnesia de un 20%, el código es ZAMMIGD2023
The discount 20% and the code is ZAMMIGD2023
https://www.zamnesia.com/
agrobeta: https://www.agrobeta.com/agrobetatiendaonline/36-abonos-canamo
Mars hydro:
Code discount: EL420
https://www.mars-hydro.com/
Hasta aquí es todo, buenos humos 💨💨💨.

Likes
12
Share

@SwabianMadness
Follow
Don’t have real Stretch. How i expected.
I defoliate her because the tiny Buds at the Sides don’t have Light. Now we can see what hangs on it 🙂👌🏼
Just added 1,6ml Calmag this Week

Likes
24
Share


@eh_eh_eh_buds
Follow
So at the moment im at the end of week 1 flower... i do not own any type of real fans operating in tent other then just a couple house hold fans and no ducting of any type running.. at the moment the smells are getting a bit faint in the air, its similar to a skunky coffee bean when i open the tent, i honestly love the smell personally lol.
Likes
7
Share


@Dairon
Follow
Día 24 de crecimiento, voy a trasplantar a macetero de 3l para ocupar todo el area de cultivo, haciendo SOG. en pocos días pasaré a floración, previa poda apical para estimular el crecimiento y aumentar la producción, debido a que las sativas del armario de floración van a tardar bastante, voy a experimentar un poco y dejarlas donde están, a ver que sucede al pasarlas a floración y como se comportan bajo luces con un espectro de crecimiento (led citizen 4000K). Cuando trasplante, usaré micorrizas para estimular la vida microbiana del sustrato y pulverizo con acti vera y Alg a Mic para que sobrelleven mejor el estrés de trasplante, buenos humos!!!👌👌😃
Likes
207
Share


@DogDoctorOfficial
Follow
Week 12 day 79 Flower and they keep on going 🤯😳😅 i do believe that some point this week they will go to sleep for 24h and harvest mode will be put on for this beautiful phenotypes … im soo in love with everything on this run, the seeds they are great , the nutrients are amazing , the light is performing amazing, felling supper humble and blessed with it all .
Day 82 Flower and this girls are ready to come down 😇 i will give them a 24 mb 36 hours dark before harvest them . Man am i exited for this one or what , yes i am , yes i am hehehe cant wait to do a proper smoke test 😍
Growers love to you all , and as always thank you guys for reading my diaries , i truly appreciate your time , your love and it all 🙌🙌🙌
And with enormous honor and pleasure that i start collaborating with Zamnezia and Viparspectra
For this run i will have the pleasure of growing some Runtz genetics from Zamnezia seeds that they wore kind enough to send me for test and review 🙏🙏🙏💚💚💚🙏🙏🙏 and for the testing and reviewing i was blessed with the VIPARSPECTRA model P2000💚💚💚🙏🙏🙏 they wore amazing and send me this LED light for me to do some testing and some reviews. Special thanks to Zamnezia and to Viparspectra for this opportunity, lets make magic together 💚💚💚🙏🙏🙏
All i grow is medicine for myself, for me and for my best friend with is me 😆 nothing to sell, so don’t even ask 😅💚💚💚
All info and full product details can be find in can find @
https://viparspectra.eu/collections/grow-lights DISCOUNT CODE 5% - DOGDOCTOR ( all store )
https://www.zamnesia.com DISCOUNT CODE 10% - GROWITGD ( just for seeds )
https://aptus-holland.com/
More info and updates @
https://growdiaries.com/grower/dogdoctor
https://instagram.com/dogdoctorofficial
https://youtube.com/channel/UCR7ta4DKLFMg2xxTMr2cpIg
💚💚💚Growers love to you all 💚💚💚
Processing
Likes
21
Share


@LittleBigTrees
Follow
The plants were so crowded I decided to put them into a Larger tent to allow some light to the lower bud sites and to help lower the humidity amongst the plants. I'm sure they will love the extra space.
The light has now been raised 20cm (20cm taller tent)
Allowing me to turn out right up which is 45000 lux in the centre right below it.
I will up the bloom to 2ml/l this coming week.
Likes
43
Share


@Sejnik
Follow
Ke konci týdne dostali poslední lehkou defoliaci.
Biobizz má sytě zelené barvy a viditelně o něco málo větší květy.
Florganics chytil světlejší zeleno žlutý odstín a má o něco menší květy. Ale má o trochu víc pryskyřice. Pokračuji v zalévání čistou vodou


Processing
Likes
5
Share


@AlbasDiary
Follow
Buenas tardes jardineros!!!
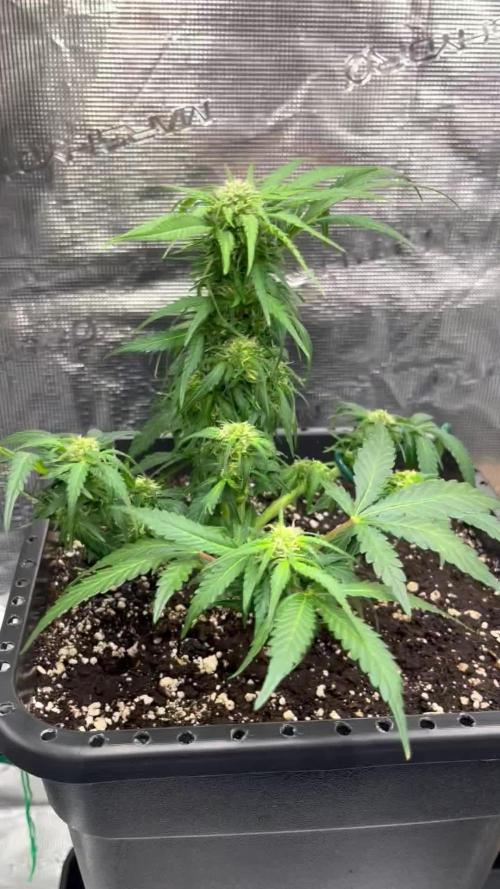
Hoy actualizo las preciosas la rica, que como podeis observar están preciosas y verdonas.
Sigo informándome todo lo que puedo sobre cultivos de interior para tener el máximo control posible sobre esta cosecha de florecientes.
De momento ni rastro de plagas, he notado como unas crecen un poco más rápidas que otras, pero la diferencia es mínima y no estoy haciendo distinciones entre ambas.
Espero que tengaís un gran día y que a pesar de estos tiempos de incertidumbre y encierro, al menos podemos disfrutar de un gran pasatiempo como es la jardinería.
Nos vemos para la semana.
MUY BUENOS HUMOS😍

Likes
Comments
Share

@SubliminalSociety
Follow
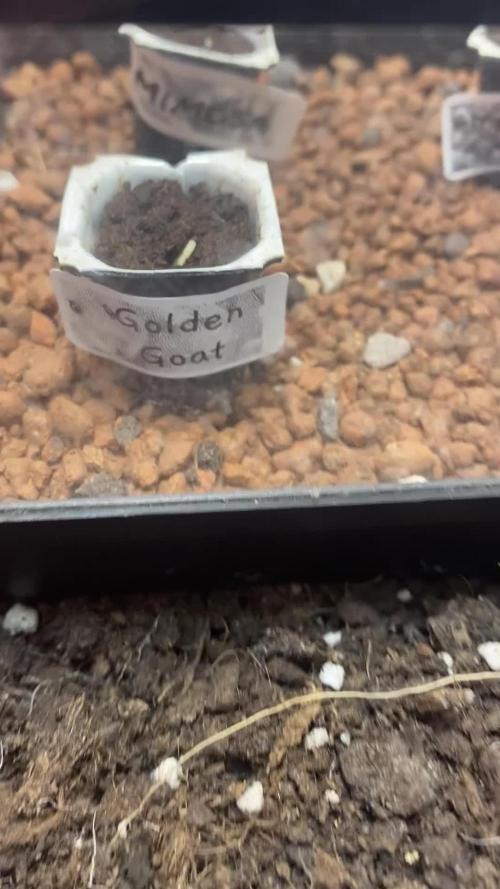
RQS propagator doing its job.
Golden GOAT was the first strain to show her stem.
Was recommended by a friend who smoked it before and loved the taste!
Processing
Likes
13
Share


@Green_Blood
Follow
On the final few days of a 10 day flush.
Will be chopping down this week to harvest and hang dry.
Really excited to try this one. The smells in the room are unreal.

Likes
3
Share

@Mr_NYceguy
Follow
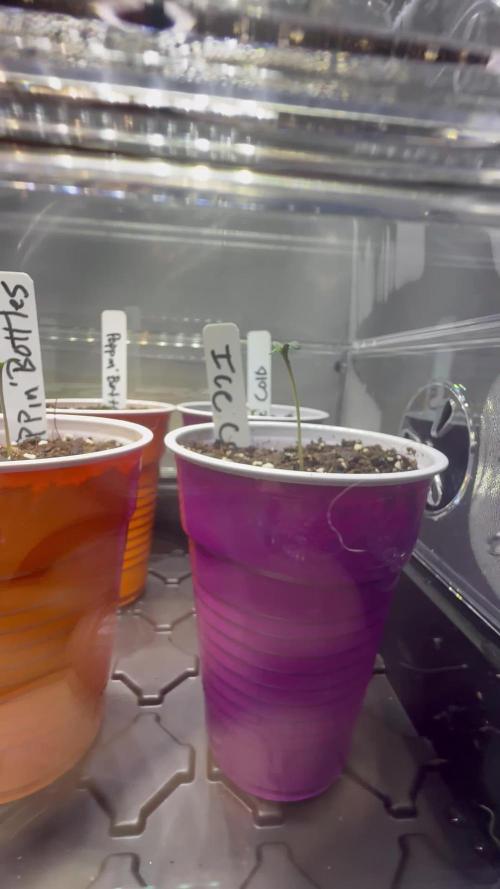
Paper towels placed between two dinner plates, placed on heating mat. 48 hours all seeds had tap roots. Placed in solo cups filled with coco loco, and sprinkled a little Great White in the holes. All seeds sprouted with in 36 hours. 76-78 degrees with 80% humidity. 100% Germination - AMAZING! #nomids