
Likes
Comments
Share


@CanarianGrow92
Follow
Week 6 already, we will add some extra PK until week 7 more or less as this strain has a little longer flowering, the buds are starting to look great, they are getting bigger and longer week by week!

Likes
17
Share


@AfroBlooming420
Follow
Not much to report. I'm watering every three days or so. Every other water they get a little unsulfured molasses mixed in.


Likes
3
Share


@High_Grade_Dadli
Follow
Moved dem girls into direct sunlight so they are getting more light coverage now....jus leave dem to do their

Likes
51
Share


@Corwinism
Follow
WEEK 16 - (06/13/2021 - 06/19/2021)
Week 8, Day 50 - FLOWER: 06/13/2021
After inspecting the trichome development for the last 7-10 days or so, I’ve decided that today would be the ideal time to begin flushing. The American Pie #1 does not look like it’s ready to begin flushing quite yet, as she appears to be about a week behind in maturity. Despite that, I’ll still begin flushing her today too.
Recycled water: 70ppm, 69℉
+ pH Up: 7ml
Mixture: 95ppm, 6.4 pH, 69℉
ppm/ppm = runoff/soil
JB#1 - 895/800, 6.1 pH
AP#1 - 529/434, 6.5 pH
AP#2 - 365/270, 6.7 pH
GC#1 - 624/529, 6.3 pH
--------------------------------------------------------------------------------------------------------------------------------------------
Week 8, Day 51 - FLOWER: 06/14/2021
Did a trichome check on the plants today. Spent more time with the Jelly Banana to better determine her maturity level. She actually looks like she is ready to harvest today. I’d say trichomes are 75-80% milky, with an amber trichome here and there.
I’m going to try and push her through at least one more low-ppm watering and test the runoff. If I start seeing more amber trichome development, I will cut her down.
--------------------------------------------------------------------------------------------------------------------------------------------
Week 8, Day 54 - FLOWER: 06/17/2021
Recycled water (8 gallons): 69ppm, 5.8 pH, 70℉
+ HydroGuard: 8ml
+ pH Up: 3ml
Mixture: 82ppm, 6.0 pH, 70℉
ppm/ppm = runoff/soil
JB#1 - 688/606, 6.5 pH
GC#1 - 602/520, 6.5 pH
AP#2 - 633/551, 6.9 pH
AP#1 - 685/603, 6.5 pH
--------------------------------------------------------------------------------------------------------------------------------------------
[SUMMARY]
I expect this to be my last full week of flower. All the girls are looking ripe for the chopping.
The aroma that bursts out of the tent when I unzip it every time is heavenly. American Pie #1
is still about a week behind in maturity, but she will get cut down with the other plants
regardless. Jelly Bananen started to turn a lime green color so she'll probably get chopped
and hung up in the next few days when my second tent arrives (4x2 AC Infinity).
That wraps up this week! See you ladies and gentleman in the next entry. 🙏


Likes
70
Share


@Smokin_Joe
Follow
Sorry for the late post - pics from weekend, just now getting them up. Added a second net to hold the weight - did some moderate Defoliation for light and airflow - lower buds are responding well now.
Seems like she was very thirsty just a few weeks ago but has slowed down. Responds after feedings well still. I think I'm a still good 3-4 weeks out from harvesting, which seems odd since my first grow with this strain only took 8 weeks in flowering, but I'll roll with it.

Likes
65
Share


@Dendegrow
Follow
Week 2 of the flowering phase flew by 🌱💨. Unfortunately, I may have overdone it with potassium or kept the water level too high – the classic signs of clawing leaves were evident. Thankfully, they seem to be recovering now and are back under control 💪🍃.
My IR night experiment is showing clear results 🌌: The plants exposed to infrared radiation at night stretched significantly more. This might be especially beneficial for this indica-dominant strain as it leads to better canopy distribution, improved airflow, and reduced risks of mold and disease. Plus, the light distribution is much more efficient now, which I’m excited to see pay off.
On the downside, my Orange Sherbert turned hermaphroditic 😔. It’s hard to pinpoint the cause – overfertilization seems unlikely since I’m using only organic nutrients. I suspect it might be linked to an E-field experiment I’ve been running. To confirm this theory, I’ll conduct a new grow with a similar strain next year to see if the electric field negatively impacts cannabis development.
Stay tuned for updates! Drop a like and follow along for more grow insights 🌿✨. See you next week!
Woche 2 der Blütephase ist wie im Flug vergangen 🌱💨. Leider habe ich wohl etwas zu viel Kalium gegeben oder den Wasserstand zu hoch gehalten – die typischen Anzeichen von Adlerkrallen waren sichtbar. Zum Glück scheinen sich diese jetzt zurückzubilden und sind wieder unter Kontrolle 💪🍃.
Mein IR-Nachtexperiment zeigt bereits deutliche Ergebnisse 🌌: Die Pflanzen, die nachts mit Infrarotstrahlung bestrahlt wurden, haben deutlich stärker gestretcht. Das ist besonders bei dieser indica-dominanten Sorte wahrscheinlich von Vorteil, da es zu einer besseren Verteilung des Blätterdachs führt. Dadurch verbessert sich die Luftzirkulation, das Risiko von Schimmel und Krankheiten wird minimiert, und die Lichtverteilung wird effizienter. Ich bin gespannt, wie sich das weiter auswirkt!
Leider hat meine Orange Sherbert gezwittert 😔. Woran das genau liegt, kann ich schwer sagen. Eine Überdüngung halte ich für unwahrscheinlich, da ich nur biologischen Dünger verwendet habe. Ich vermute, dass mein E-Feld-Experiment eine Rolle spielt. Um das zu bestätigen, werde ich nächstes Jahr einen neuen Durchlauf mit einer ähnlichen Sorte machen und prüfen, ob das elektrische Feld tatsächlich eine ungünstige Rückentwicklung der Pflanze verursacht.
Bleibt dran, lasst ein Like da und folgt mir für weitere Updates 🌿✨. Bis nächste Woche!


Likes
12
Share

@Chubbs
Follow
What up fam, weekly update on these gorgeous girls. They're showing preflowers now which I'm definitely happy as that means the stretch is almost over. I did add a 2nd scrog net its 6ft high. Over all I couldn't be happier with how they've grown. Happy Growing.

Likes
10
Share


@Elguacho420
Follow
Buenas a tod@s!!! Arrancamos con la primera semana de floración de está lemon cookie kush, con lo que respecta a la variedad va muy bien, la veo bien, vamos a ver q tal va floreciendo. Altura no mucha pero será x algún fallo mio como novato, pero bueno, de a poco se va mejorando, ya voy teniendo en cuenta varios puntos de riego y demás cositas... Bueno x el momento va la primer semana y vamos a ver q tal van las demás... Buen finde para tod@s y buenos humos... 🏻♂️👍🏻🇦🇷🤝🏻🇪🇦

Likes
11
Share

@Trinidad
Follow
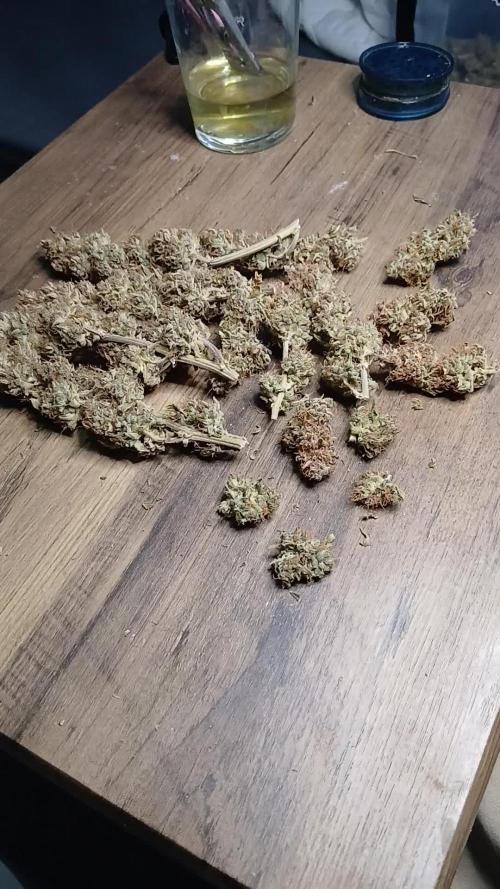
Easy grow. Trim was not too bad. I had many laffy buds in the bottom. Next time I need to lilipop more.
Likes
2
Share


@bbs42
Follow
Smell starting to kick in. Plant is drinking more water everyday. I'm no longer feeding any nitrogen

Likes
27
Share


@GODSGIFT_2005_JM
Follow
🥊
🍼Greenhouse Feeding BioGrow & Bio Enhancer
⛺️MARSHYDRO
The ⛺️ has a small door 🚪 on the sides which is useful for mid section groom room work. 🤩
☀️ MARSHYDRO FC 3000 LED 300W
☀️Also special thanks to VIPERSPECTRA P2000 (200W) & XS2000(240w) LED growlights
🌱 FASTBUDS 420
Likes
55
Share


@Max1973
Follow
Day 29 - Things going along nicely .... i trimmed down some of the bigger bottom leaves, i didn't have enough soil to fill the pots, and the plants are short, bushy, weird little things, that filled out the inside of the pots..... they are only 15cm tall, but the leaves are 10+ cm .... really weird little plants.... haha....
i decided to trim the fk out of one of the ones in the double pot, and practiced topping on her.... i'll cut her down maybe trimmer her of the pot, and focus on just the 2........ they seem to be still growing upwards, so i'm not in a hurry to put em into flower mode......... on the main one i noticed some neut deficiencies ... so i upped the neuts.... should be ok, i put a good heavy neut and it stopped the spots etc..... i think some bug or something got in the double pot and is livin in there, but he doesn't eat much, haha....... the main stalks are as big as my thumb and under each canopy is all the branches..... it's really strange, to go in under all the growth and see it all .... they look kinda small, but the entire under canopy of leaves is all full .... i'm moving the huge sized leaves out and pulling each branch up over them as they grow..... this is 21 THC and 19 CBD, so it's all the good stuff for medicine ... the smell is getting abit noticable and i'm hoping the exhaust fan arrives from china soon.... just got positive ventilation into a carbon fil. ... and daily air out........ i think i had the led lights too low..... so i'll raise em abit more and see if i can get em to stretch ....
Day 30 -- added some video's...... daylight vids... worth watchin for a laugh ...... first grow, so idk what i'm doin, ... any help/comments appreciated
Day 32 -- added some pics of the late night trim and LST,... idk looks ok....
Day 34 -- added a video...
Likes
6
Share


@Snakeking
Follow
Barely feed them with terra aquatica tripart and compost tea every 2 week.
They are happy and lush

Likes
14
Share


@Do_it_Dan
Follow
She's come along way now in the flush and hopefully chop this week, shes swealling now and oh my does she stink so gassy yet fruity, remember happy growing and stay green 😀 💚✌️
Likes
4
Share


@pzwags420
Follow
Week 7 is going smoothly so far. The flooding issue has subsided and the clones seem to be really taking off now. I'm excited to get back from vacation and really see my girls and my reservoir conditions after a 2 week hiatus.


Likes
13
Share


@Inhaledmonkfish
Follow
Amazing week buds have grown loads both plant really top heavy both smell amazing and look beautiful!!
