


Likes
Comments
Share


@Elmakka
Follow
suuuuper flowers really strong an good smell, let it dry and curing then ill enjoy it

Likes
245
Share


@Roberts
Follow
THC Bomb auto has been growing really well under the Spider Farmer 100 watt SF-1000 light. Well on its way to becoming a monster. Has been stretching all week and more signs of flowering are becoming present. Been raising the light as stretching continues. I have increased bloom and bloom booster. Will likely sep nutrition up more in a few days. Thanks again Spider Farmer. 🤜🤛
Thank you everyone in the GD community for your support. Please like, and follow along. Extra thanks to my YouTube subscribers as well. Stay safe everyone, and happy growing 🌱🌱🌱🌱🌱🌱🌱🌱

Likes
12
Share


Likes
7
Share


@Coughy
Follow
Super lazy week... noticed some deficiency from only adding water a couple times this week. I’m a few days late in reservoir change. Vegging longer than I want but all good. 😎

Likes
4
Share


@GLOrganics
Follow
Plant are under the structure i build. It will he used to provide shade, protection against moths and shelter from heavy late summer rains. Every now and then plants were trained through LST. I watered twice a day about 2% of total volume.

Likes
3
Share


@Renatissima
Follow
For sure i will keep this plant in stock. Very different and potent head high with great looking buds and strong flavor.

Likes
31
Share


@MadeInGermany
Follow
Info:
Unfortunately, I had to find out that my account is used for fake pages in social media.
I am only active here on growdiaries.
I am not on facebook instagram twitter etc All accounts except this one are fake.
Have fun with the update.
Hey everyone :-)
The growth this week is very nice :-)
This week I will give her some time with training to recover and then I will continue next week 👍.
Otherwise, as always, the tent was cleaned and the humidifier refilled.
Have fun and stay healthy 🙏🏻👍
You can buy this Strain at :
www.Zamnesia.com
Type:
Runtz
☝️🏼
Genetics:
Zkittlez x Gelato
👍
Vega lamp: 2 x Todogrow Led
Quantum Board 100 W
💡
Bloom Lamp : 2 x Todogrow Led
Cxb 3590 COB 3500 K 205 W
💡💡☝️🏼
Soil : Bio Bizz Coco
☝️🏼
Nutrients : Green House Seeds Company Powder Feeding Bio
☝️🏼🌱
Water: Osmosis water mixed with normal water (24 hours stale that the chlorine evaporates) to 0.2 EC. Add Cal / Mag to 0.4 Ec Ph with Organic Ph - to 5.8

Likes
4
Share


@blaze_fpv
Follow
Started off week 2 with heavy defoliation // they took it like champs // they instantly started to fill the space again // back right corner is still a bit behind but the rest of the canopy looks crisp 👌🏼
End of week 2 // kolas starting to form up // currently 27° at 60% // gonna lower the temp to 25 very soon // also collecting the water every day and then water them daily // gonna start using green power phosphor booster in the next week

Likes
6
Share


@DrBud420
Follow
21.06.
Dos Si Dos 33# 1# Day 56#
Dos si Dos 33# 2# Day 56#
With a little delay because I'm a lazy stoned person, and in addition the responsibilities regarding the plants are already starting to grow, and I also have a lot of work around the garden and then I don't always arrive in time to release the update.
The plants are progressing well, but now they are already hungry, so the next watering is for food.
Two days ago they were topped for the third time, I also topped the two highest side branches.
Yesterday was the end of their eighth week, the pictures are also from yesterday.
Last night I sprayed them with SMC for prevention, but none of those pests can harm the plant outside as well as inside..first of all, the plants are much bigger, and therefore have much more leaf mass, and secondly, it is nature, there are many of them in nature, the only thing that can destroy them all are caterpillars during flowering and mold when the humidity is too high or when there are frequent rains, everything else does not worry me at all.
Tomorrow I will move them somewhere where there is a lot less grass because now they have already filled this space and they can't expand any further, so in order for them not to get too long and to go wider I have to move them where the grass and other plants won't bother them.
Stay High and Keep Growing!!!

Likes
6
Share


@NiBaMeCa420
Follow
Hi guys,
Hope you are all doing well in these difficult times the upside is you can spend more time on this amazing hobby of ours.
Another week has passed and i have a few updates we are still growing on a 24 light schedule and im thinking about switching to 18-6 for the following week-week and a half of veg fase,
The growth is good but they are not very thirsty which concerns me a little but we will see what will happen.
3 of the plants have a little defect which shows it self in weird looking leaves and stunned growth don't know what is up with that but we will also see what the future brings, experience tells me that although the plant may look a little retarted that does not mean that these will not grow to be amazing plants with a big harvest
very curious to see how they are going to develop further down the road.
I stopped giving the Hy-pro Terra i love the company and their products but there is something with the Terra line that does not make me happy although it's very easy to use just one component as a base and a few optional additives it doens't give me the results i expect so i made the switch to Hy-pro Hydro Part A+B and within a day or 3 the plants have a fuller green color and the development of the plant overall is very noticeable and the stem is getting steurdier and thicker.
As for the lights they are still hanging on the same height as i started and i gave it a little more power the plants are stretching towards the light just like i wanted and when i made the switch to 12-12 i will gradually move the light lower untill it's about 30-35 cm above tha canopy and i may or may not take out met scrog netting i haven't decided yet.
That is all for this week
Hope you all are doing good stay healty and keep it green
Cheers,
Nibameca

Likes
70
Share

@Roberts
Follow
Big Fat Wedding Cake is growing great under the Spider Farmer G5000/UVR40 lights. She is starting to stack now. She has been very hungry. Everything is looking good at tye moment. Thank you Spider Farmer, Athena, and DutchFem Seeds. 🤜🏻🤛🏻🌱🌱🌱
Thank you grow diaries community for the 👇likes👇, follows, comments, and subscriptions on my YouTube channel👇. ❄️🌱🍻
Happy Growing 🌱🌱🌱
https://youtube.com/channel/UCAhN7yRzWLpcaRHhMIQ7X4g
Spider Farmer Official Website Links:
US&Worldwide: https://www.spider-farmer.com
CA: https://spiderfarmer.ca
UK: https://spiderfarmer.co.uk
EU: https://spiderfarmer.eu
AU: https://spiderfarmer.com.au
G5000 Light Amazon Link:
amzn.to/4643esa
UVR 40:
https://www.amazon.com/dp/B0BR7SGTHS
Discount code: saveurcash (Stackable)

Likes
15
Share


@DailyhighclubNLyara
Follow
CHOP CHOP
Okay so the LST worked, not great but it worked basically. The head tops from Olga and the one on the back where showing 30-40% Amber already so I decided to cut them already. I’ve read about the 2 days of darkness so I decided to give that a try. After 48hrs of darkness I chopped down the selected tops! Because it where head tops they are hanged in the closet in a dark room until the branches snaps.
After 5 days the buds where dry and I decide to cure them. I’m curing them with the Boveda 65% and its really easy. Just burp the pot once a day or a while and check the hygrometer. The first day the % was 75max and 3rd already 70%.
The rest is still going until I see enough amber spots, this cut will be done immediately after the day so I can see differences.
I’m happy with the buds and the first cut is 23g Dry weight ✌️🏼❤️💛💚

Likes
2
Share


@Thomaat
Follow
As this is my first time I just followed the instructions on the box. I watered with nutrients, followed up by a watering without nutrients.

Processing
Likes
19
Share


@NewbieDoobies
Follow
Loving this plant resilient isn’t the word she’s survived my beginners mistakes thus far and she’s thriving flowers getting nice and big now coated in crystals smells incredible few weeks left 👀
Likes
1
Share

@LveR
Follow
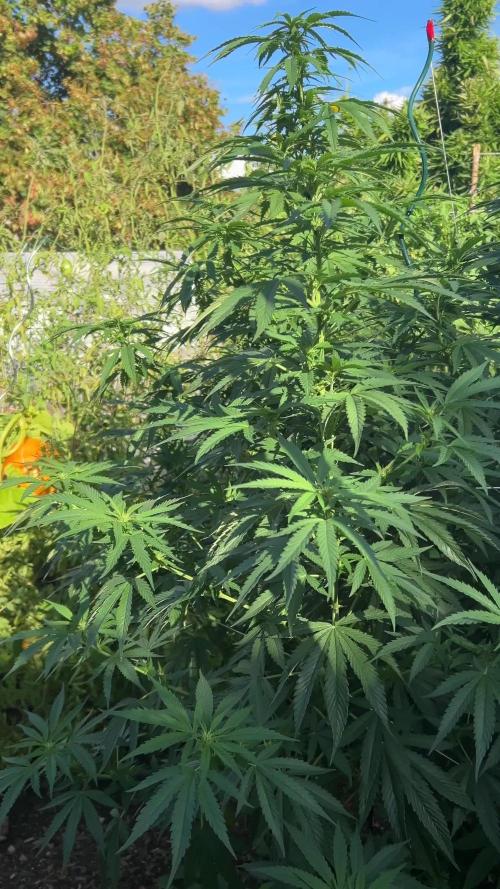
The last late 2 GG4 Sherbert (i presume) are starting to flower. Fast, maybe, but not early at all. It will end at the end of October, not what i was expected actually. But 'c'est la vie' :)
The Wedding Cheesecake is in her 4th week, budding her best life, i did a very slight defoliation, just 4 or 5 big fan leaves, and the last one who is still an unknown strain ends her second week of flowering. Reached already 150cm, a deep bottle green, nice babe. (All four are great actually)

Likes
2
Share

@Sensemillia
Follow
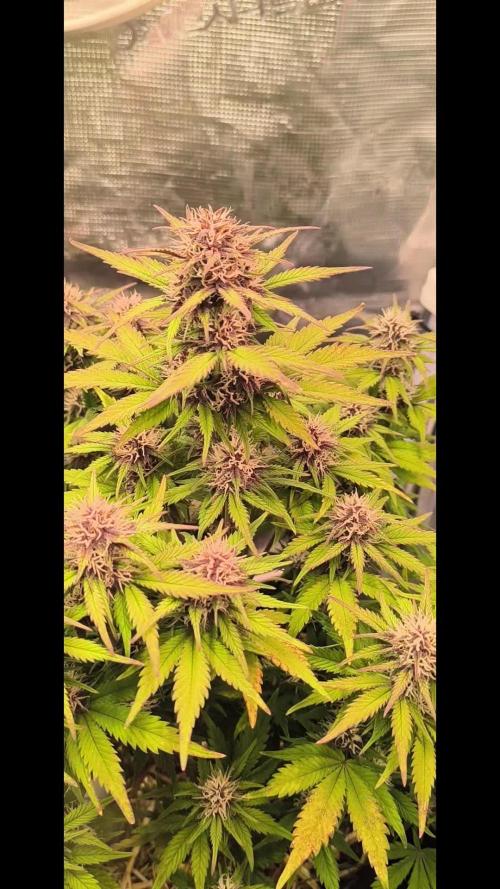
Day 43 from seed
Coming back from a N and P def.
arround 700 PPFD
0 training
Edit:
Day 48 from seed
The right one is showing purple colors on buds.
The left one looks like a freakshow but she keeps chugging on :P
Likes
11
Share


@DuckeedWizard
Follow
Patience is in fact a virtue.
I tought she was near, but to my surprise, she had a growth explosion, a lot of new calyxes!
I'll wait another week, keeping a close eye.


Processing
Likes
16
Share


@Joehydro
Follow
Finally starting to smell that heavenly smell and seeing budlets exploding everywhere. Both girls were defoliated a little at a time over the past week to expose any prime bud sites. So far both strains have been lovely and easy to grow as long as Nutes are fairly light. Will keep updates through the week and as always happy growing everyone!😊🤙
Likes
Comments
Share


@BaNanaGrow
Follow
Wurden umgetopft in 5,7 l Töpfe deshalb stehen die Blätter so tr


Likes
15
Share


@the_big_pink_place
Follow
01/03/22 Watered plants 2L of nutrient water each , assessed plants to determine what LST I'm doing, looks like these plants have potential to be monsters. Let's hope I don't fuck it up now. 01/01/22 Topped and defoliation was done, didn't water that day even though they needed it I wanted to give them a day or two from the stress they went through, watching to make sure they didn't wilt. Its paying of not listening to my ocd mind thinking I need to do something everyday, I didn't even want to top them, but they where looking very kushy type of plant. And I have trellis going in later two tiers. 01/08/22 Did a full water threw tested run off , it's sitting 800ppm above what I'm feeding, next watering straight 6.0ph water. Lights at 💯%
