Likes
Comments
Share


@Boomdrawfyah
Follow
Dia 134 y semana 6 de floración,ultimo dia de vida de las plantas.
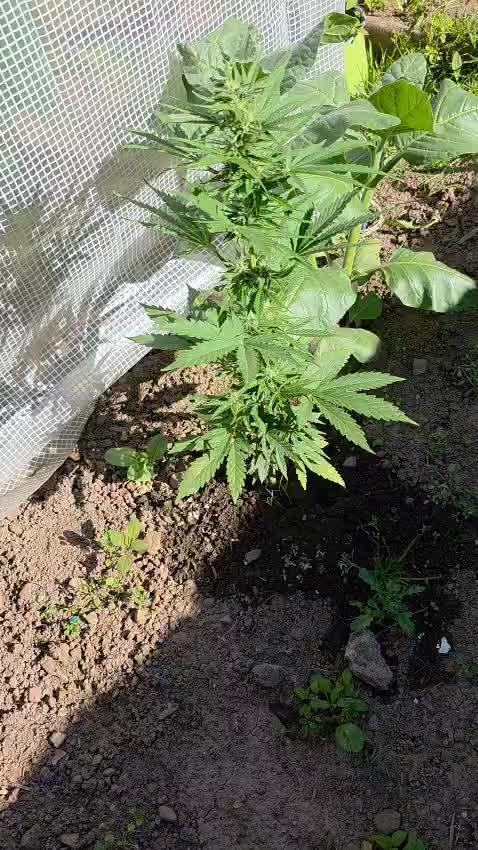
Este año ha sido un poco raro las plantas han crecido como monstruos tuvieron un crecimiento espectacular un tallo muy grande y junto con sus ramas flexibles y muy resistentes. Pero al llegar el engorde de floración no se porque les falto el empujon final para hinchar el cogollo, tiene muy buena pinta , mucha resina y muy fuerte buen olor pero me esperaba mas en la fase final. Cortamos ya que tambien habian orugas y no terminaba de eliminarlas por completo, la semana que viene era entera de lluvias así que decidi cortar un poco mas temprano para poder prevenir cualquier mal mayor, hay mucha gente que le gusta cortar antes de tiempo ya que el efecto es muy diferente, este año probaremos que tal.

Likes
3
Share

@MrGrOH1008
Follow
Did a light defol on 1. Gonna let the other just go until day 21 of flower. But yeah, these babies been a little struggle. But they’re drying out from their first real pot soaking feed. Another day or 2 and we’re gonna flip! Let’s gooooo!
Likes
15
Share

@masterofsmeagol
Follow
8/17 Watered everything but the 50. Found two leaves with sep markings on the pink kish in the 50. Definitely not using old soil again. I'm pretty sure THIS plant contracted it from the soil and not the way the others did with the lawn mower and birdseed hijinx. It's supposed to rain for the first time basically all summer. It's am 80% chance so I HELD OFF ON PLANT DOCTOR AND DID NOT APPLY as I'm supposed to have a clear day after. I'll apply the plant doctor in the morning. I'm hoping this rain will knock down a bunch of those thrips. They seem to be on a small branch on a plant or two. One or two leaves show damage and I'll pick them off. I figure I'll get them after I apply plant doctor. I'll use either citric acid or just my regular bt-k pillar treatment with Castille or liquid soap. That will kill them as well. I'm on really worried about it. I also might just buy a bunch of lady bugs and unleash them once things get further along.
EDIT: TOOK A QUICK VIDEO AND A COUPLE PICS. HOPEFULLY WE GET THIS RAIN. IF NOT IM GOING TO TREAT THE THRIPS THAT ARE ON TWO PLANTS NOW. I THINK IM GOING TO GO WITH BT-K FOR NY PILLARS AND HOPE THAT THE DISH SOAP IN THE MIX KILLS THE THRIPS. I HAVE LOTS OF DIFFERENT OPTIONS SO ILL FIGURE SOMETHING OUT. BUDS SEEM TO BE EXPLODING IN GROWTH. OH AND THANKS TO THE OUTDOOR GROWER THAT MESSAGED OFFERING TO HELP. I APPRECIATE THAT. THANKS.
8/18 We got the rain we were expecting. It was sheet rain for a few hourscand rained during the night. Everything was drenched and it was cold (50°F). I shook off the special kush that's way further in flower. I decided to use the leafblowrr despite the risk of spreading anything. I did it so that it wasn't ever blowing TOWARDS another plant but still. I was hoping it might blast off some thrips that might have survived that torrential rain. We've never had a dry summer like this. I'll moniter things. My water day is tomorrow so I assume that's when the girls will get their plant doctor dose. It's a great time of year for cannabis growers. We get to watch all the hard work we've put in literally pay off. It's very peaceful in the garden.


Processing
Likes
17
Share


@BudsBanditUK
Follow
She is now well into flower. A very light smell which is very nice. I am feeding her heavily with no issues so far. Looking forwards to this one.

Likes
5
Share
@Gorillagrower
Follow
I'm so happy to see pre flowers at 4 weeks... going into week 5 Dutch Blue Automatic is looking strong and robust growth everywhere. Thank you Marcel, @ Spliff Seeds for the opportunity to grow! Life is good! The true UVB light has been killing any insects and any mildew or mold... UVB is a must have in every garden.

Likes
101
Share


@Grey_Wolf
Follow
Dinafem Cheese
1st week of flowering
10th june 2020
Well after 5 days since switching to a 12/12 lighting regime this lovely girl is starting to bloom. 👌 😃
I gave her a feed of some Blackstrap molasses @ 1 teaspoon / Gallon (mixed with water)
also added in
Ozi Magic Monstabud @5mls/L
She hasn't stretched too much which is a relief to me and I'm now looking forward to watching her buds develop over the coming weeks 😎
the Marigold I planted as a companion has flowered now also and is a brilliant yellow colour
Thanks for stoppinng by 👍


Likes
5
Share


@banditman1200
Follow
major growth spurt with 2 Lsd-25,with one reaching for the sky .adopted 2 (green crack) looking better .also a tidy up with some slight defoliage .Also added small oil filled radiator on low setting for night time to maintain steady temp
Likes
31
Share


@Fruitgrower
Follow
17.12
F47
I am definitely thinking I mixed up the seeds now.
The 2 in the airpots are now likely to be the same strain and I'm guessing royal gorilla because of the purpleing.
The 2 in the fabric pots must be cookies gelato. They are taller, greener and way thicker stems.
If anyone could chime in and help me out identifying the two strains that would be appreciated 🤦♂️
Still no nutes given.
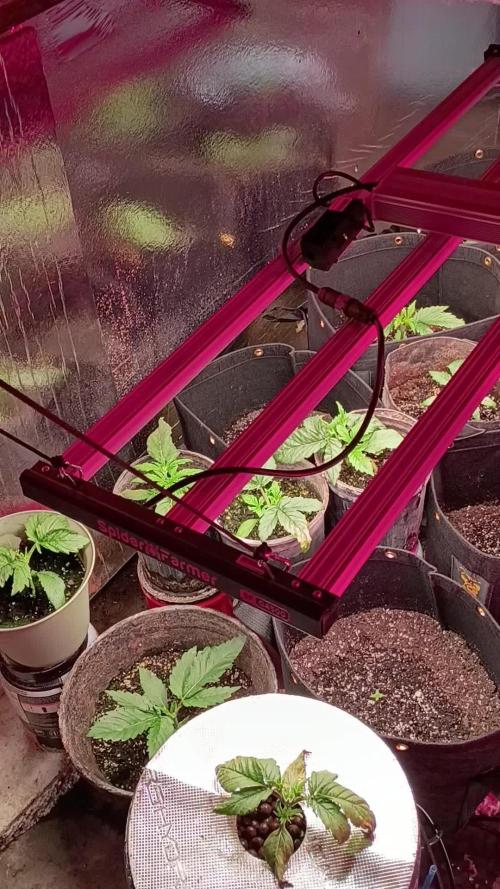
Under 12 hours of spiderfarmer light
19.12
Day 49
Noticed some odd (or not) deformeties on the 2 (what I believe to be after the potential mixup) cookies gelato....
Likes
6
Share


@LoganatorDude
Follow
Firstly, the video of the popcorn bud from the mother plant, is showing what’s known as xylem sap from a process known as guttation. I never new that until this.
Additionally, I am sorry to have missed out on so much documentation.
I can talk forever about my plants so this will be short and to the point.
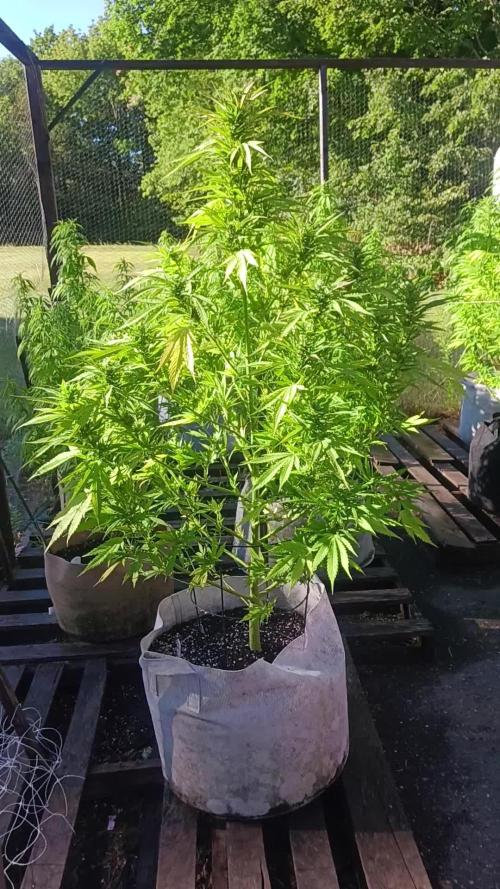
Fast vigorous growth. Very resilient and hardy strain able to shrug of cold damp conditions, and freezing nights down to 32 Fahrenheit. The immune system seemed to be very strong. Never did I find any pathogens or even pests! A few but those little ghost spiders really helped out. During harvest, a thorough inspection resulting in surprisingly clean product!
Finishing with large “airy” buds with fat bracts covered in trichomes. A rich musky cheese smell that surprisingly tastes of berries! I suppose I’m getting ahead of myself. But I was able to finish cure and smoke test the mom before harvesting the clone.
Finally: this fast 50-60 day pheno will continue popping new bracts up to 90 days!!!! Or at least the mother in the tent did.
Also, the dry weight is an approximation as I’m not finished with trim.

Likes
20
Share


@Fergie
Follow
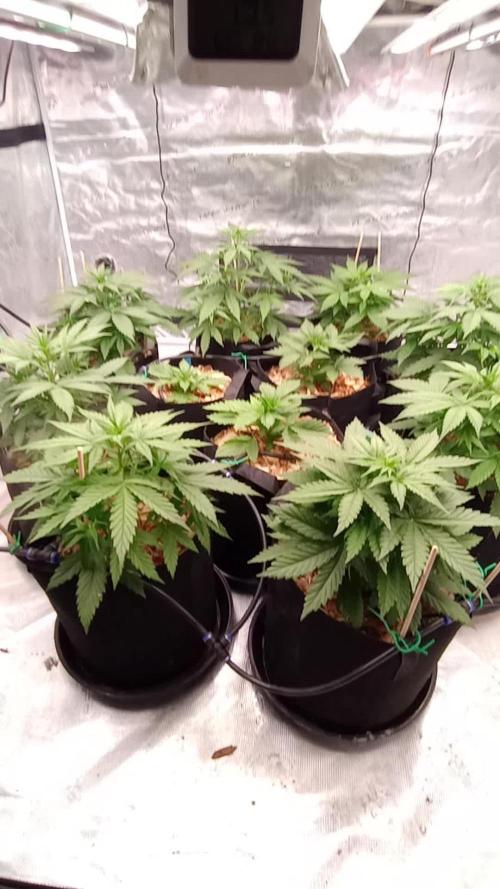
Hey guys so another week has past these lady's are filling out nicely crystals forming everywhere . All looking fantastic and should start to fatten right up over next few weeks 😀

Likes
18
Share


@Yasyjlakh
Follow
It's growing, but slowly this last week maybe it's going to enter in flowering stage?
This is the #26 day from germination, and I didn't defoliation but only LST
Likes
1
Share


@kauilmayel1996
Follow
Me está gustando mucho como huele
Muy frutal
Estoy agradecido ya que las plantas resistieron y siguen creciendo
Revisando parámetros y limpiando
Alistando para el día de corte
Likes
4
Share

@TKCS_Pinoy
Follow
🌸 Woche - Week 11 Review
🌡️ Wetter: Wechselhafter geht’s kaum – Regen, Sonne, Regen, Sonne … typisches deutsches Wetter eben 🌧️🌞.
📈 Wachstum: Höhe bleibt gleich, ganze Energie fließt in die Blüten.
💡 Licht & Energie: Trotz grauer Tage keine Spur von Stress.
🌿 Blattgesundheit: Gesund, sattgrün, wirkt robust.
💧 Wasser & Nährstoffe: Regen nimmt mir das Gießen fast ab, nur Nährstoffe gezielt gegeben.
🔄 Entwicklung: Blütenstrukturen werden dichter, erste Harzschichten sind sichtbar – Vorblüte stabil und schön ✨.
✅ Fazit: Erste Pflanze, dauert länger, aber ich bin echt zufrieden – auch wenn sie mehr Regen als ich verträgt 😅.
------------------------------------------------------------------------------------------------------------------
🌡️ Weather: Rain, sun, rain, sun … classic German weather 🌧️🌞.
📏 Growth: Height steady, all energy into flowers.
💡 Light & Energy: No stress despite cloudy days.
🌿 Leaf Health: Healthy, deep green, very robust.
💧 Water & Nutrients: Rain almost does the watering for me, nutrients added carefully.
🔄 Development: Flower sites denser, resin starting – pre-flowering steady and nice ✨.
✅ Overall: First plant, taking longer, but very happy – she handles the rain better than I do 😅.


Likes
14
Share


@Italy_Grower
Follow
12/02/2022 - are still lengthening, growth does not stop, they have gained +5 cm from yesterday to today. Some advice?
13/02/2022 - Hello everyone and happy Sunday, this morning I irrigated with a little flora grow, micro flora and calmag just a little fertilizer, not too much, very light to give a touch of color to this painting.
Humidity is always under control at 45% now. Tomorrow I will clean up and raise the 8cm lamps to favor the light intensity for all the girls. The smell it releases is shocking and we are still at the beginning. 🌲
14/02/2022 - it’s impressive how buds develop day in and day out 😮
16/02/2022 - first of all I did general cleaning of the growbox and then I defoliated the branches and the lowest buds, what do you think? Was this operation successful? 🙂


Likes
4
Share


@NordicClosetGrower
Follow
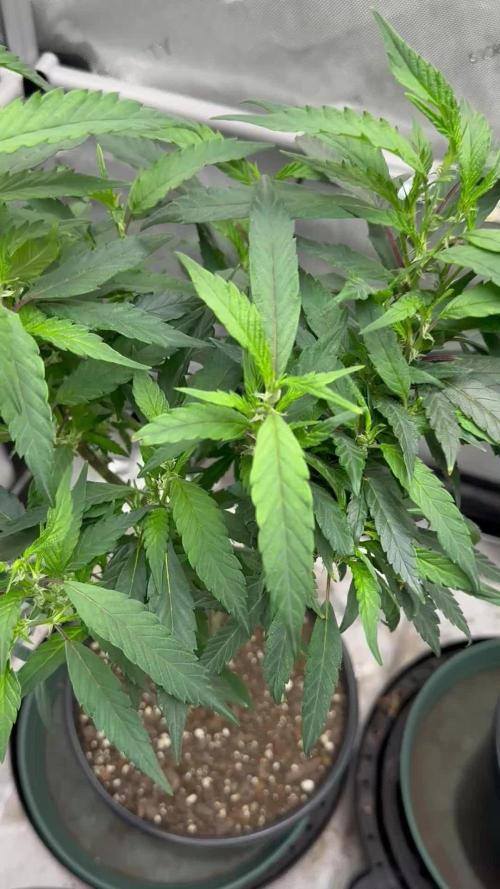
Another week of slow growth has gone by, thought I end it with another round of topping on one of the plants. I'm looking to make up for the previous grow where I didn't top at all and it produced so little, hope I don't go overboard with things :D
Likes
12
Share


@carlitospiratahaze
Follow
Hoy día 20/4/26 hemos añadido el primer riego de monsterbloom.
Tengo que decir que e metido dos riegos desde la última vez hasta ahora muy suaves con calmag y purezym rebajando con esto la ec ya que tenía muchos puntos salinos y algunas plantas quemaron sus hojas
Después de este riego en dos días intercaló 20l de calmag más purezym y a los otros dos días vuelvo a meter abonos así iré intercalando para no subir más la salinidad y preparando el terreno para el lavado de raíces.. tengo que añadir que el último riego con power roots y silick se acabó hoy.