


Likes
Comments
Share


Likes
103
Share


@DeepWaterGrower
Follow
🗓️ WEEK RESUME // DAY 71-77 (from dry seed)
⚡- Light: 30 cm / 150 watt;
⌛- Schedule: 14/10;
🌡️- 20.5° C - 65% RH average;
📑- PH 6 - EC 0.4;
💧- 6° change DWC. Flush until harvest!
🌸- Buds are heavy, all of them!
🌱- According to trichomes and pistills this lady is ready on day 74!
✅ HARVEST
- From seed to harvest: 74 days (2 days germination + 23 days veg + 49 days flo).
- Chopped after 4 days flush, no dark time;
- Wet trim, removed fan leaves. This plant had a ridiculous calyx-to-leaf ratio, it was just big buds!
- Now begins the drying stage, two weeks more or less.
👯♀️- She shared the box with:
Biscotti - Zamnesia: https://growdiaries.com/diaries/183150-grow-journal-by-deepwatergrower
Likes
9
Share


@Bretwalda
Follow
Think ive sorted the nute lock out, dont think the smaller skywalker has long left she at 68 days from sprout, the bigger one has a little longer i think i was a bit behind the smaller one

Likes
7
Share

@GERGrowDesigns
Follow
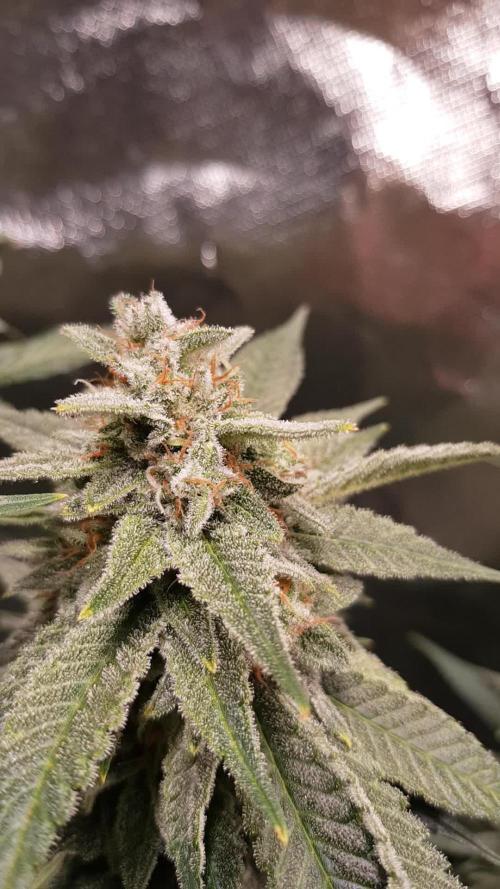
Welcome to Flower Week 4 of Fast Buds Purple Haze Auto
I'm excited to share my grow journey with you from my
FastBuds Project . It's going to be an incredible ride, full of learning, growing, and connecting with fellow growers from all around the world!
For this Project , I’ve chosen the Feminized Auto Purple Haze:
Here’s what I’m working with:
• 🌱 Tent: 120x60x80
• 🧑🌾 Breeder Company: Fast buds
• 💧 Humidity Range: 60
• ⏳ Flowering Time: 8 Weeks
• Strain Info: 23%THC
• 🌡️ Temperature: 26
• 🍵 Pot Size: 12
• Nutrient Brand: Hy-Pro
• ⚡ Lights : 600W x 2
A huge thank you to Fast Buds for allowing me to try my Best with this amazing collection from Automatic and Photo Strains they managed to Sponsore . Big thanks for supporting the grower community worldwide! Your genetics and passion speak for themselves!
I would truly appreciate every bit of feedback, help, questions, or discussions – and of course, your likes and interactions mean the world to me as I try to stand out in this exciting competition!
Let’s grow together – and don’t forget to stop by again to see the latest updates!
Happy growing!
Stay lifted and stay curious!
Peace & Buds!

Likes
18
Share


@Thedibber
Follow
23/08/25 - Watered all living soil 1.5L each with microben actus 4ml per L
25/08/25 - Watered all living soil 1.5L each
28/08/25 - Watered 2x strawberry gorilla and 1x Sour crinkle. 2x Poundcake are much smaller so sipping not slurping 😂
30/08/25 - Watered 2x Poundcake
01/09/25 - Watered 2x Strawberry gorilla and 1x Sour crinkle and moved into their new 4x2 👽


Likes
7
Share

@Chucky324
Follow
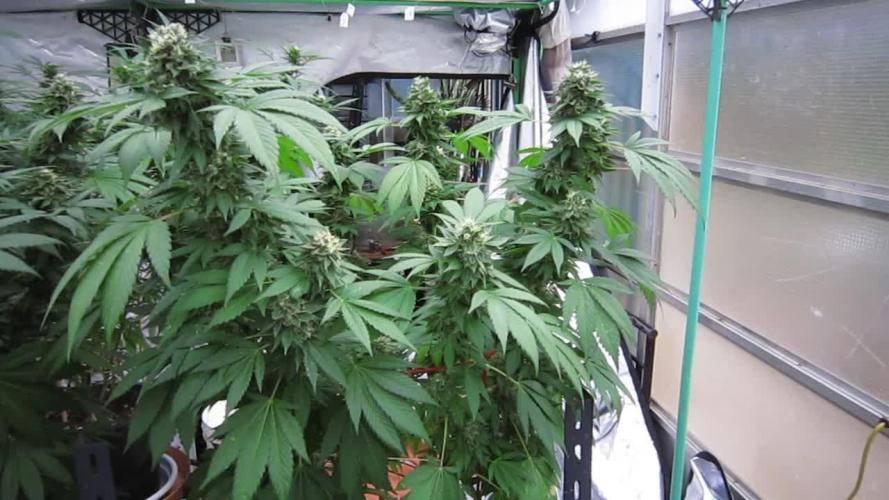
Hello This is the end of week 8 and the beginning of week 9 of flowering.
I started flushing 4 days ago and I'll be harvesting the one plant in about 4 days.
It's got huge buds but doesn't have much of a smell. It hasn't since the start of resin production.
So I didn't take clones of this one but the sister has a great smell like citrus candy/ice cream, wonderful, and I took 4 clones yesterday.
I'm fighting some WPM on the sister plant, Knocking it out with altered frequency water. Works good.
OK. Keep Growing Straight.
Chuck.

Likes
162
Share


@Lukush
Follow
Hear we go finally week 11!!
Getting really close last 1 week in a half to 2 weeks and she is coming down. Looks like the Hidro Mars ts1000 is Healping and giving the plant a good push!
I started to flush hear out 3 days ago already,no ph't water.
She is looking Amaizing !!!❤️😎
The colors 🎨🎨
The smeal 😤
The Buds 🌲🌲
All wunderfol ❤️❤️
Thanks all for healping out and supporting really makes me happy and willing to grow more !!
If you enjoyd and like't mi diarie hit that like Button and support ✌️😎😎
Thanks to All ❤️
Likes
10
Share


@DeepRootsGrowTrees
Follow
APRICOT GORILLA AUTO /
GANJA FARMER
HARVEST WEEK
This lady produces golf sized trichome covered buds that had a sweet aroma to her. She's a nice smooth smoke not heavy at all light notes with this lady.
Thank you for stopping by and taking a look it's much appreciated!!
THANK YOU GANJA FARMER!!
APRICOT GORILLA AUTO /
GANJA FARMER
Likes
8
Share


@Kirsten
Follow
17.3.25:
I've starred a Hulkberry auto. This was the first pack of seeds I bought! I realised it was mostly sativa, but now I'm ready to give it a go!
Made my soil mix, which I will update next week. Planted the seed into an RQS seed starter plug. Mainly to keep the seed in place when watering.
Join my journey and hang out 🌱✌️


Processing
Likes
1
Share


@DocChronic420
Follow
Having some major heat problems in the group room due to the summer heat raising up a temperature of the addict which is where I’ve been through. However the planter you’re looking fine above but we have some drying out leaves on the bottom
Likes
21
Share


@NoProbation4Weed
Follow
Indoors its day 56 since flip to flower. Both Slushberry Mintz plants are absolute eye-catchers. Indoors, they are developing gorgeous purple buds with an impressive bud structure. The terps are exceptionally strong and incredibly tasty. Rich grape-cake terps fill the air, while the buds continue to swell and become denser and firmer.
The outdoor Slushberry Mintz is at flowering week 2 i guess, showing its first signs of bud development with already purple nodes. Overall, the outdoor plant also looks very healthy and vigorous, and I have high expectations for it. Hopefully, we’ll continue to have a dry late summer and autumn.
Likes
7
Share


@Nacholicious
Follow
She is a beast at the end of week 5 (day 35).
LST Goal:
Create an even FLAT Canopy with out the use of Scrog nets or stakes.
This is achieved by tying down all the branches evenly, so that every top gets the same amount of exposure to light, air and nutrients.
Likes
13
Share


@growlikepros
Follow
This week was the girls last, they were lightly watered with zero nutrients and I carefully monitored humidity levels, insuring a clean finish. Overall I am stoked with the results, the smell is exquisite, sweet and floral, and the buds are fairly dense.

Likes
77
Share


@Basementganja
Follow
Flowering slowly, likely due to the roots having low PH(4-5)..
I flushed her a few weeks back.. I'm done experimenting with nutrients for now; I had better results, with less issues with just using the basics.
*Special Nug picture - This Bud-site has a different shape/structure compared to every other nug on this plant.. Never seen this before, on any other strain.
Processing
Likes
8
Share


@Gs_13
Follow
During this week the plant start stretching more and more every day at the end of that week reached 76cm,she had a nutrient lock this week but I flushed her with PHed water to clean the soil from salts and unused nutrients ,seems that that worked, also pre-flowering signs shown ,I am going to change on flower nuts next week.
Likes
29
Share


@Smokwiri
Follow
Welcome to week 8 of my Zamnesia seeds - Wedding cake diary
Plant is developing very good and is loving the light ;)
Beautifull to see the buds develop.
Cant wait to see coming weeks development.
10% discount on Zamnesia seeds with code GROWITGD


Likes
24
Share

@Chubbs
Follow
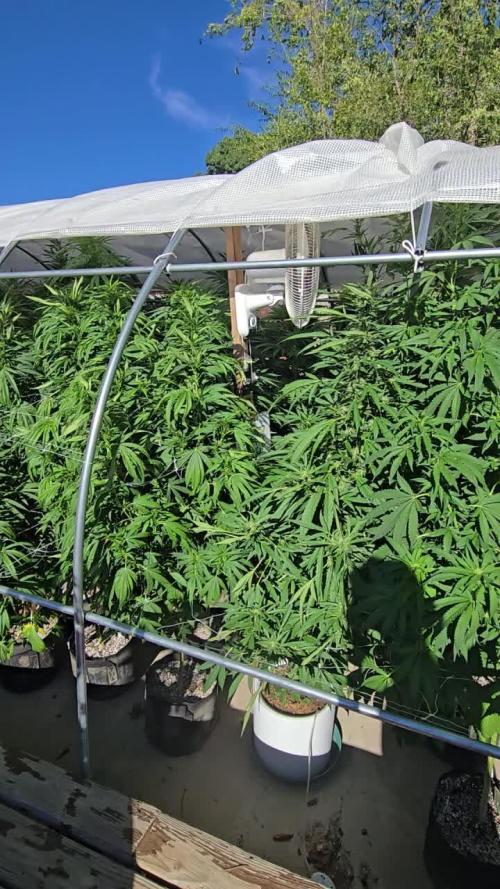
This week has been wild. I had to cut the sides of the greenhouse as the plants had it bursting at the seams. These girls are all flowering beautifully and starting to frost up. Happy Growing.
Likes
7
Share

