
Likes
Comments
Share


@CaliJ
Follow
like my previous experience, easy plant, the Fast Eddy grows almost alone, a real pleasure. a little disappointed by the wet harvested weight, but nice big nuggets. let's go for the dry

Likes
11
Share


@Farmerskr
Follow
Me encanto esta semana, gran avance en las 2 Gorilla Rainbow y gran avance tmb en las 2 White Gorilla.
BSF Seeds sin duda está haciendo un gran trabajo…
Se les hizo más podas apicales y defoliación, y reaccionaron perfecto.
Así damos por finiquitada la 4ta semana de vegetación y espero darle unas 2 semanas mas.
Saludos cultivetas
IG: @farmer.skr 🤙

Likes
3
Share

@420DeepGrow
Follow
📆 Semana 7
La Lemon Cherry Runtz sigue su avance imparable en floración. Los cogollos se vuelven más densos y pesados, cubiertos de una capa de resina cada vez más brillante, que refleja la luz como un pequeño tesoro. Los pistilos comienzan a oscurecerse, anunciando la llegada de la madurez final, mientras el aroma dulce y afrutado se intensifica, envolviendo el espacio con notas golosas y envolventes.
Las ramas laterales mantienen su fuerza, soportando sin problema el creciente peso de los cogollos, y la estructura general sigue equilibrada y aireada, perfecta para un desarrollo óptimo. Las hojas grandes ceden aún más espacio, dejando que la floración ocupe todo el protagonismo.
🌸 El espectáculo visual y aromático sigue en pleno apogeo, y lo mejor aún está por venir.
Seguimos creciendo fuerte 💪!

Likes
79
Share


@Salokin
Follow
Hey Growmies!
I'm thrilled to share my latest project: two exceptional grow environments, each a lush green haven with 9 plants on plant rollers. We’re employing a blend of Scrog (Screen of Green) and Sog (Sea of Green) techniques. Each plant has its individual ScroG, directly connected to its air-pot, facilitating easy mobility and care within the tent.
As the Room is on the cooler side at the moment, I've set up a Solea infrared heater, controlled by an Inkbird ITC-308 temperature controller, to maintain a cozy climate. Each tent is also equipped with a Spider Farmer Cool Mist humidifier for perfect humidity levels. Initially, I planned for identical setups in both tents, but adaptation is crucial. I encountered a challenge with the UR45 lights due to their single plug and UV/IR switches. To overcome this, in Tent 1, I’ve installed two UR45 lights: one dedicated to IR and the other to UV, each managed by a Meross smart plug.
The Mars Hydro app manages the light and in-line fan controls in Tent 2, though it has its limitations. The ITC-308 takes care of the infrared heater, while the humidifier regulates itself. I'm really into this setup, but I'm already thinking about upgrading to a single grow controller for all devices.
Excitingly, ‘Epic Buzz’ in Tent 1 is competing in the Tent-X Ultimate Grow Challenge sponsored by Trolmaster, who has also sponsored a Tent X Controller for this tent. This addition will greatly enhance our control and monitoring capabilities in this tent.
This grow season is extra thrilling as I’m collaborating with Anesia Seeds and Ganja Farmer Seeds. They've provided some amazing strains. Tent #1 houses ‘Epic Buzz’, ‘Red Banana Pudding’, and ‘Pink Matcha Slush’ from Anesia Seeds. Tent #2 features ‘Caramel’, ‘GMO’, and ‘Bruce Banner x White Russian’ from Ganja Farmer Seeds. I’ll be documenting their growth in individual diaries. Check out these links for each strain's story:
1. Anesia Seeds - Epic Buzz [Grow Diary](https://growdiaries.com/diaries/189991-anesia-seeds-epic-buzz-grow-journal-by-salokin)
2. Anesia Seeds - Red Banana Pudding [Grow Diary](https://growdiaries.com/diaries/189995-anesia-seeds-red-banana-pudding-grow-journal-by-salokin)
3. Anesia Seeds - Pink Matcha Slush [Grow Diary](https://growdiaries.com/diaries/189993-anesia-seeds-pink-matcha-slush-grow-journal-by-salokin)
4. Ganja Farmer Seeds - Caramel [Grow Diary](https://growdiaries.com/diaries/190093-ganja-farmer-seeds-caramel-grow-journal-by-salokin)
5. Ganja Farmer Seeds - GMO [Grow Diary](https://growdiaries.com/diaries/190089-ganja-farmer-seeds-gmo-grow-journal-by-salokin)
6. Ganja Farmer Seeds - Bruce Banner x White Russian [Grow Diary](https://growdiaries.com/diaries/190091-ganja-farmer-seeds-bruce-banner-x-white-russian-grow-journal-by-salokin)
For those curious or seeking inspiration, here’s the detailed equipment list for each tent:
Equipment List for Tent 1:
- Mars Hydro 120x120x200cm Grow Tent Dark Room
- Mars Hydro Smart FC 4800 Samsung LED Grow Light – 480W
- 2 x Mars Hydro UR45 IR & UV LED Grow Lights
- Mars Hydro iFresh 6-Inch Smart Inline Duct Fan
- Spider Farmer 6L Cool Mist Humidifier
- Solea Infrared Heater 500W
- Inkbird ITC-308 Digital Temp-Controller
- 3 x Meross Smart Plugs (for UV/IR light timing)
- Tent X Controller (sponsored by Trolmaster)
- 9 x 12.5L Airpots
- 9 x 30cm Plant Rollers
- 9 x 36cm Plant Saucers
Equipment List for Tent 2:
- Mars Hydro 120x120x200cm Grow Tent Dark Room
- Mars Hydro Smart FC 4800 Samsung LED Grow Light – 480W
- Mars Hydro iFresh 6-Inch Smart Inline Duct Fan
- Spider Farmer 6L Cool Mist Humidifier
- Solea Infrared Heater 500W
- Inkbird ITC-308 Digital Temp-Controller
- 1 x Meross Smart Plug with Consumption Measurement
- 9 x 12.5L Airpots
- 9 x 30cm Plant Rollers
- 9 x 36 cm Plant Saucers
Always happy to hear tips or chat about gear with fellow growers!
Can't wait to update you all as these tents transform
Stay Lifted
Salokin

Processing
Likes
29
Share


@MadameMary
Follow
Entering the second week full of doubts, are they stunted? I transplanted four of them into 8 l airmax pot.Also a little bit of something similar to mold appeared on the seed shells (grey little hairs).Can it be the mycorrhiza?
I began adding Royal calk, cause i heard and readed that the autos need it since the begining(this one is susprisingly concentrated) and inoculatethe first time with the microbe photosynthesis plus,3 ml/l the first time and 1,5ml/l the next weeks along with a sugar application once a week in order to feed the microbes and fungi from the floor.
Processing
Likes
201
Share


@MagnoliaFrost
Follow
10/5
Day 28 - LED lamp now on 24h
-
Water: Both plants got 1L of water with nutes.
Summary for the day:
I still do some LST but truing to do less and focusing on spreading the tops. LED in 40cm full effect. Did some defoliation today but not sure if I'm doing right.
-
12/5
Day 30 - LED lamp now on 24h
-
Water: Both plants got 1L of water with nutes increased to 1.5ml because it's been 10 days since I started with giving them 1ml each time they got water.
Now I started to see they drink much more. Last time it was 3 days between watering. This time it was only 1 day since they got 1L water. Maybe increase 1L to 1.5L next time.
Summary for the day:
I still do some LST but truing to do less and focusing on spreading the tops. LED in 40cm full effect. Did some defoliation today as well.
-
14/5
Day 32 - LED lamp now on 24h
-
Water: Nothing
Maybe increase 1L to 1.5L next time.
Summary for the day:
I still do some LST but truing to do less and focusing on spreading the tops. LED in 40cm full effect. Did some defoliation today as well.
-
15/5
Day 33 - LED lamp now on 24h
-
Water: Both plants got 1L of water with 1.5ml nutes x2 (A+B)


Likes
57
Share


@MadeInGermany
Follow
Hey everyone 😀.
A lot has happened again this week 👍.
Pheno 1 goes from the color more and more to red 😍, whereby Pheno 2 also slowly starts to color 😃.
Flowering day 21
Today both were poured with 1.2 L each and checked for their health.
The humidifier was also refilled.
Flowering day 22
Today the tent was cleaned and both phenotypes checked for pests and so on.
Flowering day 23
Today both were poured again, this time only 1.6 l for both together.
The tent was cleaned with disinfectant 👍.
Flowering day 24
Today the humidifier was refilled, the activated carbon filter changed after 9 months, and all the electronics checked :-).
Flowering day 25
Today 1.5 l was poured per plant so that some train comes out and rinses out excess nutrients 👍.
The box was also cleaned and the plants checked for health.
Flowering day 26
In both phenotypes, the bottom mini buds were removed for the last time so that the full energy goes into the top buds 👍.
The tent was cleaned and the whole room was cleaned.
Flowering day 27
Like every two days, the water was also poured today, but this time only 0.7 l per plant, because two days ago it was poured with Train 😄.
The lamps were adjusted to the size and placed about 5 cm high.
All in all, it was a perfect week, everything is going as it should and the plants are feeling very good 👍.
I wish you all a lot of fun with the update, stay healthy 🙏🏻 and let it grow 🍀
You can buy this Strain at :
https://sweetseeds.es/de/red-mandarine-f1-fast-version/
Type:
Red Mandarine F1 Fast Version
☝️🏼
Genetics:
Red Poison Auto®️ (SWS39)
X
Tangie (California Orange x Hybrid Skunk)
👍
Vega lamp:
2 x Todogrow Led
Quantum Board 100 W
💡
Bloom Lamp :
2 x Todogrow Led
Cxb 3590 COB 3500 K 205W
💡💡☝️🏼
Soil :
Canna Coco Professional +
☝️🏼
Fertilizer:
Green House Powder Feeding
☝️🏼🌱
Water:
Osmosis water mixed with normal water (24 hours stale that the chlorine evaporates) to 0.2 EC. Add Cal / Mag to 0.4 Ec Ph with Organic Ph - to 5.5 - 5.8 .

Likes
13
Share


@Popothamio
Follow
Pues esta es la última semana el sábado 12 corte las red mandarine y hoy martes le toca a la 8 ball

Likes
23
Share


@Growshh
Follow
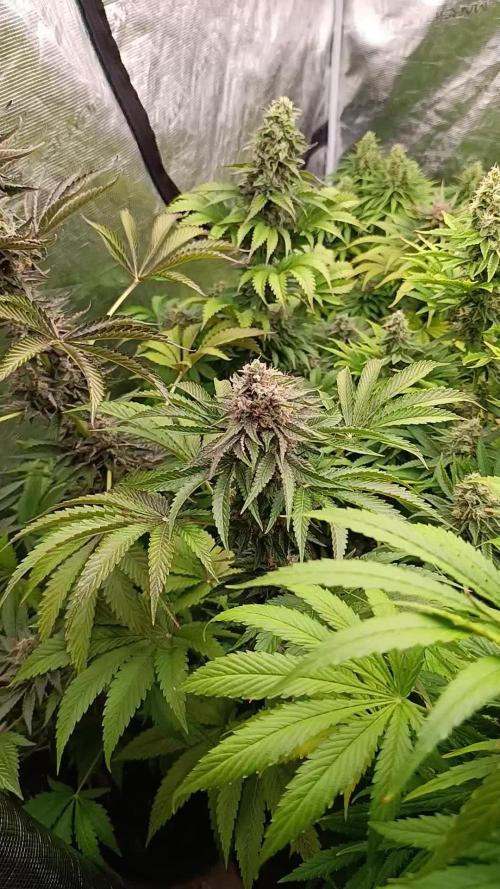
The girls are happy! Pistils are long and the calayxs are developing nicely. Starting to stack and swell!
Kinda turned into a jungle since the defoliation and now it's so much leaves...I removed a dozen or so but I dont like defoliating at this stage so I just tucked them to expose more light.
Some unexpected stretch from the watermelon wedding cake and zkittlez.
Really happy with this one!


Likes
20
Share


@ukterpdoc
Follow
Been going so well plants looking amazing they're going to find bigger pots by next weeks update and be in the veg room under there new lights and out of the tent lots more space and lots more light

Likes
9
Share


@Ejenji
Follow
Its the beginnig of week 4 and by now the growbox is complete. It was truthfully said a lot of hard work and starting from the beginning again and again... But I DID IT! Cheers to all growers!


Likes
57
Share


@ThrashedTV_BakedByGlaze
Follow
Week 4 - 01/22 to 01/28 2021
Pictures from Days 25 + 26
TRANSPLANTED! Might have waited too long but hopefully the transplant and LST stress might slow the plant down since i think it's already flipping to flower like the Red Poison & Purple Lemonade in my other diaries 😱
Ended up more 50/50 ratio of Destiny Organic's Dark Matter Living Soil + ProMixHP since I had to make the Destiny last. Apparently they went out of business just after I decided it was my favourite/new soil :( Would rather stay away from Ocean Floor since I haven't had the best experiences with it (bugs/rust fungus etc) Feel free to drop some recommendations other than Fox Farms below 👍
The Dark Devil Auto is otherwise healthy and starting show hints of colour in the stems 😈
I raised the @ViparSpectraLED P1500 another eight inches after transplant and started basic LST. I really wanted to get these four under a ScrOG but if 3/4 are already flipping and the LSD is still runty I might have to wait it out again.
It already has a solid skunky/hash plant smell on the fingers after adjusting them and it looks like it might actually be a tripod mute with three flower sites per node. Hopefully I can stretch it out and take advantage of the extra bud potential 🙏
I have the @MarsHydroLED TSL2000 set up and ready to go once the girls settle into their new pots. Have the new surge protector/heavy duty power cords/power tool grade timers as mentioned in Week 3. Some of it shown in the pictures.
Threw some videos in this week as well with some Queen's Radio GaGa, Beastie Boys' Brass Monkey, and a little hint of Arkells ....COME TO LIGHT on the short @ViparSpectraLED ..GET IT.. 😓
--
Thanks for checking in! Throw down a like and/or follow so I can return the favour 🙌
Check out my Diary of the Year 2020 Entry for my Original Auto Sour Diesel: https://growdiaries.com/diaries/54258-fastbuds-original-auto-sour-diesel-grow-journal-by-glazedgrow
IG: @GlazedGrow
CannaBuzz: @GlazedGrow
Likes
5
Share


@Bluemels
Follow
Tag 61: Noch 2 Wochen bis zur Ernte. Die beiden Mädels richen schon sehr aromatisch und sehen recht verschieden aus. Ab heute gieße ich nur noch Wasser ohne Dünger.
Likes
16
Share

@Shawneyboy85
Follow
This week the smell have really developed and the pistols are long gone but she’s plumping up! This one is only 63 days old and shows a lot of ruderalis in the fans but I’m happy how the bud structure is forming and would recommend anyone else that grows this to top it and scrog it for sire cuz she’s going to stretch a lot she’s 38 inches tall.

Likes
41
Share


@TerpTurtle
Follow
_Eyeing up trichomes clusters and buds as they ripen to determine a harvest day
-Plant still drinking heavy..
-Bud flops, any motion and the branches are ready to lay. Heavy buds
-Flipping Slurricane #7
-Day 69 harvest on BCS seed

Likes
7
Share


@Cargic
Follow
11/16 everything is going great! I went through and pulled all of the dead leafs off to prevent mold. She smells super sweet almost like a candy or butter sweet it’s odd but I’m not complaining!!! Very excited to try it!


Likes
11
Share


@TooMedicatedToThinkOfOne
Follow
Well guys week 5 is complete and she looks to be doing fairly good! She is growing like a champ and right now im trying to figure out what to go to get my light higher, im growing in a closet so im hanging the light on the bar you would usually hang clothes and the canopy is about 6 inches from light surface and im sure she hasnt finished growing yet so i need to figure that out for a better grow. I'm also starting to see some new growth on the bottom branches have leaves that are slowly fading to yellow which makes me think maybe its not getting enough nitrogen? could be that once i flushed my soil from week 3 mistakes that i took out all of it and now it is lacking? I will keep an eye on it regardless but i am just curious what its doing and how i can fix it before it become a real big issue! That being said i am seeing tons of pistils pop up everywhere its actually quite amazing. I guess one thing i am curious of as well as one of the pistils on a calyx have turned orange im not sure what that means for me but ill be keeping my eye on it regardless! Hope you all enjoy this weeks update and i will make sure to keep updated further!

Processing
Likes
13
Share


@FrenchDoctor
Follow
Week 3 😈
I cut the top of all these babies 2 days before
I have to put more soil next days in the 6L pots
Hope u gonna enjoy 👍🙏
