


Likes
9
Share


@Glen1818
Follow
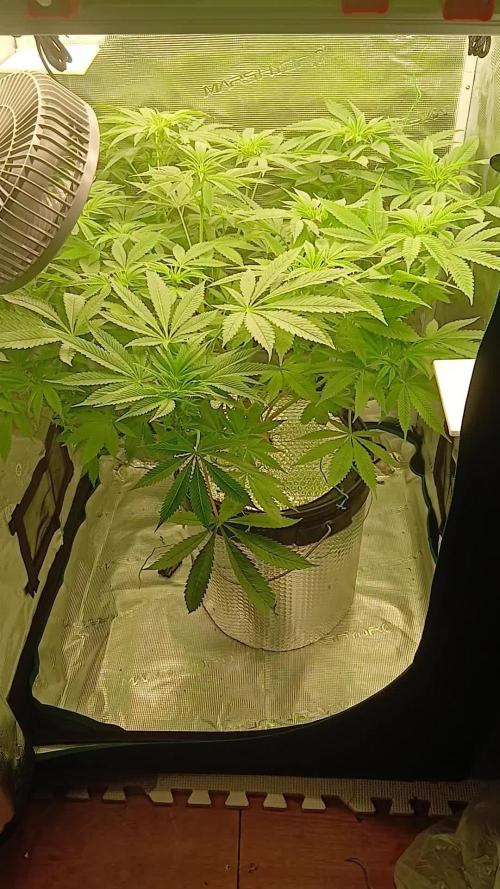
Its Week 9 , i flush them once with AN Flawless Finish, i will cut them when most trichomes are cloudy and a few amber , should be in 7-10 days ready

Likes
22
Share


@Slobasian
Follow
Love every plant each one is growing differently stacking different even the visual difference of one strain growin two different ways combined smells of diesel, pez candy and lemons


Likes
7
Share

@Trinidad
Follow
1.10.25
Day 66
Day 18 since 12/12
Fresh reservoir change out. Added 10 liters. I want to see how long it will last. I also increased light intensity.
Likes
57
Share


@DankeyeBeaverjuice
Follow
Excellent week of growth, we're in the second week of flower on the two little ones so I have begun the pollination process. The donor plant is almost as tall as me now it's ridiculous how big this plant gets. If I was doing a flower run Id have a staggering amount of cannabis at the end, as it is I have enough pollen to impregnate all of Canada lol, best steer clear of my facility lest you want a baby :)

Likes
7
Share


@Staffedition
Follow
Всем привет. Вот и вылезли мои маленькие малыши!
Выглядит растение счастливым и здоровым!
Сегодня 4 день от каски.
Увидимся на следующей недели друзья!

Likes
4
Share


@smoking_hills9
Follow
These cali genetics are blowing my mind 🤯 super sticky, very frosty rock dence buds with extra strong smells. All 3 strains are 10 out of 10, very impressed. Done last defoliation few days ago, preparing for the harvest so it's much easier. Stalks are super fat, same as buds.
Got big surprise from Atami, plant food, and many extras. Crazy. Thanks a lot guys. 💚 Start adding you Bloombastic food already. They love it. Smell is mad. I think most of plants ready in week or so.
Likes
30
Share


@Love2Bud_UK
Follow
22/9first update since I've been on holiday, I left the plants in the best hands i could find 👌💚
23/9 really pleased with plant #2 I've taken plenty of clones off her before she was in flower(and gifted to friends/kept a couple). Any water she will have this week will just be water & little calmag
24/9 both starting to show where bud sites will soon be, I hope!! Plant 2 has definitely been the start child the whole grow.
25/9 plant 1 popping pistils alot quicker than plant 2
26/9 growing well but taking a while to start flowering, I'm not sure if that's just me being impatient or what?! Either way plant 2 is actually going to be a monster at this rate. I increased boost nutes in hope it will speed things up
27/9 not sure if plant 2 is popping green pistils or she is just a layer bloomer 🤔 plant 1 was put in to flower a little bit later than #2 however she is starting to bloom quicker. Maybe just different phenos? Or maybe because I fucked up with the light timer the other week, who bloody knows?!
28/9 fiiinally starting to get pistils on the larger plant!! I was getting worried she would never stop growing!

Likes
4
Share


@jamaljackson
Follow
About 60 days in now and the plants are done getting taller. Buds are starting to get bigger and everything is starting to get nice and frosty, still have a long way to go on this one I think. I just got done with a res change and filled it back up with more Cropsalt at 3.4 g/Gal Bloom A and 1.74 g/Gal Bloom B. This stuff seems great so far, PH is super stable and the plants seem to like it.

Processing
Likes
14
Share


@Wicked_Stix
Follow
My first seed didn't make it due to technical difficulties, so I popped another to try to maximize the output from the mini machine. She is growing well at day 7. Seeing some leaf curling from her adjusting to the environment, but she is still showing steady growth. She is a week behind the 2 plants that were originally germinated. She will be topped around day 10 or 12 as soon as the third node comes up enough to pinch off.
I started this setup to compete in the solo cup challenge, but I needed something that will be minimal maintainence and doesn't require hand watering. So this is what I ended up with. I will not be entering since I know it will bring controversy, but I am going to follow the rules and treat this grow as if I am competing.
I didn't want to use regular solo cups because last time I had a lot of algae growing in the root zone when I harvested. I opted to use a black light proof cup. These cups were 27 oz originally so I filled them with 16 oz of water, marked the level, then cut them down to 16 oz. I set the drain pipes about an inch from the bottom so they have a little reserve if I have pump or power issues. I know people will see the drains as a way for roots to grow out of the cup but in reality I have to keep the entire pipe free of roots or it will clog and overflow. So I am actually losing a little volume due to this.
I filled the bottom inch or so of the cups with river gravel to stop the perlite from washing into the reservoir.
I am running a 5 gallon reservoir with a small air pump and the plants will be getting irrigated 24 hours a day from an aquarium power head pump. I set the system up to be totally self contained and easily portable. It was all built from things I had laying around other than 97¢ for the cups. I will be keeping the feed simple as always feeding maxigro and maxibloom with a couple flower boosters.


Likes
41
Share


@MadeInGermany
Follow
Flowering day 44
since time change
to 12 / 12 h
Hey guys :-)
The buds are becoming incredibly beautiful and smelling better and better ☺️.
Today there was again the full load of food and will be slowly driven down as soon as it comes to an end :-)
Was watered 3 times a week with 1.2 l each (nutrients see table above)
Otherwise everything was cleaned.
Have fun and stay healthy 💚💚💚
👇🏼👇🏼👇🏼👇🏼👇🏼👇🏼👇🏼👇🏼👇🏼👇🏼👇🏼👇🏼
You can buy this Nutrients at :
https://greenbuzzliquids.com/en/shop/
With the discount code: Made_in_Germany you get a discount of 15% on all products from an order value of 100 euros.
👇🏼👇🏼👇🏼👇🏼👇🏼👇🏼👇🏼👇🏼👇🏼👇🏼👇🏼👇🏼
You can buy this strain at :
https://www.exoticseed.eu/
Water 💧 💧💧
Osmosis water mixed with normal water (24 hours stale that the chlorine evaporates) to 0.2 EC. Add Cal / Mag to 0.4 Ec Ph with Organic Ph - to 5.8 - 6.5
MadeInGermany


Likes
50
Share


@Rwein93
Follow
Ciao ragazzi e bentornati qui con me e le sorelle Limonose 🍋
Tutte 3 hanno smesso di crescere, la numero uno ha una struttura incredibile,💪 mi sono pentito di non aver fatto Lst su tutte le sorelle.🤦♂️
La numero 2 è alta e ben strutturata ma ha una sola cola bella grassa.
Mentre la numero 3 sembra più avanti delle altre con quasi tutti i peli arancioni e i buds di media grandezza.
Le cole principali delle altre invece misurano circa 3/4 cm, ma sono ancora parecchio indietro👍
Il colore è standard! Niente di particolare bei buds verde chiaro e pistilli bianchi ma sembrano molto gelide🤙
L odore delle sorelle sembra diverso tra di loro. La numero 1 ha note accentuate di diesel e nocciola, la numero 2 ha un profumo aspro tipo mapo e la numero 3 ricorda un dolce cremoso al limone 😋
Eh niente ragazzi! Aspettiamo che loro ingrassino per bene!👊
Grazie a tutti per aver guardato e restate sintonizzati per nuovi aggiornamenti.🙏
Buona settimana e felice crescita 🌱 🌱 🌱

Likes
4
Share


@Jabbamo
Follow
_______________________________________________________
Di. 3.3.
- Pflanzenhöhe 90cm (mitte)
- Supercropping (mitte)
- Toplight Abstand auf maximum 50cm nach cropping
_______________________________________________________
Do. 5.2.
- 3,3 Liter pro Pflanze gegossen (ca. 300ml Drain)
1,2 ml / Liter "Calmag"
1,0 ml / Liter "Bio Grow"
3,0 ml / Liter "Bio Bloom"
1,0 ml / Liter "Top Max"
Ph 6,3 / 600 qqm
_______________________________________________________

Likes
18
Share


@maneaura
Follow
I came back from vacay. Im harvesting the amensia haze next week!! i’m really excited! i wonder if the painkiller will make it tho. spider mites and thrips somehow got to the plant even though it was inside. and all the pests collectively decided to leave the amnesia alone? Also got new seeds! only paid for 3 lol
Likes
44
Share


@Chedderbob112
Follow
El living la Vida chedda mother Fukin Bob 112 here wee fuking go usual rite troops need tae go see a man aboot a dug


Processing
Likes
4
Share


