Likes
Comments
Share
@Theia
Follow
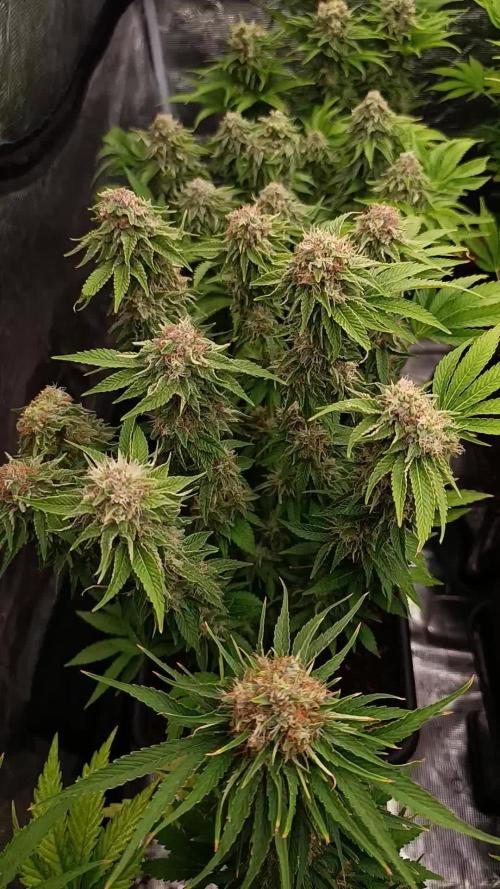
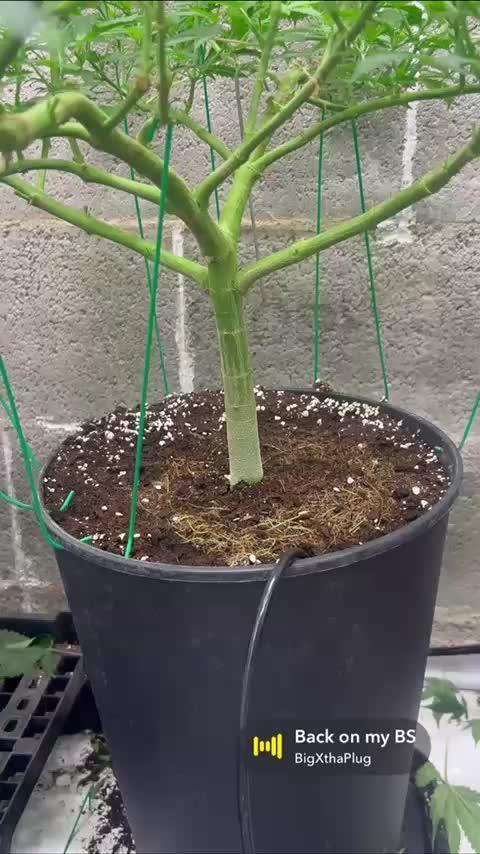
Purple punch has gone nuts she had a lot of supercropping done on her and after 10 days has doubled in height and basically gone mental. Amazing strength in this genetic very vigourous growth and lovely bud sites everywhere. I'm away in America doing the formula 1 so the updates are from photos and messages sent from my wife back home who is looking after the ladies.. No issues really apart from higher RH then we would like but she has gone in and defoliated a bit and things seem to have settled. I'm awa until November 1st as I'm doing the Mexico formula 1 after this.. Updates will be a little light on detail I'm afraid and images will be generic from the room.. Thanks growmies. Stay safe 😷 Grow well 🌿
Likes
12
Share
** COST ** TO RUN - Used previous ⛺️ setup : $0.00 - Monthly electricity : $36.73 <-- other ladies sharing ⛺️ - 1 Gallon Fabric pot : $0.10 - Bonsai wire : Apx. $0.03 - Reused soil from last run : $0.00 FOR NUTRIENTS - Jadam Microbial Solution : $0.00 - Fermented Plant Juice : $0.00 APPLYING - JMS : 30ml / 1 Litter - FPJ : 30ml / 1 litter TOTAL COST : $36.86 Throughout the week, I give JSM, and fermented plant juice once each ^^ Hope you guys have a wonderful day today ^^v *** Please Like, comment & share *** Highly appreciated -----/-----<@
Likes
4
Share
Bumped up the nutes to 10ml for calmag and tiger bloom. Started having mag deficiency between weeks but seems to be recovering quickly after the bump in nutes.
Likes
7
Share
Likes
21
Share
09/14/22 plant is growing nice. Leaves have a mutation, I think will be fine.
Likes
4
Share
Muy contento con los resultados, hubo un error en el riego en la Mesa B i se estubo regando durante medio dia, exceso por riego. Error arreglado del sistema de riego. Dejo descansar 2-3 dias. La mesa A todo va bien.
Likes
25
Share
Day 22 25/07/24 Thursday Still no Feed/water since Tuesday. Been a humid and overcast two days so not as much evaporation as normal. All plants happy and healthy 💚 Video updates Day 23 26/07/24 Friday De-chlorinated watering pH 6 with 5ml calmag to 5L water. Watered each with 250ml and had small run off. I will continue to feed/water with small run offs to help prevent salt build ups. Video update. Day 26 29/07/24 Monday Nice feed today, using de-chlorinated tap water pH 6. They each had 300ml with small run off. All looks incredibly happy and healthy! The Auto Kabul that was mutated and twisted has pulled herself through and is just a bit shorter than the others. Day 28 31/07/24 Wednesday End of week😁 De-chlorinated water pH 6 today with Plagron pk13-14 5ml to 5L Plagron power buds 5ml to 5L Used 300ml of the 5L solution. I will be using these on water days from now on as they are advised to be used every irrigation. We'll see how they perform 💪💚
Likes
53
Share
@Roberts
Follow
Merlin Mintz Autoflower is growing great. She just started with her first pistils. She should start stretching very soon. She is looking really healthy, and grow well. I did some selective defoliation in center of the plant. I also been lst on branches as needed. Thank you Aeque Genetics, Spider Farmer, and Athena. 🤜🏻🤛🏻🌱🌱🌱 Thank you grow diaries community for the 👇likes👇, follows, comments, and subscriptions on my YouTube channel👇. ❄️🌱🍻 Happy Growing 🌱🌱🌱 https://youtube.com/channel/UCAhN7yRzWLpcaRHhMIQ7X4g
Likes
2
Share
Remember that, however you are played, or by whom, your soul is in your keeping alone. Even though those who presume to play you be kings or men of power, when you stand before God, you cannot say, 'But I was told by others to do thus,' or that virtue was not convenient at the time. This will not suffice. Remember that. Day:18 84°F and 65% RH (VPD) for the vegetative stage. Approximately 1.15kPa(assuming leaf temperature is about 2°F cooler than the air), which falls right into the ideal vegetative sweet spot (0.8kPa to 1.2kPa). At 1.15kPa, plants can draw water and nutrients efficiently without risking stress or wilting. It keeps the leaf pores (stomata) open, allowing for ideal carbon dioxide intake and maximizing vegetative growth. VPD is determined by the leaf's temperature, not just the ambient air. Because leaves usually run 1° to 3°F cooler than room air under bright grow lights, my actual VPD will be slightly lower, closer to the 1.0kPa mark. As she transitions from vegetative growth to flowering, one can gradually lower the humidity (to around 45–60%) and drop temperatures slightly to prevent disease from settling inside dense buds when they appear. Night:6 At 70°F and 60% relative humidity, Vapor Pressure Deficit (VPD) is 0.86 kPa. This is right on the cusp of whats optimal for the vegetative stage. During the nighttime, plants generally close their stomata and undergo cellular respiration rather than photosynthesis. Transpiration slows to a near stop, making VPD less critical at night than during the day. However, maintaining a nighttime VPD between 0.8 and 1.0 kPa is highly beneficial in that it ensures the air is dry enough to prevent powdery mildew or bud rot, but moist enough to keep the plant from undergoing unnecessary stress. This range keeps the environment comfortable for cellular processes and prevents large atmospheric swings. Keeping it all flowing. (Not pushing them yet, these are photoperiods) The optimal soil (root zone) temperature for cellular root respiration and nutrient uptake in cannabis is between 68F & 72F This narrow range balances biological energy production (cellular respiration) with the dissolved oxygen levels in the soil, maximizing plant growth and health. Warmer soils hold significantly less dissolved oxygen. When soil temperature exceeds 74F oxygen depletion occurs, inhibiting cellular respiration almost entirely, At 68-72F root cells generate optimal adenosine triphosphate (ATP) via respiration to power root-tip elongation and the active transport of water and nutrients. Too Hot (Above 78F) Root respiration increases, demanding more oxygen, while the water's oxygen-carrying capacity drops. This creates a prime environment for anaerobic pathogens and Pythium (root rot). Too Cold (Below 60F) Root metabolism and cellular respiration slow to a crawl. This severely impairs nutrient and water absorption, leading to yellowing, wilting, and phosphorus deficiencies. A lot depends on whether it's automatic or photoperiod; with photoperiod, there is not as much of a need to push "hard" as the real countdown only begins once the flower is initiated. Automatics, on the other hand, the chronological "clock" begins ticking the moment the seed germinates. It is of critical importance that the seedling growth gets off to the races, understanding that early growth is like compound interest, which will pay off come harvest. This reality is why getting autoflowers "off to the races" early on yields such exponential benefits. The "compound interest" is directly related to the surface area of the leaves. Larger, faster-growing seedlings process more light and build bigger root networks early on, which translates into an explosion of vertical and lateral growth during their short vegetative window. The margins for error are so thin with autoflowers; this early-stage momentum depends on several critical practices. Seedlings exposed to increased atmospheric CO2 levels early in life will develop at an increased rate. To effectively "extend" or optimize the capacity of Photosystem II (PSII) for increased photosynthetic efficiency. In standard oxygenic photosynthesis, Photosystem II (PSII) is naturally limited to the red-light spectrum, peaking at 680nm. Extending its light-harvesting capacity past 700nm into the far-red region requires bypassing the natural limits of standard chlorophyll a. Adding 730 nm (far-red) LEDs alongside standard red/blue lights has been shown to increase canopy photosynthesis by 20–30% in several crops by acting synergistically with shorter wavelengths. However, the limitation is that excessive, pure IR/Far-red light (without accompanying red light) can trigger the "shade avoidance response," causing plants to grow tall, weak, and spindly rather than robust. Utilizing infrared light (specifically the 700-750 nm far-red range) is a viable method to boost photosynthetic efficiency. It acts as a bridge to allow PSII to utilize a broader spectrum of light, breaking the traditional 700 nm barrier. UVR8-mediated signaling (often in conjunction with CRY proteins) triggers protective mechanisms that maintain the stability of the photosynthetic apparatus (including LHCII and reaction center proteins), thus ensuring that the efficiency of Photosystem II remains higher in UV-B-exposed plants compared to plants lacking this receptor. ΦPSII indictates the rate of electron transfer from water to plastoquinone, which drives the production of ATP and NADPH. There is a close link between ΦPSII and the true rate of CO2 fixation (Φ*co2). ETR stands for Electron Transport Rate. It measures the speed at which electrons are moved through the thylakoid membranes in a plant's chloroplasts during the light-dependent reactions of photosynthesis. Infrared light (particularly Near-Infrared or NIR) improves cellular energy by interacting directly with the electron transport chain (ETC) in mitochondria. This process boosts adenosine triphosphate production, which acts as a metabolic coefficient multiplier by accelerating enzyme activity dramatically. Extend then multiply. Far-Red photons interact with plant photoreceptors to accelerate the plant’s biological "clock" or trigger a shade-avoidance response. Autoflowers don't use the plant's biological clock, although the IR will initiate a shade avoidance and make them stretchy. You can just add equal measures of 660nm-680nm to negate the shade avoidance effect. Replacing nights' "darkness" with a combination of IR+ and 660nm. Because autoflowers don't require a dark period to flower, many growers just blast them with light. 18/6 24/0. However, this ignores the plant's metabolic rhythms, where daytime photosynthesis (light reactions) must be perfectly balanced with nighttime carbon fixation and assimilation (Calvin cycle) to avoid bottlenecking plant development. Cellular respiration is a 24/7 process, but it can only function while the plant has the free oxidative capacity to do so. A 100% photosynthetically active leaf cannot perform cellular respiration. The viral trend of defoliation of every leaf that isn't "getting enough light" is of great detriment overall, putting 100% of the cellular respiratory "workload" and responsibility on the 0/4/6 hours of darkness in sub-optimal conditions for enzymatic activity. Photosynthesis captures nearly 100% of the initial energy as carbon, while cellular respiration is the process that unlocks 90% of that captured energy into usable ATP so the plant can use it. Respiration is considered only roughly 30% to 40% efficient. It captures enough of the potential energy in glucose to synthesize around 30 to 38 ATP molecules per glucose molecule. The remaining 60% to 70% of the energy in the sugar is not captured in ATP; instead, it naturally escapes into the environment as heat, which helps regulate plant temperature. In plants, the primary enzymes of the Electron Transport Chain (ETC) and the ATP synthase complexes are typically adapted to function optimally in warmer temperatures (roughly 77°F to 95°F, depending on the specific plant strain). As temperatures rise within this physiological range, molecular collisions increase, speeding up respiration and ATP production. The cannabis plant has a branched respiratory pathway. During heat or cold stress, plants activate Alternative Oxidase (AOX). AOX burns sugars to dissipate energy as heat rather than coupling it to ATP production. This pathway actually functions optimally at elevated temperatures to help protect the cell from the damaging build-up of Reactive Oxygen Species (ROS) during heat stress. Enzyme activity generally scales with heat; there is a strict biological limit. If canopy temperatures in a grow room exceed 104°F, the enzymes and their supporting lipid membranes lose stability. Not saying you need to go crazy, just optimize nights the same as we optimize days. Phosphorus is the driving force behind early seedling development. It acts as the "energy hub" of the plant, directly driving cell division, robust root growth, and the creation of DNA. Without an adequate, easily accessible supply early on, the plant's overall growth potential and final yield can suffer permanently.
Likes
Comments
Share
@TREBBOR
Follow
Put the net up 2 ladys go faster then my tent can handle ......
Likes
34
Share
Great week. Plants are growing really fast. Huge difference in size compared to last week. Starting to see signs of purple already. If all goes well they should look nice.
Likes
5
Share
@Zeaiache
Follow
Sorprendido con el último transplante, la 10th consiguió una ramificación brutal, pasaron a 4/5 gal, espero unos días que se estiren y floro rápido antes que se pasen de área 😬
Likes
31
Share
Welcome to 📅 day 8 of veg 3/22/2021 the little girl is doing great🌱 I'm very happy with the fast progress. note: The Mars Hydro TS 1000 is sure a fantastic light the only small problem was the blue light from my Aglex 1200 was causing the plant the lean to the side toward the light so I put up a barrier and the problem is now gone. also it looks like she is growing just a bit faster than her sister next to her🌱🌱 Update 📅Day 10 of veg 3/24/2021 she is doing very well under the TS1000 leaves are getting big and and topping is coming near I also added Fox Farms Kelp me Kelp you, to the veg cycle to see if it helps Update 📅 Day 11 of veg 3/25/2021 she grew quite a lot over night and so I micro toped ✂️ her I will upload pics in the morning
Likes
8
Share
I cut the plants, remove the remaining fan leafs and hang the plants upside down inside the dark tent for 8 days. After 8 days I trimmed the buds and put them into glass containers with boveda packs. I burped the containers everyday for 10 minutes (first two weeks twice) for about 4-6 weeks.
Likes
15
Share
@Borberad
Follow
Wächst sehr schön und lässt sich Zeit, hat noch nicht sichtbar in die Blüte gewechselt und zeigt daher bisher auch nur ein minimales Strecken. Tag 52: Es wurden zur besseren Durchlüftung ein paar der inneren Blätter entfernt. Tag 53: Ein wenig LST tut ihr hoffentlich nicht weh.
Likes
1
Share
Will Update after cure and weight check
Likes
27
Share
1/20/2023- So much to do pre grow and over the next 16 days, absolute first order of business is that I have to take down my current Grow---TIMBER-- Then I have a list of things I have to get done in order to be ready to start this grow 1 Feb. With that said T - 2 days until start 48 hour Flush T - 2 days until Start 48 hours of Light T - 4 days until TIMBER!!! Items that need to be done before 1 Feb 2023 1. I need to clean the tent out 2. I need to clean the equipment- Proper Sanitization between grows in Hydro is a must!!! 3. I need to get the hole in the ceiling above my tent repaired- For my last grow I had a deep sink installed in my grow room, to make Hydroponics a little bit easier and have a water source in the same room. The seals on the pipes they were installing broke and leaked through the ceiling causing some damage all the way across my grow room, I was already weeks into my grow and couldn't risk them working above my tent and it would have been very awkward positon for them to be working in as well, so have to get this done quickly between chop and germination. 4. I have to install my new light- I was using a Vivosun 4000 and for this grow I am switching up to a Spider-farmer SF 7000. 1/20/23- For this upcoming grow I am working with M/F photo seeds so I ordered 4 Sex determination kits. I recieved my my 4 Sex determination testing kits from Rimrock Analytics today. I will be using these to test my plants at week 2 of Veg so that when/if I take clones I know I am taking them off females. As well as I don't want to accidently pollinate my tent during this grow I am looking for big beautiful buds not seeded buds. :-) 1/24/2023- Harvest of current grow- Started at 2:00pm and finshed wet trim and firt batch into the freeze dryer. 1/25/2023- Next batch into the freeze dryer and cleaning all my equipment for this Grow. T-1 Day until the workers are supposed to be here to fix the hole in the Grow Room. T-3 days until I instll my new Gorilla Grow Tent and my New Light Spider Farmer SE-7000 for this grow. T-7 Days until Start of Germination 1/26/2023- Harvest is done ran through the Freeze dryer and dry tim completed. 1/27/2023- Grow Room repairs completed. Hole is gone Letting the paint dry before I install the new tent. T-2 days until Install the New Gorilla Grow tent and the new Light T-3 days until I put the hydro equipment in the new tent T-5 days until Germination 1/29/2023- Day 0- Final Pre Germination activities Germination Start T-3 days The paint on the ceiling was dry and it was time to finish prepping for Germination. I got the following items knocked off my list. New 4X4 Gorilla Grow Tent is up and ready New Spider Farmer SE-7000 Light is installed- Thanks Moony Grows for the suggestion and for the Code that got me some money off and free shipping (Moonygrows)!! I turned the lights all the way up to max and set the timer to 18/6 0600-0000. I will keep an eye on the temperature and humidity without my plants and see how hot it gets with the new light. I put my Hydro system back together and put in 40 gallons of water into it, time to monitor for leaks the next few days. I Setup my cloning machine for Germination Days 3-11 1/30/2023 let me break down the situation, ROOM in the TENT.. Enough said.. No really I tried putting my exhaust system up in the new tent with my new light, The light is so big corner to corner that it really didn't give me enough room for the lights be be raised, with the exahust hanging the buckets my plants are Starting in are 2 and 1/2 feet off the ground, great for plenty of room for roots but not so great for upwards space for the plant to grow. In a 6' 11 tent with the exauhst in side and hanging that only gave me a little over 4 feet of grow room to play with. My last grow if you saw my diary, anyone could tell I was struggling to keep the buds off the lights. No good, Since space was such an issue I was running my carbon filter inside on the ground but It really needed to be up sucking the heat out not shooting the cool out. With that setup I was sucking air through the filter and pushing it out the tent at a bottom exhaust hole cold out. Wasn't doing me any good for my heat. I was hitting temps of up to 85 degrees. I bought a portable AC unit and have been running it in the grow room to try and keep temps below 85 and I have had to lower the power on my lights during grow also not ideal.. With that said a friend of mine MoonyGrows (Check out his diary) took the time to look at my issue send me a picture of my grow tent setup with detailed instructions on how to suck the air out from the top but putting my filter and fan on top of my tent so no room issue and I am sucking the air out from the top where the heat is instead of pushing the air out from the bottom where the cool is... THANK YOU MoonyGrows For taking the time to help me get this straightened out.. Now I have room and I have the exhausts working right and now my temps with everything at 100% are topping out at 80 this dropped the temp by 5 + degrees at 100% max. T-2 days until Start of Germination Prepped my seed tray with humidity dome Prepped my Rapid Rooter plugs. I Used RO water, and I added a few drops of Hydrogen peroxide to Oxygenate the water. I then PH balanced between 5.7-6.0 the same that they will be getting in the Cloning Machine and when they get to thier final grow pod. I perfere the 5.8x range and I hit 5.84 for these rapid rooters. If you want to see a complete video on the process HowWeedGrow has an amzing video that shows step by step how to do it and explains it better than I ever could including how to plant the seeds. Which I will cover when I get to that step on Wed. https://www.howweedgrow.com/how-germinate-weed-seeds-cannabis-rapid-rooters/ 1/31/2023 T-1 day until Germination Start All set and ready have my Rapid Rooter plugs ready to go have my seeds out.. Have my seed tray warming up tonight. Tomorrow morning right into the Rapid Rooter then strait into the tray. I will spray the dome to start the humidity in there. 2/1/2023 Germination Day!! Let the games begin! 0600am Put the seeds into the Root Riots. And then put the seeded Root Riots into their first home the Seed tray. I have them under the light 24/7. Sprayed the dome 7:30pm Sprayed the Dome to keep humidity going on the dome. 2/2/2023 Day 1 of Germination Sprayed the Dome in the morning Sprayed the Dome in the evening 2/3/2023 Day 2 of Germination Roots are starting to come out the bottom of the root riot plugs and the heads are slowly popping out of Number 4 just below the surface. Afternoon- Number 4 has popped up Evening- Number 3 has popped up as well. Happy Dance!! 2/4/2023 Day 3 - Germination Surprise Surprise Surprise- all 4 have now poked their heads up.. Happy day!! 100% Germination succeeded. Now major milestone to track is how many are female and how many are male. I will take look at the roots this afternoon/evening and see if they have enough root to go into the cloning machine for the next 7 days before they go into their Hydro Pods. Day 3 - Germination - Evening.. Roots looked good and they were tall enough to make it into the cloning machine. Now that they are all in the cloning machine I have switched the lighting to veg state 18 on 6 off. 2/5/2023 Day 4 - Germination - Morning All the Ladies (fingers crossed) looking great stretching nicely and look nice and green, Photo synthesis underway.... UPDATE!! After a very interesting POD cast on FSTS by Dr. Bruce Bugsbee from Utah University, I have shifted my lighting to 24 hours on through seedling and then I am going to shift to 20 hours on the rest of Veg. 2/6/2023 Day 5 - Germination While Checking on my conditions inside the new tent last night, I found that the Humidity was down to 39 Percent. I added an AquaOasis Cool Mist Humidifier, the reason I selected this humidifier is that I needed one that could be turned on and off utilizing my Inkbird Humidity Controller IHC200 that I have my Pro Breeze Dehumidifier currently running with. Root structures are starting to get there about 1/4 of an inch. 2/7/2023 Day 6 - Germination Everything seems on track more roots poking out of each today. They are each getting a little taller as well. Checked in the evening and number 3 was drooping the Root riot plug on the bottome was dry and the roots were not in the water yet. I raised the water just enough that the longest root that was sticking out is now hitting the water. 2/8/2023 Day 7 - Germination Everything looked good while checking in on them this morning number 3 is now full up and no droop again. 2/9/2023 Day 8 - Germination T-2 days until Plant into Forever Pods and we start week 1 of Veg .. :-) Surprising thing to me is that number 1 and 2 were later in popping then 3 and 4 but the roots are growing longer in 1 and 2. 2/10/2023 Day 9 - Germination Number 1 and Number 2 are definitely ready for transplant today.. Based on how they were yesterday and where they are today I am hoping by tomorrow 3 and 4 are ready. Today they look to me where 1 and 2 did yesterday.. I really hope 3 and 4 catch up by tomorrow since.. T-1 day until transplant to new/ final home for grow. Need the roots long enough to have some clay down in the basket to keep the root riot out of the water and only roots in the water.. 2/11/2023 Day 10 - Germination Today they got placed in thier forever Home, 7 days from Sprout and 7 days until Week 1 Start. PPM- 180 this is water out of the Tap Temp Water: 70.7 Temp Tent: 77 Humidity: 40% I have a humidifier going 24/7 to try and bring this up.. I also have Humidity Domes on each plant. 2/12/2023 Day 11 - Germination Sprayed the domes, all are looking good.. Nothing much to do at this phase but Keep monitoring the PH level in the system and making sure they have a comfortable home. T-6 days until Week 1 start 2/13/2023 Day 12 - Germination Sprayed the domes, They were looking a little yellow today so I moved the light down to assist. Nothing much to do at this phase but Keep monitoring the PH level in the system and making sure they have a comfortable home. T-5 days until Week 1 start 2/14/2023 Day 13 - Germination Sprayed the domes, They were looking a little Florissant yellow today, with what looks like slight burn on the tips, I talked with a fellow grower and we agreed that It was probably that I was drowning them, Yes you can drown you plants even in Hydro, but only early on.. :-) It usually happens with the water being too high, which soaks not only the roots but the medium (root Riot plug in this case). I lowered the water from touching the bottom of the pot to about 1" away. This will probably take 3-4 days to resolve. I will continue my daily monitoring. T-4 days until Week 1 start 2/15/2023 Day 14 - Germination Sprayed the domes, continue my daily monitoring they look a little darker green instead of lime green now that I lowered the water levels in the system, so I think that I might have resolved the issue but it will take a few days for recovery to happen. T-3 days until Week 1 start 2/16/2023 Day 15 - Germination I looked in on them this morning, 3 and 4 look like they are doing well and recovering nicely. Number 1 not so much it has brown spots on the leaves, this very well can still be a side effect of the overwatering but I decide to go ahead and add Nutes earlier than I was planning just incase. I was going to wait until Saturday but I think intervention is necessary now especially after drowning them early on. I added 1/2 what I am planning on adding for week 1 start. I also think I am going to adjust my chart to add 1/2 2 days after plant from now on. I don't think it would hurt it to have some Nutes to pull from. .25ml/Gal Calmag = 12.5ml 1ml/gal GH FloraMicro= 50ml 1ml/gal GH FloraGro = 50ml 1ml/gal GH FloraBloom = 50ml T-2 days until Week 1 start = I will drain the system and start it over on Saturday with Week 1 Nutes. 2/17/2023 Day 16- Germination I didn't even want to post today after looking in on them this morning, 3 of the 4 are now showing signs of dronwing.. Brown spots on the leaves, the water levels were still too high.. I drained about another inch out of the tanks.. Will see how quick they recover.. I start week 1 tomorrow and will have to ensure my water levels are at least 1" away from the basket on this round.
Likes
81
Share
Last week of feed for this lady :) Update end of week nine , Well the bud production this week has been absolutely crazy , She has now slowed right down on her feeding too , so the flush begins , she still needs too cloud up and go amber but she will have enough nutrients in her and the soil too last her until she ripens , she really has been a joy too watch grow and develop , I would not think twice about growing this strain ,
Likes
12
Share
*Week 3 Flowering 09/17* Fastbuds - Mimosa Cake (Auto) (2) Thus far the flower transition has run smoothly and both plants are running accordingly Nute feeds have increased *Week 3 End of week Flowering 09/23* Flowering for both Mimosa's is proceeding accordingly. Light defoliation was applied Light LST to heavy COLA's was applied, anchored to the trellis net. *FRONT TENT (MIMOSA-2) QUICK VIDEO ADDED*