
Likes
Comments
Share


@Northern_Ent
Follow
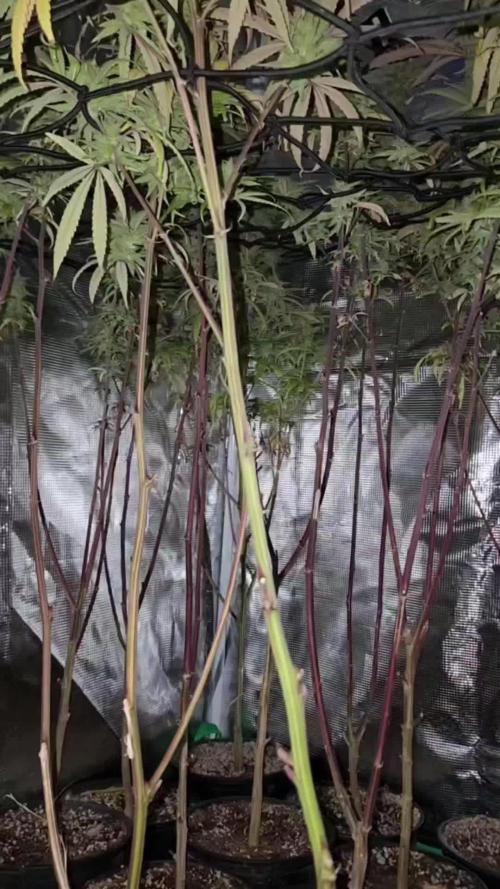
Oct 17: close to ready but we’re running out of nice weather in two days. It’s been an absolutely great run of cannabis weather since July but first snow is forecast for 7 days from now, and then it’s below zero all day and there’s no hope at that point.
Oct 23: weather has still been good enough to keep going but I’ll take her down tomorrow. She’s the last plant in the grow area and potentially the biggest overall but I don’t think she’ll win that contest.
Oct 24: took it all 2,800 g wet. In keeping with Canadian outdoor tradition, there was a bit of snow falling as the plant was being chopped. She would have better buds with stronger sunlight but it’s all for hash and I’m happy with the total weight (of course).

Likes
7
Share

@GoodTimesOrganics
Follow
Hi liebe Community and Welcome Back! 🌿💚
Die kleinen Äffchen rocken! 🌄🐒
Hier im Weedefix Grow, erreichen wir aktuell eine höhe von 68 CM.
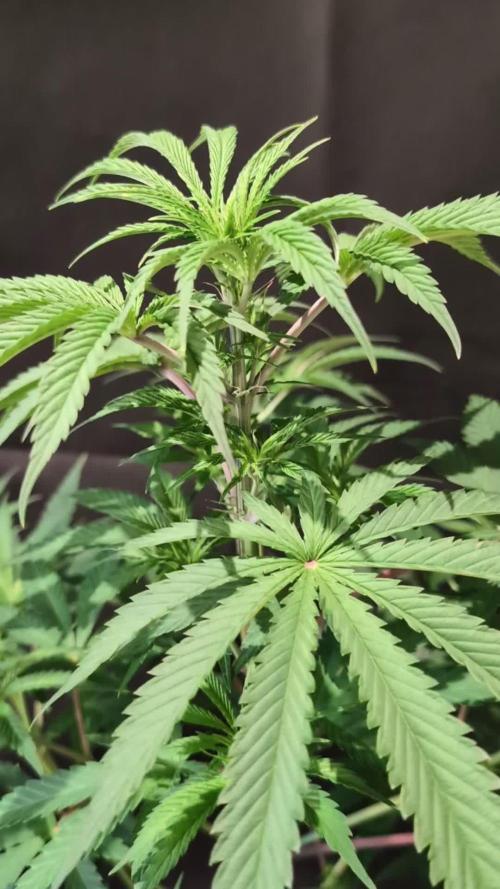
Es zeichnet sich ein durchgängis schönes und gesundes Wachstum ab.
Die Pflanzen entwickeln sich super gut und sind sehr robust.
Es ist bereits ein leichter fruchtig süßer Geruch wahrnehmbar.
Die Seitentriebe bilden sich immer weiter aus. Die Blattform ist schön Breit und Buschig.
Die Umgebungsgegebenheiten sind aktuell gut:
—————
🌞 Temp: 24
🌚 Temp: 18°C bis 19°C
💨 RH: 58%
VPD: 0,91 kPa
💡ppfd: 330 mpm
—————
Viele Grüße 👋


Likes
1
Share
@Gaso425
Follow
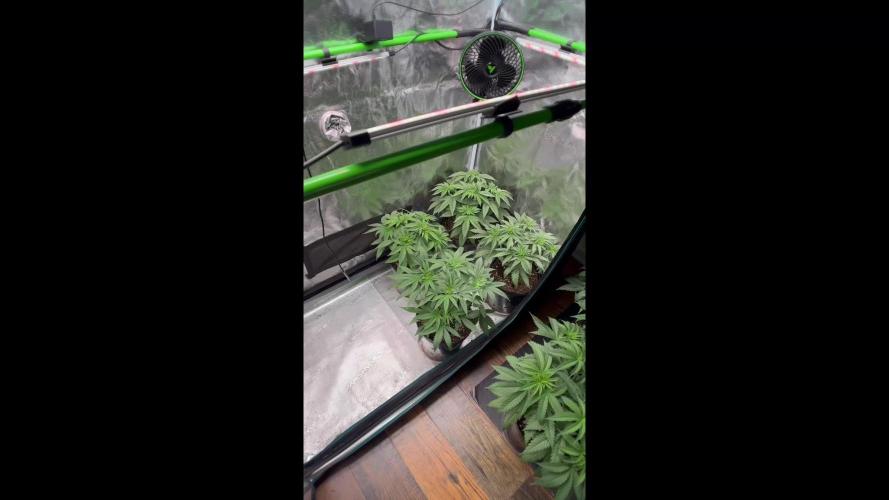
The girls push in to the flower and next week we start whit UV light in the night


Likes
2
Share


Likes
10
Share

@GREENPHOENIX6262
Follow
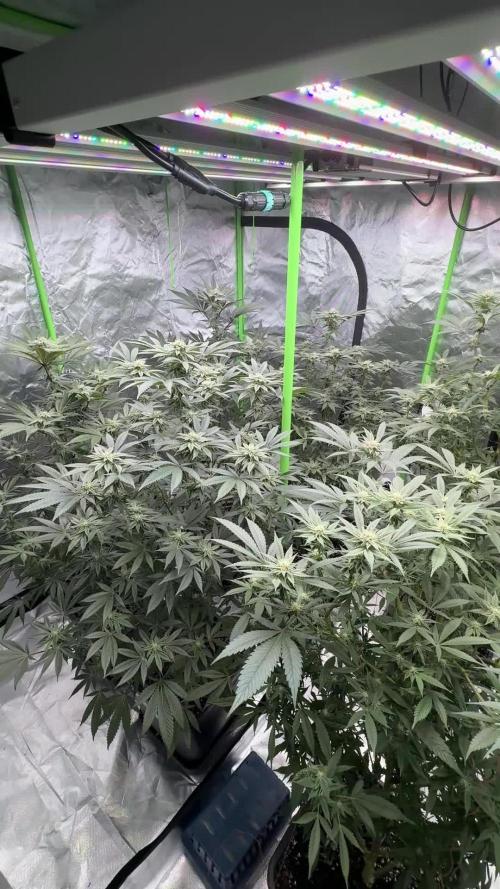
01/06 - Week 5 of flower - Increased nute feed to daily micro-dosing and increased Silica feed - temps running 72 (F) 65% humidity - Using light brown sugar as carbohydrate.
01/08 - Flowering coming along nicely - Light brown sugar for carbohydrate subs seems to be working effectively - micro dosing has continued with one morning feed before lights out and another 2hrs after lights on. Feeding solution temps are approximately 35 (F) - Drop in water feed temps has increased trichome production.


Likes
2
Share

@Lahuertacannabica
Follow
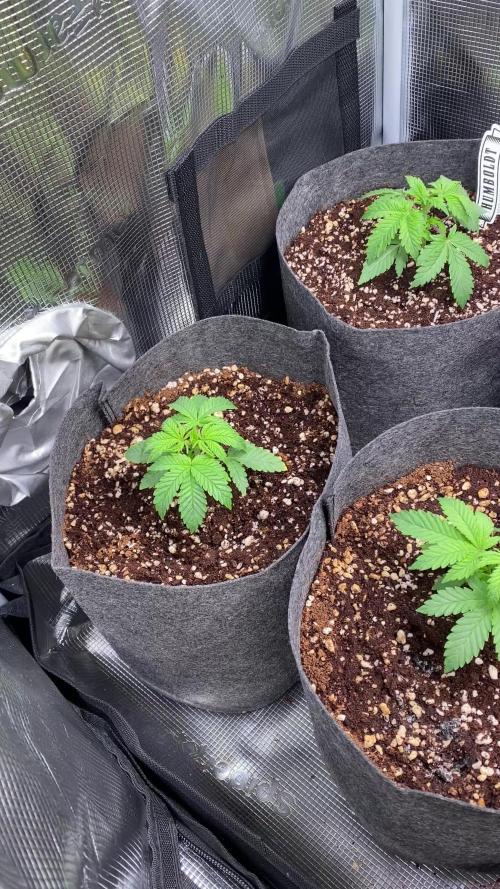
🌱 Semana 3 desde germinación – Ajustes clave.
Entramos en la semana 3 desde germinación y esta semana hemos hecho varios cambios importantes para empezar a empujar el crecimiento.
🔹 Riego y fertilización.
Esta semana hemos aumentado la cantidad de fertilizantes, subiendo la EC del riego hasta 0.8.
Además, hemos cambiado la estrategia de riego:
Riegos más cortos y continuos
Objetivo: subir la EC del suelo, que estaba bastante baja
📉 EC suelo inicio semana: 0.5
📈 EC suelo final semana 3: 1.2
Este control ha sido posible gracias al sensor 3-en-1 del kit GGS AC5 de Spider Farmer, que nos está facilitando muchísimo el ajuste fino del cultivo.
🔹 Próximos riegos.
A partir de ahora, en los siguientes riegos añadiremos Atazyme de Atami a la tabla, para mejorar la actividad radicular y ayudar a asimilar mejor los nutrientes.
🔹 Iluminación y clima.
Hemos subido la potencia del LED Spider Farmer SF2000 301H EVO al 75%, lo que ha provocado Un ligero aumento de la temperatura ambiente
Mejor intensidad lumínica para esta fase de crecimiento
Por ahora las plantas están respondiendo bien a los cambios, con un verde sano y crecimiento constante. Seguimos ajustando poco a poco, sin prisas pero sin pausas 💪🌿


Likes
132
Share


@Natrona
Follow
***DIVINE SEEDS *****
*****OPIUM*****
Week 22
For my outside ladies, Opium, Fractal, and Lemon Cake
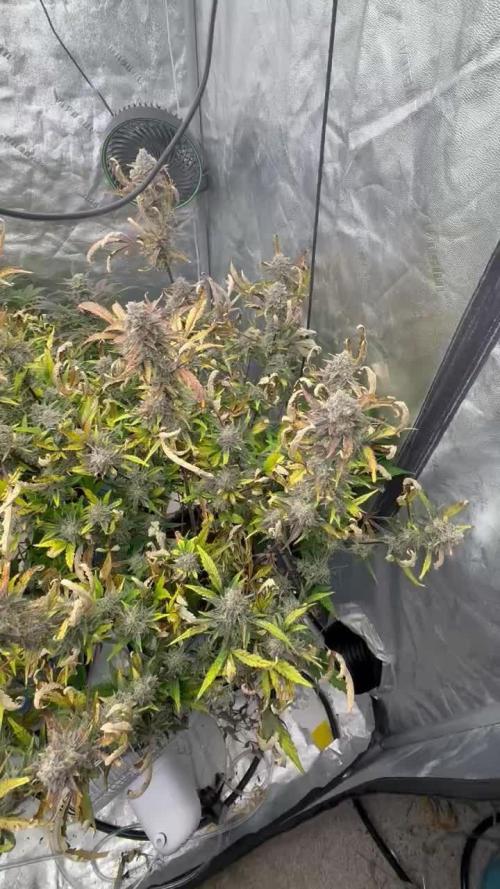
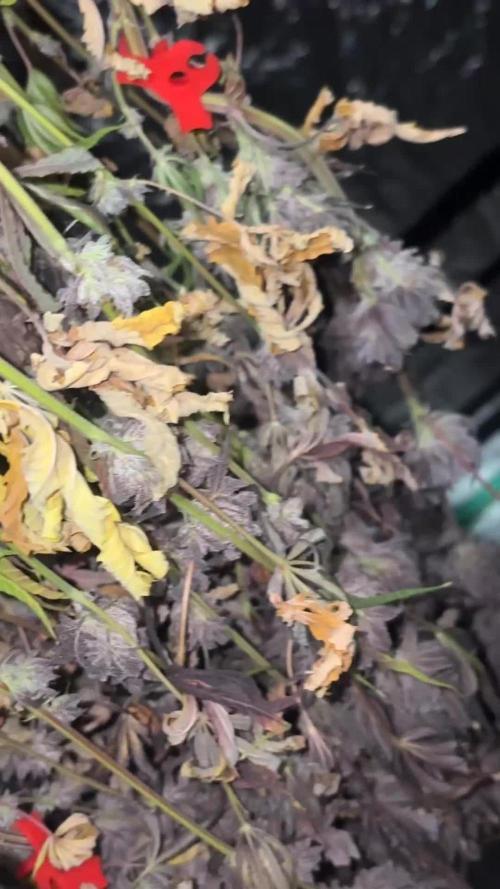
These gals are weathered. Opium is taller than I can see (over 6.5 feet) but from my dining room window, I see the top 3 inches of her main cola is dead. Many dead leaves packed in the buds. Her colas on all stems are massive, sticky and resinous. My plan was to wash and make bubble hash from her. Temperatures should be dropping into the 70 with nights in the 60’s but have returned to the upper 80-90 with high humidity. This week rain is expected every day following another hurricane. That was the determining factor to chop all outside girls down.
All the plants were chopped on Sept 12. Opium hung in the dark for 2 days and when Hubby started trimming up Opium he found dark areas deep in the buds and much of the bud mass just fell off. So both Lemon Cake and Opium have been tossed into the trash. I don’t even want to compost the plants in the event spores over winter. I hate losing any plant after I spent so much time growing them out but I won’t risk health over questionable harvests. I did an initial spot check on Fractal and she looked clean, but is being trimmed for a thorough inspection for any disease.
These ladies had a long vegetative phase. Probably too long since I started them in April so they would be hardened off before I went on vacay in May. Three months of veg caused massive vegetative growth, especially on Opium deep in the buds.. The various breeder notes on photos indicate late September or October harvest. So that was in the back of my mind during this grow.
All of them were in flower by early July. Light hours were over 14.5 and won’t be at 12/12 until September 26 (2 more weeks). I’m sure the plants were confused by the long veg and just said "Hell, I'm going for it" and started early flowering. I grew them too long waiting for the trichomes to develop.
👉Note for next year start seeds later in spring.
👉Plan start date based on counting back from the vernal equinox.
👉Based on such a long growing season, Autos may be preferable to finish quickly and not have extended vegetation phase before flower.
Thank you @DivineSeeds for the opportunity to grow your exotic strains. I wish I could have completed the grow with a smoke report. I was looking forward to being daydreamy psychedelically stoned, not to mention killing my chronic pain and insomnia. I do have more seeds and will try again in a controlled environment and trying topping or mainlining to keep her shorter and more manageable.
Thank you friends for the visits, likes and comments, I appreciate all of you💚.
Sending love, light, and healing 💫
💫Natrona 💫


Likes
31
Share


@BigBadLion
Follow
Heeey! 👋
It's week two and everything went quite well I believe! The girls are growing and they look healthy! 💪
During the first days this week and while I was checking them I started to think how I could improve (and fix) what I did in my previous grow, specifically the veg. phase. I wasn't the brightest person in my previous grow because I left the lights at their maximum power during this phase to increase the overall heat of the tent (it was a winter where I live) and while that idea made total sense to me at that time later I found out that was a not the best idea at all 😰. By doing what I did it meant my plants were receiving way more energy they could handle and that meant the plants didn't grow as much as they could 😱😭
So, how could I improve that this time? The best way was to get a PAR meter so I could measure how much light my babies are receiving but those are expensive so the best option after was using the lux meter (or rather the RGB brightness sensor) that's available in my phone (most phones come with one) and by doing that I get a rough idea how much food my babies were receiving (in lux tho, not the best method but it helps to get an idea) 👌
The first days Pistachio and Matcha were getting about 8000 lux and as the week progressed I ended near 18000. Some websites said that amount was acceptable for young plants (they do not talk about the quality of the light tho). For the next week I plan to reach 24000 lux and stay around that 😊
I also think this week I'll move the girls to a slightly bigger pot and with each transplant I'll keep using mycorhizes (Mico Root are mycorhizes) to help the root development.
Anyway, that's all for now. Thanks for reading and I hope you'll all enjoy the photos and timelapses I took (the 2nd one looks cool!)
Cheers! 😃

Likes
32
Share


@Platinouuu
Follow
El secado fgue bantante rapido, olorosas, sabrosas al comsumo y asotan como toda una verdadera indica. la cosecha es poca, pero la sepa es exotica. Muchos terpenos, los colores de la sepa son violetosos y verde flourecente. La recomiendo altamente, solo que su cosecha por planta es poca.
Likes
3
Share


@Go_Ku
Follow
My ladies are doing good, smell are weak at the moment but they are still on the beginning.

Likes
1
Share

@Ninjabuds
Follow
My super boof plant is gonna be a really thick bushy plant. It already I showing signs of large fan leaves and the nodes are already starting to stack on top of each other. I think this will just be a plain Jane green plant in the end but seems like it will stack really well. We will see it’s always a surprise
It’s day 41 from seed and all of the plants are really thriving
Likes
25
Share


@Prototype0181
Follow
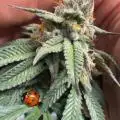
Liking this pheno so far she's producing some serious budsites already @ Day 8 of flower
Likes
10
Share


@Fat_Olsh_Farms
Follow
Forming a nice cross shape. Filling out nicely
Don't forget to pH up if you decide to try the maxigro. I use it every other watering, watering slowly until 10-15% runoff
Day 33 super cropping like a boss.


Likes
13
Share


@a1Andrew
Follow
MK Ultra
How long this strain will need up to the harvest? 55 - 65 Days
How many side branches will be build? 8/10; a great many
How strong these side branches will be? 8/10; strong and vigorous
How long these side branches will be? 5/10; into an average length
The stature can be described at the best one as follows: bushy, strong, strudy, slowly
How high is the yield? 7/10; high, but i dont opened it full potential
How is the relationship from buds to leaves? 7/10; above average
How compact are the Buds? 8/10; hard and compact
How "strong" is the Weed? Does it have a lasting effect? Or will it be soft and effectless? 8/10; is strong and long lasting
How fast there is tolerance build if you smoke (only) this Weed? 8/10; very slow tolerance education
How do you would describe the effect/high? 90 body/10 head
General Impression: 8/10; extraordinary and quite recommendable
In this grow I dont defoliate MK's and LA SAGE so they all were more bushy and had more stems than Og18's. The main problem of the grow was temperature, cuz it was up to 38-40 degreese and the plants had hard times, also there were some issues in watering. 600w HID + HLG 135v2 kit in 4x4 gave me 272g of extra dry buds of MK ultra and 200+ of LA S.A.G,E. (dryed 7 days in 30% humidity and 26-30 celsius) ... Love the strain, one of classics :)


Likes
54
Share


@DogDoctorOfficial
Follow
And this girl is on fire and in flower mode, i mean in just a few days she wen from big girl to a retarded enormous one, and she is not stoping at all, and i kind beed her to stop growing , she is way to tall for and indoor closet auto plant , go and figure this one out , i have no idea whats happening but they all are getting massive beyond expectations ever imagined , not complaining at all, just saying , i mean look at the size on this freaking monster, and at the same time look how gorgeous she looks , at least yo me she looks sexy af hihihi and now that she is in flower i can start spanking her , staring by defoliate the hell out of this cutie at some point very soon <3 <3 <3
Lets see how all goes
She keeps going and going and dont want to stop, need to defoliate asap
OMG Not STOPING and not so much time to defoliate yet …. I will i promise, i must , space is kind a getting in an SOS situation … OMG lol <3 <3 <3
As always thank you all for stoping by, for the love you guys put in the community, in to growing and it all, i am blessed to walk among all of you and am blessed with it all.
Genetics :
AUTO SOMANGO GLUE @ ADVANCED SEEDS
All info and full product details can be find in can find @
https://aptus-holland.com/
https://advancedseeds.com/
https://autopot.co.uk/
https://lumatek-lighting.com/
#aptus #aptusplanttech #aptusgang #aptusfamily #aptustrueplantscience #inbalancewithnature #trueplantscience #growerslove #dogdoctoofficial
With true love comes happiness <3 <3 <3 Always believe in your self and always do things expecting nothing in return and with an open heart , be a giver and the universe will give back to you in ways you could not even imagine so <3 <3 <3
More info and updates @
https://growdiaries.com/grower/dogdoctor
https://instagram.com/dogdoctorofficial
https://youtube.com/channel/UCR7ta4DKLFMg2xxTMr2cpIg
<3 <3 <3 Growers love to you all <3 <3 <3
