
Likes
Comments
Share


@sunshinegroww
Follow
Just hang to dry now lol smells amazing full update to follow once dry

Likes
9
Share


@Corks_Crew
Follow
Growing: 5 weeks
Flowering: 9 weeks
This was my first grow indoor from some time ago. First time using the Mars Hydro SP250. Was amazed at the result, did not expect it. Encountered a few problems, including Calmag deficiency and some bugs. Did not gave them water for 30 days after plantation to the big bags of 25L. Harvested all plants at the same time, which might have been too early for a few ladies. Nevertheless I enjoyed getting to know the lamp and hoping I will do better next round. The lamp was in this round not at max capacity but at 226w, it came like that out of the box and I did not adjust it. Also did zero defoliation which resulted in a lot of "Albino Tops" under the net, which I recovered to make butter and bubble hash from. Most of the buds above the net where really dense and not fluffy at all.
End result: 320gr total, around 4x 70gr average from the 2x BB OG, 1x A.M.S. and 1x Jack, the Purple Bud gave around 40grams.
Thanks for checking out my grow! Good luck growing!


Likes
34
Share


@Dunk_Junk
Follow
19.5cm/7.75" growth this week! Her flowers have developed very fast over this week.

Processing
Likes
14
Share


@CityFarmer
Follow
Hello everyone,
As you can see the White Gold is doing good, only topped her once but she still got nice, buds are growing really close and shes stinking really good, lets see how it she goes...
See you guys next week🤘🤘👊👊👊😉😉
Likes
28
Share


@Ultraviolet
Follow
In addition to improving the chemical composition of plants, UV light also accelerates the germination process for seeds and helps prepare plants for higher light intensities. It acts as a natural stimulant for seeds, encouraging quicker sprouting and robust initial growth. Photosynthesis, as we all know, is the process where plants use sunlight, water, and carbon dioxide to create their own food. But here’s a little twist – UV light has been found to enhance this process. When plants are exposed to UV light, their chloroplasts (the tiny structures inside plant cells where photosynthesis occurs) work even more efficiently. This means they can produce more food for themselves! UV light triggers a response in plants by activating specific proteins and enzymes that optimize their photosynthetic processes. This translates into increased growth rates, improved nutrient absorption, and enhanced overall health. It’s like giving the plants a little extra boost to reach their full potential. For instance, when certain flowers are exposed to controlled amounts of UV light, they produce deeper and richer colors. Think of it as a form of “sun-kissed” enhancement! This deepening of color isn’t just about aesthetics; it also indicates improved biochemical processes within the plants.When plants are exposed to UVB light, it is now known something incredible happens—they begin producing vitamin D3 at an accelerated rate. UVB light exposure can lead to an increase in the production of vitamin D3 in plants. The optimal wavelength range for stimulating vitamin D3 synthesis in plants is around 290nm-310nm. Vitamin D3 is produced by UVB exposure of 7-dehydrocholesterol (provitamin D3) in the skin. The conversion to the pre-vitamin D happens by exposure to sunlight at 290–315 nm (UVB). Vitamin D3 is synthesized in the skin upon UVB exposure 290-315nm. The UVB exposure of provitamin D3 (7-dehydrocholesterol) in the skin breaks the B-ring to form previtamin D3, which undergoes thermally induced rearrangement to vitamin D3. Vitamin D3 is transported to the liver where it is hydroxylated at C-25 by the enzyme 25-hydroxylase producing 25OHD3, which is the major circulating form in vertebrates. The 25OHD3 is hydroxylated a second time at C-1 in the kidneys to the active metabolite. Magnesium is used in large quantities for the enzymatic process, which enables the plant to process vitamin D3. Increase magnesium accordingly.

Likes
2
Share


Likes
32
Share

@yan402
Follow
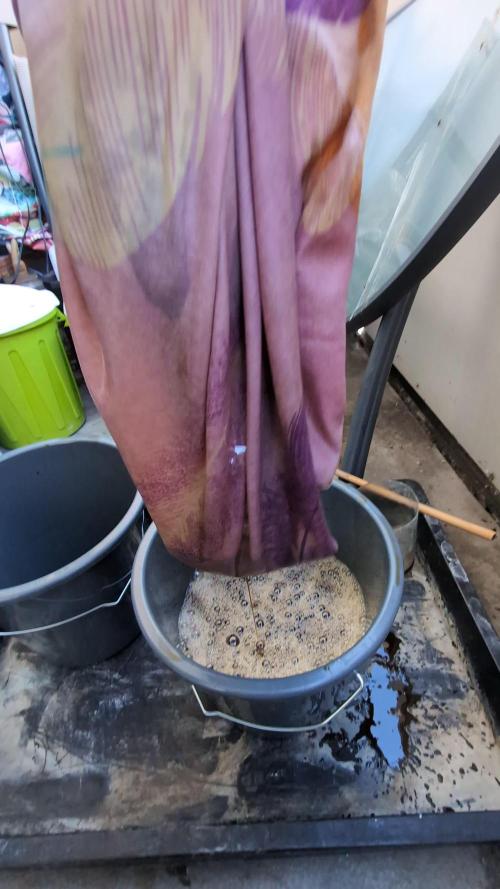
⚗️ FERMAKOR – Neutralisation & Filtering (Final Stage)
🧠 “From reactor to bottle — the first real batch.”
---
13.10.25 — Pulled about 1L of the finished FERMAKOR extract into a 5L bucket and added roughly 2L of clean water. Let it sit for a bit to calm down and cool off before touching the pH.
Sample came back around pH 6.8–7, totally non-caustic — exactly what I wanted before acidifying for storage.
Started adding phosphoric acid (59%) slow and steady, stirring between each pour.
Ended up using about 50ml total before the colour flipped red on the GHE drops, landing the mix right around pH 3–3.5.
No foam, no violent reaction, just smooth. Smell turned clean and metallic-sweet — the kind of smell that tells you it’s done reacting.
---
Filtering setup
Used a pillowcase and cheesecloth layered together as the filter stack.
The pillowcase handled all the heavy junk, the cheesecloth grabbed the fine silt.
It came out thick, dark amber, glossy — zero grit.
I’ll leave it to rest overnight, open, just to let any tiny bubbles or gases clear out before bottling.
---
Final note
This batch is officially FERMAKOR B Concentrate V1.0 (1:4).
Storage pH locked between 3.3–3.8, ready to bottle and shake before use.
This one’s rich in P, K, Mg, and micros, while Calcium Nitrate will handle the N and Ca on the A-part side.
---
🌱 Closing the diary
That’s it for this round — extraction phase complete.
I’ll be closing this diary here and opening a new one called “FERMAKOR A+B Test Grow – V1.”
Testing starts Monday, 20.10.2025 on a single plant.
Time to see if this brew actually works in the tent.
📸 All images videos to be added later — filter setup, pH colour, and final concentrate.
Likes
16
Share


@Willy_Balls
Follow
Last days before chop. Limiting watering and reducing temp really boosted maturing. They ripened fast this last week.
I’m glad o made it in time.
Next update chop.


Likes
45
Share


@GreenHouseLab
Follow
So we have one in week three of flower and the other is currently still in veg do to vegetables and other #AUTOs started for friends. It’s going to be interesting to say the least having that hydro in flower will be insane, almost need to remove half in clones just to be able to maintain. From what I’ve from her sister the stretch is easily manageable.
Cheers to good Budz & Buds
Likes
84
Share


@Hydro_Hiebs
Follow
🌱Welcome to my 2 x 4 ft autoflower tent. Here we have Ganja Farmer's Strawberry Banana Purp. We just finished the 8th week of flower and it's harvest time! The terps really changed more into a strawberry Orange on this one and I am not complaining it is mouth watering and I am looking forward to the harvest report in about a month and a half from this post. 😌💨
💧She has been receiving water every other day about 1 L of pH adjusted to 6.5.
✂️ TRAINING: NONE
💡⚡Check Mars Hydro out on Instagram! @marshydro_aliexpress2 💡⚡

Processing
Likes
45
Share


@UKauto
Follow
Doing gooood. She's small but looks great so far 👌🏻
Smells peppery and sour.
Not really frosty but might start knocking some trichomes out these next few weeks.
Really happy with all the shogun stuff so far. Noticed a big difference from my previous grows I couldn't be happier 😁
Started on the pk boost this week,
Stopped the katana roots and dropped the samurai bloom down. go time for these buds now 👊🏻

Likes
5
Share


@SopChop
Follow
Keeps growing too close to light. Have now raised light as high as can get it. Doing HST to keep top of branchs at least 10" from light.
has now been stretching for about 5 long weeks. please make it stop.


Likes
40
Share


@iLoveGoodWeed
Follow
Week 10 - she stop stretching finally and the high is 93cm and I can see that the buds are stretching instead which is good. Looking forward to see how fat she will be, I think another. 3-4 weeks and flush time.
Likes
2
Share


@GuniGugu
Follow
- nutrient doses are the same as prescripted in BioBizz chart, but still, every second and a half watering is pure water
- 52 Day cut some leaves in the middle to open some space for lower floors


Likes
15
Share


@Chubbs
Follow
420Fastbuds
FBT2313/Week 4
What up everyone. Hope all are well. Weekly update on these two gorgeous girls. This past week has been fun doing a major defoliation taking off most the bigger fan leafs. Hard to tell a few days later I took anything off. Which is amazing they never skipped a beat. No big issue's and since sprouted have grown phenomenal being relatively easy. All in all Happy Growing.
Likes
19
Share


@Wenz004
Follow
Unten rum etwas beschnitten
erste Woche mit 12h verlief gut soweit.
Ab der mitte der Woche 5 hat sich def Wasseverbrauch deutlich erhöht auf 3 Liter pro Tag...Transpiration jetzt hoch...Luftbefeuchter raus
Tag nach Aufdrehen auf 100% (SF2000) haben sich die Zackenspitzen der Bläter verdächtig nach oben gerichtet...pro hänger entfernt und die Drahtseile direkt mittels Karabiner an der oberen Stange aufgehängt...Lampe auf 90% zurückgedreht...jetzt sind die Spitzen wieder gut...im weiteren Verlauf noch mehr Änderungen


