


Likes
Comments
Share


@organicman
Follow
hb3 has been trashed, is a hermie
heat alarm:
outside temp is 40˚C, in tent 32°C / 67 rh
decrease of lamp dist to 30cm, decrease of lamp power from 200 w to 175 w results in:
in tent 30°C / 64 rh
____________________________________________
light- and watering schedule: see photos
now:
15 plants
3 x Auto Orange Bud > Dutch Passion (early80's)
1 x Haze Berry Automatic > Royal Queen Seeds (2018)
2 x Auto Euforia > Dutch Passion (late 90's)
2 x Auto Bubblegum > TH Seeds (late 80's)
2 x Original Auto BubbleGum > Fast Buds Company (late 80's)
1 x Strawberry Pie Auto > Fast Buds Company
1 x Gorilla Cookies Auto Seed Stockers (2015)
2 x Auto White Widow x Big Bud > Female Seeds
setup + strategy:
18 seeds
3 x Auto Orange Bud > Dutch Passion (early80's)
3 x Haze Berry Automatic > Royal Queen Seeds (2018)
3 x Auto Euforia > Dutch Passion (late 90's)
2 x Auto Bubblegum > TH Seeds (late 80's)
2 x Original Auto BubbleGum > Fast Buds Company (late 80's)
2 x Strawberry Pie Auto > Fast Buds Company
1 x Gorilla Cookies Auto Seed Stockers (2015)
2 x Auto White Widow x Big Bud > Female Seeds
setup:
18 x gronest 2 liter
60 cm x 120 cm x 180 cm (2 x 4) growtent
4 l humidifier
25 watt axial fan
15 watt clip fan
ro-filter
bath room with a 50 watts room fan (-> carbon filter not necessary)
...and a lot of odds and ends.
grow strategy:
max yield by stressing with:
1. tiny shoes (2 l fabric pots standing on 3 plastic rings (4 cm) for max oxygen)
2. tiny growspace (18plants on 0.72 sqm)
3. many strains (8 strains)
4. annoying neighbourhood (mixing old - i.e. bubblegum (late 80's) - with young- i.e. hazeberry (2018) - genetics)
5. no stress by light or food or water
6. unintentionally too much food
plus:
- no lst - no hst - just leaf tucking
- positioning bigger strains (euphoria, orange bud, haze berry) or just bigger phenos on less intense light spots (end of tent + edges)
- music-rotation: 24 hrs reggae (for sativas) - 24 hrs classicals (because it's scientifically proofed) - 24 hrs traditionals from the hindukush region (for the indicas)
max efficiency (min electricity - max yield):
- light: 23 h on - 1 h off
- keeping the distance of 18" (45 cm) and dimming to the right par (lux) - value depending on growing stages (see sheet: beginning 185 par ( 10000 lux/100 watt )/end 340 par ( 18000 lux/175 watt )) => ends up in approx. 170 watts in average over max 15 weeks
temperatur management:
- using approx. max. half of what the lamp can do keeps temperature low:
my tsl 2000 is pulling max. 360 watts of the wall - i need only 175 watts, results in less temperature than using a 175 watts lamp
- adjusting the temperature by using a humidifier outside of tent:
blown in humidity is soaking degrees and is transported out by fan, works much better than doing the same with pure air
summer extreme: no humidifier: 36°C / 35 rh - with humidifier: 29°C / 65 rh
works for 1-2 weeks of real hot summer days, no mould, no signs of stress in two summers
germination:
seeding in waterglass
spraying "basic"-water: ro-water (22 ppm) + calmag to 180 ppm every 4 - 8 hours until sprouted
man versus fungus gnat:
5 days before seeding i'm running the tent with "basic"-watered pots as if there were plants inside - led on, fans on, humidifier on. Fungus gnats coming with the soil might take the chance to come out now for breeding. i'm waiting with a 9 mm rifle. in the past i found 6 gnats in 2 of 8 x 50 l biobizz lightmix bags coming out of the soil. i could eliminate every single gnat successfully ;)
rotating harvest:
the little ones will be harvested completely when ready. at this point only the top branches of the big ones will be cut...and the new (basic-watered) pots of the new grow will move into the tent. 2-3 weeks later the secod half of the big ones will be cut and the second half of the new grow will move in...
nutes:
biobizz / soil: biobizz lightmix
bloom,grow,topmax,activera,algamic
+ aminopower instead of bio heaven (too expensive)
individual feeding schedule/once a week:
veg: 200 - 600 ppm
bloom: 600 - 900 ppm
water:
ro-water with:
veg: 100-150 ppm calmag
bloom: 150 ppm calmag






Likes
Comments
Share

@Lvnsource
Follow
Feed Log:
D:61 - 4L - [pH 6.0-7.0] Si[1.2ml],Algo[0ml], Molasses[2tsp],HakaphosB[0g], HakaphosR[3.8g],Ca[0.3g/L/]Mg[0.2g/L] INPUT; [1.658 EC] OUTPUT; 1.1L pH ? [1.472 EC] previous irrigation: D:55
———————————————————————————
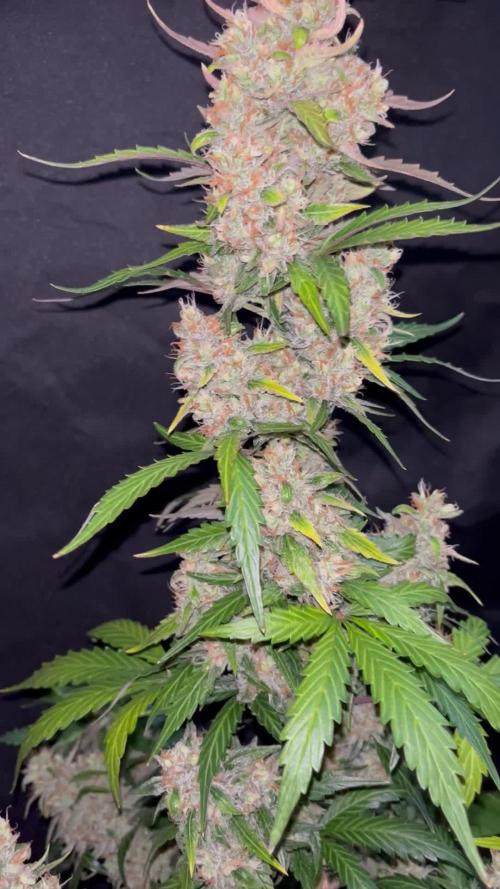
This past week I had to change the light cycle making the grow run at night instead of daytime since it’s summer and heat is an issue : temps stay around 28-29c consistently with rh levels ranging between 55-62% ; I hope some terps will stay in tact ?
Lights are set to run at 60% 270 watts (780 PAR at the top) instead of the usual 337.5w.
The branches have also started sagging so to remedy that I’ve tied them upwards this way the buds also get extra PAR which should help increase gains further 📈
The past 2 fertigations I’ve also included a tsp of organic molasses for the microbial life; since I’m running a hybrid approach “synganic” 👍
Also once again my pH meter broke which leaves me with pH test strips ; they’re usually good enough to get by ✌️
Likes
422
Share


@Crashoverite
Follow
Hi all🧑🌾
Welcome to my final 🍌💜👊 week update.
First of all. I would like to thank you all for such an amazing support on this bananas journey. I am amazed of the amount of love received from community here. Thank you Grow Diaries and Fastbuds for opportuniy to share and grow this amazing genetics. Love you all❤️💜💚
Was looking for strong indica dominant strain and after reading and hearing so much about this one. Just couldn't resist to not give a go. Was a bit worried before planting seeds that my final yield outcome may not be satisactionary as only have 0.26msq and Fastbuds advertising this strain as 450-550g msq but thankfuly my result was way above this scale.
My 2 beautiful ladies
Athena - right corner lady. She was slighlthly more dominant over entire grow cycle. She got more space on scrog earlier and that's why she developed the most.
Xena - left corner lady, I belive that she could outgrew her sister if she just have more space and another week of time. Did not expect her to turn so well on the end.
Both girls were put in darkness for 48h before chop. Wet trimmed and hang for a week. Daily jars burbing for 10 days and every 2-4 days now.
Weights
Wet trimmed
Athena 870g
Xena 632g
Total 1502g
Dry trimmed
Athena 172g
Xena 147g
Total dry 319g
Bubble hash 6g (37g of trims)
I am very happy with this result.
In my opinion Banana Purple Punch Auto its a masterpiece.
Thank you so much for all the support, likes, follows and comments 🙏❤️💜❤️
Peace and love brother and sisters ✌️💚🧑🌾
Smoke review coming in shortly
Links
https://2fast4buds.com/seeds/banana-purple-punch-auto
https://plagron.com
https://www.biobizz.com/
https://fishheadfarms.com/
Likes
16
Share


@GreenMunchkin
Follow
Alright grow cycle, mistakes, improvements, etc...
She did stay in veg for too long, her growth was slow and not the best and so she took quite long, next time i'll be there from the beginning so I can take care of her throughout.
But her growth is really fun. It is a tall growing sativa with fairly tight noding when trained accordingly, producing long filled colas. The buds grow fairly dense and fluffly but do air out a little when dried. Trichome production was pretty impressive as well as terpene production.
She had thrips since her early days but did not seem to mind them at all. I did spray them initially but once flower started I stopped. I believe predatory mites might have been feeding on the pupae in the soil, if that is what this specific species of thrips did, the reason I say that is I could never see adults only larvae. Whatever the case maybe they were there but the population never really increased.
Something I did not mention during the grow is that those plants were played music during the days, music that is apparently developed for plants.
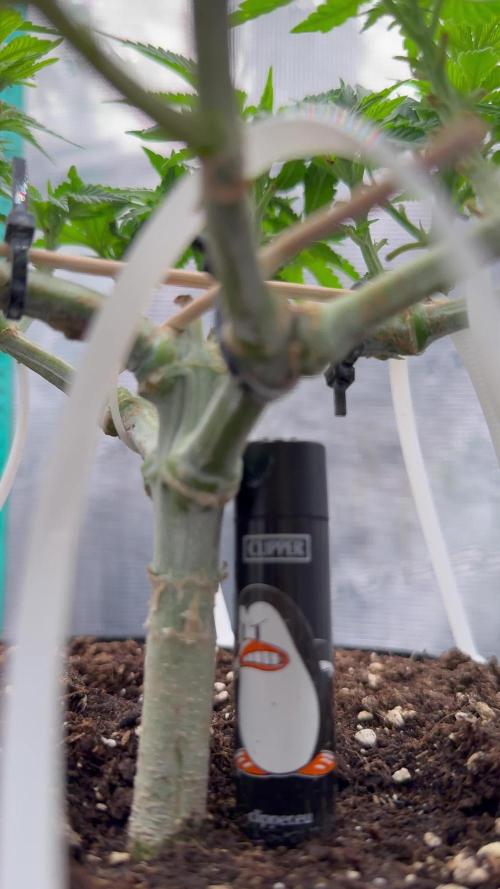
The 10L pot was WAY too small for a true sustainable living organic and to provide enough space for the plant, that was a mistake, I'd say a 20L would be the bare minimum and still. The bigger the better.
The hempy transfer did not hurt the plant and I believe even helped to some extent, BUT, I am still running test on the subject and so can't confirm anything, here are my observations
Roots did not colonize the perlite, a little on top and the sides but that was it, I was expecting to see a big root mass in there.
I believe hempy are great for salt fert as it hold a soup of nutes where the plant can feed from since the coco only holds very little
Whereas in nature most nutrient are in the top soil where the highest amount of decomposition happens, this is where the highest microbial activity happens and so where the plant will find food. Living organic is trying to reproduce nature and so there is no need for the plant's roots to gather at the bottom of the pot. Although it could have potentially provided the plant access to a larger amount of water and possibly more oxygenation of the pot. Those are all theories, please speak up if you have other proofs.
In conclusion , unless i get proven otherwise by someone or my latest running experiment , I will not be using hempies again as I believe it brings more complication and issues than a simple fabric pot.
The lights, The 600w at the start was good, then I decided to add a 400w...😂 That was completely overkill and not necessary. Waste of electricity. And they started suffering from too much light it seems at some point, I raised the light by a good 30 cm and they were fine.
600 is more than enough.
I am happy about how the soil performed but it has room for improvements.
As for the watering technique I have been watering large ammount every few days, next time I will be giving constant small amount of water each day and a soak every week or so, I believe the soil might perform better under those conditions.
She was also an easy plant to harvest whit her long colas which had very little foliage, I do trim in excess as I like my buds extra clean but the buds are not excessively bushy.
The trims were use to make some bubble hash, around 100g of wet trims yielded around 1.5-2g of bubble hash.
I did add a negative effect but only because it wouldn't give me a smile otherwise, but to be honnest it barely dries your mouth.
The soil is going to be recycled and reused in a next grow.
I can't think of anything else at the moment but if you have any question don't hesitate.

Likes
10
Share


@StoneJackson
Follow
The outdoors are going great at the moment other than a few yellowing lower leaves. I corrected with a nitrogen booster (mainly blood and bone meal I think) and also hit them with some rock phosphate, manure, compost, earth worm castings, bio-char, and epsom salts for a magnesium kick, the yellowing should fade in the next week and I’m thinking they’ll have everything they need for flower.
I mixed all that, top dressed the ground around the bottom of the pots (they’re well and truly rooted in the ground) and topped up the pots with the rest.
Looking forward to a good yield out there it has been raining lately, humidity is up but I’m sure the week of sunshine coming up will correct any issues trouble is they’ve gotten so think at the top it’s hard to splay everything out in an optimal way, I’m slowly working through the branches bringing heads down and airing the more bushy sections out.
Other than that I’m a little concerned about insects I’m seeing lots of fungus gnats but i have been using eco-neem so I’ll continue to foliar spray thoroughly, soil drench and hope for the best 🤞🏽
Likes
16
Share


@DreamIT
Follow
Sponsored by:
🎭ZAMNESIA SEEDS🎭-💡VIPARSPECTRA💡-💐GREEN BUZZ NUTRIENTS💐-🛠️WEDRYER🛠️
28/7 I took a clone and leave it a week of greenery before moving it to bloom, yeah
2/8 it has recovered very well from the cut and grows luxuriantly. soon she comes into bloom too
__________________________________________
Personal advertising (contains affiliate links)
__________________________________________
🦄Zamnesia boasts the most complete and accurate site where you can find everything related to cannabis and the "psychedelic" world. Autoflowering, feminized seeds, mushrooms, salvia divinorum, afrodisiacim of everything, and more! ( no affiliate link)
✅https://bit.ly/Zamnesiaseeds
__________________________________________
Did you know that Green Buzz Nutrients fertilizers are 100% vegan? A complete line of products ready to give the best to each of your plants! Visit the site and see my journals to see how they work 🦄
🤯 And with the code "dreami t" you will immediately receive a 15% discount on your purchases
✅https: //bit.ly/GreenBuzzLiquidsPro
__________________________________________
👀 Are you looking for a good lamp to start with? 👀
🌞Viparspectra has something more than the others, take a look at their site.
⏩ Use "GDVIP" for an extra discount or "DREAMIT3" for an extra 5 %% discount
👀 Search for it on Amazon
✅Amazon USA: https://amzn.to/30xSTVq
✅Amazon Canada: https://amzn.to/38udUVe
✅Viparspectra UE: bit.ly/ViparspectraUE
✅Viparspectra USA: bit.ly/ViparspectraUS
______________________________________________
🌈 Tired of blowing on your weed hoping it dries quickly? Check out the Wedryer website! You will find a well-made accessory that will help your weed dry in just 8-10 days without the annoying risk of finding mold or other annoyances! (no affiliate links)
✅https: //bit.ly/Wedryer_
______________________________________________
📷🥇Follow the best photos on Instagram 🥇📷
https://www.instagram.com/dreamit420/
Backup
https://www.instagram.com/dreamit4200/
🔻🔻Leave a comment with your opinion if you pass by here🔻🔻
🤟🦄💚 Thank you and good growth 💚🦄🤟


Likes
142
Share


@MadeInGermany
Follow
Hi people 🤗
A lot has happened this week 😄
The 3 Blue Cheese and 2 Kosher Tangie Kush which have been in the flowering tent for 1 week have become very bushy 👍
Unfortunately I just noticed that I completely forgot to take pictures of the Blue Cheese Phenotype # 3 🤦♂️🏻
The picture will be given later.
The rest of the Vegi tent is also progressing very well.
They are repotted in 11 liter pots this week, and then come to the flowering chamber die the following week
The next week there will be new pictures, until then I wish everyone a nice start into the new week 🙏🏻💪🏻
Let it grow 🍀🌱


Likes
11
Share


@4F1M6
Follow
Super solid canopy between these 2 ladies. Nice sea of colas brewing up. No vertical growth really to speak of. Just some flower mass. Very happy and healthy and looking very vibrant. Looking sexy in the garden lol.
They got treated with Dr zhymes as a preventative. That will basically wrap up their treatments ...possibly once more with lost coast.
Upped the pk intake as they are blooming strong now. Gotta keep those engines well fuelled. Response was stellar. Happy happy happy.
Until next update. Happy growing and stay lit fam.

Likes
5
Share


@savvage61
Follow
bad week just getting over covid had a defense on 1 plant I believe it was a genetic issue rather than stretching out it grew with in not allowing light and air so I did a 3x flush followed by 1 gal of PH 6.3 and 1 tsp of cal mag plus I believe I had a molybdenum or magnesium issue. here is a very helpful chart that will let you diagnose and treat any issues https://dutch-passion.com/en/blog/a-visual-guide-to-cannabis-deficiencies-n987 I do have covid and am on the road to recovery this has been a tough grow be sure to check out the video. I did manage to get my temps in line 69*f light out 80* f with light on after 16 hrs. I dont belivbe I will be doing my Super Sativa seed club photo contest I never received the seeds they did off to send them out But there is no way I can go from seed to harvest in 110 days. so I will be changing my grow to a Halloween themed Nuclear Scary Bubbles and Blackberry moonrocks straight from the high quality genetics of NUKEHEAD seeds "anyone who grows Knows Nuke head stayt tuned for more fun to come

Likes
14
Share


@Fre_84
Follow
It was my first cultivation. I learned a lot and will learn a lot more with the next ones. I understood that intervening on the plant requires a certain experience. In fact, of the three plants, this is the one that has grown best (and has not received any intervention). Easy cultivation ... great result!
Processing
Likes
26
Share


@Dunk_Junk
Follow
Good growth this week but I think she is still in Veg mode.... I hope I have not made a big mistake not FIMing her or any of the others in the tent. She is easily the tallest of all four.

Likes
10
Share


@BigHickory357
Follow
This grow was educational. I had major problems not with just germination, but actually getting the seed to grow .... I am majorly pleased and happy over all...
Her buds are super dank sticky icky... smells of fuel, citrus, earth, wood... visable THC/ Cannabinoid Crystal's all over her buds... her buds are THICK...
MA2 definitely yielded more than MA1! But both plants very similar in "body type" she took longer than MA1, but shes definitely fatter...
I can not wait to try this sexy hot mamma....
Likes
21
Share


@Bluemels
Follow
Der Geruch ist sehr intensiv geworden 😲
Seit ein paar Tagen gieße ich nur noch mit Wasser, nur noch 11 Tag bis zur Ernte 😁
Ich senke nach und nach die Temperatur und Luftfeuchtigkeit.
Likes
26
Share


@Highgrade_Harvests
Follow
The 3 that are in the 5 gallon pots are the gorilla gas seeds and the one in the litte pot is the blueberry pie f1 fast and another grow off im involved in with seedsman. All of them are off to a great start in seedling starter mix. Just transplanted the gorilla gas seeds into their 5 gallon pots where they will remain for the rest of the grow. Right now I'm just feeding them 6.5.ph water. The coco I'm using is preamended with nutrients to last a couple weeks. Can't wait to watch these girls grow! I'm going to try to get a time lapse video of the grow if I can get my camera working right.

Likes
22
Share


@Slobasian
Follow
You walk into the back yard and it’s a straight face punch of smells. Looking like some indoor rn moved all plants to safer place in case storm hits so now I atleast have a wind break

Likes
52
Share


@Santica_Garden
Follow
Just another update for the King's Juice by Green House Seeds, I have uploaded a video for you guys which gives you guys a better look and how I'm progressing and how I'm training the ladies.
Any questions guys just ask.
Happy Growing 👍🏾🌱💚😎

Likes
41
Share

@Santica_Garden
Follow
So we have reached the end of Week 6 from and I am flipping the the ladies to flower. I have uploaded a video along with pictures..... Hope it plays.
Stay Safe guys and Happy Growing, any questions just ask away 👍🏾💚
Likes
1
Share


@420Cannaking
Follow
Vegetation cycle starts.
Light intensity 50% @ 16 inches
Nutrient program starts at 50% Green Planet Easy Feed and Week 2 begin Green Planet Pro Feed @ 50%.
Abit too much light for the plants finding the sweet spot on a 480watt LED,they recovered well.
Still battling high humidity and high temps. 28-31'C 65%-90%. Introducing a new dehumidifier as of next week.
Have turned AC on High between 11am-5pm (hottest part of the day) Summer only!

Likes
4
Share
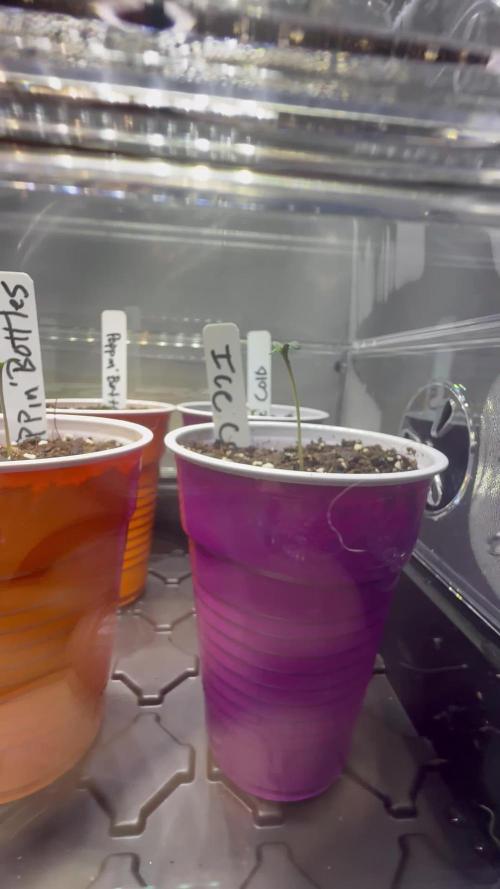

@Mr_NYceguy
Follow
Paper towels placed between two dinner plates, placed on heating mat. 48 hours all seeds had tap roots. Placed in solo cups filled with coco loco, and sprinkled a little Great White in the holes. All seeds sprouted with in 36 hours. 76-78 degrees with 80% humidity. 100% Germination - AMAZING! #nomids
