


Likes
Comments
Share


@jermainemorris2011
Follow
Noticed that four out of the five plants have began to pre-flower at week five so I’m beginning to switch my nutrients from grow to bloom and soon after that I’ll be adding my bloom booster..I’m wondering if I should Switch from my grow nutrients to my bloom nutrients as soon as I seen those pistols or should I give it another week

Processing
Likes
2
Share


@Cogollo_eu
Follow
**Encontrarás la traducción a español al final de la descripción**
From/Desde: 23/09/19 || To/Hasta: 29/09/19
From day/Desde día: 22 || To day/Hasta día: 28
BlueBerry Cookies Diary / Diario de las BlueBerry Cookies:
https://growdiaries.com/diaries/38769-dinafem-039-s-blueberry-cookies-at-the-ocean
If you like this week, please hit a like, it costs you nothing! 👊. Thanks in advance 😉!
-----IMAGES & VIDEOS-----
I'm so sorry about the quantity of contents for this week and the following ones, as I've been telling I was under hard work pressure, and this week and the next one where the worst of them. In fact this week has some more images, but I decided to move them to next week or otherways next week is empty of contents.
V1: Timelapse week video that covers 4 days. At about sec 25 I performed the topping on the babies, as I told before abobe 5th node, and one of them abobe the 6th.
V2: This night I tried to make some videos of all the Cookies, but suddenly at 2:00 a.m my telephone ringed, I had to end up with the session, not a single BlueBerry capture and start to work 😲💻 (Server migration stuff... Damn unexpected boss calls!!)
P1: BlueBerry Cookies Left <--•--> Ocean Grown Cookies Right
-----WEEK SUMMARY-----
This week the growing was georgeous, the Ocean Growns have almost doubled in size, the went from 15 to 29 cm even topping them. I'm loving the branch distribution os this plants is very beautiful. The leaves of this Strain are specially Beauty
-----WATERING CALENDAR-----
28/09/19 DAY 27 - 1 l with all week nutrients @ (1.2 EC | PH 6.2 | 25.1ºc)
*****ESPAÑOL*****
Por favor, si te gusta esta semana dale un like, no te cuesta nada 👊. ¡Gracias por adelantado 😉!
-----IMÁGENES & VÍDEOS-----
Siento mucho la carencia de contenidos de esta semana y las que vienen, como he estado comentando he estado bajo muchísima presión de trabajo y esta semana y la siguiente han sido las peores de todas. De hecho esta semana tenía alguna imágenes más, pero he decidido pasarlas a la que viene, si no la semana que viene estaría sin contenidos.
V1: Un video Timelapse de 4 días. En el segundo 25 les realizo la poda apical a las pequeñas.
V2: Esta noche intenté hacer algunos vídeos de todas las Cookies, pero en mitad de la sesión, a las 2:00 a.m llamada del jefe, y a terminar la sesión sin una sola foto de las blueberries y aponerme a currar 😲💻 (Migración de servidores... Maldigo las llamadas inesperadas de los jefes!!)
P1: Ocean Grown Cookies Dere <--•--> BlueBerry Cookies Izqui
-----SUMARIO SEMANAL-----
El crecimiento de esta semana ha sido brutal, las Ocean Grown casi han doblado su tamaño, han pasado de los 15 a los 29 y eso que les he realizado la poda apical.
-----CALENDARIO DE RIEGO-----
28/09/19 DAY 27 - 1 l con todos los nutrientes semanales @ (1,2 EC | PH 6,2 | 25,1ºc)


Likes
12
Share

@Hempface86
Follow
Big shout out to Herbies Seeds for making this grow possible, this is a very exciting grow for a couple reasons, one being that I love purple haze, and secondly, this is my first run with growdots so I'm really hoping they work great because I don't have the time with work. Anymore to do my old concoction, because it would take me literally 3 hrs some days just to gave all the plans their own individual feed, because I would make each batch for each individual plant depending on their needs... I hope everybody's doing well. I am doing better than I was doing, and so God is good ... i hope everyone's having a great day. And I really look forward to this girl growing out because there's a good chance as well that this is gonna be my last auto flower for a little bit.. I have a couple that I wanna grow ( purple b****** eater by roc bud and banana daddy bx auto my ethos ... both thanks to my buddy @Grow4releaf...
Hope everyone is doing well.God bless and happy growing ✌️
Likes
4
Share


@Kitties_and_Colas
Follow
We pulled her down with approx 90% cloudy trics..not a massive harvest and she could have gone an extra week but we're still playing catch up from our hermi ,we also desperately needed the space..I REALLY like this strain, it's easily becoming a favorite...it didn't last very long the firs time lol...the wife gives it a 7 and I'd say it's a firm 8.5 :)
Likes
11
Share


@BruceBlack
Follow
Well , so I started the week having some over-fertilization problems and some of the leaves were getting curly , also green was too intense.
Due to some great advice from more experienced growers I decided to give'em just water for this past week which I guess was great, you can see color of the leaves in the last video I posted, look more natural overall
Today I decided to gently break the main stem from my tallest girl in order to see if it ill grow better in horizontal position and will start fattening buds soon, I've used the same technique in another one was growing too tall and now its fattening properly, that was one week ago tho
Overall everything went fine , had some problems with water, I guess I will feed 'em more often , maybe every 3-4 days with 2-3 days just water and then my organic nutrients cocktail.
I'm very happy to see my tent almost full of white hairs (pistils) everywhere yeahh! I've found out as well that every of them its female so can't complaint.
From next week I'll try to show how that plant I've bent over is doing , and also will start applying nutrients together with the water, also need to put the net higher and show a real SOG
I'm using some baking soda and vinegar in order to create CO2 but I guess the reaction finishes quite fast
About defoliation I don't feed very confident since I think flowers need as much energy leaves can absorb in order to be big plus the leaves of my plants are huge and I love that, never sees bigger leaves, ofc I know I'm new in the game but would like to see things myself as well
Thanks for every advice and I hope we keep on growing together and learning from each other
Have a good one everybody!!

Likes
Comments
Share


Likes
21
Share


@TheBluntBeauty
Follow
Heading into this week with nothing but exciting to see her bulk and pack on the Frost this is such a gorgeous plant I’m loving every minute I spend with her

Likes
37
Share

@Purrple_Haze
Follow
Red Hot Cookies goes Indoor! 🍪💡
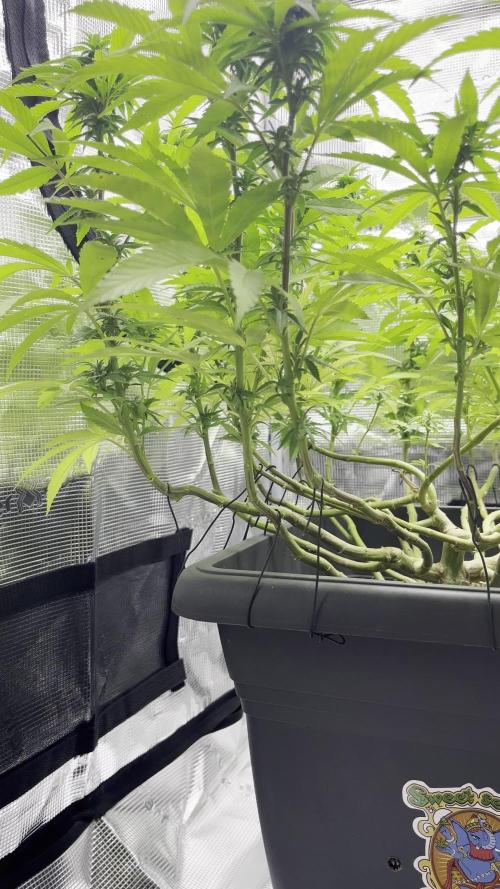
This week marked a big transition for my Red Hot Cookies photoperiod, as the relentless rain finally made me pull the plug on her outdoor run—for now. 🌧️ With more wet days on the horizon, I moved her into the grow tent, now running under a 300W LED to ensure the buds can develop in peace. She’s currently sharing the space with my two lovely Divine Seeds autos from the ongoing Divine Seeds V2.0 Competition, and the energy inside the tent is buzzing. ⚡🌱
Since the switch indoors, she’s adapting really well. 🌿 The buds are swelling visibly, and I’ve started to see a nice layer of early trichome frost forming on the sugar leaves. The scent is starting to develop—still subtle, but promising!
However, I did notice some slight yellowing on the bottom fan leaves, which pointed to a nitrogen deficiency. Likely due to her strong structure and demanding flower phase, so I’ve increased BioBizz Grow slightly in this week’s feeding plan.
Here’s what went into her care routine this week:
🔸 BioBizz Grow, Bloom & TopMax (standard dosage, with Grow slightly increased)
🔸 CalMag support for water hardness
🔸 Alg-a-Mic for overall vitality and stress resilience
🔸 Effective Microorganisms added to enrich microbial life
🔸 Homebrewed compost tea for extra soil life and root stimulation
🔸 pH: 6.5, carefully adjusted with BioBizz pH-
🔸 EC: 2.0, right in the sweet spot for mid-flower
✂️ On Day 21 of flower (10/07), I performed lollipopping to clean up the lower growth and focus energy upward
She’s now officially in Week 4 of flower, and I couldn’t be happier with how she’s shaping up. Indoors she’s finally getting the light and airflow she deserves—no rain, no pests, just a controlled environment and full focus on fattening those buds. Let’s see how the next weeks unfold! 🔥🌿

Likes
43
Share


@Sabac
Follow
Última semana de mis plantitas
Hoy corto 12 de 16
Fue un cultivo sin problemas.
Y creo que viene buena producción
Recomiendo 100% los fertilizantes hesi buenísimos.
5 cultivos con ellos y 0 problemas.
El sustrato Biobizz light mix excelente
Las semillas de barneys farm uff pura crema. Eva seeds recomendables y las sweed seeds buenisimas semillas para seguir cultivando. Los Led yxo para ser de un perfil bajo qué no a toda la gente les gusta cumplen la. Función 480w de pura potencia en un espacio de 120x120 los recomiendo para gente que tenga un presupuesto bajo.
Ahora voy por unos sobre 600w aunque los reforzaría estos con unos led de 100w
.
Bueno feliz con los resultados.
Esta semana mostraré los resultados de las plantas cortadas.
Se vienen más cultivos
Salu2


Likes
6
Share


@midnitrtoker
Follow
What’s up everybody. So I started to flower already as you see I identified the sure males and tossed them out. What is left is 2 that still have not confirmed whether they’re female/male. I will see you all next week. Where they lol be in there forever home which will be 1Gal. The nutrients are all in Grams I hope this doesn’t confuse anyone.
Likes
14
Share


@Snickelfritters
Follow
10/21- Flower has begun!! I've been gradually removing growth from under the canopy that I dont anticipate will become sizeable buds. Now we wait for the stretch. Took a few clones to try my hand at that.
Air is drying out big time lately. I'm probably going to have to give in and buy a humidifier because it's going to be essential to keep my buds from drying out too fast and keeping these plants in healthy rh range.
Despite humidity swings, plants seem to be doing well across the board so I already have a leg up on my last grow. I sprayed for bugs as a precaution. Neem and peppermint Castille soap diluted in water was the choice. Left a residue on my plants though so live been keeping my light between 30-40% and gradually turning up the intensity each day until I reach where I was(70) I dont want to burn my leaves because I have treating for bugs before.
I will add pictures this weekend. This is posted on Day one so there's really not too much change to show in the plants. Really excited to see how they develop over the next 2 weeks.
10/24
Added pics of two plants. I accidently deleted my shoot of GZ 2 and I don't feel like taking them out of the tent again because it's a bit of a pain with the net. It's much taller than it's sister and maybe the healthier plant at this point. Moby dick is a bush, very healthy even still.
No real signs of flower yet. They do seem to be stretching a bit but when you look everyday it's hard to tell. I'm hoping to have a really nice canopy in a week.


Likes
7
Share


@fabialien
Follow
A esta semana le cambiamos radicalmente la solución para que de esta semana en adelante su nutrición sea de la misma linia, principalmente para tener un control del PH en la solución nutritiva .
Likes
21
Share


@Wrongholn519
Follow
It's been another easy week in the Fastbuds tent. I've spent most my energy preparing my outdoor grow space for a wild summer. At this point, there's not much I can do except water and watch my plants grow. I've added videos of other plants in relations to the mimosa cake just for visual aid. I also added a photo of my cheese auto.. it's still drying!
With the Mimosa cake auto I've been taking fan leaves off slowly for weeks now. This is a very busy plant. She is also going to run later than I expected. She's on day 76 and I suspect 95 to 100 days to finish time. I'll have to keel feeding her bloom nutes for the next few weeks; her 3 gallon bucket ran out of nutrients already.
Feeding schedule: water, feed, water, feed
Step 1- I'll take an aeration stone and use it to remove the chlorine residual in the water... this only takes 8 - 12 hours depending on water temperature. (I'm a water treatment process operator, I have checked several times in the past with my own Cl2 meters).
Step 2 - add Calmag
Step 3- add bloom nutes
Final step - pH the water accordingly (very important that this is final step)
A TDS residual of 500 ppm equals roughly 1 E.C. (I just double it)


Likes
110
Share


@Roberts
Follow
Mamba Negra was a very frosty, and smelly autoflower. Has been chopped, and hung to dry. Looks very promising to be some great smoke. We shall see. No contest winner, but got some good smoke out of it. PEV said they wanted to send me some more seeds to grow. We will see if they get back to me. After this beautiful plant, and Moby Dick auto is going monster size, check it out 🌱😁. I will work my way through some or all their autos. 🌱😏
Thank you Grow Diaries community for the likes, follows, and subscriptions on my YouTube channel. I appreciate your support. Happy Growing everyone 🌱🌱🌱🌱

Likes
7
Share
@Chrisandweed
Follow
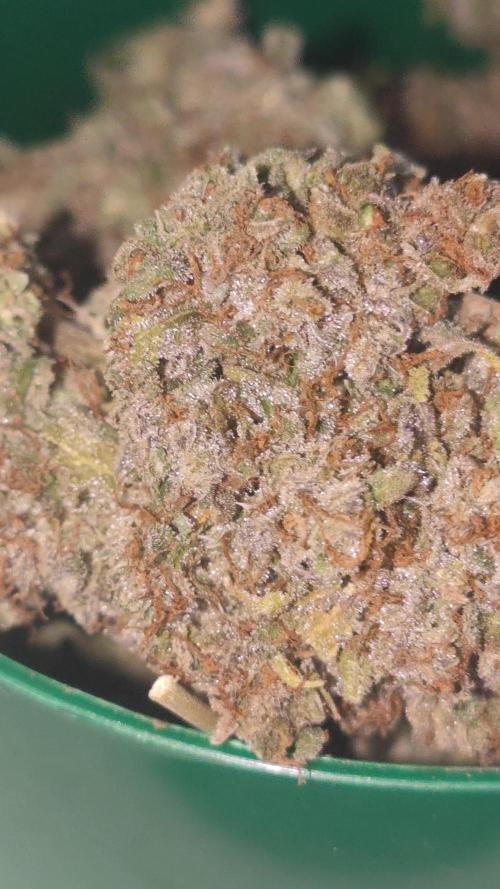
Muy buena planta, me ha gustado muchísimo este cultivo, va a salir mucha producción, además que hiper resinosa! Huele fuertisimo a frutas! Cualquiera que le enseño la planta coincide en eso.
Creció muy grande, muy fuerte y muy resistente.
Para un proximo cultivo de autos, que no sé aún ciando será, probaré una fertilización diferente, alargando el nitrogeno un poco mas, y todos los jaleos que explicaba por ahí en otra semana xD.
Como la plataforma va como va, repito por aquí ya la sensaciones con la planta probada. Muy rica, sabe suuper fuerte a frutas junto a un toque muy profundo diesel.
Sin duda recomendaría esta variedad! Pese a ser auto y formato XXL, la potencia y sabor no dejan dudas de que ha sido un bicharraco, pega durisimo y ademas de los +130g que he sacado, en seco y recortado, que luego el trim sumara unos 15/20 gramos mas! Despues de navidades seguramente adquiera los equipos para extracciones y ya subiré que tal el hash de esta bestia.

Likes
44
Share


@MadeInGermany
Follow
Info:
Unfortunately, I had to find out that my account is used for fake pages in social media.
I am only active here on growdiaries.
I am not on facebook instagram twitter etc All accounts except this one are fake.
Flowering day 8
since time change
to 12/12 h.
Hey guys :-) .
The lady develops incredibly beautifully with GreenBuzzLiquids .
Fast Plant and Bio Bloom were added this week.
This week it was poured twice with 1.2 l each (nutrients see table above).
The lady was checked for her health and it seems as if the last trips in the tent have also disappeared 🙏🏻.
The entire tent was cleaned.
For the next two weeks I filled canisters with fresh osmosis water.
Otherwise, as always, she was watched for a while every day as she blows in the wind 😊👍.
I wish you all a nice start to the week.
Stay healthy 🙏🏻
You can buy this Nutrients at :
https://greenbuzzliquids.com/en/shop/
With the discount code: Made_in_Germany you get a discount of 15% on all products from an order value of 100 euros.
You can buy this Strain at
https://www.amsterdamgenetics.com/product/super-silver-haze/
Type:
Super Silver Haze
☝️🏼
Genetics:
Haze x Skunk #1 x Northern Lights
Type:
70% Sativa – 30% Indica
👍
Vega lamp:
2 x Todogrow Led
Quantum Board 100 W
💡
Bloom Lamp :
2 x Todogrow Led
Cxb 3590 COB 3500 K 205W
💡💡☝️🏼
Soil :
Canna Coco Professional +
☝️🏼
Nutrients :
Green Buzz Liquids :
Organic Grow Liquid
Organic Bloom Liquid
Organic more PK
More Roots
Fast Buds
Humic Acid Plus
Growzyme Big Fruits
Clean Fruits
Cal / Mag
Organic Ph - Pulver
☝️🏼🌱
Water: Osmosis water mixed with normal water (24 hours stale that the chlorine evaporates) to 0.2 EC. Add Cal / Mag to 0.4 Ec Ph with Organic Ph - to 5.8
