


Likes
Comments
Share


@hi_bengal
Follow
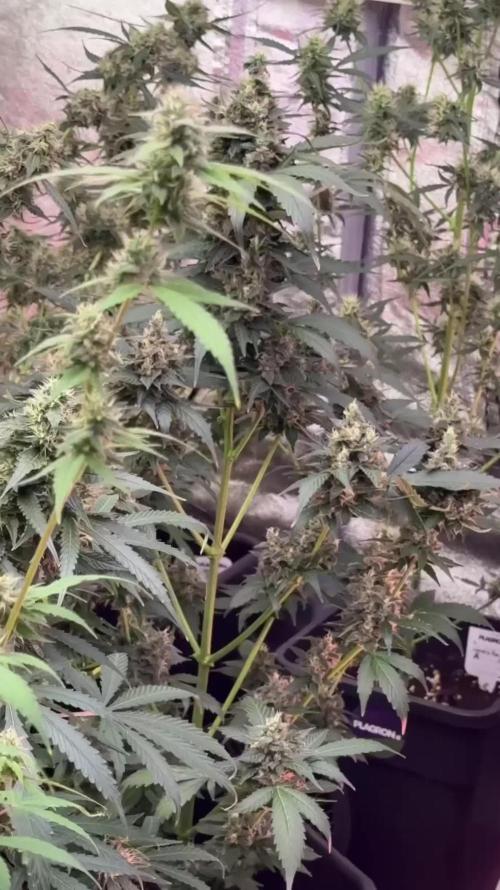
Mephisto Creme de la chem Earthbox grow using buildasoil medium and amendments.
Soaked seeds in water for 18hrs and planted into earthbox. Light hanging at 24" 300 par reading. Keeping humidity between 60/80% Temps running between 75°84°



Likes
4
Share


@cowstick
Follow
Start of Flower.
PPFD avg. 700
Soaked entire pot.
Started my Flower Foliar Spray right before lights out. I will Spray plants once a week for 4 weeks of Flower.
Foliar Spray Recipe per 2L as follows:
All Advanced Nutrients Products.
4ml Bud Ignitor
4ml Nirvana
4ml Bud Factor X
10ml B-52
Midweek update.
Second round of foliar spray. Ladies loved the first round, went with a second. Ill do this twice a week until I'm through week 4 of Flower.
Video is right after I sprayed for the 2nd round at 15 mins before lights out. Don't want all the foliar spray burning the ladies now do we.
Likes
6
Share

@DogDoctorOfficial
Follow
💎 Black Diamond Auto by Zamnesia – Pheno A
Week 10 | Still Shining, Still Demanding, Still Amazing 💎🔥
Welcome back to another chapter of the 8×8 Adventure! 🌱💚
Honestly...
I'm starting to run out of different ways to say it.
She keeps shining.
Every week I come into the room expecting to find something that needs attention, something that needs correcting, something that gives me a reason to complain.
And Black Diamond Pheno A keeps looking at me like:
"I'm fine. Give me what I need and let me work." 😂💎
So that's exactly what we're doing.
She demands.
We deliver.
She builds.
We watch.
And somehow, every week, she manages to look even more impressive.
The flower formation.
The colours.
The trichomes.
The overall maturity.
Everything is moving in a direction I really like.
She's not the biggest plant we've had in this 12/12-from-seed adventure, but she's definitely among the substantial ones.
And when you look at what she's putting together...
size isn't the first thing you notice anymore.
You notice the flowers.
You notice the colours.
You notice the frost.
You notice how far along she is becoming.
And then you smile.
Because this girl is doing something special.
💎 Still Shining Bright
Last week we called her Beast Mode.
I'm not sure I can take that name away from her yet. 😂
Because she's still operating in that mode.
But this week, I think the better description is simply:
She's shining.
Not because she's demanding anything unusual.
Not because she's causing problems.
Actually, quite the opposite.
She's basically telling us exactly what she wants...
and then rewarding us for listening.
Give her the environment.
Give her the nutrition.
Give her the light.
Give her the water.
Give her the room to develop.
And she goes to work.
That's the relationship I love having with a plant.
We're not forcing her.
We're not trying to make her become something she isn't.
We're simply supporting what she's naturally doing.
And what she's naturally doing is looking absolutely amazing.
🌸 The Flowers Are Getting Serious
This is where my attention keeps going.
The flower formation is becoming seriously impressive.
The individual flowers are gaining definition.
The structures are becoming denser.
The pistils are developing through the flowers.
And everything is beginning to look increasingly mature.
We're getting to the point where I don't need to imagine what these flowers might become.
They're already showing us.
And there's a lot of them.
That's one of the things I really appreciate about this phenotype.
She isn't just putting everything into one location.
She's using her structure.
She's building throughout the plant.
And as the weeks move forward, that distributed flower production becomes more and more impressive.
❄️ The Trichomes Are Doing Their Thing
And then...
there's the frost.
💎❄️
This girl continues to develop an increasingly beautiful resin-covered appearance.
The trichomes are becoming more obvious.
The flowers are getting that crystalline character.
And when the light catches them just right...
she really does shine.
That's probably one of my favourite things about documenting her.
You can look at the whole plant and see a beautiful flowering plant.
Then you move the camera closer...
and suddenly there's another world there.
The individual resin heads.
The sugar leaves.
The pistils.
The developing flower surfaces.
All those little details that you simply cannot appreciate from across the room.
Black Diamond is giving the macro camera plenty of reasons to stay busy. 📸💎
🎨 And Those Colours...
The colours are another thing that really catches my attention this week.
Her greens remain beautiful and vibrant, giving the plant that strong, healthy appearance we've been enjoying throughout the run.
But alongside those greens, we're starting to see more of the colour development that comes with moving deeper into the flowering cycle.
And together with the frost...
it's a beautiful combination.
Green.
Colour.
White resin.
Developing flowers.
It's becoming a seriously photogenic plant.
And yes...
I know I say that about several of the girls.
But that's the point of having twelve different phenotypes in the room.
They each find their own way to impress us.
Black Diamond has chosen:
"I'll do it with flowers, colour and frost."
😂💎
🌿 Big Enough to Make Herself Known
At around 169 cm, she's certainly not a small plant.
She's among the larger plants in this 12/12-from-seed room, or at least comfortably within the substantial group.
But what I find interesting is that her size isn't what defines her anymore.
When she was stretching and building her framework, height was part of her story.
Now?
The flowers have taken over the conversation.
She's built enough structure.
She's established enough height.
Now she's putting that structure to work.
And honestly...
I like where she's going.
👑 She Knows What She Wants
This phenotype has always had a certain confidence about her.
She doesn't seem interested in asking permission.
She just does her thing.
And that hasn't changed.
If she needs something, she lets us know.
If she's happy, she gets on with growing.
And when everything is aligned...
she produces.
That's what I mean when I say she keeps demanding whatever she wants and we keep delivering.
It's not a difficult relationship.
It's actually a very simple one.
Listen to the plant.
She's talking.
😂💚
✂️ After the Cleanup
Last week we gave her some selective defoliation.
This week, I'm much more interested in watching how she continues from there.
The plant still has plenty of foliage.
She's still green.
She's still carrying enough leaf mass to support herself.
But we've given the structure some additional breathing room.
And now the flowers are becoming even easier to appreciate.
I like this stage.
The plant isn't being stripped.
She's simply been given a little more room to show us what she's building.
And she's taking full advantage of it.
💡 Light From Above, Within & Below
The lighting ecosystem remains one of the fascinating variables throughout the 8×8 Adventure.
The primary overhead lighting continues driving the canopy, while the additional lighting throughout the lower and inner portions of the room gives us another dimension to observe.
And with Black Diamond?
There is plenty to observe.
Her flowers are distributed throughout that structure, so seeing how those different levels develop as flowering progresses remains particularly interesting.
I don't want to assume exactly what the lighting is doing to each individual flower.
I'm much more interested in documenting the result.
And right now...
the result looks pretty damn good. 💎
💧 She Wants It, We Give It
The feeding strategy remains consistent with the room.
We're not creating a special recipe just for Black Diamond.
She's part of the same overall nutritional program as the other plants.
Current flowering nutrition remains:
🌸 Terra Bloom — 2.2 ml/L
🌱 Power Buds — 1 ml/L
✨ Green Sensation — 1 ml/L
🍯 Sugar Royal — 1 ml/L
⚗️ pH adjustment products — as required
The solution remains around pH 6.0 with an EC around 2.0 mS/cm.
And apparently...
she's happy with the arrangement.
😂💎
She asks.
We provide.
She builds.
Everybody wins.
🌡️ Current Environment
The current recorded conditions for Week 10 are:
🌸 Flowering: Week 10
📏 Height: 169 cm
💡 Light schedule: 12/12
🌡️ Day temperature: 29.9°C
🌙 Night temperature: 25°C
💧 Relative humidity: 60%
⚗️ pH: 6.0
⚡ EC: approximately 2.0 mS/cm
💦 Solution temperature: 25°C
🌱 Substrate temperature: 26°C
🌬️ CO₂: 639 ppm
? Pot size: 15 L
💧 Watering: approximately 1.3 L per plant / 24h
Once again, the environment remains consistent.
And that's important.
Because this entire project is built around giving the plants a shared environment and then watching how differently they express themselves.
Same room.
Same general conditions.
Different genetics.
Different personalities.
Different results.
And Black Diamond Pheno A is definitely giving us one of the more impressive results.
📸 The Camera Is Having Fun Again
Looking through this week's photographs, I keep seeing the same thing.
There's a lot going on.
The wide shots show her overall scale and structure.
The closer photographs reveal the flowers.
And once we move into the detailed shots...
the trichomes start taking over.
That's what makes this stage so enjoyable.
We're seeing the plant transition from a flowering plant into something that increasingly looks like it's approaching the more advanced stages of its journey.
I'm not saying she's finished.
Far from it.
But she's clearly moving.
And she's moving fast enough to get my attention.
I know she's not a racehorse. 😂
She's a plant.
But when you watch her progression from week to week, the pace of development is absolutely noticeable.
And I like it.
💎 The Green Is Beautiful
I don't want the frost and flowers to distract from something else I really like about this girl:
her green.
The foliage still has that beautiful, healthy appearance.
The greens contrast beautifully against the developing flowers.
And when the resin starts catching the light...
the whole combination becomes something really special.
Green leaves.
Bright pistils.
Developing colours.
White frost.
Dense flowers.
That's Black Diamond right now.
And she wears it very well.
🔥 She's Becoming a Heavyweight
We're also starting to see the consequences of all that flower production.
She's carrying weight.
A lot of it.
The structure that looked impressive earlier in the run now has a job to do.
It has to support everything she's been building.
And that's where the combination of good structure and sensible support becomes important.
We're not trying to make her stand perfectly like a showroom plant.
We're helping her carry what she created.
Because honestly...
I'd rather have the problem of supporting heavy flowers than the problem of wondering where all the flowers went.
😂💎
🧠 Another Lesson From the 8×8 Adventure
Black Diamond is another reminder that plant size and production aren't always the same conversation.
She's among the larger plants.
But her flowers and resin are what make her stand out.
And that's exactly why I don't want to judge these girls simply by height.
One plant can be huge and express itself one way.
Another can be smaller and absolutely cover itself in resin.
Another can build enormous individual flowers.
Another can distribute production throughout the canopy.
And then you have Black Diamond...
doing a little bit of everything.
😂💎
She's big enough.
She's structured.
She's loaded.
She's colourful.
She's frosty.
And she's becoming increasingly mature.
That's a pretty good combination.
🔮 Looking Ahead
Now I'm getting genuinely curious about the next few chapters.
We're entering an increasingly advanced stage of flowering.
So my attention is going toward:
🌸 continued flower swelling
❄️ increasing resin development
🎨 colour progression
🌿 overall foliage health
💎 density and structure
⚖️ how much more weight those branches will carry
👀 overall maturity
And I'm not going to try to predict exactly where she ends.
We'll let her show us.
That's the whole point.
We observe.
We document.
We learn.
And when she tells us she's ready for the next stage...
we listen.
💎 Let Her Shine
There are moments in a grow where you don't really need to say much.
You just look at the plant.
And you smile.
That's where I am with Black Diamond Pheno A this week.
She's beautiful.
She's big.
She's colourful.
She's green.
She's frosty.
She's building flowers everywhere.
And she's moving deeper into the flowering cycle with a confidence I really enjoy watching.
She keeps demanding.
We keep delivering.
And she keeps rewarding us.
Fair trade. 😂💚
So yes...
let her shine.
Because she deserves it.
💎 Black Diamond Is Still in Beast Mode
Maybe that's the simplest conclusion.
Last week:
Beast Mode Activated.
This week:
Beast Mode Continues.
😂🔥💎
Nothing dramatic.
Nothing complicated.
Just a beautiful plant continuing to do what she has been doing from the beginning.
Growing.
Building.
Developing.
Frosting.
Colouring.
And slowly becoming more and more impressive.
She's trying to steal the spotlight.
And honestly...
she's making a very good argument for it.
🙏 Thank You
Another week.
Another chapter.
Another beautiful reminder of why the 8×8 Adventure has been such a fascinating experiment.
Twelve plants.
One room.
One general environment.
One 12/12-from-seed philosophy.
And twelve completely different expressions.
Black Diamond Pheno A continues to show us her own version.
A substantial plant.
Beautiful structure.
Beautiful greens.
Increasing colour.
Amazing flower formation.
And an increasingly impressive layer of frost.
A huge thank you to:
💚 GrowDiaries — for giving growers a place to document, share, learn and inspire one another.
🌱 Zamnesia — for providing the genetics behind this beautiful Black Diamond Auto phenotype.
💜 Plagron — for the nutrition supporting this adventure.
💡 Future of Grow LED — for powering the main lighting environment.
🌿 TrolMaster — for helping maintain the controlled environment behind the scenes.
✨ LumiFlora — for contributing the additional lighting that lets us explore what happens throughout the different levels of the canopy.
And of course...
thank you to everyone following along.
Every comment.
Every question.
Every bit of feedback.
Every person stopping by to see what these twelve girls are doing.
It means a lot.
And Black Diamond?
Well...
she's still here.
Still shining.
Still demanding.
Still building.
Still getting frostier.
Still getting heavier.
And still trying to steal the spotlight from her sisters. 😂💎👑
This week, I think we can let her have it.
Because she's earned it.
The colours are beautiful.
The greens are beautiful.
The flowers are becoming seriously impressive.
The trichomes are shining.
And the whole plant is moving toward a more advanced stage of flowering that I really like watching.
So let's keep doing what we've been doing.
Keep listening.
Keep delivering.
Keep documenting.
Keep photographing.
And most importantly...
let Black Diamond shine. 💎🔥🌿
Growers Love, my friends, and happy growing! 💚🌱💎


Likes
2
Share


@CheeRz
Follow
The ladies are doing great, and the buds are slowly developing. The growth is also slowing down. It's a really nice sight at the moment. 🍋🍒🍦

Likes
17
Share


@SuperGlue
Follow
Отличный рост , ну а дальше все сами увидите на фото и видео .
Радует душу , глаз и вскоре будет радовать тело :)
Likes
1
Share


@Growing_Spartan
Follow
May 27th-29th
Trellis net is getting full and plants looked good, could’ve flipped to 12/12 but my smart self completely forgot about that flowering stretch so I vegged them till I saw a “good height” lmao I know but it’s my first grow leave me alone lol

Likes
176
Share


@Herbalize
Follow
Hello folks
Havest Day 53 of flowering ( Life cycle 93 days )
Drying with 59% RH--17/18°C since about 10 Days
it's the start for curing.
Overall everything went well
I learned a lot, and I must be close to 0.7 G / W which is good in my opinion.
6 Plant was way too much with 40 days of growth and my little square meter , next time 4 max!
I would also reduce the doses of fertilizer because Canna remains strong enough
Now it's time to invest and improve some things !!! Soon ™️ 😋
Thanks to all who comment / like either to encourage or give advice
see you soon guys 😘
Peace Love and Weed 000


Likes
92
Share


@DogDoctorOfficial
Follow
🌱 Week 2 Report: The Journey Evolves 🌱
Grow Fam, the adventure is in full swing! 🌟 The Gorilla Melon from Fast Buds is out and shining its light, and the Papaya Zoap has made its debut in the Cannakan, bringing with it a story that adds even more depth to this incredible run.
When the universe speaks, we listen. 🍈✨ I didn’t plan on popping Papaya Zoap from Sweet Seeds just yet, but sometimes things just have a way of aligning. After a few other seeds didn’t germinate, I felt an inner pull toward this special strain. As it turns out, the universe had something beautiful in mind! Just days later, my brother @daggadna also began germinating the same genetics—gifted to us during Spannabis. Was it a coincidence? I don’t think so. 🌱 This is more than just a grow now—it’s a journey with purpose, guided by synchronicity and connection. I can already feel the magic building up with this one, and I can’t wait to see where this road takes us!
Now, onto the Papaya Zoap… something tells me this plant is going to take us on a ride we didn’t expect but absolutely needed. 💚 Let’s make something incredible, Brother Dagga—this one’s going to be legendary.
Gear Updates: All Systems Go 🚀
This week, everything’s dialed in perfectly with the TrolMaster system. Shout out to the incredible DSH-2U Humidity Station! 🌬️ This tool is giving me precision control over the RH (relative humidity) ranges in the room, keeping the environment just right for my babies. Having that accurate readout and control allows me to maintain optimal levels for each stage of growth. It’s like magic—you plug it in, set the desired ranges, and let it do its thing! 🌡️
By monitoring and adjusting humidity levels on-the-fly through the TrolMaster app, I can ensure the environment remains stable, and that means happier plants and healthier growth! No more guessing games. From anywhere—whether I’m working in the garden or chilling out—I can track and tweak it all. Heck, I could be on the toilet and still have complete control over my room! 😂
The AMP-3 Precision Meter has been running 24/7 in my water solution, giving me real-time updates so I can make any corrections when needed, right from my phone. This tech has taken my grow to another level. ✨
Nutrition Update: Keeping It Balanced 🍃
As for feeding, we’re sticking with the basics to give the plants what they need, without overloading. Right now, I’m running:
• Regulator: 0.15ml/l
• Startbooster: 0.25ml/l
For now, I feel like this is the sweet spot—just enough to encourage root development and early growth without overloading them. I’ll be adjusting the feed as we go deeper into the grow, keeping an eye on how they respond. You know me, always tweaking and improving along the way!
Shoutouts & Gratitude 🙌💚
Huge love to everyone following along—whether you’re here on Grow Diaries, over on YouTube, or on IG. Your support keeps this journey alive, and I am so grateful for every comment, like, and message! Special shoutout to my sponsors for fueling this project:
• Nutrition: @aptusholland @aptus_world @aptus_es @aptusbrasil @aptus_thailand @aptus_portugal @aptususa_official @aptusplanttechnz @aptusplanttechaus
• Controls: @trolmaster.eu @trolmaster.eu.support @trolmaster.support @trolmaster.agro
• Soil: @promix_growers_eur @promix_cannabis @promixmitch
More to come soon, and you won’t want to miss it! 📺 I’m also documenting everything on my YouTube channel, and I’ll be sharing behind-the-scenes content on IG, so hit that subscribe button and follow along. Let’s grow together, fam!
Growers Love to All 💚
The love and support from the grow community is something I never take for granted. This journey wouldn’t be the same without all of you! I’m so honored to be part of this amazing community, and I can’t wait to share more updates and insights along the way. Remember, this isn’t just about growing plants—it’s about growing together. 🌱
Until next time, stay positive, stay inspired, and keep pushing forward!
This week’s shoutout is dedicated to the synchronicity of life, my growing community, and of course, Papaya Zoap and Gorilla Melon. Let’s see what magic we can create together!
#HighFrequency #PositiveVibesOnly #PapayaZoap #GorillaMelon #TrolMaster #InBalanceWithNature #GrowLife #AptusTruePlantScience #GrowersLove


Likes
2
Share


@eldruida_lamota
Follow
Vamos familia sexta semana floración de estás Pink Runtz de RoyalQueenSeeds.
Que ganas tengo de ver el progreso de esta variedad, las plantas están marcando una deficiencia que estoy ya solucionándola aplicando los nutrientes necesarios, y estos días espero que recuperen el color.
La cantidad de agua cada 48h entre riegos.
Esta semana ya añadimos nutrientes de floracion estas próximas semanas veremos cómo avanzan.
Agrobeta:
https://www.agrobeta.com/agrobetatiendaonline/36-abonos-canamo
Hasta aquí todo, Buenos humos 💨💨💨
Likes
13
Share


@DeepRootsGrowTrees
Follow
DIVINE OG KUSH / DIVINE SEEDS
WEEK #20 OVERALL
WEEK #8 FLOWER
This week her buds are really getting weight to them they have that OG bud structure smaller tight dense buds that are covered in trichomes!! She got a overpowering smell to her that's WOW!! She's almost done a few left!! Stay Growing!!!
Thank you for stopping by and taking a look it's much appreciated!!
THANK YOU DIVINE SEEDS!!!
DIVINE OG KUSH / DIVINE SEEDS

Likes
5
Share


@Rizza78
Follow
Sorry busy week. They are getting close. Just turned the lights down 20% to simulate fall for last couple weeks. Will add ice in 6 days to flush.

Likes
10
Share


@Anonymous_buds
Follow
This was a big plant and considering I brought this back in from the outside hard big buds
Processing
Likes
13
Share


@Ghosttown
Follow
Day 42
Blooming nicely
Day 43
Water
Day 44
Bloom
Day 45
Water plus 2lm cal mag.
Day 46
Fert just lightly with Tiger Bloom 2ml in 2 litre water just to help stack buds. Pray it helps and enjoy my First Video. 08 May 20
Day 47
Bloom
Day 48
Bloom
Processing
Likes
3
Share


@Dico29
Follow
Day 120
Smells good buds are fatter and looking better then I thought last week, I flushed but I think I may have caused nutrient burn or nitrogen since my stems have turned purple also along the buds and tips or ideas of what I should try thanks
Day 127 photos at the bottom

Likes
15
Share


@AK1210
Follow
New flowering continues to develop on this lady, she seems to be swelling up day by day.
Yellowing of the fan leaves has started which usually means it's time to flush, I need to check the trichomes to see how amber they appear before I do just in case the flavour or yield could be effected.