
Likes
Comments
Share


@FreakShow
Follow
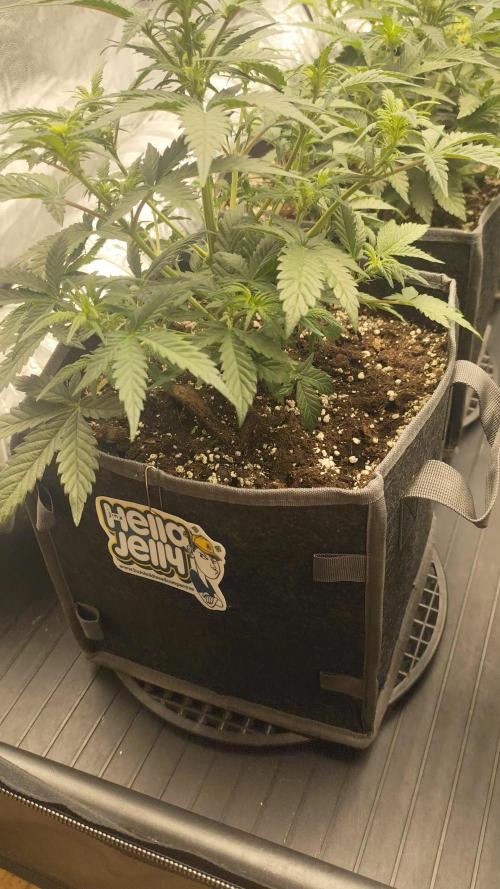
Her roots are boosted amazing and i transplanted her to 7 galon smart pot
And fed her first time 😍😍
Lets see what will happen 🤔🤔

Likes
36
Share


@nonick123
Follow
Día 94 (02/09) Aplico Insect Frass como Top Dress para ver si revierto un poco el amarilleamiento que muestran algunas hojas, ya que empieza a ascender por la planta
Riego con 500 ml H2O pH 6,5
Día 95 (03/09) Dia nublado y de temperaturas entorno a 24 ºC. NO es necesario regar!
Día 96 (04/09) Llueve que te llueve! 🌧️. Temperatura 21 ºC. Dias de humedad alta por aquí!
Riego con 500 / 1000 ml H2O pH 6,5
Día 97 (05/09) Floración en progreso. No veo ni una sola oruga con el bacillus thuringiensis y espero que siga así! 🤞
Dia muy nublado. No hace falta riego
Día 98 (06/09) Riego con 500 / 1000 ml H2O pH 6,5 + 4 ml/L de BioGrow de Biobizz para tratar de parar el amarilleamiento que asciende por la planta
Día 99 (07/09) Riego con 500 / 1000 ml H2O pH 6,5 + 4 ml/L de BioGrow de Biobizz para tratar de parar el amarilleamiento que asciende por la planta
Día 100 (08/09) Riego con 1 Litro de Té Floración de Lurpe Solutions. Preparación: 24 horas con bomba de aire (oxigenación) con ingredientes:
Healthy Harvest 8 ml/L + Insect Frass 16 ml/L + Hummus Lombriz 8 ml/L + Melaza 1 ml/L + Kelp Hidrolizado 0,25 g/L
Aplico de nuevo Insect Frass como Top Dress
💦Nutrients by Lurpe Solutions - www.lurpenaturalsolutions.com
🌱Substrate PRO-MIX HP BACILLUS + MYCORRHIZAE - www.pthorticulture.com/en/products/pro-mix-hp-biostimulant-plus-mycorrhizae

Likes
29
Share

@ZariRat_Grow
Follow
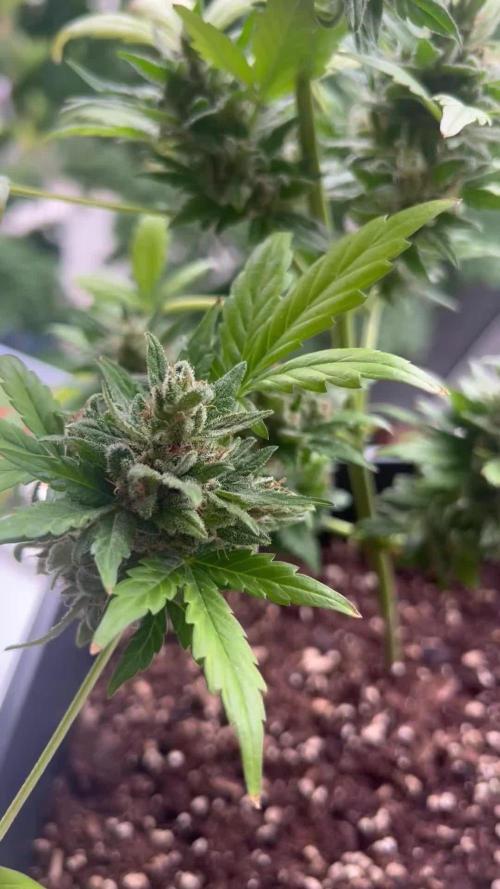
Tras una vegetación impecable, las tres Hella Jelly han entrado oficialmente en floración y el cambio respecto a la semana pasada es evidente. 🌸
En solo unos días han dado un estirón espectacular, han multiplicado los puntos de flor y ya lucen los primeros pistilos blancos por toda la copa. La transición ha sido rápida, uniforme y, sobre todo, muy saludable. 🌱🌿🌸
🌡️ Temperatura: 24°C
💧 Humedad: 60%
💡 Luz: 80% a 1 metro
⚡ EC: 1.0
💦 Agua + Great White Premium
✂️ Defoliación muy ligera
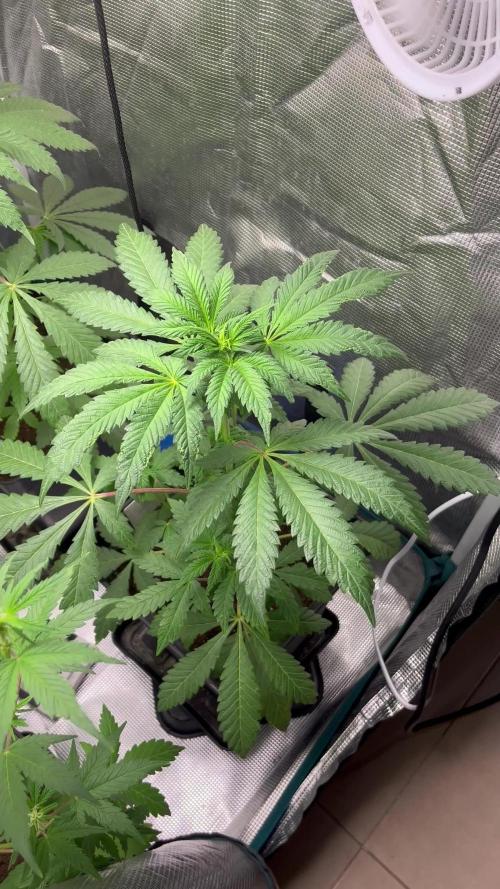
No podría haber empezado mejor la floración. El crecimiento ha sido espectacular y las tres plantas mantienen un verde intenso, hojas erguidas y una estructura abierta gracias a una defoliación muy suave que permitirá que la luz llegue mejor a todos los futuros cogollos. 🌿
Todo el cultivo sigue muy estable y las plantas lo están agradeciendo con una transición prácticamente perfecta. Donde hace unos días solo había brotes, ahora empiezan a formarse pequeñas flores. 🌺
Esta semana las tres amigas han dejado claro que la espera ha terminado.
🍬 Jinx ha empezado a llenar cada rama de pequeños pompones blancos.
🍯 JellyBean continúa creciendo con esa elegancia tan característica.
🍭 Mochi ha decidido demostrar por qué es la más alta del grupo, estirándose con una energía impresionante sin perder su estructura compacta.
El armario empieza a cambiar de aspecto. Cada día aparecen nuevos pistilos, el aroma gana intensidad y la sensación es fantástica. 💪🏻
Saludos y buenos humos amigos growers 💚🐭


Likes
12
Share


@2Stones1Bird
Follow
Checkout my Instagram @smallbudz to see the Small budget grow setup for indoor use, low watt, low heat, low noise, step by step.
27/12/2019 - Fed her 1.5l of 6.4PH water with 0,5ml of each: Grow, Bloom and Max, and 1ml of each: Heaven, Alga-mic and Vera, I use about 1/3 of the nutrient dosage on the chart, to achieve about 200/300PPM (500 scale).
01/01/2020 - Fed her 1.5l of 6.4PH water with 0,25ml of Grow, 0,75ml Bloom and 0.5ml Max, and 2ml of each: Heaven, Alga-mic and Vera, mesured about 280PPM (500 scale).
Processing
Likes
5
Share


@deadstockgenetics
Follow
10.29 hours after lights on, just switched to 12-12
11.01 video update

Likes
104
Share


@Lordshiva83
Follow
Olá amigos! Mais uma nova Semana, a minha árvore começou a florir 🙌💪 🤩 e continua a crescer está com 2,20m e 2,50m de diâmetro 🤩, esta semana fez 40 graus c, fez muito calor, folhas velhas ficaram amarelas e caíram.. fiz uma limpeza de folhas amarelas por dentro da planta e por baixo mas tudo parece estar bem com a planta, está semana adicionei a rega mais uma vez com BactoHemp 3ml e 1ml de bactobloom para activar a floração, fiz prevenção de pragas com insecticidas bio, fiz mais uns tutores para suportar o peso da planta para não se partir nenhuns ramos, acho que estou a preparar a minha árvore para uma boa floração 💪💪✌️🌲🌳

Likes
37
Share


@Aleks555
Follow
🏆 Eternity Grow Cup 2025 with Plagron and Zamnesia 🏆
Zamnesia – Runtz
93 days from seed | 62 days in flower
The time has come — harvest day is here, and our incredible journey with this beautiful Runtz from Zamnesia has come to a fragrant, frosty end. For the past two weeks, she’s been enjoying pure, clean water as we prepared her for the finish line. Her leaves gently faded to gold, signaling her maturity, while the trichomes turned from cloudy to amber — with about 15% showing that deep golden hue we were waiting for.
She grew strong and vibrant thanks to the outstanding genetics from Zamnesia Seeds, and we’re beyond grateful for this opportunity to cultivate such a top-tier strain. Her structure, aroma, and resin production were truly impressive.
A massive thank you to Plagron as well — your nutrients have once again proven to be the perfect fuel for our grow. Easy to use, reliable, and effective — we couldn’t ask for better support for our plant’s development.
Stay tuned — soon we’ll share the dry weight and a full smoke report. But for now, it’s time to celebrate the harvest!

Likes
39
Share


@valiotoro
Follow
Hello everyone 😎
Last week for the Auto Cinderella Jack from Dutch passion ❤️🔥
I will harvest in 2-3 times first the top bud

Likes
5
Share


@TJHeadley
Follow
RSQ Wedding Cake has just start producing hairs but still not in flower yet. FB Cherry Cola has already started producing some Icy . SS Bruce Banner has an issue going on, I've got mixed reviews on what it could be. Added about 8ml of Athena IPM to the water for that one. Hopefully she snaps back and grows strong


Likes
26
Share

@GermanGrower416
Follow
Sie reift wirklich recht langsam.
Vor allem die unteren Buds brauchen noch ein bisschen mehr Zeit.
Das Wetter ist sehr wechselhaft aber zum Glück ist kein Schimmel in Sicht.


Likes
142
Share


@MadeInGermany
Follow
Hi everyone 🤗
This week the two Kosher Tangie Kush were harvested by Amsterdam Genetics 😍.
extremely good phenotypes. The blue cheese pheno 2 and 3 were placed in the darkroom according to the video.
These were harvested yesterday, from which the pictures will come in the next update :-).
All others need 2-3 weeks.
I wish you lots of fun with the diary, stay healthy 🙏🏻 and let it grow 🌱


Likes
32
Share


@AsNoriu
Follow
Day 78. Only 5 left from first wave and 3 will fall at the begining of next week.
Two biggest Mimosas looks like on week 5 or so and I hope to finish them before June. Such a difference in one strain ... But they will be huge !
Last Smoothie is still pumping, Purple punch started to fade, hope small Mimosa will join fade army too .
Nothing to add, just pure water, watch out for nanners and bud rot daily ...
I added Mars SP150 and SP3000 to the mix, now it's 1400W in dA hOuSe !!! ;)))))
Happy Growing !!!
Likes
13
Share

@eldruida_lamota
Follow
Que pasa familia, vamos con la primera semana de floración de estas Papayton feminizadas de fastbuds.
Vamos al lío ,se trasplantaron en macetas de 7 litros definitivamente.
El ph se controla en 6.0 , la temperatura la tenemos entre 24/20 grados y la humedad ronda el 50%.
El ciclo de floración puse 12h de luz, el foco está al 50% de potencia.
De momento van creciendo a buen ritmo y tienen un buen color, estaban muy bien enraizadas al realizarle el trasplante se notaba la abundancia radicular.
COMENTAR: que una de las 3 salió macho directamente las últimas fotos lo apreciaréis.
Agradecer a Agrobeta por el kit Gold series que mandaron, siempre os portáis, unos maestros.
- os dejo por aquí un CÓDIGO: Eldruida
Descuento para la tienda de MARS HYDRO.
https://www.mars-hydro.com
Hasta aquí todo, Buenos humos 💨💨💨


Likes
14
Share


@Cannibalgardens
Follow
You guys this lady is doing great since the first day she took it really well with the environment and the hot soil . The frost is thick and she smells so dam musky it's the classic gorilla glue smell. The tricohmes are showing more amber and the flush had started so looking forward to the end of this run ... Harvest times are coming ....
Processing
Likes
12
Share


@GrowGuy97
Follow
Day 7 - Everything seems to be going ok they are all growing about the same pace!
Day 8 - They are all growing pretty equal right now , extremely happy with how things are going!✌️🏼🌱
Day 11 - one plant has some twisted leaves hopefully it’s nothing serious😫 will be keeping a eye on her, other than that they all seem to be growing great! Thanks for following & happy growing friends!✌️🏼🌱
Day 13 - have a few with some weird leaves & growing a little slow, other 3 are growing pretty good! Hopefully they all do alright, fingers crossed! Happy growing friends!
Likes
11
Share


@BruWeed
Follow
🍀13/07 - Empieza su séptima semana en semana en etapa de floración.
🍀Esta llena de tricomas, cada semana le agrego el Top Bud que ayuda mucho.
🍀Estoy tratando de que la temperatura en el armario sea baja, en algunas fotos se nota que de apoco estan tomando color violeta.
🍀No tuve problemas hasta el momento, dentro de dos semanas ya la podo.
🍀La planta entera esta en un 60% ambar.
🍀Esta cumpliendo 86 dias de vida en total desde su germinación.
🍀En estos dias seguire subiendo más imágenes de como viene.
🍀🇦🇷😶🌫️Podes seguirme en Insta gram como @bruweed_arg🍀🇦🇷😶🌫️
