
Likes
Comments
Share


@Roberts
Follow
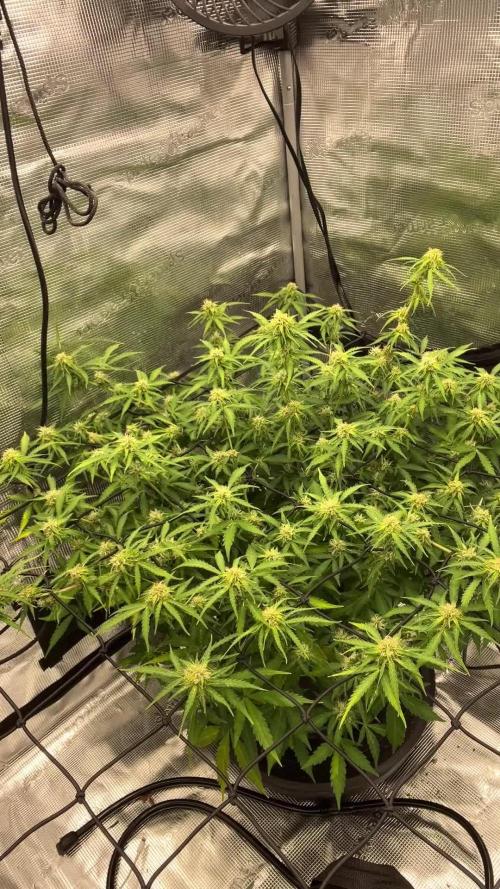
Now 14 days into light schedule change. She has been growing good under the Spider Farmer G3000 light. I am running at 65 percent on the light for the moment. Everything is looking good. She should have some pistils by next update. Thank you Spider Farmer, and Amsterdam Marijuana Seeds. 🤜🏻🤛🏻🌱🌱🌱
Www.amsterdammarijuanaseeds.com
Thank you grow diaries community for the 👇likes👇, follows, comments, and subscriptions on my YouTube channel👇. ❄️🌱🍻
Happy Growing 🌱🌱🌱
https://youtube.com/channel/UCAhN7yRzWLpcaRHhMIQ7X4g
Spider Farmer G300w: https://amzn.to/3S2zvsd
Spider Farmer 10X20 Heat Mat Kit - https://amz.fun/lsa0J
Spider Farmer Amazon Store: https://www.amazon.com/spiderfarmer
Spider Farmer Official Site: https://spider-farmer.com
Discount code: saveurcash

Likes
8
Share

@Samsationalseeds
Follow
I trimmed these a little early because I am going away for two weeks.
The person taking care of them will only water them.That's why I trim them.Hopefully when I return, one would be ready to harvest and the other two would be finishing up shortly after.
The last couple posts of this might just be screenshots until I return and harvest.
I defoliated a lot of the leaves that were covering nug sites a lot of leaves that returning a slightly different color.

Likes
16
Share


@AestheticGenetics
Follow
4/9/25
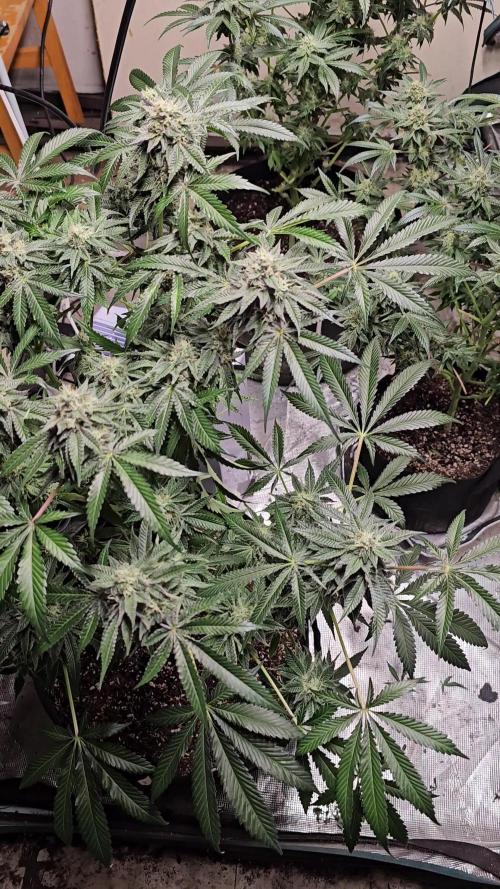
This plant is beyond frosty. Stacking up super nicely. Seems like she will yeild quite a bit.
My only gripe is that she has like no smell at all.
Using the foil as a soil cover is working quite nicely. the top soil is getting filled with roots quite well.
Top dressed 1tsp of Bloom
1tsp microbe charge
1tsp bloom

Likes
5
Share


@Unkraut
Follow
nice resinous strain, with strong scent and quite hard hitting high!
check www.sr-organics.com for some topnotch 5 in 1 fertilizer!
root, growth, bloom, micro-organisms, enzymes & vitamins all in one!
CODE: "Unkraut10" for 10% Discount! 😊

Likes
3
Share


Likes
36
Share


@Cannabeast40
Follow
Once again, I welcome you back to my summer grow🙂💚
Still adding more bloom and PK boost to the nutrients mix and also bumping up the light a bit 😎🤙🏻
I started to add UV/IR for one hour a day, mainly before lights go out 🙂
Happy growing y’all 💚
-------------------------------------------------------------------------------------------------------
SpectrumX LED🔥 @medicgrow
880 Watt⚡️
2x UV/IR LED panels 💥
2.7 μmol/J🔥
Full Spectrum V1,F1,VS,FS🌈
Display with PPFD & Live spectrum
Light measurement: Apogee MQ-610 & Apogee DLI-600.
Fertiliser:
Organics Nutrients
https://www.organicsnutrients.com/en/
Green Buzz Nutrients
Discount Code: GD42025
Grants 25% with a minimum Order value at 75 Euro.
https://greenbuzzliquids.com/en/shop/


Likes
3
Share

@HuskyHouse
Follow
Her roots started coming out of the pot and was going into the gravity fed system about 5-6 days ago, trimmed her roots with a scissors slightly and elevated the pot for a few hours to air prune and is showing no signs of stress!
I did a feeding today, I will be giving her 2 feedings a week for a few weeks during the beginning of flowering. Humidity has gone down, have been managing it with keeping the door open to the room and added a extra humidifier.

Likes
9
Share


@TrueG
Follow
Its really goin fast
In every grow i see better results
Couldnt be more happy
Start to feed the girls


Likes
17
Share


@MadeInGermany
Follow
Hey guys :-)
She is growing great and will be ready for the flowering tent in the coming days :-)
A few cuttings are taken beforehand.
Was poured 2 times with 1 l each.
I'm looking forward to the start of flowering :-)
have fun and stay healthy 🙏🏻
👇🏼👇🏼👇🏼👇🏼👇🏼👇🏼👇🏼👇🏼👇🏼👇🏼👇🏼👇🏼
You can buy this Nutrients at :
https://shop.greenhousefeeding.com/us/
👇🏼👇🏼👇🏼👇🏼👇🏼👇🏼👇🏼👇🏼👇🏼👇🏼👇🏼👇🏼
You can buy this strain at :
https://www.amsterdamgenetics.com/product/skyrocket-feminized-cannabis-seeds/
Water 💧 💧💧
Osmosis water mixed with normal water (24 hours stale that the chlorine evaporates) to 0.2 EC. Add Cal / Mag to 0.4 Ec Ph with Organic Ph - to 5.8 - 6.4
MadeInGermany

Likes
30
Share


@Bread_n_Buds
Follow
Today is Karen Kush day. Zamnesia has created this crazy strain with truly exceptional aromas and we have tried it.
First of all, I invite you to look at the other specimen in the diary "BIG KAREN KUSH" which has been worked with topping, lst, fimming and even a central splitting. Very beautiful at the top, many buds but let's move on to our plant which lacks nothing, grown straight with an important main cola and a crazy appearance that makes it impossible not to love it.
The outside part of this plant is the only thing I can't show you: the smell, guys it's an absolute wonder and it is combined with that fantastic oily effect that resinous plants have, pulensola was all a cream.
The plant requires some skills in controlling fertilizers, it is very voracious even of nitrogen at the beginning it discolors, but we know how to look at what the plant tells us and we have always kept it under control with a slightly higher dose of fertilizer than the others.
In flowering it also seemed to tend to go into deficiency but Plagron does not allow this, if you use Plagron and you know how to recognize the deficiencies in the initial stage you can forget about seeing yellow leaves before time. Especially in flowering Alga Bloom is perfect for reconstituting a plant with deficiencies then the enzymes, amino acids and many other bio elements present in the additives do the rest. Guys I recommend not to underestimate the additives it is true we can grow even with only the basic fertilizers but the additives give a pimp that you do not expect, I have used a significant series now and I have had immortal results I must say.
Thanks to Zamnesia I have another important news for you ZERO HERMAPHRODITES. I bet photoperiod growers have had this problem a lot lately. Sorry for the thousand sstrains I tried when I was sponsoring but I've always had them too, until now when I've been growing exclusively Zamnesia. Does that sound weird? I don't have any fucking seeds in my weed? Let's talk about it if you want.
Zamnesia Strain Description // Yes, Karen, you read that right. Load up a bowl or roll a blunt and kick back with Karen Kush, our indica-dominant hybrid. This breathtaking strain was born when our skilled breeders crossed Monster Bud Kush and White Widow. As expected, both parent strains rose to the challenge and passed on their most valuable traits to their progeny, such as a solid THC level (24%), great yields and a fairly fast flowering phase.
- Get a seed of this fantastic strain --- https://www.zamnesia.io/it/10780-zamnesia-seeds-karen-kush.html
The plant has eaten the 100% Organic feeding of Plagron: Alga Grow and Alga Bloom as basic nutrients, the rooting Power Roots, the amino acids of Sugar Royal, the Enzymes of Pure Zym that eat the dead parts in the soil, Power Buds that always gives us immense satisfaction with rapidity of start of flowering and composition of the buds, the legendary Green Sensation that now needs no introduction, a name a guarantee. Also the foliar Vita Race used for the first time with success.
The fertilizer kits that you can find on the Zamnesia website are perfect for this purpose, there is everything. Choose them based on their mineral/organic composition and the soil you have chosen.
at the link --- https://www.zamnesia.io/it/11457-plagron-easy-pack-natural.html
The quantity was measured using the sheet prepared on purpose on the Plagron website based on the soil chosen: Plagron Pro Mix + Perlite.
at the link --- https://plagron.com/en
Air system is the DS120w by Secret Jardin as well as the DF16 ventilation system and all the fans
at the link --- https://www.secretjardin.com/it/
The growbox and The light SP3000 were supplied in the past by MarsHydro and it went crazy but it came back to me to produce very well too...
at the link --- https://marshydro.eu/
A fantastic selection of seeds, a headshop and a selection of exceptional accessories on the world of cannabis, many other things about mushrooms, health, well-being and all the beautiful things that nature offers only on the Zamnesia website
at the link --- www.zamnesia.com
Instagram ----
@zam.nesia - @zamnesiawebshop - @zamnesia_usa - @bread_n_buds

Processing
Likes
14
Share


@mrekansh
Follow
3 ml npk in 2 l water
And given half of it! Plant seems to like it
And pruning worked wonder! Leaves are healthy and getting much bigger in size! 15 cms+ excited!!

Likes
15
Share


@38PLAN
Follow
Non metterò la germinazione me la sono scordata e non metterò nemmeno tante foto,a fine ciclo vi dimostrerò come far uscire 6 autofiorenti da almeno 200g l'una
Ho 2 hps da 600w e 6 vasi/buste da 40 litri
20/4 di luce più luce naturale che entra dalla finestra,la terra é stata fatta da me perche mi ero rotto il cazzo di quella con i moscerini
30% terriccio/ 30% fibra di cocco/ 20% lapillo vulcanico/ 10% humus di lombrico/ 10% perlite e torba bionda
Likes
114
Share


@Natrona
Follow
**************Sponsored Grow***************
Hello friends and followers to my weekly Titan F1 update:
3/17-23 This week is mostly coasting and keeping my girls happy.
Bud stacking continues giving more height. This week both gals did some more bud stacking .5 inch each. T2 is now 5 inches. T3 7.5. You can see that in the profile pics.
3/19 Whew, my gals got a haircut this week. T2 teapot gal was so bushy and dense. I removed some leaves off and some pinning. Note: for future grows the small diameter of the pot made it very difficult to trim T2. Very tight squeeze even for my small hands. This opened the lower buds and showed off T2 roots, ¼ inch on a 5-inch plant. The main stalk is sturdy. As I was trimming the lower area, I was bending the plant over 2/3 the way and there was no breakage.
T3 got the same trimming but removed fewer leaves than T2. I also washed out their drain pots. For some reason, algae is developing in the catchments. I am now within 3 weeks. RQS says harvest 70-75 days or 40-45 days of flower. Harvest is getting close. My calculations – harvest of T3 will be April 13-18 and T2 15th-20.
Thanks for the likes and comments, I appreciate all the plant love💚.
Have fun & love what you grow 💚
Sending love and light 💫
💫Natrona 💫
**************Sponsored Grow***************
Royal Queen Seeds is the first to off genuine F1 cannabis seeds. F1 hybrids are the future of cannabis genetics, offering unrivalled stability, vigor, and yields. They have eight (8) F1 hybrid strains including a CBD. Unlike regular hybrids, which can be created by crossing virtually any two cannabis plants, F1 hybrids are made by crossing two pure (also known as "inbred") genetic lines. The resulting seedlings not only grow bigger and stronger, but also maintain stable growth traits that result in a uniform crop.
In Rocket to the moon, I grew one Apollo F1, (please refer to my diary for full details). Huge base stalk, strong stems, remained under 3’, and yielded over 4 ounces. They have come down in price since their introduction. I was so impressed by the yield and growth of Apollo, I strongly urge you to look at the site for a variety that has what you are looking for.
I would like to express my sincere thanks to @James at @Royal Queen Seeds for giving me this opportunity to grow their quality seeds. It was a hard decision to select the strain to grow; I’m excited to grow Titan F1.
====================================
Royal Queen Seeds
Https://www.royalqueenseeds.com
use Discount Code use **GROWERS20** for 20% discount
Titan F1 stands out as one of the most potent options in F1 hybrids. Thanks to her genetic lineage, she produces sky-high levels of THC and boatloads of delicious terpenes. Plus, plants reach modest heights while churning out impressive yields.
Talented breeders created this F1 by crossing inbred lines that share a heritage with Blue Dream, Sugar Magnolia, and Amnesia.
Effects, Flavors, and Aromas of Titan F1: Powerful Effects and Sugar-Citrus Notes
Titan F1 will treat your olfactory system throughout the flowering phase, and beyond. This auto flowering variety unleashes a powerful terpene profile consisting mostly of myrcene, farnesene, ocimene, pinene, bisabolol, and limonene. Combined, these aromatic compounds offer notes of fruit, candy, and lemongrass. With the highest THC concentration within our F1 hybrid range, Titan F1 exerts a powerful and fast-acting effect that melts the muscles and clears the mind. Perfect for enjoying after a long day at work.
Growing Titan F1: Stealthy, High-Yielding Plants
With an average height of 65cm, Titan F1 can grow just about anywhere and maintain a low profile. This bushy plant features an indica morphology, a huge trichome count, and develops into a mature specimen in around 73 days from germination. Gear up for a uniform, consistent crop that will thrive in practically any environment.
Titan F1 data sheet
Variety: F1 Hybrid auto
Genetic Background: Blue Dream x Sugar Magnolia x Amnesia
THC: Ultra-high
Yield: XXL
Height:55 - 75 cm
Flowering time:40 - 45 days
Harvest:70 - 75 days after germination
Major terpenes: Caryophyllene, Farnesene, Myrcene, Ocimene
Effect: Calming, Focus, Physically Relaxing, Uplifting
Flavor: Candy, Diesel, Herbal, Pine, Vanilla
Climate: Short Summers
=================================
Equipment: AC Infinity
CLOUDLAB 844 – Advance Grow Tent 48”x48”x80”
CONTROLLER 69 PRO – Grow Tent Controller
CLOUDLINE LITE 6 - Inline Fan 6"
IONBOARD S44 – LED Grow Light Board 400W
CLOUDRAY S6 – Oscillating Circulation Clip Fan
Carbon Filter 6”
Pots: 2 liter wire basket tea pot
3 gallon Air pots
Soil Fox Farm Happy Frog Amended with worm castings, dolomite lime and mychorihiza
Seeds provided by Royal Queen Seeds
Https://www.royalqueenseeds.com
use Discount Code use **GROWERS20** for 20% discount
Nutrients: Total Plant Solution
TPS1
Canopy
Signal
Processing
Likes
3
Share


@LittleBigTrees
Follow
Only given water so far, house and garden bat special is strong in nutes.
Likes
12
Share


@Bromsnor96
Follow
Not stretching that much. Going great so far!
Day 11 flower they are starting to smell a bit stronger. Heavy gelato smell.
Day 13 flower first hairs have appeared!
Likes
15
Share


@Uwish
Follow
The run continues nicely, we still had some temperatures of nutritive solution a little high with the heat of Danielle. It drops drastically in 2 days so I will finally finish this growth in the calm one and will be able to begin my bloom on September 24th.
I apply hydrogen peroxide at a rate of 0.5ML/L, twice a week as a treatment. The root Rot X is used every ten days when changing the nutritive solution.
I put less water in my system, in order to create a wet zone and a dry zone, I make sure that the roots are always immersed of course.
As soon as the temperature drops, I will switch to 800 ppfd for the end of growth and depending on the evolution of the plants I may add some sensi grow a and b to increase the ec a little.
If you are attentive, you will observe on the tips of the leaves or even on the leaves, spots of burns or deficiencies, it is simply the consequence of the pythium a few days earlier.
The last growth update will be around September 24/25.

Likes
25
Share

@TrickzGrowz
Follow
Ich bin jetzt schon verliebt in die Terpene der 7th Wave! Ich kann es kaum abwarten. Die Buds sind steinhart und schwellen immer dicker an!

Likes
8
Share


@Growformyself
Follow
ich habe die Temperatur etwas senken können, die Lampe reduziert und etwas höher gehängt. Mal schauen wie die Woche verläuft.

