
Likes
Comments
Share


@Fatbudz
Follow
Incredibly, they both gave almost the same, 70 grams each.
good quality but it was below expectations
I felt a difference compared to the autos in the first round.
maybe my fault or genetics 🤔😅🤪

Likes
28
Share


@TheHighentist
Follow
The ladies has been having issues since day one, but im not giving up on these fighters!
I have only been feeding ph 6.3 water, with no nutrition.
Monitering moisture level in soil, and feeding before dry.
-Temps - 26-27 day / 22-23 night
-RH% - 65%(+-1.5) day / 70% night (+-1.5)
-VPD 0.8 - 1.0 KPA
👉12/9 Climate on point, still recovering.
👉13/9 Letting them be.
🙏14/9 Praying every day.
👉15/9 The 3 bigger ones, is showing signs of adapting and overcoming the struggle.
👉16/9 The 3 smaller ones is still behind by a lot.
👉17/9 Topping two of the biggest and cloning the tops. *********First nutrients added to watering. (The 3 smallest got a bit of Biobizz root juice as top feed.)
👉18/9 In the mist of gathering data, to dial in vpd.
I have only been feeding ph 6.3 water, with no nutrition.
Monitering moisture level in soil, and feeding before dry.
-Temps - 26-27 day / 22-23 night
-RH% - 65%(+-1.5) day / 70% night (+-1.5)
Likes
15
Share


@VanHealzing
Follow
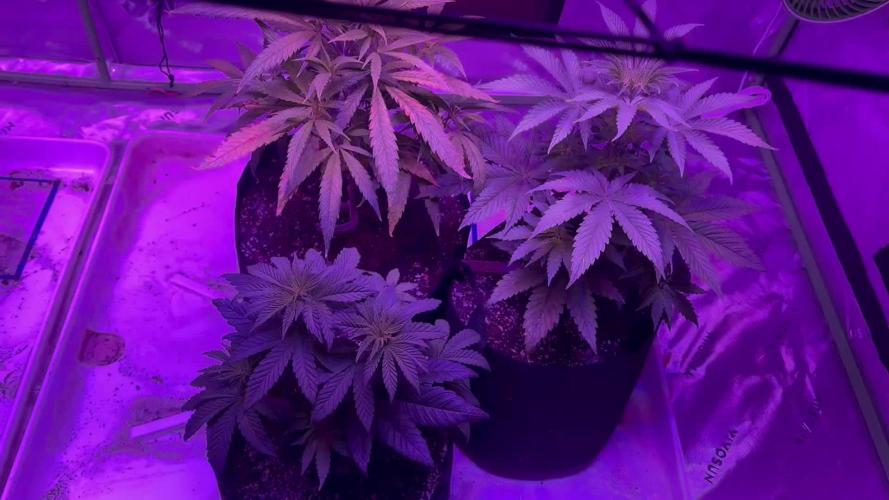
All 4 are growing very well. I noticed some light stress on 2 and 3, so I dimmed the lights.

Likes
1
Share

@SolitudeCorners
Follow
Overall Development
Week 4 marks the transition into mid-flower. Stretch has mostly stopped, and the plants are now directing energy into bud formation. The canopy remains uneven, with some taller, thinner phenotypes and others more compact and structured.
Bud sites are clearly established across all main branches. Flower stacking is progressing steadily, and early cluster formation is visible on the tops.
Plant Health & Observations
• Significant yellowing on older fan leaves, especially mid-to-lower canopy.
• Some plants appear pale green overall, indicating high nutrient demand during bulk transition.
• One or two phenotypes remain darker green and structurally stronger.
• Lower interior growth is lighter and less vigorous.
• Selective removal of old yellow leaves was continued to improve airflow and light penetration.
Despite visible leaf fade, bud development continues actively.
Bud Development
• Flower clusters are expanding and beginning to connect along the stems.
• Pistil production is strong and consistent.
• Buds are not yet dense but are clearly transitioning into the bulk phase.
• Resin production is beginning to increase.
This week represents the start of the main swelling period.
Environmental Adjustments
• Temperature reduced slightly (~1°C) to stabilize the flowering environment.
• Airflow maintained across canopy level.
• Canopy density moderately thinned to prevent moisture buildup.
• Light coverage remains strong across the upper layer.
Current Focus (Entering Week 5)
• Support nutrient demand during bulk phase.
• Prevent excessive early leaf loss.
• Maintain stable humidity to protect developing flowers.
• Monitor weaker phenotypes closely for further decline or nutrient imbalance.
Overall, the crop is entering the critical mid-flower stage. The next two weeks will determine final bud density and structure.


Likes
5
Share


Likes
3
Share


@Green_Dream
Follow
The two main events this week: Defoliation and training.
The lady seems to take it well.
Apparently the nuts I use have a rather low amount of Phosphorus... I had the same problem in my last grow (dark leaves, slow bud development)... unfortunately that time I didn't get what was happening. So I started giving them "Bud Explosion" now, 2ml/l, which basically contains a mix of Phosphorus and Potassium, and the improvement was almost instantly noticeable!
I'm thinking she gets 4-5 more days to recover in veg. then I flip her.
Likes
8
Share


@Max1973
Follow
Day 14 - Clay balls arrived, all looks good.... 😎
**the rust and damage on the first leaves is nothing to worry about,
the ice cream container water level dropped below the root level, fixed it,
but was cool to learn how fast hyrdo dmg can occur.... 👍
Day 17 - Lookin good... vid....
👍😎👊


Likes
Comments
Share


@JardineiroBr
Follow
Os fertilizantes tenho usado alternadamente em intervalos de 3 a 4 dias entre as regas . Pois tive que recolher as plantas para a estufa.
Quebrei as ponteiras para não alongar muito a planta pois tenho limites de altura da iluminação e quero ver se ela fica mais cheia de botões no caule .

Processing
Likes
14
Share


@420Somewhere
Follow
Week 1 of flower, pics and video taken on day 6. Lollipopped everything beneath the scrog 3 days ago.
All 4 plants are looking healthy and happy.


Likes
10
Share


@Shefman93
Follow
Will harvest tomorrow morning, so this is my last photo dump of it growing. Grow was less stressful than my last and I am hoping it continues to progress that way.


Likes
10
Share


@mutantfarmer
Follow
Since my plant is sativa dominant, I decided to abandon the use of Hybrids and change the base fertilizer to GHE. I use Root Booster and Diamond Nectar exclusively in the form of a spray on the leaf, so that organic matter does not shorten the life of the solution. Mister small has built up root power and copes with abundant watering more easily. I water it 2 times a day for 10 minutes. After watering the PH solution grows slightly, I let it balance between 5.5 and 6.2.
I also updated the first post in the report. Added information about my system and lighting!👽
Processing
Likes
12
Share


@Therbalist
Follow
Coming along, got the temperature down by moving the schedule more into the night and morning. Hopefully have it down enough to get some colour towards the end!

Likes
3
Share


@Dico29
Follow
Day 120
Smells good buds are fatter and looking better then I thought last week, I flushed but I think I may have caused nutrient burn or nitrogen since my stems have turned purple also along the buds and tips or ideas of what I should try thanks
Day 127 photos at the bottom

Likes
13
Share


@BigDaddyK
Follow
Crazy growing going on , looking we’ll see for yourselves, I don’t want to say anything as pictures speak louder than words 💪
Also we now have conclusive proof that soil plants ripen faster , the soil ones look at least 1 week ahead with flowers forming
Adding biobizz nutrients to Soil plants , watered 3l each Friday
Changed solutions Saturday
Reduced daytime to 1130
Watered 3.5 l monday soil ones definitely ahead - why ? They all exactly the same plants

Likes
10
Share


@BR1CK_SANCHEZ
Follow
Flowering has really taken off. Kolas are thickening up and smelling amazing... The plants are still a little short. I think I may have stunted them in veg, possibly by giving them some bloom nutrients too early. Was a recommendation from "Mr. Canuck's Grow" (not sure that it was a good one).... Brewing a fungal-dominated compost tea for flower rn, going to administer tomorrow and show the results next week... also trellis didn't make much difference with the uneven canopy, maybe I installed it too late 🤷♂️
Likes
9
Share


@JamaweedOPO
Follow
A planta segue bem parou de crescer na última semana e começou a engordar as flores.
