
Likes
Comments
Share


@Onlygrow99
Follow
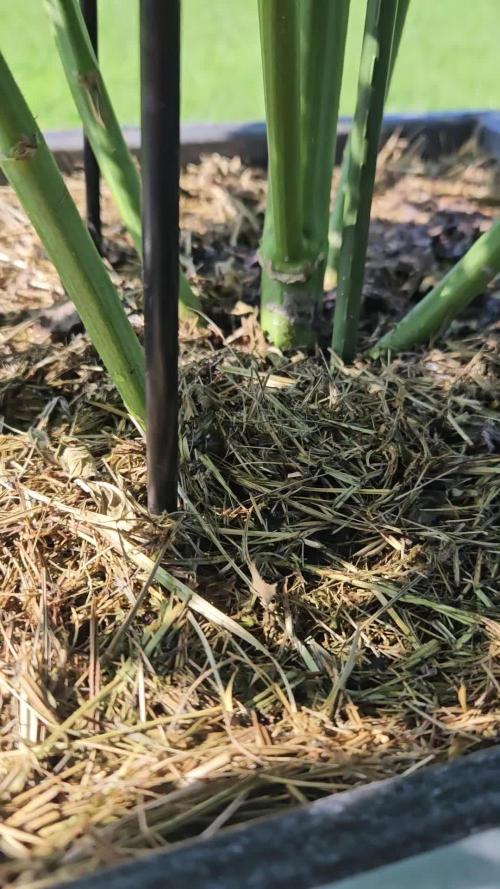
Empecé la germinación el 23/01/23 en un vaso de agua durante 12 horas, después al taper con servilleta húmeda 24 horas más.
Radícula de 2cm y las planto en maceta de 1L
Actualización estado de germinación 03/02/23:
Meto fotos ya con las macetas rellenas al 10º día y fotos del 7º día comparando las macetas y los tallos.
En cuanto el 2º par de hojas sea mas que evidente empezamos las semanas de crecimiento. Dentro de 2 o 3 semanas quizás, trasplantamos a maceta definitiva de 7Litros. Lo veremos.
Actualización 06/02/23:
Meto unas fotos de las plantas mas grandes, 3 días después para que se vea la diferencia de crecimiento.
Además un video mostrando el cultivo entero, la luminaria y la extracción. Llevamos 13 días desde la germinación.
Actualización 08/02/23:
A partir de aquí voy a empezara a contar ya las semanas de crecimiento. Hemos tenido 15 días desde la germinación.
Venga va, día 10/02/23 meto unas fotos mas, llevamos 17 días desde la germinación

Likes
15
Share


@BigDaddyK
Follow
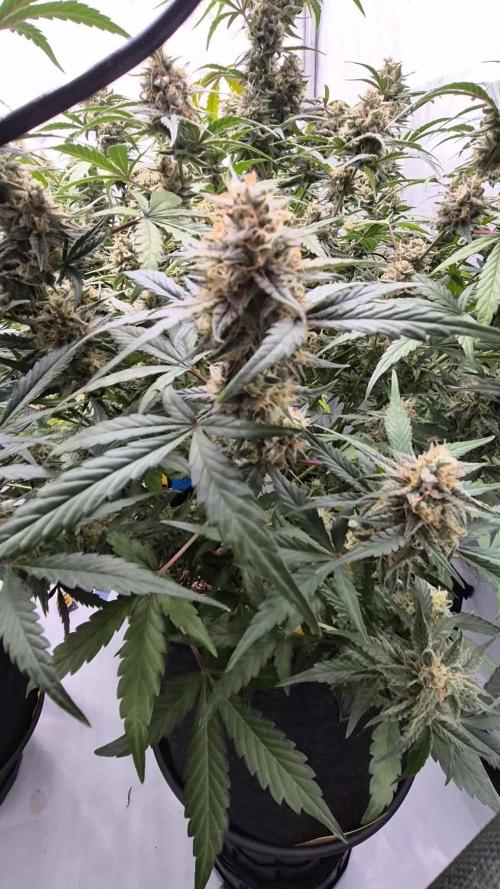
This strain yields firm compact cookie tasting buds , like biscuits, grew well under my LEDs , in 12-13 Weeks in DWC on 20/4 , I will also say how similar both plants taste , which can sometimes not be the case , so pheno stability in this strain is also good. Top bud for sure , smells is good , but that Strawberry pie now that’s that’s a different story .......

Likes
22
Share


Likes
5
Share


@Ninefold
Follow
Added white foil in the back of the greenhouse to allow for some more light in the back. She reacted to this fairly quickly by rotating her leaves more upward rather than to one side. I also raised the camera more and adjusted the position of the pot for it to be more centered.

Likes
8
Share


@Chubbs
Follow
420 Fastbuds Week 9
Cherry Cola Auto
What up grow fam. Week 9 for these girls and from the looks they are getting really close to being ready to chop. The smell is absolutely heavenly sweet. When pulling dead leafs off your hands get sticky as can be so keep some alcohol close by.
All in all Happy Growing
Likes
33
Share


@Mr_weed_pt
Follow
Another week almost in end, and is going everything alright one critical and the strawberry gum are show signs of becoming ready faster then the other 2 plants let’s see during this week I pretend to flush does 2 or all the plants..


Likes
8
Share

@NoProbation4Weed
Follow
Both plants look very healthy and are showing vigorous growth. They only receive nettle manure tea occasionally and no other supplements or fertilizers. Considering this minimal input, they are in excellent condition and look outstanding.
Likes
2
Share


@Stevee256
Follow
Oh this week is absolutely fantastic!
Outside is 22 degrees all day with sun..
Some days gorillas is just lay outside..put them out on a fresh air!
The 2x ladies without topping will grow fantastic 160 cm!!!Im so surprised ../picture/
Flowering is hard the trichomes level is good..
The bat guano is powerful nutrient ..my mixture was maybe too strong..so Kalium level is on the max !..
I use clear rain water only this week..
The light stress is continued a bit ..im nervous about that but its on the border ..hopefuly its not decrease my crop.
Wait for the next week
Processing
Likes
5
Share


@I_roll_my_own_420
Follow
The smell is getting stronger, lots of citrus in it. All grows without any problem, as always with barneys seeds. Amnesia Lemon stopped stretching finaly and its now working on buds. looks like Im almost at the half of flowering. Will see how it goes next weeks. Cheers!

Likes
12
Share


@Terpyboyz
Follow
So this is week 5 of flowering - definitely not sure what’s happened to this grow to be fair hopefully get something nice from a few of them.
Added atami bloom stimulate so hopefully that push’s buds to max out a bit more weight
Happy growing 👌🏻


Likes
14
Share


@Esperanza7
Follow
I think the situation is very good. Im exciteed to see lst result
Day 20, lst show good results. She drink so fast now.
Day 21, going for week 4, what you think about she?
Likes
10
Share

@Skunky420
Follow
➡️ Day+63, the Purple Punch Auto outdoors received 2.5 liters of PK Booster Compost Tea yesterday. The buds are starting to develop little by little. We can see some brown pistils, probably due to the recent heat.
Some days, one or two dull stinging bugs reappear, but they don't seem to be doing much damage at the moment.
The Dosidos Autos plants are continuing to mature, but the least mature phenotype started senescence quite early, either due to the heat or because it should perhaps have received a third tablet or some Orgatrex or Silicium Flash on the soil surface a few weeks ago. It will still be mature enough to be harvested with the other two in a week.
As a precaution, for the past week all the plants, including those outside, have been receiving water that has been oxygenated with an air pump and cooled to 20-22°C with ice packs (I was worried it might be the beginning of Pythium at one point with temperatures between 28 and 29°C in the tent, and the lower leaves drooping slightly).
Currently at 750-800 PPFD

Likes
6
Share


@Thckaos
Follow
30-08-20. 7 días sin tocar nada por vacaciones. Se comido toda solución y se nota que la planta 1 está más alta. Las planta 1 y 2 han empezado a florecer. La planta 3 sigue en crecimiento.
Se cambia de solución y se lava las raíces. Se baja 0.2 ms y PH 6.5. Luego se vuelve alimentar con una solución como hay en los datos de esta semana.
31-08-20 Conduc: 1.95 ms PH: 5.8
Temp: 24°C
01-09-20 Conduc: 2.1 ms PH: 5.8
Temp: 24°C
04-09-20 Conduc: 2.3 ms PH: 6.05
Temp: 24°C
Likes
49
Share


@AsNoriu
Follow
Day 36. Girls are flying !!!
Was comparing my previous dairies here and they look really good, have in mind, two heavy waves of training involved, each time i had a bag full of leaves ...
One more training and i think on day 42 its 24 hours of darkness and FLOWEEEEERRRR ;))
Day 37. Its hard to add anything, because everything going kind off well ;))))
Last night watered them with 6.2 ph, they stop drinking, at least as fast as before, usually my ph is 6.5-6.8, but sometimes i drop to 6.2-6.4 for one feed in a month or so ..SweetSeeds don't like that trick ...
Still leaves praying, loads of new grows after each night , just Kushes overgrew others a bit. Will supercrop them soon.
Day 39. All is going smooth, they drink biobizz nutes feed in one day, phed water in 2, so you would want to overfeed them, Kushes could eat more 4sure now.
Installed last wall fan. Now setup is full...
Kind off ;))) need to find exhaust silent and powerfull 5 inch fan ...
Day 41. This is official - JUNGLES !!! ;)
Change in plans :
Killer Kushes are moved to veg/dry tent, Autos started there will come instead of them. Thinking that way ill lower canopy a bit and make more space for rest 8.
Tomorrow it will be done together with heavy training for Skunks and Cheeses. They will be sent to flower at the end of next week.
Happy Growing !

Likes
21
Share


@w33dhawk
Follow
Hi liebe Freunde des grow sports 🌻🌻 die 2. Woche ist zuende, und ich muss sagen, ich bin begeistert von den Blumen. Die Entwicklung ist ziemlich schnell voran geschritten ( Im Verhältniss zu meinen vorherigen Reporten) ich Weiss nicht ob es daran liegt, das ich das Wasser ab stehen lasse und die ganze zeit mit Sauerstoff auf blubbere dadurch verschwindet ja chlor aus dem wasser und mehr Sauerstoff ist in dem wasser, kann natürlich auch am Dünger liegen das die Pflanzen gut drauf reagieren ist denke ich aber eher unwahrscheinlich anderer seits könnte es auch an der Genetik liegen, das die Ladys einfach top Qualität haben. Nun auf zur Woche
Am 09.04 und 10.04 war nur zu schauen und mich des Wachstums erfreuen
11.04.22 ich musste heute gießen also alle 5 bekamen 150 ml reines Ph eingestellt es wasser ( Ph 6,3)
Am 12.04 bis 15.04.22 war wieder nur beobachten und dem Wachstum zu sehen Ach ja natürlich hier und da mal nachschauen ob Temperatur und luft Feuchtigkeit stimmen ggf. Nach justieren das wars.
Ich Wunsch euch allen ein schönes Wochen Ende und einen erfolgreichen Grow bis nächste Woche ihr growmies ✌️

Likes
119
Share


@Natrona
Follow
****DIVINE SEEDS *****
*****OPIUM*****
Sponsored grow
***DIVINE SEEDS *****
Week 11 6/16-23 Opium Loves the outside. She is tall and lanky, towering over the other outside girls: Fractal, Lemon Cake and Drizzle. All are showing yellowing leaves so everyone is now getting nutrients with feedings.
I saw a Japanese beetle on my Lemon Cake and some small holes in the leaves so I added 1/2 tsp neem to the feed solution 6/12. Also started using fish & kelp. I'm still watering 1 gal per plant when I feed 2x/week. With the heat and humidity, I water daily but do not feed daily.
Nutrients:
TPS1 15ml/gal @4 gal =60ml
Signal
1.5 ml
Cal mag 10ml @4 gal
Recharge ½ tsp/gal =10ml
Kelp & fish GS plant foods 1/4c /gal @ 4 gal =1c
Neem ½ tsp (for Japanses beetles)
Ph5.7
PPM 1414
Solution Temp 85
Outside temp 92f
6/19 Opium had a Spa day. Hair cut. All large umbrella fans were removed. Since she is in flower, she didnt need excess vegetation. This defoliation reveals true sativa form. There are 6-8inch stretches between nodes. I added a 6 ft support pole since we've had thunderstorms with high winds. I didn't want her majestic crown to snap off. I water daily and feed 2x per week now.
*****OPIUM*****


Likes
9
Share


@YockerCClown
Follow
Por el momento ha ido todo bien, he tenido unos problemas con algunas plagas depredadoras qué hay en el jardín, por lo cual he aplicado riegos foliares de aceite de neem + jabón potásico para alejar todas las plagas posibles.
En cuanto a los riegos estoy regando con 2L: 1L agua ph 6.5 + 1L agua y nutrientes ph 6.7 día por medio. (No aplico fertilizantes en todos los riegos para no acumular sales, ya que he notado que al regar la tierra aun cuenta con fertilizantes por lo cual con el riego solo de agua, es como si se diluyeran las sales en el sustrato.)


Processing
Likes
45
Share


D38. Growth is good. They was starting to be a bit more yellow than I like when the lights come on I added a bit more food. Jumped the ppm to 600 counting the. 140 from the tap water. I could. Probably. Feed more but. No need. They happy. The one girl is staying. To small I'm worried it's not gonna be able to reach the screen. So stripped it staked it. And gonna try. To branch it out more. To make up for it and will raise if needed. I've been. Really twisting these girls. Everyday. It has slowed growth down but the smell let's me know it's worth it. Very very sticky already like velcro. First thing I've noticed. For me is. That comparison wise my girls are very easy to make. Sticky& Stinky I've never had this much. Smell or. Taste or stickiness this soon outside they starting to get used to it. So now I'm able to really. Hurt the plant. And make it fight. Fir me the way I do it I get more sticky more stinky the smell is bad actually but I'm not sure if this is normal for inside. Already? I wish you guys could smell this already. It's got that classic skunky smell for sure but there's a Sprite smell mixed with a sweet. Taste already the leaf is very sweet and has a nearly pear taste already. At this rate. Probably gonna be vegging 80+ days. I'm gonna scrog um so really just gotta fill the canopy in but I'm not sure how much these hps can penetrate so I'm not sure how thick to make it. I got 7.5 feet. To work with and I can get the hoods. Real close to the top so I'm thinking. Minuse 1 foot for container 1 foot for the hood. And then the light distance. they brand new so 18+ or it does burn um I can get. 18 for sure so I figure once they hit the wall I'll switch the lights. First time. Here. So I'm sure I'll mess this up. But hey that's the fun part right I'm getting leafs with 9+ leaflets forgot to take a picture of the 13 one. Next one I will for sure. Got the 9 for ya happy growing. Everyone. And does anyone else. Add a month of grow time. To really damage the stems in a good way and keep stripping leaves. just curious ? I'm still giving them 5 gallons of water a day probably 50% run off maybe. More. I keep adding tell the run off is perfect. Ph for me that's 5.8 everyday when I check it. It's around 6.1 and the tds will be around 800 the madness behind this is all bro science but seems to me I only get so many. Water cycles 8b the flower stage. So this way I'll be able to really pump in the. Nutes and for me I like this style of growing. Let's me correct yellowing over hours and I'm thinking. Around. Bud time I should be able to hit these a lot more. And keep the numbers. Higher longer and keep the ph more stable. But like I said some bro science so we will see but my coco is a 50 50 mix so it drains. So fast I can really unlock the hydro part of this medium it does eat up some food and water and I'm sure this will double in flower probably 2 gals a lady everyday my thing is I want the girls to have fresh new. Always. So it's always got everything. It needs but still has the synthetic nutes style were you can still burn them with to much like I said just a thought on some bro science hope everyone has a good week.


