Likes
Comments
Share


@MrGrowthSpurt
Follow
This strain was easy to grow, she started flowering on the 5th week and reached maturity on the 13th week (8th week of flowering). I had 2 of these plants growing at the same time. White LSD#2 took on a reddish/burgundy tone which made it look completely different from#1 All in all it was really a easy grow.

Likes
Comments
Share

@DogDoctorOfficial
Follow
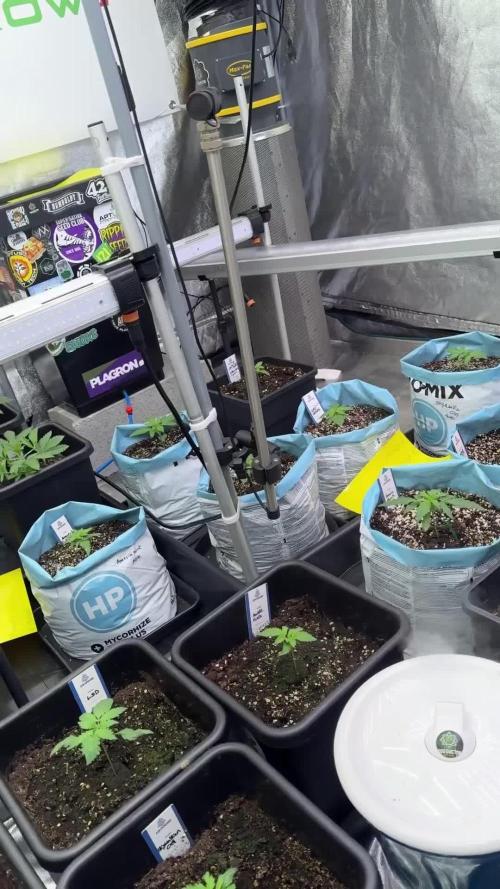
📁 Folder 11 – LSD
Week 3 · VEG (12/12 from Seed)
Week 3 closes with beautiful, confident growth across all plants. Uniformity is strong, vigor is consistent, and it’s becoming very clear that we are working with solid, stable genetics.
Despite different timelines, all plants are responding exceptionally well to the environment, the feeding program, and the hands-on approach.
⸻
🌱 Plant Development & Structure
• 15-day VEG sister
• Clearly larger and more established, as expected
• Already pushing into approximately the 7th node
• Strong vertical structure and well-spaced internodes
• Acts as a reference point for genetic potential
• 12/12-from-seed sisters
• Currently working through the 3rd to 4th node
• New true leaves actively emerging
• If counting early single leaves, development aligns perfectly for Week 3
• All plants are remarkably similar in structure and expression
Across the board, plants are showing:
• Lush, healthy green coloration
• Strong leaf posture
• Excellent response to the soil and feeding regimen
No signs of stress. No confusion. Just steady progression.
⸻
🌿 Leaf Expression & Genetics
Leaf shape, color, and texture are extremely consistent across all individuals. This level of similarity reinforces the idea that these genetics are well-selected and stable.
So far:
• No erratic behavior
• No weak individuals
• No outliers
Everything feels balanced and intentional.
⸻
💧 Watering Philosophy (Hands-On Approach)
At this stage, everything is hand-watered, one plant at a time.
• No automated irrigation
• No connected systems
• No shared reservoirs
Each pot is lifted, weighed, and observed individually.
Watering decisions are based on:
• Pot weight
• Visual cues
• Leaf posture
• Overall plant behavior
This approach allows for:
• Individual attention
• Better understanding of each plant’s needs
• Stronger grower–plant connection
While this method will later be explained in more depth through video content, it’s important to document it here so readers understand how decisions are being made during these early stages.
⸻
💡 Light & Environment (Baseline)
Plants continue to grow into the light under a controlled PPFD range. No pushing, no forcing — just gradual adaptation.
Everything else remains aligned with the locked baseline:
• Stable temperatures
• Balanced humidity
• Consistent feeding
• Clean, predictable conditions
⸻
🔮 What to Expect
• Continued node stacking and leaf expansion
• Increased growth speed as root systems mature
• Clearer differentiation between the 15-day VEG plant and the 12/12-from-seed plants
• Preparation for more visible vertical movement in the coming weeks
🚫 What Not to Expect (Yet)
• No explosive stretch just yet
• No need for stronger feeding
• No aggressive training
• No automation at this stage
Observation remains the priority.
⸻
📝 Final Notes
Week 3 confirms that LSD is thriving under this approach. The combination of strong genetics, consistent environment, and hands-on care is producing predictable, healthy results.
This is one of those weeks where nothing dramatic happens — and that’s a very good sign.
Everything is right where it should be.
FOR DISCOUNT CODES AND MORE JUST FOLLOW THE LINK https://website.beacons.ai/dogdoctorofficial
📲 Don’t forget to Subscribe and follow me on Instagram and YouTube @DogDoctorOfficial for exclusive content, real-time updates, and behind-the-scenes magic. We’ve got so much more coming, including transplanting and all the amazing techniques that go along with it. You won’t want to miss it.
GrowDiaries Journal: https://growdiaries.com/grower/dogdoctorofficial
Instagram: https://www.instagram.com/dogdoctorofficial/
YouTube: https://www.youtube.com/@dogdoctorofficial
⸻
Explore the Gear that Powers My Grow
If you’re curious about the tech I’m using, check out these links:
🔆 Lighting & Environmental Control
• Future of Grow — Advanced LED lighting technology
https://www.futureofgrow.com/
DISCOUNT CODE: DOG20
• Lumiflora — Under-canopy LED lighting
https://lumiflorade.com/
• TrollMaster — Environmental controllers and automation gear (past collaboration)
⸻
Genetics
• Zamnesia Seeds — Genetics used in this project
https://www.zamnesia.com/
⸻
🌱 Soil, Substrates, Boosters & Root Support
• Plagron — Substrates, bio mixes, and supportive products
https://plagron.com/en/
⸻
🎒 Storage, Curing & Preservation
• Grove Bags — Curing and storage solutions
https://grovebags.com/
⸻
📸 Photography Equipment & Tools
(Not sponsors, but part of my creative toolkit)
• Sony A6700
• Sony full-frame macro lens + few more
• Stacking photography workflow - learning
• iPhone (for behind-the-scenes shots)
We’ve got much more coming as we move through the grow cycles. Trust me, you won’t want to miss the next steps, let’s push the boundaries of indoor horticulture together!
As always, this is shared for educational purposes, aiming to spread understanding and appreciation for this plant. Let’s celebrate it responsibly and continue to learn and grow together.
With true love comes happiness. Always believe in yourself, and always do things expecting nothing and with an open heart. Be a giver, and the universe will give back in ways you could never imagine.
💚 Growers love to all 💚
📸 P.S. – The Eye Behind the Lens
All photos in this diary (for now — except for the ones showing the camera, which I took with an iPhone) are taken with a Sony A6700 paired with a Sony full-frame macro lens and a few more.
Photography is part of the story — it’s how we share the fine textures, the glow, and the quiet details that words can’t always capture.
I’ve also started experimenting with photo stacking — a technique where multiple images, each taken at a slightly different focus point, are layered together to create one perfectly sharp image from front to back.
It’s not digital enhancement or AI; it’s pure photography — a way to reveal the plant’s beauty in microscopic depth, from trichome to petal.
You’ll even see a few shots of "ghost me" capturing the shots — camera, lens, setup — because every grow deserves not just to be cultivated, but documented like art.
FOR DISCOUNT CODES AND MORE JUST FOLLOW THE LINK https://website.beacons.ai/dogdoctorofficial
NEW DISCORD - Official Server Invite Link : https://discord.gg/ksjAkA5T74

Processing
Likes
5
Share


@Subbe
Follow
They are growing very well .
I trues top and lst on one og the plants. Just triumf to get a frem for it. Proberbly dosent make sens when the rest is not lst or topped. But had to try

Likes
15
Share


@Fibro_Witch
Follow
This week I decided it was time to employ some LST. Really I should have just done LST and not topped them, aside from the largest one which responded well. They weren't putting out fast enough growth to take to topping well, and I've learned my lesson. That's why my autos haven't done so well in the past.
I'm still learning😬
So in order to get as much as I can out of them as we enter flowering, we're doing a little LST this week.
Earlier in the week I did have to bring them in the hoop house on 7/11 because we got a lot of rain that day, our basement flooded and the water got so high in the stream that it washed the bridge out. So I think I made the right decision otherwise they may have gotten lockout.
I also changed their feed a bit. I added in some Neptunes Harvest Fish Fertilzer 2-4-1 with the Alaska 5-1-1 in equal portions on the 13th and will continue with it tonight. I may add a little molasses as well.
Most of what I was trying to accomplish with each plant is explained in the video. Enjoy!

Likes
13
Share


@Corwinism
Follow
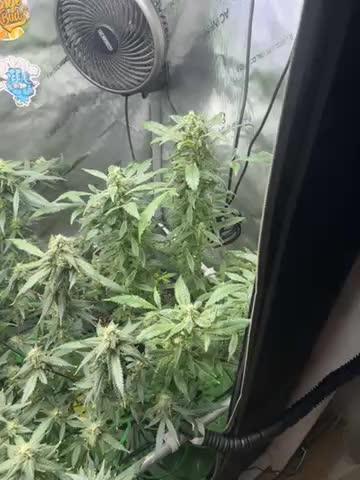
So it has begun... I've had to start utilizing string to hold up branches by tying them to the ceiling rods and surrounding equipment. These plants are healthier and happier than my first grow, so I wasn't quite expecting them to blow up like they did, therefore my single-layer screen was not enough to support the branches. Not to mention the net used was store-bought and kind of sucks. I prefer my double-layer from the first harvest.
The Mimosa is packing on some major frost, followed closely by the Glookies. American Pie trichomes seem to appear and ripen much closer to the ending stages of flower.


Likes
2
Share


@Jelemond
Follow
Hello names John this is my first grow.I’m not using any bottled nutes for this grow. Instead using nature’s living auto flower concentrate.

Likes
12
Share


@LetItGrow420
Follow
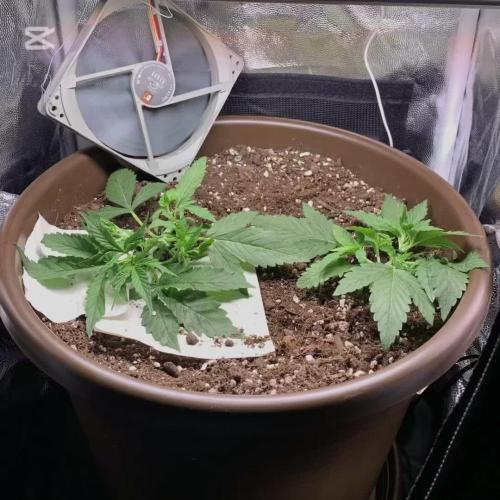
Week 2 she's getting bigger and stacking them nodes, having to water more frequent. Also she almost ready for a transplant.

Likes
11
Share


@Papastroumf
Follow
Day 65 : This lady started to make amber some of the trichomes. So today i flushed this mature lady with around 50L+ . Runout before flush was 1300ppm. After flush the runout was 400ppm. I decided to stop there. The plan is the next watering to be with pure water and when she drinks it chop chop. I goal for 15%-20% of amber. Now lets say that we are between 5%-10%. She has big heavy nuggs, not long but fat enough. LST was perfect on this lady, almost all colas are in the same height and growth.
Edit Day 69 : The nuggs are very thick, Stills i don't see the number of them that i want. So i watered with pure water and continue till is ready. Leaves started to getting yellowish, so flush was successful.


Likes
111
Share


@Salokin
Follow
Hi Growmies,
I topped her towards the end of this week and removed two sets of fan leaves. It opened the plant up very nicely in combination with the light LST I applied earlier in the week. The plant is taking very nicely to the LST and didn’t seem to care about the topping either. I attribute this to the strong root system she already has. For the next week I have fed her additionally to the canna nutes, some plant success orca, for healthier roots and Rezin from greenplanet to prepare her for pre flower.
Here is the code that’ll give you 20% in Zamnesia‘s online store, just input ZAMMIGD2023 at checkout.
Thanks for stepping by and until next week!


Likes
42
Share


@Jackweed77
Follow
18/05/21 giorno 57 tutto procede bene le ragazze sono delle vere bombe! Anche in questa ultima settimana stanno continuando a ingrassare e gettare fuori resina...l odore e molto intenso...per fortuna il filtro fa bene il suo lavoro...💚
21/05/21 giorno 60 messo nei serbatoi acqua a ph regolato inizia il lavaggio 💚🌻🌻🌻non vedo l'ora di raccogliere i frutti del mio lavoro...💨😋
24/05/21 raccolto!👍🌱💚🌻 messo il tutto a asciugare...attendiamo con ansia di provare il risultato....🥁


Likes
34
Share


@iLoveGoodWeed
Follow
Seed one receive finalpart at the end of week and will continue till end of next week and then flush time.
Seed two buds getting bigger but it's not yet ready for final part.
Likes
4
Share


@SpliffDoc
Follow
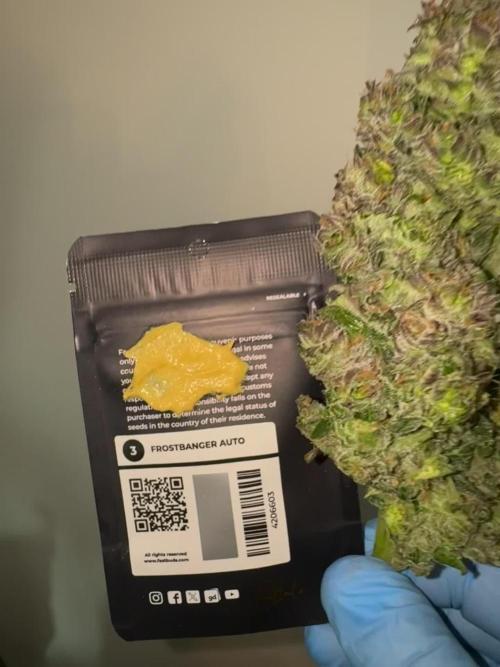
Will update midweek, got some more 420 Fastbuds beans on the way so im stepping up my journal game.
Have a great week, smash it.
Likes
97
Share


Processing
Likes
10
Share


@Reaper
Follow
start of week 2 veg,
i put an aquarium heater in my res to keep the temp 21 celcius
also added an extra airpump in the res with the waterpump
roots are already in the water
i used CFL so far i might hang my led above them now
Processing
Likes
24
Share


@BillMonroe
Follow
No complaints... :)
I installed a webcam. Now I can learn how the plant responds. It's very interesting. I can recommend a webcam to make timelapse to everyone.
I used Booru webcam software to capture pictures. This time lapse video is of week 3 into week 4. (The light never changes, but the webcam auto-adjust messes with the colors)
Lots of changes daily... pics are from day 2 of this week